

| Home > e-Learning main page > How it Works > Resizing a Photo |
By Bonita Walker, Used with permission
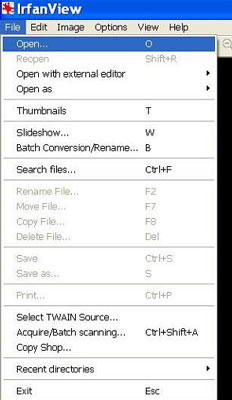
Getting StartedIrfanview is a free download, available at http://www.irfanview.com. It is for PC's only, not Macs. Log onto your computer and open your IrfanView program. This will normally be on your desktop or in your program files. Opening your PhotoWith your mouse, left click FILE on the menu bar, then left click OPEN.
|
 |
|
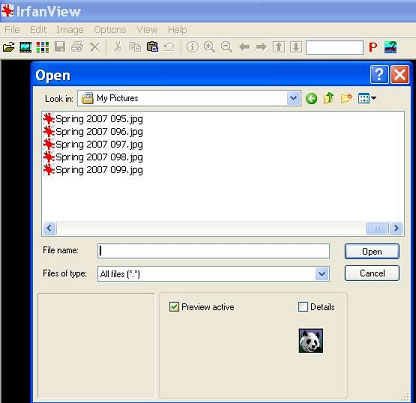
Open the folder where you have saved your photo. Select the photo you want to resize. Left click on it once to select it, then click OPEN. |
 |
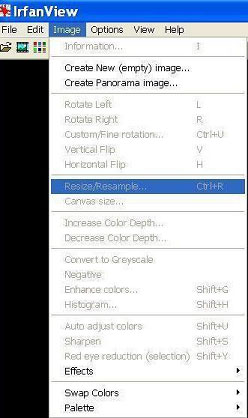
ResizingSelect IMAGE in your toolbar, and then click, RESIZE/RESAMPLE. |
|
|
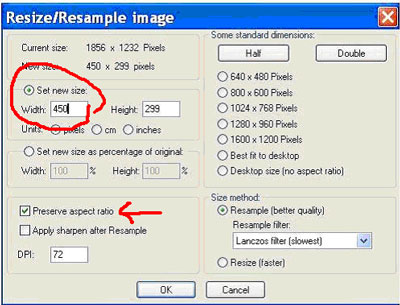
Make sure the Set New Size button is checked. Place your cursor in the Width box and type 450. Check the Preserve Aspect Ratio box. This will automatically change the Height number. Click OK. (For vertical photos, type 450 in the height box, instead of the width box. The width will automatically adjust.) |
 |
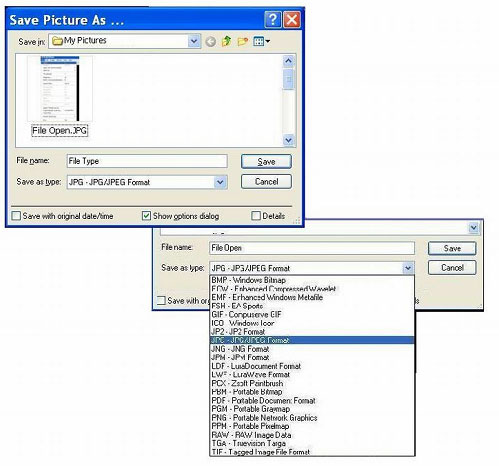
Save Your PhotoNow you need to save your image with its new size. On the menu bar, left click on FILE, SAVE AS. Save your resized picture as a new file name. For example, you can name it 'picture1' ,'pictureB', or 'picture small'. Keep your original picture, in case you want to use the the image in its former size. Important: In the Save as Type window, select JPG/JPEG Format from the drop down menu. |
 |