Intro to Double Reverse Appliqué™
Ellen Lindner, ©2017
Have you seen the awesome results that can be achieved with Double Reverse Appliqué?
Like very accurate portraits.
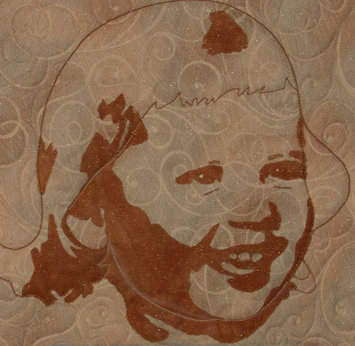
March Journal: Ellen, by Ellen Lindner

The portrait above was the FIRST thing I ever did with this technique! That’s how easy it is. Especially if you make a two color quilt, which is what I’ll explain in this article.
This is a basic overview of the steps.
- Create a pattern
- Draw the pattern onto stabilizer and attach it to the BACK of the background fabric.
- Pin the second (darker) fabric to the FRONT of the background fabric.
- From the back, stitch directly onto the pattern lines.
- On the front, trim away all the darker fabric that’s not attached.
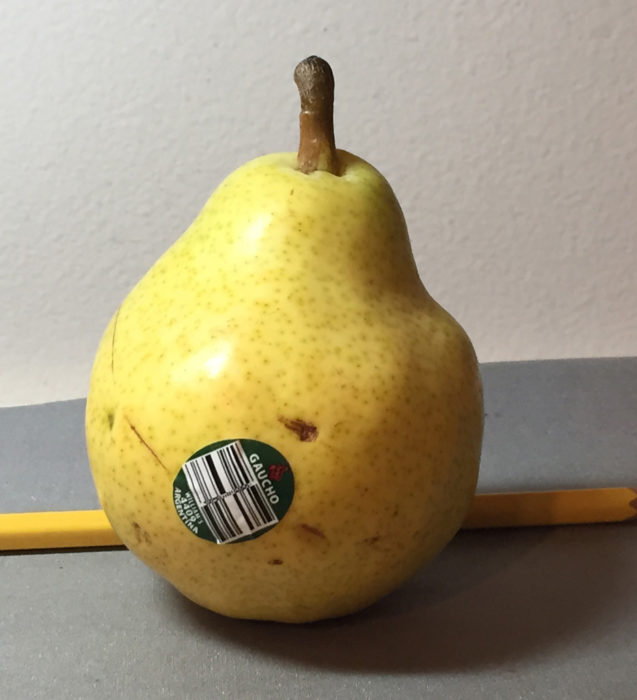
You can easily make a pattern on your own. Start with a photo that has good side lighting. This creates strong shadows which define the curvature or form of the subject. Like the ones in this pear.
Next, use computer editing software or a black and white copier to convert the image to just black and just white – no grey.
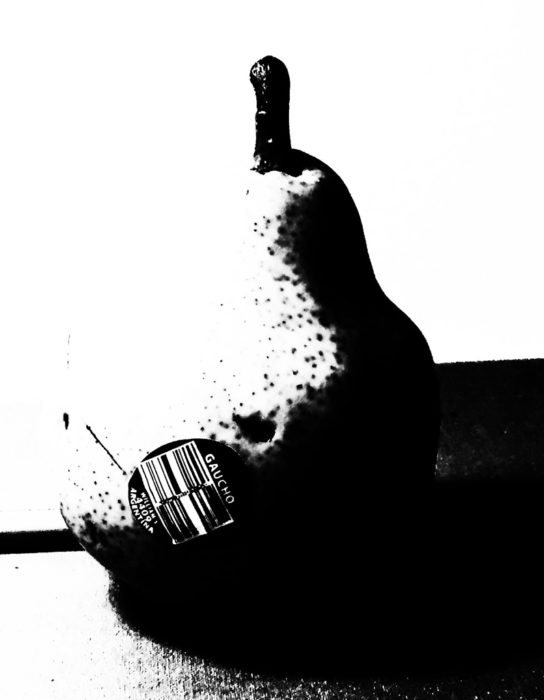
Trace the outline of the black shape and you’ve got a pattern. (Although in this case, you’d exclude the sticker and the pencil in the background.)
TIP: If doing a face pay careful attention to small details like the highlight in the eye. Use a fine tipped marker for these areas.
Carefully trace the pattern onto the matte side of the stabilizer of your choice. Attach the stabilizer to the BACK of the background fabric. Pin the darker fabric, right side facing up, on the FRONT side of the background fabric. Make sure it’s large enough to cover all the dark areas.
You should now have 3 layers pinned together:
- Bottom layer: stabilizer with pattern facing away from you.
- Middle layer: background fabric facing you.
- Top layer: dark fabric facing you.
Set up your sewing machine for free motion stitching. Put monofilament in the bobbin and thread that matches the dark fabric in the needle. Increase the tension to about 70%.
Flip the 3 layers upside down so you’re looking at the stabilizer pattern. Start stitching in the seam allowance and stitch all along the drawn line.
Flip it over and trim away all the dark fabric that’s not attached. Voila!
If your pattern has small details decide on the best way to depict them. They may be too small for fabric, but you can hand or machine stitch them. Whatever you decide, do the stitching from the back again, right on the drawn pattern. It will be super accurate and you’ll love it!
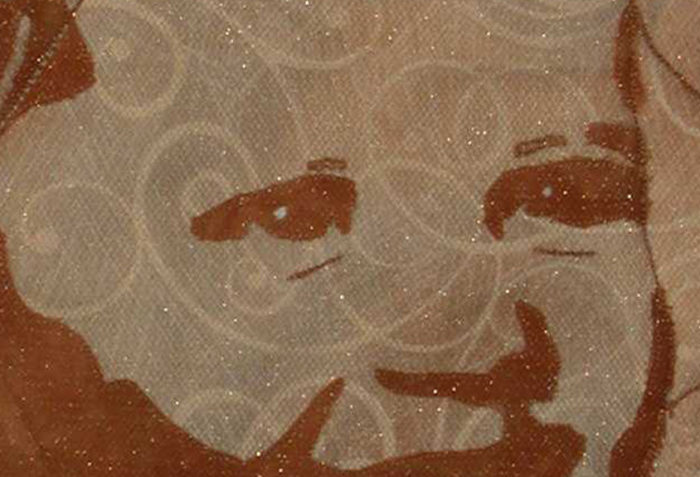
For the face above I used satin stitching for the eyebrows, straight stitching for the creases under the eyes, and hand satin stitching for the highlights of the eyes, all from behind.
You now know everything you need to know to make a two-color Double Reverse Appliqué quilt. Sometimes, however, 2 colors aren’t quite enough. When making a pear sample for Quilting Arts magazine and TV, I decided I needed a medium color to avoid losing too much of the body of the pear. No worries. I traced the photo for a pattern piece. The only difference is that I added a little “underlap” on the part that would fall under the larger dark piece.
See Quilting Arts magazine February/March 2017 or Quilting Arts TV episode 1908 for full details.
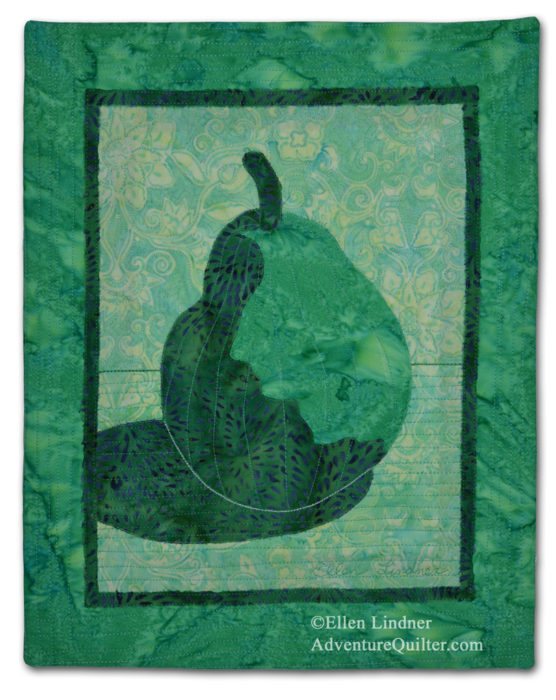
You can, of course, use this technique for many colors, but it does get a little tricky. I have easy ways to manage it, though, in the Double Reverse Appliqué classes I teach. You’ll find them online, or your guild can schedule me to come in person. Plus, the entire class content is available as an eBook, available right now!
This is the class project:
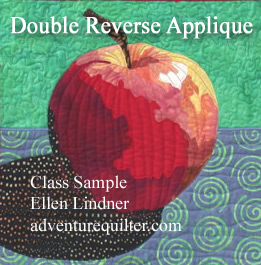
You can see many more Double Reverse Appliqué quilts in this online gallery.
By the way, can you figure out why I’ve named this technique Double Reverse Appliqué? Typical reverse appliqué involves cutting away one fabric to reveal another. That occurs with this technique, so that’s one type of reversal. The second is stitching from the back. Thus, Double Reverse Appliqué.
Two-color Double Reverse Appliqué is so easy and accurate. I hope you’ll try it out.
You’ll find more articles, classes, and eBooks in the Learn with Ellen section of my website.
