Courage in Ann Arbor
The ladies in my recent “Design Your Own Nature Quilt” class in Ann Arbor really rocked.
They set aside their fears about working loosely and forged bravely ahead. (With a few hesitations, of course.) The results were fabulous. After only three hours of working on their compositions, these photos show just some of the results.
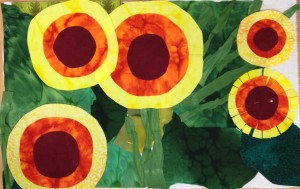
Norma cut loose – quite literally – with her quilt. Although her inspiration photo showed the flowers from a variety of angles, she decided she liked this “full frontal” view the best. (Great job being inspired by her photo, rather than owned by it.)
Click any image for a larger view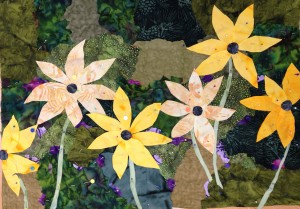
I love the way she’s filled the space so effectively with these happy flowers. Even the stems are dancing!
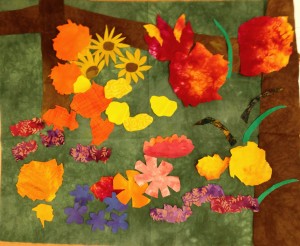
Carol worked from a busy garden photo and decided to depict her flowers somewhat accurately. However, she took liberties with shapes and added a few new flower types to her exhuberant garden.
Carol will add lots of greenery in the foreground. She’ll also add details to the flower shapes with colored pencils, thread stitching, etc. It’s going to be a wonderful explosion of flowers!
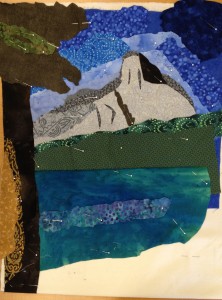
Mary interpreted a photo of a mountain lake – with a mountain in the distance and a tree in the foreground. She did a great job of working loosely, and her piece is progressing nicely. Mary wisely interpreted the light and shadows in her picutre pretty accurately, so her quilt will have a wonderful depth to it.
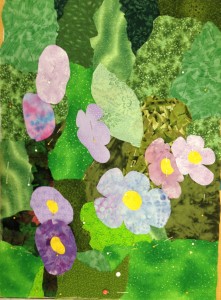
Lori worked from a wonderful photo of delicate pastel flowers, all of them facing right. She’s representing that correctly with the oval-like shapes of her flowers. Once the flowers are complete, she’ll add an abundance of delicate diagnonal stems and a few buds. It will be a delightful and peaceful quilt!
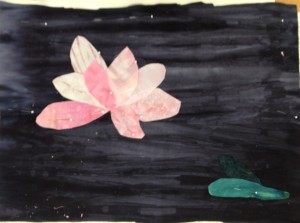
Paula’s photo depicted floating lily pads and a single flower. Although it was tempting to use blue for her water, she realized that it actually looked dark gray in her photo. She mimiced this with the perfect hand dyed fabric!
Normally, I’d suggest creating an image from the background foreward, which means Paula would have worked on her lily pads next. However, we wanted to make sure the lily pad fabrics wouldn’t over power the delicate flower. So, she created the flower first. This reference will help with all her other decisions. Doesn’t it look fantastic against the dark water?
Debbie’s photo featured closely cropped flowers with lots of tiny petals. (Zinnias, maybe?) She wisely decided to create the flowers with large pieces of fabric, cutting the tiny petals only after the fabrics were placed. Brilliant!
Debbie has just started cutting those petals on the right flower. Rather than just snipping the fabric, she’ll also cut away some tiny triangles. This will give those petals the needed definition. It’s going to be great!
Unfortunately, I didn’t get photos of all the pieces in progress. They included a Tuscan landscape with fuschia, another lily, several more lake scenes, and other exciting compositions.
It’s so much fun to teach this class! I’m very fortunate to be able to do so.
Ellen Lindner
P.S. I also teach this class online, but only about once a year. If you’d like to be notified when it’s offered next, you can add your name to the distribution list near the bottom of this page.
P.P.S. I’ll be teaching this class live in Jacksonville, FL in August, and Orlando, FL in September. Full details

I’m interested to hear when your next online class is happening. It looks like fun. Give me a shout. Thanks Ellen
Suzanne