“York Wall” – Back at It
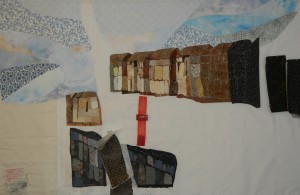
After pulling “York Wall” from the UFO pile, I began to work on it in earnest. My goal was to make it looser than my earlier attempt. This meant more patterned and colored fabrics, and more roughly cut pieces.
I started with the sky, using a variety of fabrics (rather than the sole fabric I intended to use 9 years earlier.)
Click any image for a larger view
When working loosely like this, it’s easy to get something that looks a little wacky. When that happens, I usually ignore it and continue. I know that:
1) I can fairly easily rework it later, and
2) I have to consider all the components together, rather than just one a time. So, I don’t get too excited if items (like the sky) seem overly patterned/broken/ bold, etc. at the beginning.
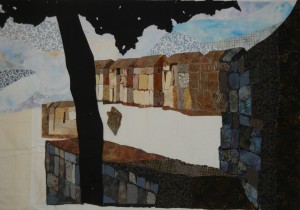
I added the tree and the far right dark wall area. I didn’t put much effort into making the stones have the perfect shape. Instead, I allowed them to be a little off, hoping that this would add charm.
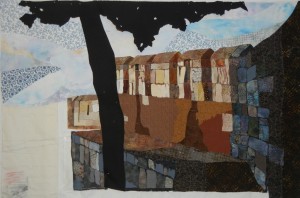
After adding the dark “crack” fabric for the mid-wall, I drew in perspective lines for the stones. That’s when I realized that the stones in the dark area were a little too off-kilter. So, I reworked them.
Can you see the difference in perspective in the photos above and below?
This is developing pretty well. Instead of pins this time, I’m revisiting the idea of securing everything with a glue stick. It seems to be working out. Glueing is definitely faster, so if it holds throughout construction I’ll be over joyed!
Ellen Lindner
P.S. The next online “Sticky Fingers” class starts on November 30th.


Good job on the far right curving wall. I’m glad the glue stick is working for you; saves lots of finger pin pricks.
Only when I saw the picture I could see that it was tilting. The shadow I had not drawn up without the picture there. I find it amazing that you after 9 years such project resuming. But why choose a glue stick and not for example steam a seam? And what strikes me is that the large surfaces of the tilting each have first and the underlying surface and makes it as the background all stuck, because the different colors on fastening. I remember, when I was with my quilt ‘kleurlengte’bezig was, I’ve made ??all the houses separately and only when they were down on the ground confirmed.
But yes, what I’m talking about, I do against someone I can learn a lot, because I follow your blog with a lot of fun. Most of what you make is exactly my taste.
Yes, Martha, the glue will be MUCH easier on my fingers when I get to the quilting part!
Hey Christina,
Thanks for your comment about my current quilt. When I worked on it 9 years ago, I used fusible web, even though that has never been my typical way of doing things. That’s part of what I didn’t like about it. Which is why I’m avoiding it now. Since I use A WIDE variety of fabrics, I don’t want to have a bunch of them with fusible on them – in case I don’t end up using a particular one. And, I don’t want to stop and fuse in the design process. Thus, the glue. (Replacing the pins I normally use – at least for this experiment.) We’ll see how I like it when I start moving it around. Hope everything stays in place!