Improvisational Piecing – Getting Started
In the midst of my creative play I stumbled upon improvisational piecing. I haven’t pieced a quilt in about 15 years, but this really looked like fun! The appeal comes from the concept of no measuring and no pins. My kind of sewing! It’s fast and the results are very interesting.
You can google improvisational piecing and you’ll find many tutorials and many variations. I decided to use:
– Only curved seams (because I saw a video about an easy way to handle them,)
– Mostly blue-green fabrics with accents of orange.
– Lots of cutting and rearranging. (What fun!)
– Skinny strips.
(These were all things I saw in videos and magazine articles, presented by Pat Pauly.)
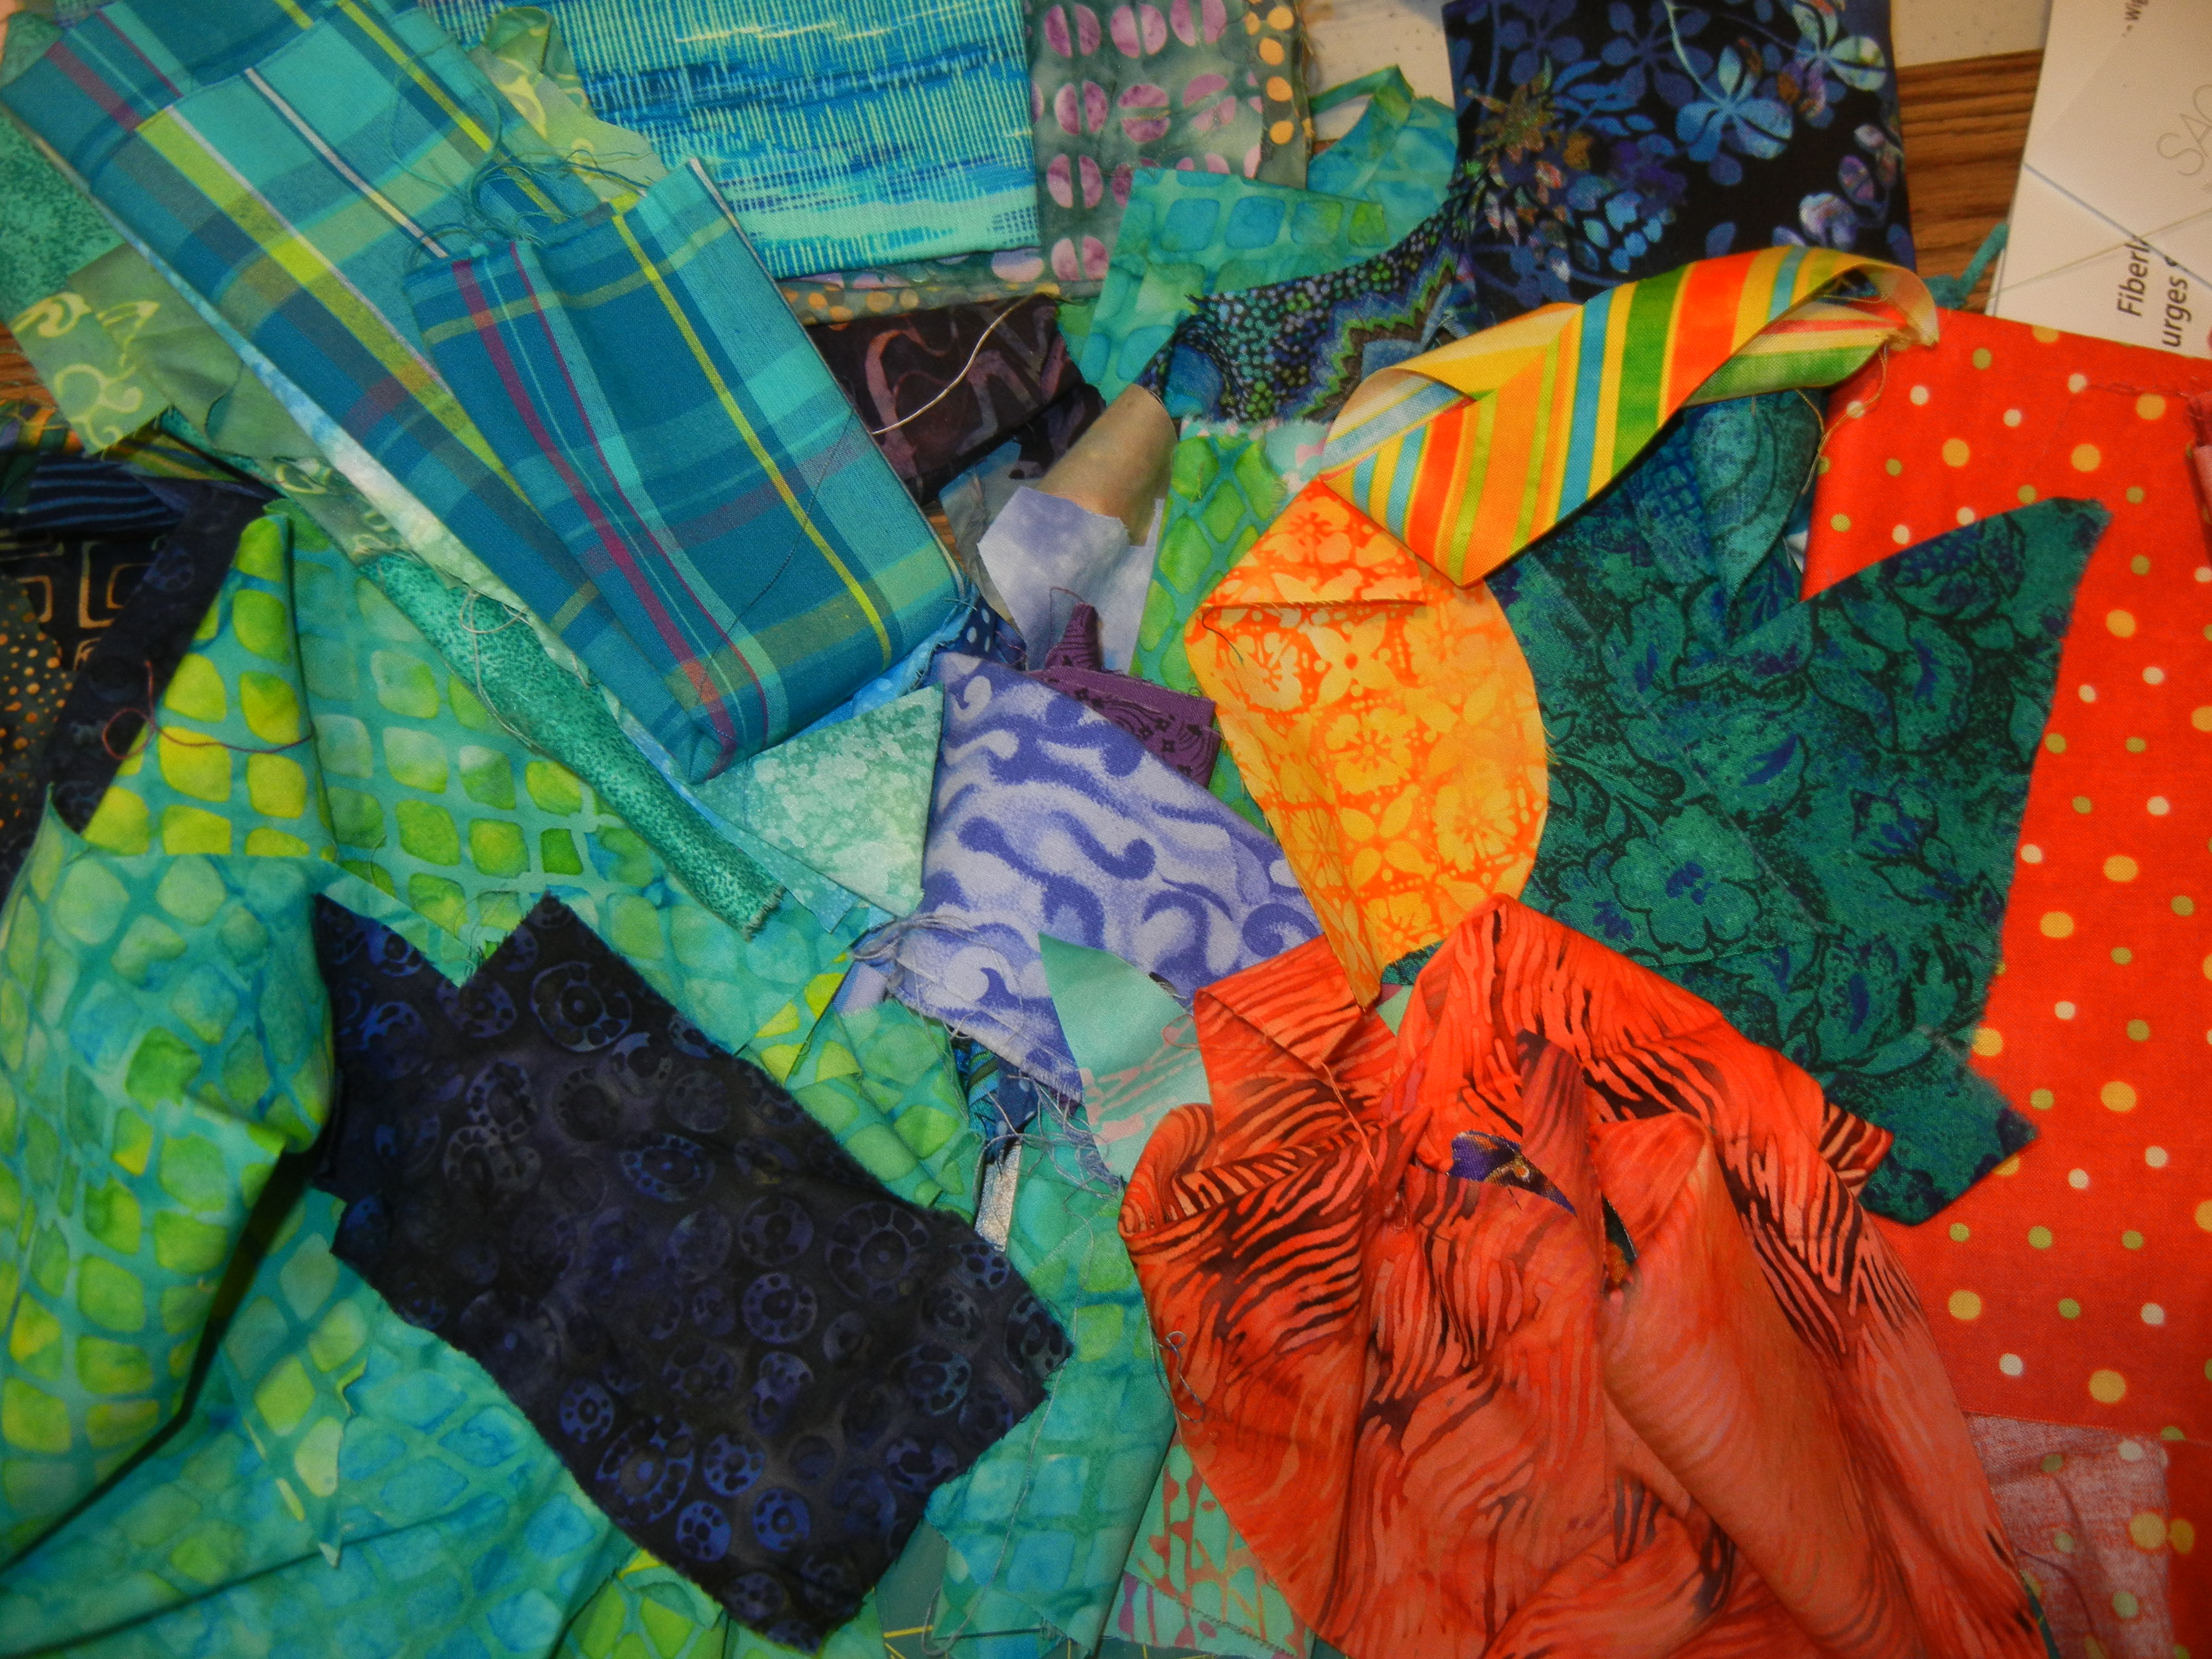
First, my palette of fabrics: My selected colors, plus some yellow for tiny accents, and some darks for contrast.
This was my first block, made with little scraps. Can you see what I did to get started?

- First, I cut the blue paisley fabric with a curved line. Then, without any pinning or measuring, I cut a skinny strip of red and sewed it in.
- Next, I cut through that and slid the two pieces so the red line had a big break it. And sewed it.
- Then, I added the red on the bottom. But again, cut through it and slid it so things no longer aligned.
Well, heck, that was so much fun I just had to keep going! This is the same “block,” finished:
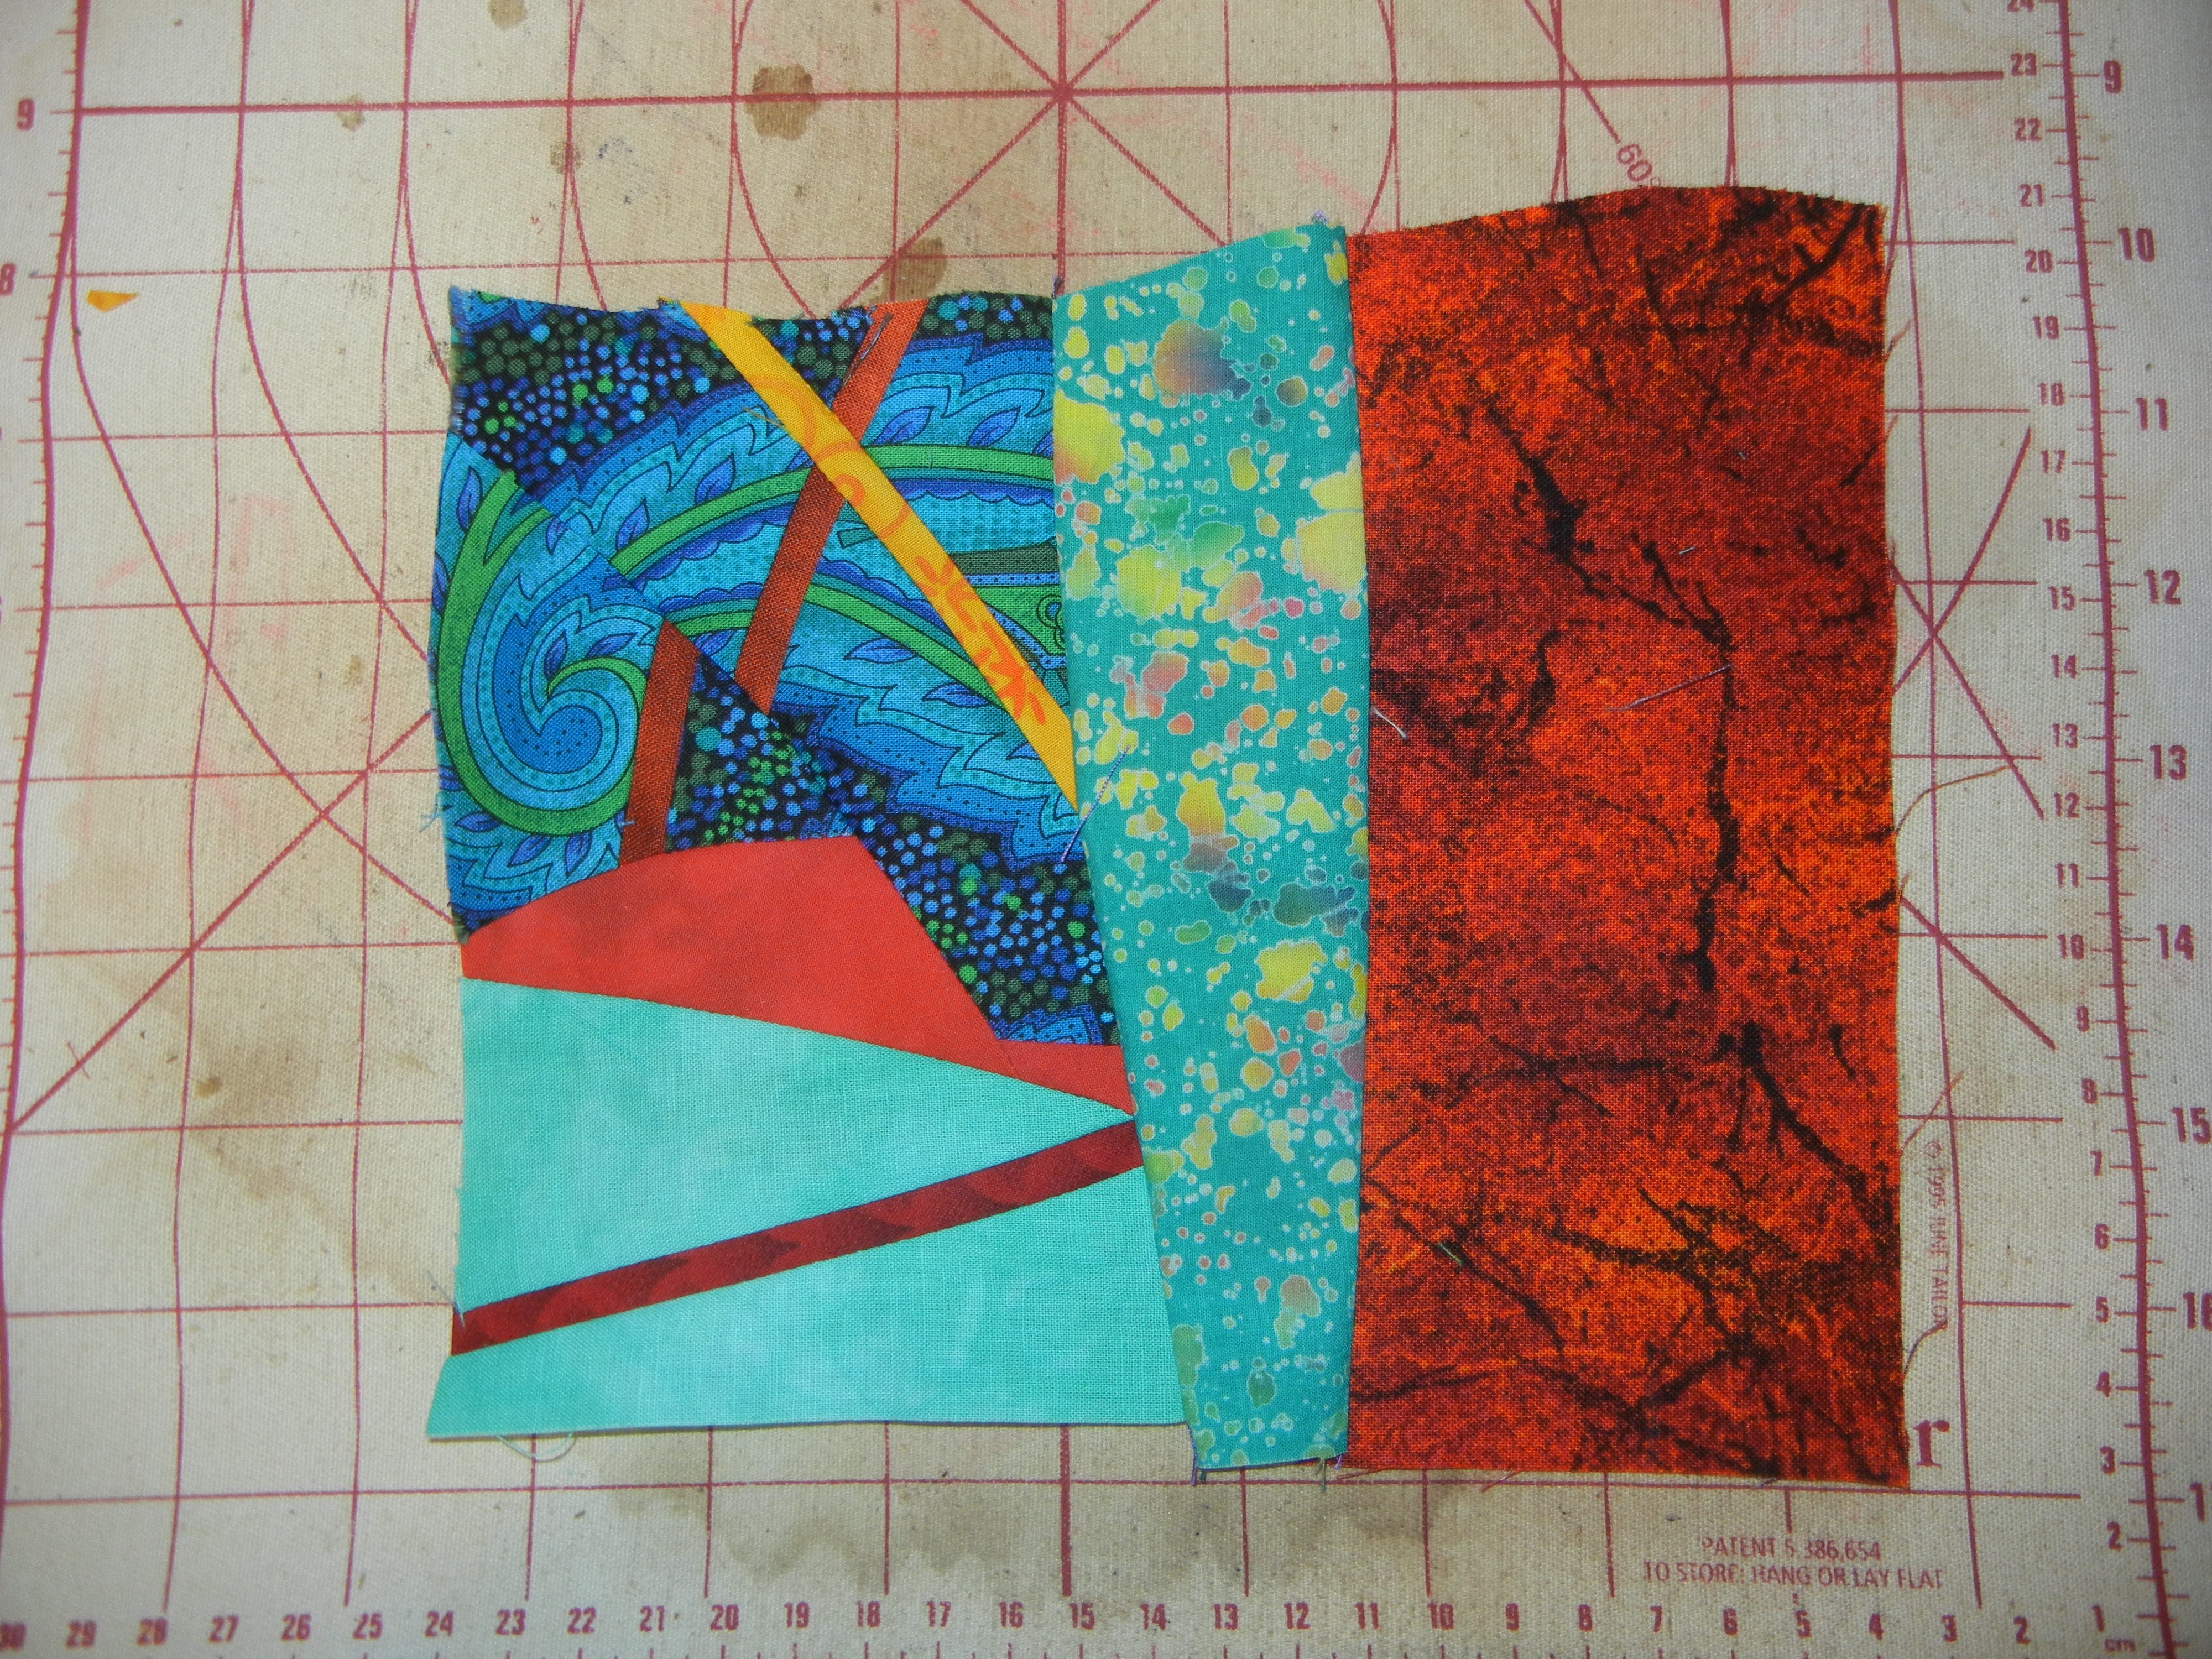
It was really exciting to sew something, cut into it, and rearrange it. I loved it!
Here’s another block in-progress. After cutting it, I debated whether to misalign it, or to add a skinny strip. I auditioned both options.
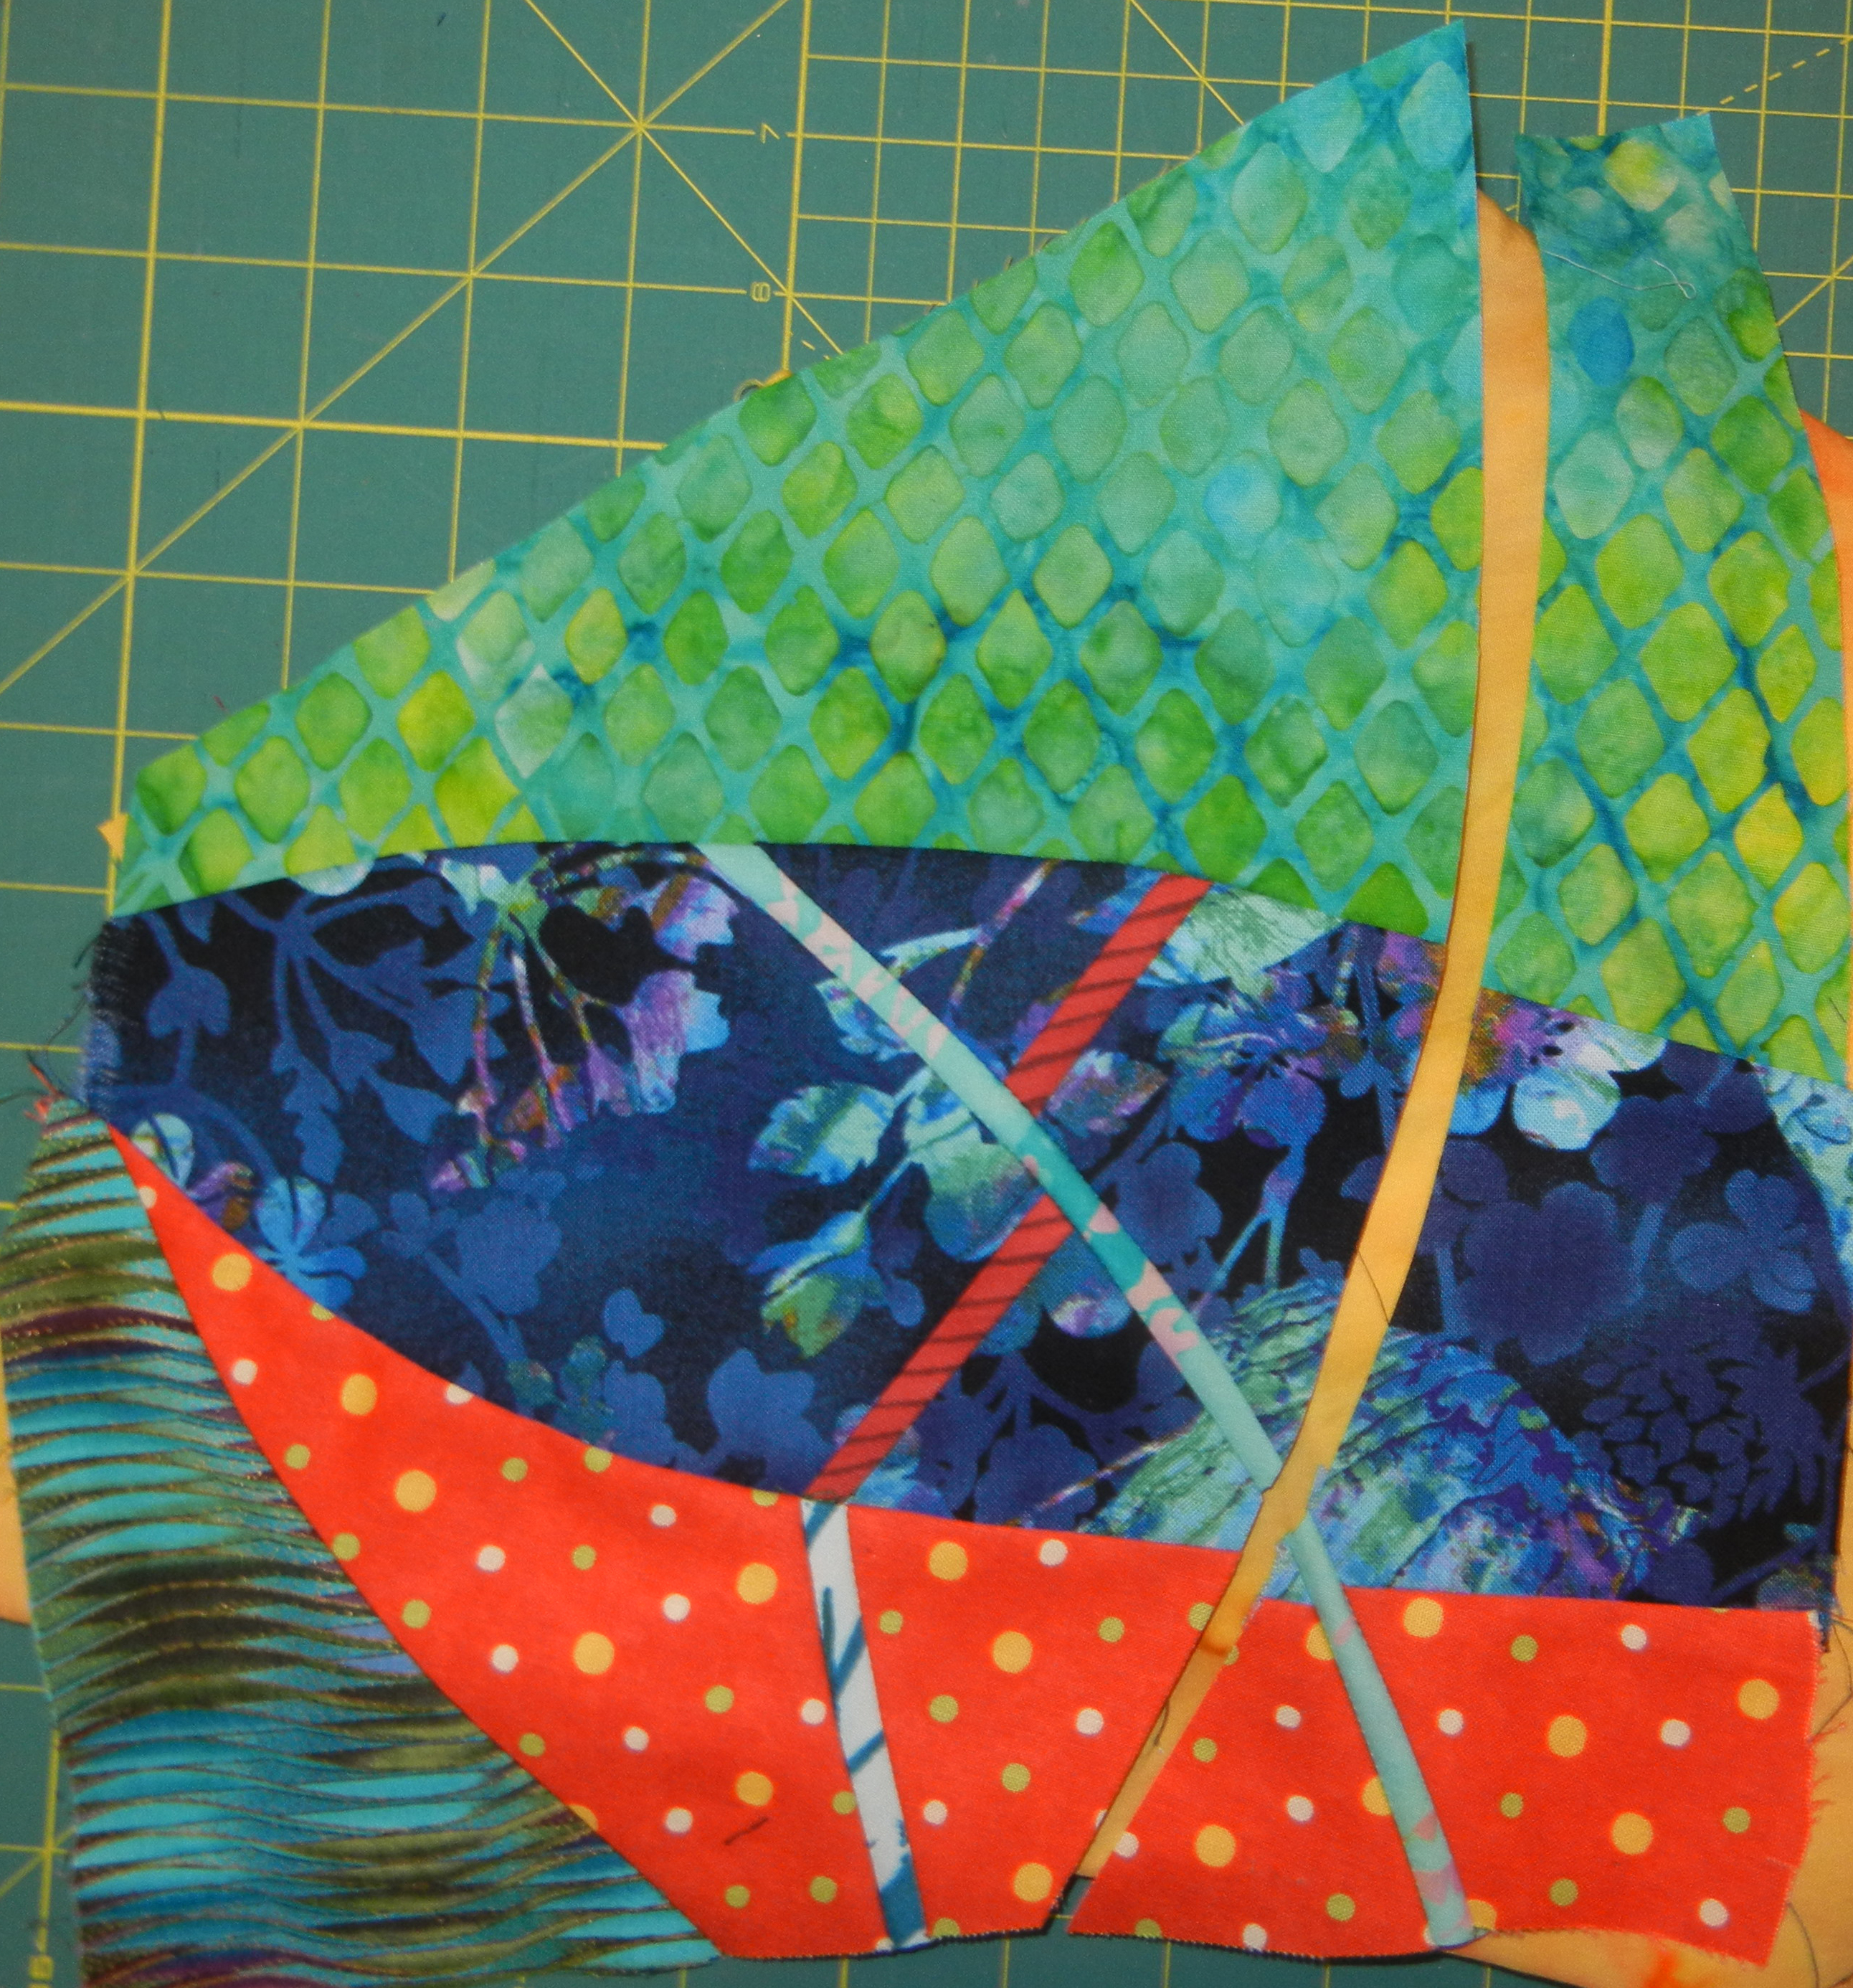
What would a skinny yellow strip look like?
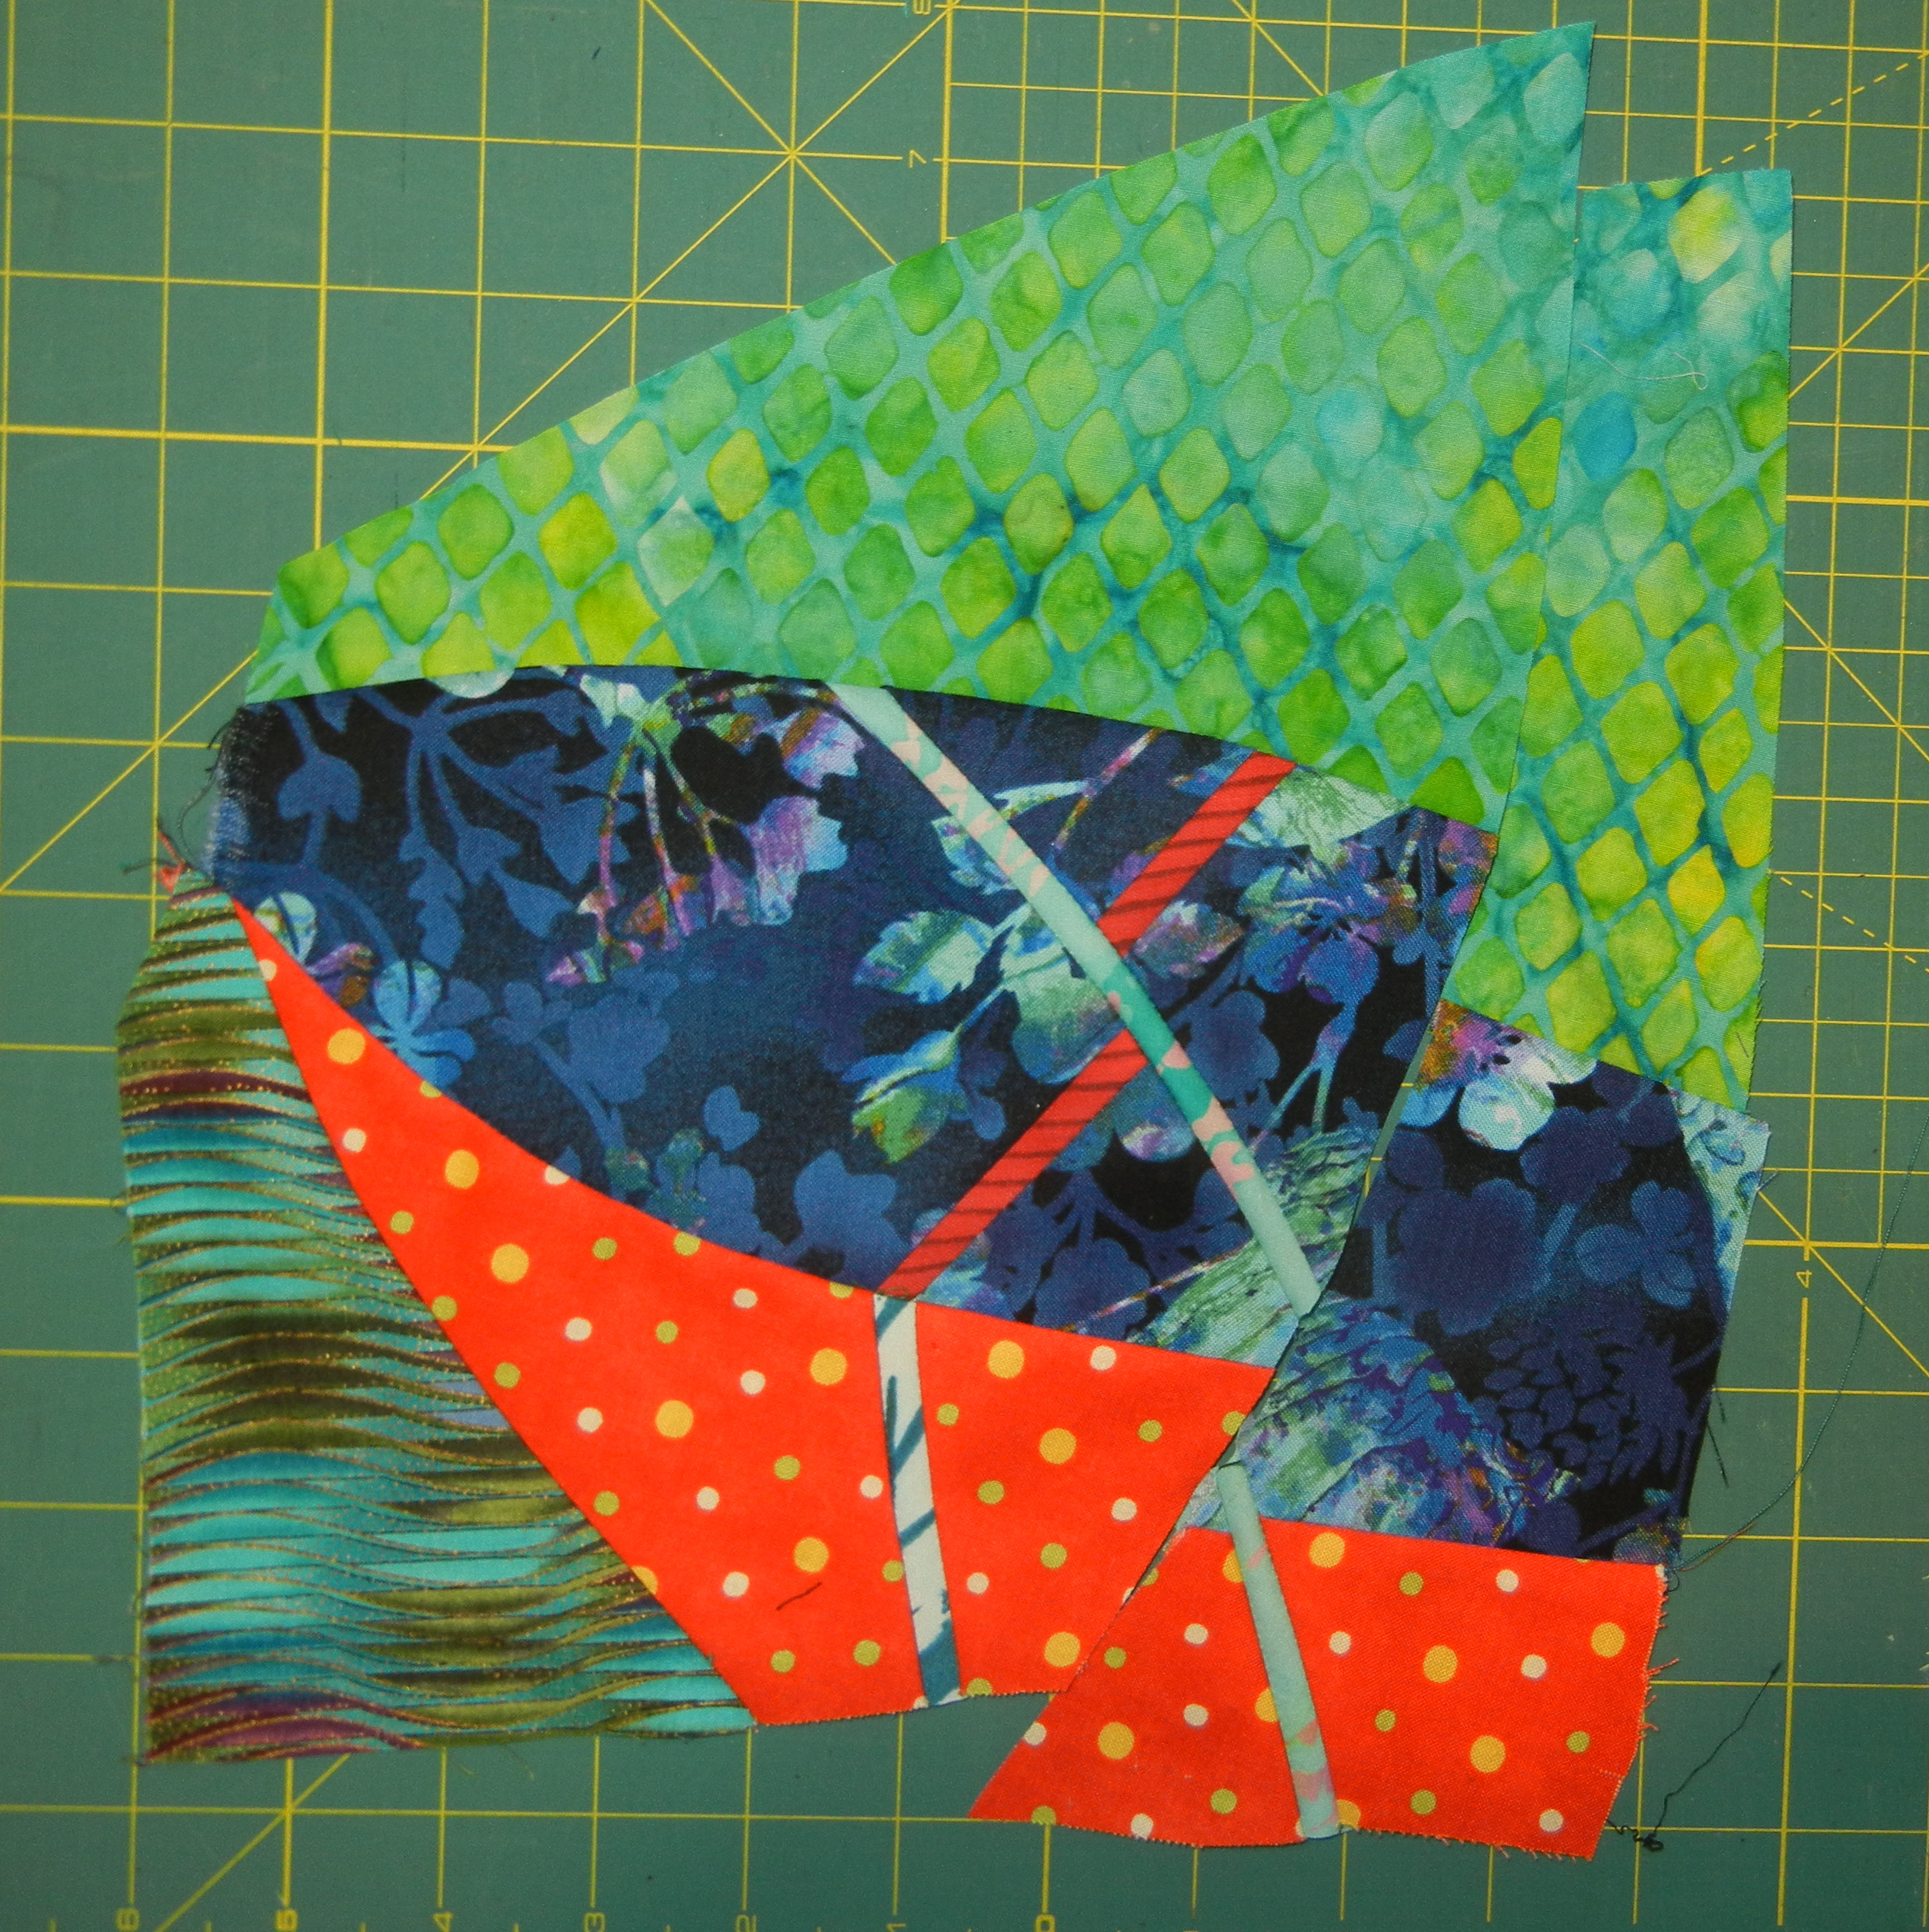
What would misalignment look like?
Of course, I could do both, right? (Stay tuned to see my decision.) In the image below, the first six blocks are randomly arranged on the design wall. The block I just showed is top right – BEFORE I altered it. That’s one of the great things about this technique. You can go back and alter each block until you begin the final joining.
Notice, too, that some blocks have wacky edges. They’ll be cut when the next thing is added, so I just left them that way as I continued.

It was looking pretty cool, don’t you think? I loved the energy!
Ellen Lindner

I love it! I hate following patterns but this is just up my alley! Can’t wait to see where it goes–an on-line class maybe?
Looks great! Thanks for the inspiration! (Now to find the time to act on your inspiring….harvest calls my name….)
Gee that looks like fun! And luscious colors. I would like to try it after I finish my sunset Grow with the Flow. 😉
Hi Sally,
Thanks for commenting. This IS so much fun! Completely stress free.
I can see teaching it in person. Online might be tricky, but we’ll see.
Oh, Christine, you would love this! It is so fun and spontaneous!
Oh, too much fun. I love these and have been doing some free-form piecing lately, too. Your curved seams are extra-interesting.
Yes, Martha, it’s a lot of fun! Like you, I really like the interest that the curves add.