
The Body Language Quilts
See the quilts here
Planning and Construction
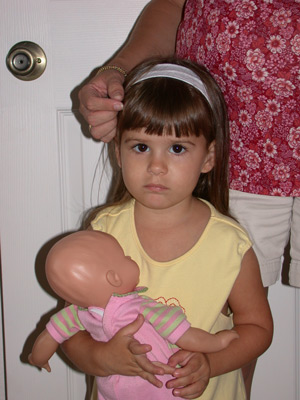
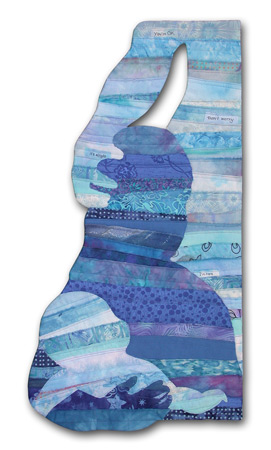
With the exception of the first quilt, (Woman Found,) each of the quilts in this series began with several reference photos. For Security, (at left,) a friend allowed me to photograph her young daughter, Grace, in the needed scenario. As expected, Grace was very leery of my attention and she quite naturally went to her mother for comfort.
As she held her own "baby," I wasn't sure whether this was an attempt to receive comfort or to give it. Either way, I ended up with many great photos from which to work.
(By the way, Grace's mom served as my model for Whispered Prayers.)
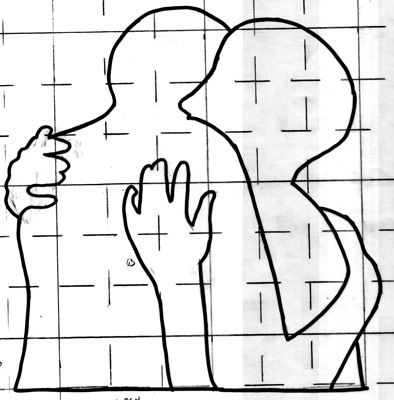
After each photo shoot, I had the images I needed to create a pattern. My method was to print out the best photo, trace the primary lines onto tracing paper, and then enlarge it to the needed size. Sometimes I mixed and matched body parts to get the pose I wanted.
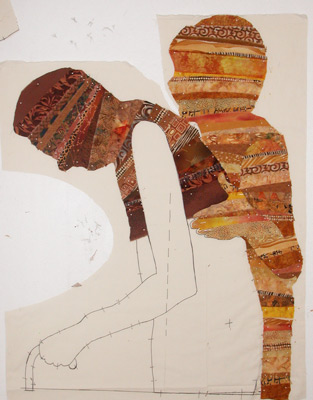
I drew my pattern onto a muslin base and began to layer fabric strips. Each strip was torn, and I used the resulting fuzzy edge as the "good" one that showed.
The perimeter edges were enlarged to allow for a seam allowance. Thus, the contours didn't take their final shape until the finishing stage. However, the interior portions were cut exactly, referencing the drawn pattern lines.
Each fabric strip was quilted. In addition, the design shapes were stitched with a clear thread and a zigzag stitch.
Finishing Up
I love the way the shape of each of these quilts is integral to telling their stories. However, such irregular edges required some creative thinking when it came to finishing and hanging.
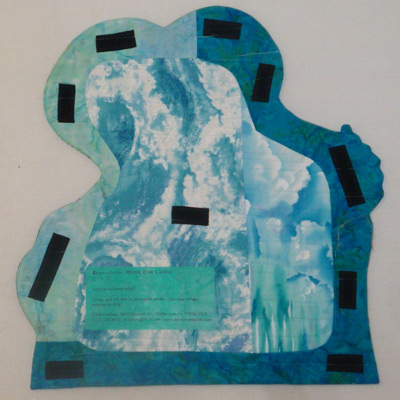
To finish the perimeter edges of these pieces, facing was an obvious choice. I use this technique a lot, so I was surprised by how difficult it was with these quilts. Matching the exact value changes with the exact turns or points was challenging!. I had to do a lot of basting, but was eventually happy with each one.
(The intricate contour edges of Caring made it especially difficult to complete!)
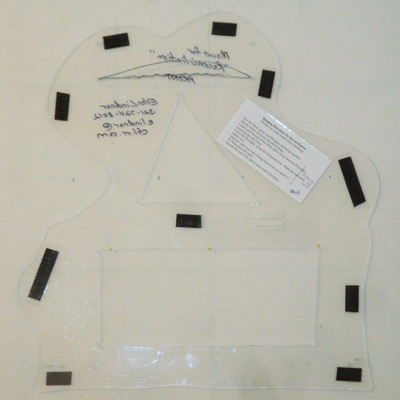
The biggest question with these quilts was "How will I hang them?" I decided to Velcro them to a rigid support which could then be hung on the wall. (The black rectangles in the photo above are Velcro pieces.) I selected 1/8" PlexiGlas as the support material. This was nice and flat, with no warping, and since it was clear, mating the quilt to it was easy. However, it was also heavy, difficult to cut, and rather expensive.
The support for Reconciliation can be seen at right, with corresponding Velcro pieces in place. Because of the weight, I cut out sections that were non-critical and drilled two holes at the top for a hanging wire. I also included hanging instructions, visible from both front and back.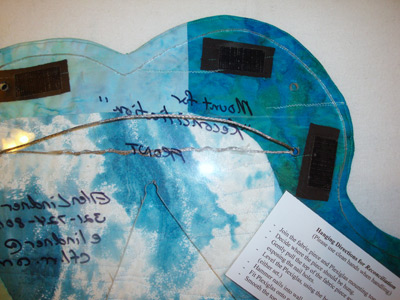
In order to make this support I had quite a learning curve. I had to master the use of a band saw, a drill, and a jigsaw! This is an involved and somewhat difficult way to support a quilt. I can't honestly recommend it unless you REALLY want a shaped quilt!
(Velcro tip: Put the soft "loop" side on the quilt or garment, so it won't snag any delicate fabrics.)
Lessons Learned
I always like to examine my quilts, (and quilt series,) to decide what works and what doesn't, both visually and technically.
Artistically, these quilts have been fun to design, but not as much fun to create. Once the pattern was determined, the actual construction was rather straight forward. Not as open ended and exciting as I prefer.
Technically, these quilts have been a challenge, especially Woman Found. Perhaps you can tell that this piece has a 3D aspect. The Twenty Something portion is very crinkled at top left and bottom right. The middle torso has gentle waves, and the right one is almost flat. I thought this would help tell the story, but in hindsight, I don't think it adds that much. It was achieved by adding a layer of wire mesh before quilting, which was sharp and hard to work with. I don't recommend it!
Of course, figuring out how to hang these pieces was also challenging, as described above. If I do more in this series, I will look for something lighter and easier to cut than PlexiGlas.
I'm very satisfied with this series. The pieces tell universal stories to which many viewers can relate. Maybe I have one more in me. We'll see.
See the quilts and read about their stories.
If you found this information useful, you may be interested in my other free articles, online classes, and e-books. You'll find a full directory here.
©2007-2012 Ellen
Lindner
|