
Note: This is not meant to be a thorough tutorial, but rather an example of the process with some available software. Please consult your software's help file or manual for more detailed information.
|
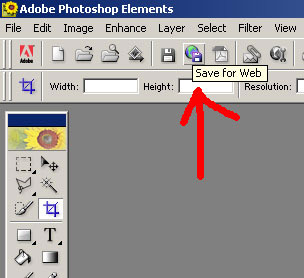
Note: These instructions are for version 2.0. Later versions will be similar. Search under Help for details. After opening your photo, one of the easiest ways to resize it is to click on the Save for Web button. |
 |
|
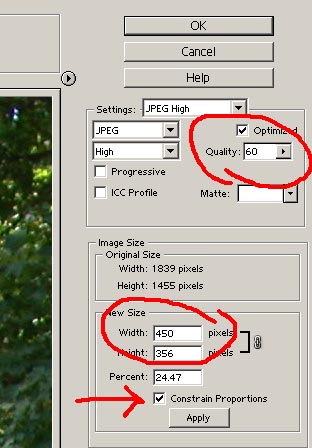
This opens a window in which you can select the pixel size and image quality. (See right.) Enter the settings shown: Image Quality 60, 450 pixels on the longest side, and check the Constrain Proportions box. Click Apply at the bottom, and OK at the top. Your photo will not only be resized, but it will also be converted to a jpg file, which is what you need for the classroom forum. You may get another box, asking about image quality and showing a slider bar. If so, set this at 6. When saving your resized photo, give it a slightly different name, such as adding the word web to the existing title. (When exiting from your original photo, you will be asked whether you want to save your changes. Click NO, since your changes are already saved under a different name. This preserves your original photo, in case you need it later.) |

|
|
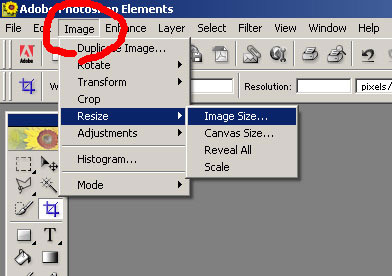
You can also manually resize and rename your photo. Click Image > Resize > Image Size. (See right.) |
 |
|
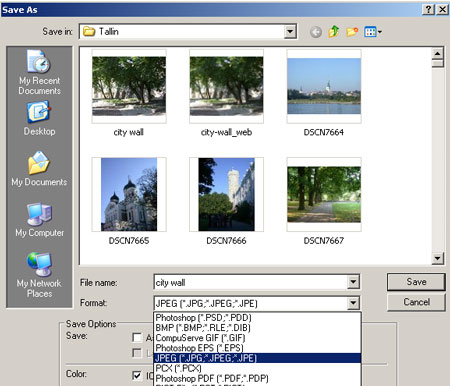
A box will appear, (not shown) in which you can set pixel dimensions. In the top four boxes check the height and width numbers, and change the largest one to 450. The bottom left box is resolution. Choose a number between 75-100. Click OK. Rename your photo by clicking on File (on the top bar) > Save As. When saving your resized photo, give it a slightly different name, such as adding the word web to the existing title. Type this into the File Name box (see right.) In the drop down Format box, select JPEG. Click Save. |
 |
©2007-2012 Ellen
Lindner
|