Beading with Glue
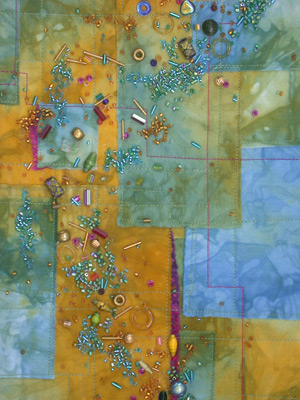
Have you ever wished there was a faster way to add beads to your wall quilt? There is: glue! Check out the tutorial in the Learn with Ellen section.
Ellen Lindner
P.S. There are a bunch of other tutorials in my Articles section.


Have you ever wished there was a faster way to add beads to your wall quilt? There is: glue! Check out the tutorial in the Learn with Ellen section.
Ellen Lindner
P.S. There are a bunch of other tutorials in my Articles section.

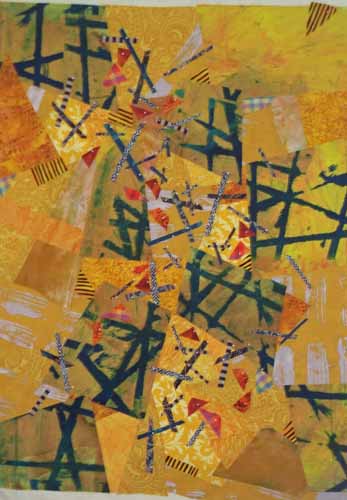
When I’m in experimental mode, my plan is to take every creative detour that pops into my head. What an Adrenalin surge that is! After completing Brainstorm I wanted to continue to work in the loose, experimental way I had when creating it. First, I wanted to play with colors. I figured I’d probably use the same…
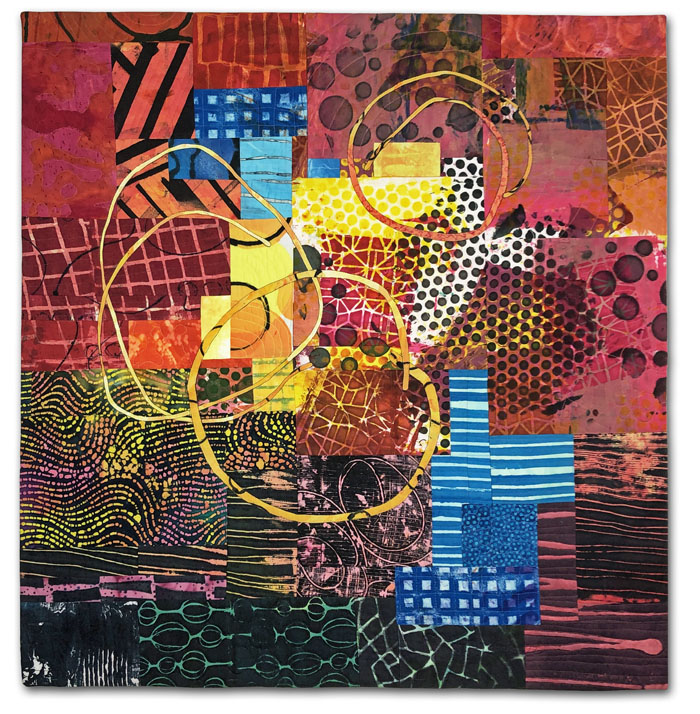
Here’s my latest quilt, Happy Family I’m REALLY happy with it and I hope you like it, too. As you can see, I added three loose circles, to add interest. Since there are three members of my immediate family, and because the colors are so upbeat, I decided to name it Happy Family. I got carried away…
Working on this quilt inspired by fall foliage, I added many more little orange bits. Hmm, maybe I got carried away there. I removed a few and it looked better. And here it is finished, called Mid-October. I liked it. But something was bothering me. Ellen Lindner P.S. Have you ever had that nagging feeling that…
I visited the Paris fabric district about 20 years ago and it was charming. It’s changed a lot now and many of the small fabric stores have been replaced by tacky-tourist shops. The main big store is still there, though, along with a few bargain shops. The large store we visited has a great view…
When you start 6 pieces in 2001, put them away, take them out and work on them several years later, put them away, and FINALLY finish them 18 years later the title pretty much writes itself: Deja Vu Again. (I’m proud of that one!) It all started in a class with Judy Hooworth way back in…

I like challenges. As a result, I’m currently working on an abstract self-portrait. It all came about when my art group, Dirty Dozen Fiber Artists, came up with (another) self-portrait challenge. This one was to be inspired by another artist. After some online searching and thought I decided on one of my favorite contemporary artists,…
Great information!
Oh oh OH! I gotta try this *soon*! Thank you for the tutorial.
PS – How did you create those irregular fabric edges on Red Strata?
Good question. That’s one of my favorite techniques. I call it jagged cutting. The idea is to scrunch the fabric into your scissor blades as you’re cutting. The result is that jagged and irregular edge. I love the effect. I use it a lot for vegetation, and anytime I want an unpredictable “zigzag.” See a class example at http://adventurequilter.com/just-a-few-hours-of-progress/
Yes, try it Lif. It’s easy and it adds a lot of bling.