

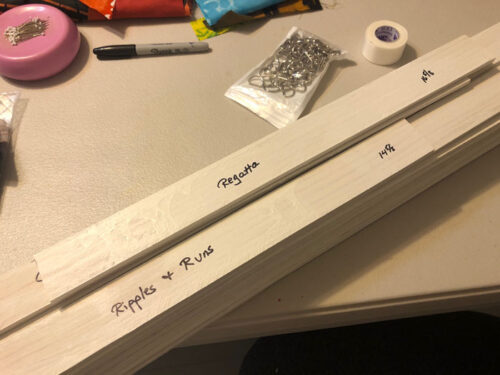
Hanging Slats with D Rings
After cutting my primed slats to length it was time to add the D rings. The venue wanted the D rings set wider than the sleeve, so I measured accordingly. This was my prototype.
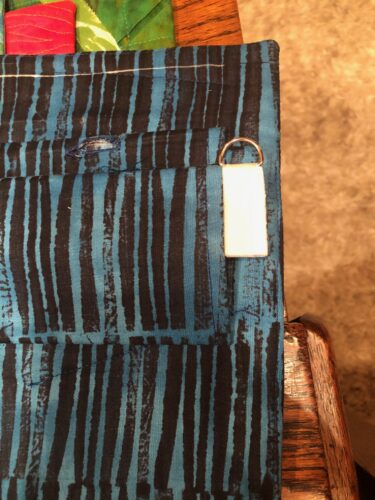
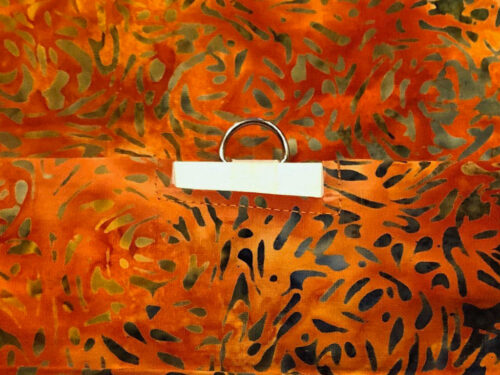
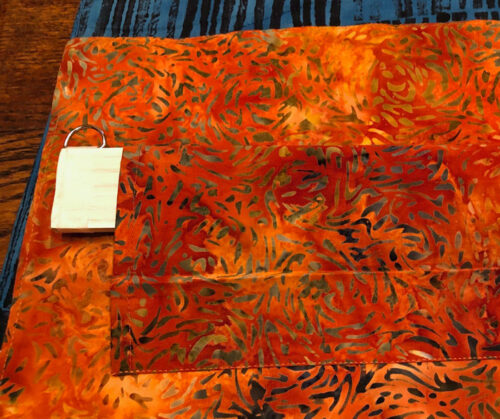
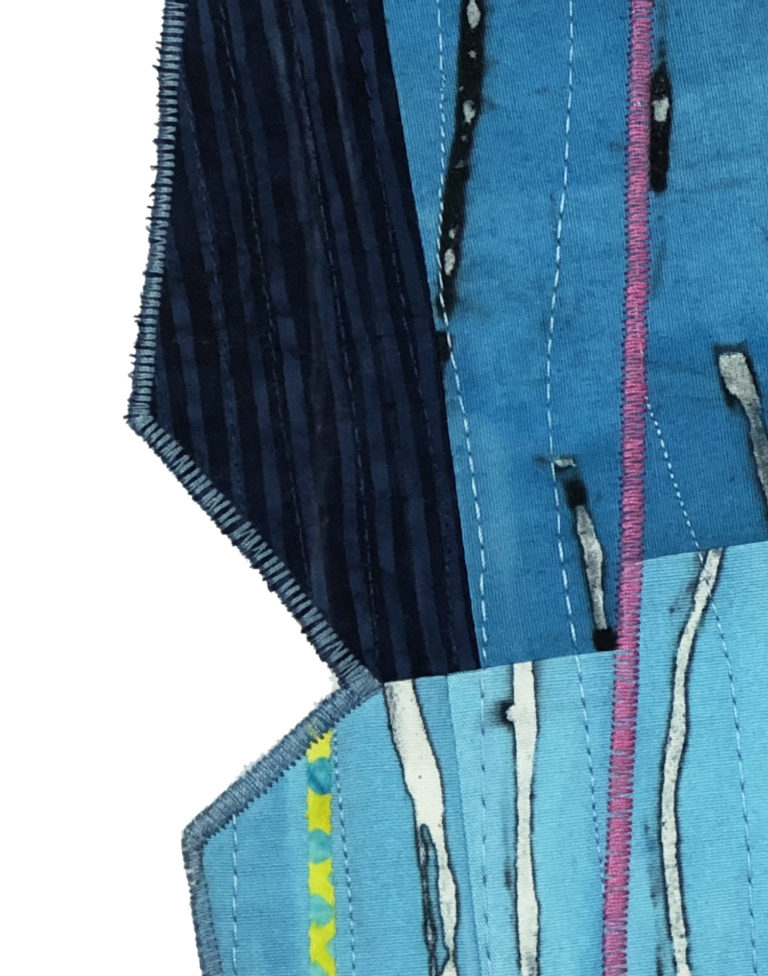
I checked to see that it wouldn’t show from the front, (using my test set up in the garage.) I found that, in general, the slat didn’t show.
However, if it shifted you might be able to see it just a little. I can definitely live with this! (See how low the sleeve is?)
Back to those D rings.
Typically, you find them at the hardware store with a tab and you put a screw through that tab to attach them. However, I wanted just the rings themselves, without the tabs, so I purchased them online. (This avoided: 1 – a thick dowel or slat to handle the screw, 2 – a bump where the screw head is, and 3 – a tilting slat.)
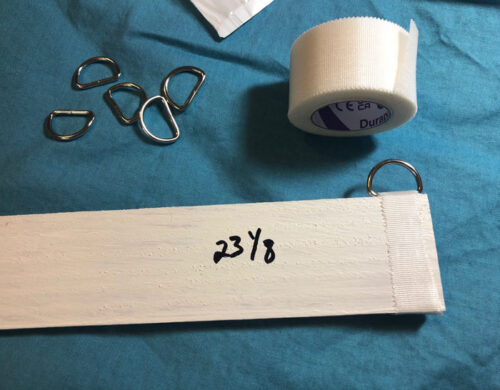
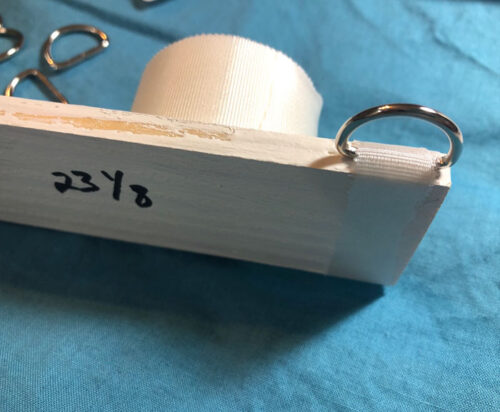
To attach the rings I use silk medical tape. It’s too wide, but can easily be split, since it’s designed to tear straight.

I used a short piece to hold the ring in place and then wrapped a longer piece (about 10″) around the slat. I made sure to center the ring on the edge of the slat. This avoids tipping the slat either forward or back due to off-center placement.
I’m loving this method!
In this post, and the previous one, I’ve been working with quilts that already had conventional sleeves sewn on. Going forward I’ll incorporate these new dimensions and procedures into each quilt. I’ll
1 – continue to sew the sleeves on very low: 2 3/4″ below the top of the quilt,
2 – add some light interfacing to the batting in the top part of the quilt that’s above the sleeve,
3 – make the sleeves narrower to avoid the D rings being so close to the edge,
2 – add a central D ring, along with a central opening in the sleeve.
I’ve now done this once and I like it. What do you think?
Ellen Lindner
P.S. Want to try it?
D rings
Medical tape


I’m always looking for a better way and I love this idea. I currently cut a hole in the middle and use a d-ring with a tab, but I’m certainly going to try this set up. Maybe a hole/d-ring in the middle and both sides to cover all the bases?
I do dislike how the top behaves when the hanging hardware is so close to the edge. I’ve often wondered why it can’t be lower but figured someone had tried it and it didn’t work. Thanks for your informative blog, Ellen!
Hi Kim,
Yes, in the future I’ll be using both a central hole and D ring, as well as the ones on the end. Due to the sleeve modifications needed for this exhibit the central one was covered – plus the venue asked for the two on the end.
I’ll also be using a light interfacing inside the top of my quilts to accommodate a lower sleeve. Quite the learning curve!
I like this idea! Do you have any idea how long the medical tape holds up? Does it lose its adhesive over time and start to ravel, yellow, or wear out? I’m guessing only time will tell. Can you take a picture of the tape package?
Hi Candy. Good question. I don’t know about the longevity of the tape, since I’ve just started using it. (I was going to try electrical tape, but that stretches.) I’ll probably continue to investigate options and keep an eye on the new slats in the meantime.
I don’t have the packaging from the tape, but here’s the link to it on Amazon: https://www.amazon.com/dp/B07811N9TR?ref_=ppx_hzsearch_conn_dt_b_fed_asin_title_1
I’m a novice, so forgive my asking: Are slats required? On small/wall quilts, would small (less than 1/2″ diameter) dowels suffice? You could wrap twine through the D right and around the dowel, add a drop of glue on the twine for security.
Hi Vicki, yes, that would work well.