The Fabric Dictates the Design

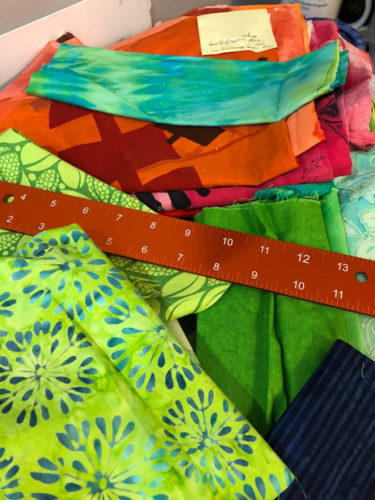
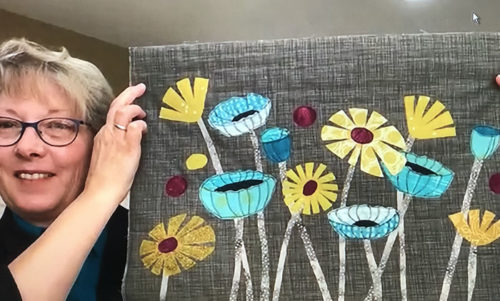
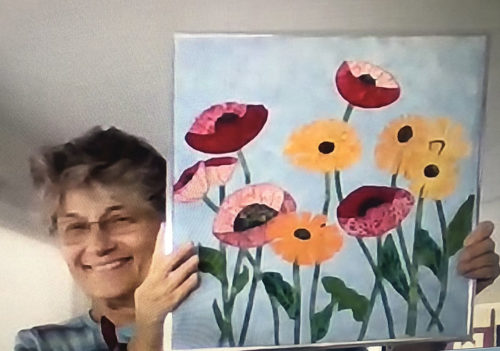
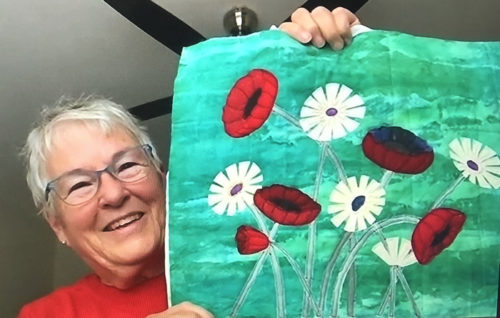
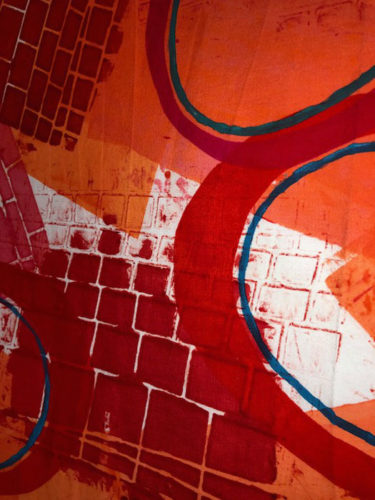
Since I’m still fairly new to dyeing my own fabric, my stash is limited. As are the sizes of the pieces. Typically, when I work with these fabrics, I find their sizes and shapes often dictate a good part of the design.

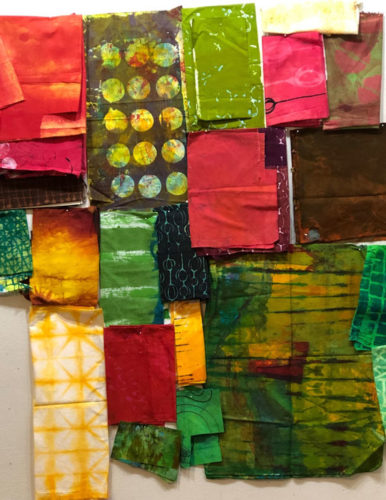
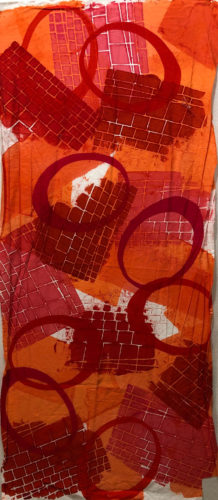
See what I mean below. The height of the gold grid, the red vertical pieces, and the gold piece on the left have determined the sizes that go into the design.

Fabric Dictates the Design. Ellen Lindner, AdventureQuilter.com/blog

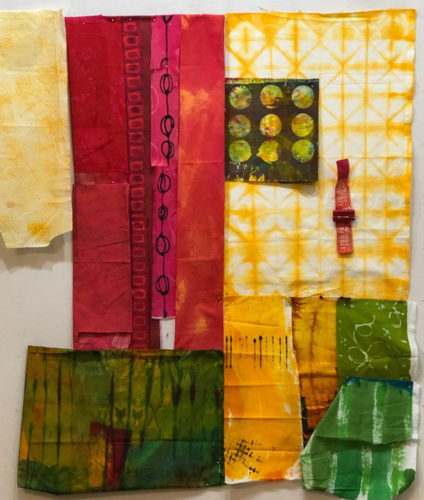
The green fabric in the lower left isn’t as wide as I’d like and several gold fabrics will be needed to complete the gold shape I have in mind near bottom center.

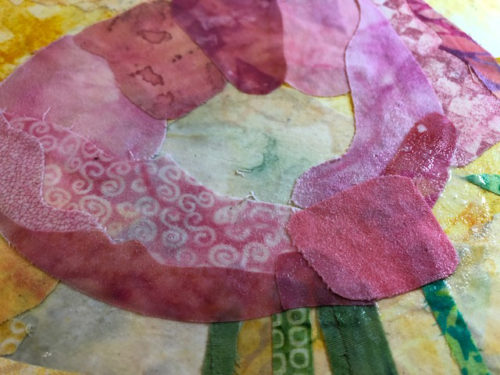
Here’s a better look at that green fabric. At this point I had cut it and joined the pieces to make it wider.

Fabric Dictates the Design. Ellen Lindner, AdventureQuilter.com/blog

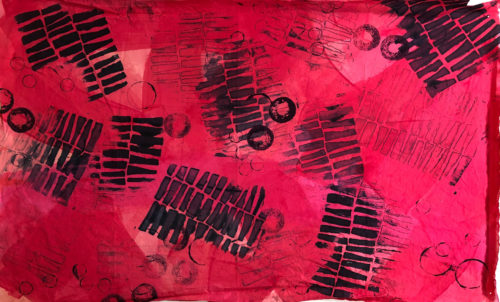
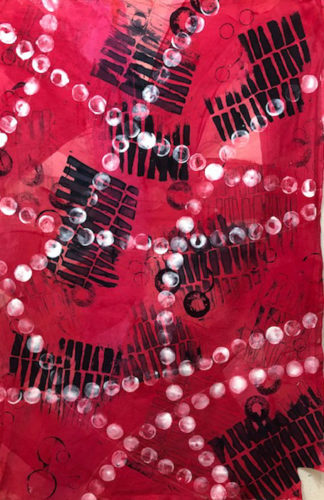
Early on I thought some diagonal brown stripes and some orange-red circles might play into the design. I auditioned them and took photos. Then, I lifted them to work on the underlying parts.

Fabric Dictates the Design. Ellen Lindner, AdventureQuilter.com/blog

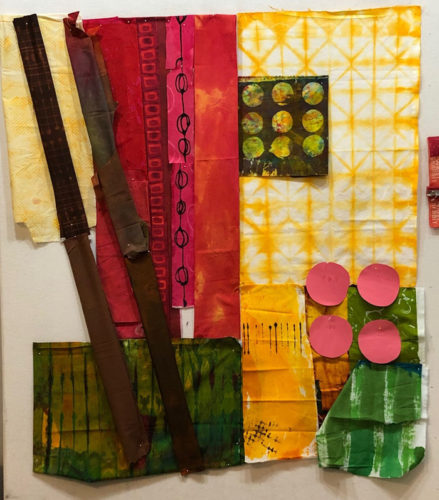
What do you think of the brown diagonals? Probably too much, right? That’s what I was thinking after seeing them, so I knew I’d do some careful considering as things progressed.

What about the vertical red fabrics? I thought this collection looked promising. A couple of these are commercial fabrics. Also, some were too short, so I had to piece them longer.

Fabric Dictates the Design. Ellen Lindner, AdventureQuilter.com/blog

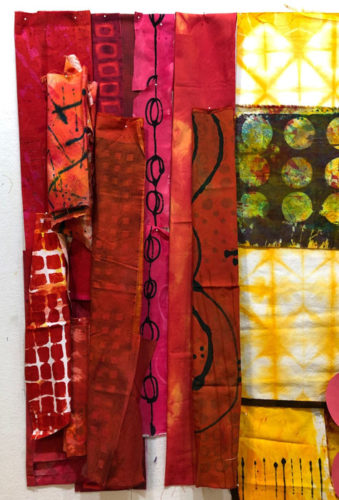
Below, I’ve pieced the red vertical lines and I like them a lot. As you can see, I also inserted a skinny yellow line. Love that!

Fabric Dictates the Design. Ellen Lindner, AdventureQuilter.com/blog

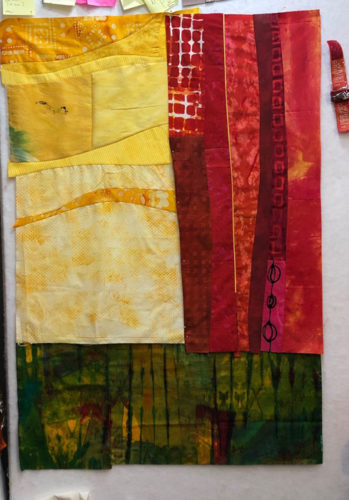
I didn’t have enough yellow-orange to fill the space on the left, so I had to dig into my commercial fabrics. As you can see, I’ve pieced them together with undulating lines.

I love working this way, making decisions as I go. It’s exhilarating! And it’s probably good to have limited choices. I find working abstractly to be very challenging (and therefore very fun.) Having fewer choices makes it easier.

Ellen Lindner

0

Color Inspiration

Slowly, over the course of a couple of months, I began to notice the same group of colors.

First, was a Croton plant.

Color Inspiration. Ellen Lindner, AdventureQuilter.com/blog

What pretty oranges and greens!

Then, I noticed the mess on my table, which had the same colors.

Color Inspiration. Ellen Lindner, AdventureQuilter.com/blog

I decided to work with green, yellow-green, and orange. I pulled out all the hand dyes I had in those colors and noticed that one dark green fabric had yellow circles. What about adding yellow-orange?

Color Inspiration. Ellen Lindner, AdventureQuilter.com/blog

Yes! I dug a little more and selected the fabrics you see above. This was getting exciting!

Ellen Lindner
P.S. Where do you find your color inspiration?

0

More Work from the Dirty Dozen Exhibit

In order to be in the Dirty Dozen Fiber Artists, you have to make a self-portrait. This has worked really well as a litmus test of how good the fit is between the prospective member and the group. Those who embrace it with minimal trepidation are likely to be a good fit, while those who are scared off are not likely to be.

We often show these self-portraits when we have our exhibits, especially if we have never members and, therefore, new quilts.

Dirty Dozen Fiber Artists: Live and On Stage - Small Self-Portraits, Ellen Lindner, AdventureQuilter.com/blog

Although somewhat out of focus, you can see the diversity, above. These were made by:
Top row, L-R: Sandy Shenker, Andrea Luliak, Ruth Anne Parker, Perlie (Phyllis) Petrillo, Jill Brown
Bottom row, L-R: Joan Engel, Becky Stack, Kathryn Robinson, Marilyn Seibring, Gabriele DiTota, and me.

Continuing onto the next panel are two more. Top: Dij Pacarro, Bottom: Laura Ruiz.

Dirty Dozen Fiber Artists: Live and On Stage - Small Self-Portraits, Ellen Lindner, AdventureQuilter.com/blog

We also provided “How To” information about cyanotype, ice dyeing, and weaving.

The final two panels of our exhibit featured some of our favorites.
They were made by, Top Row, L-R: Jill Brown, Gabriele DiTota, Kathryn Robinson, Dij Pacarro
Bottom row, L-R: Sandy Shenker, (Gabriele DiTota,) Marilyn Seibring, Joan Engel

Dirty Dozen Fiber Artists: Live and On Stage - Favorites, Ellen Lindner, AdventureQuilter.com/blog

These were made by, Top Row, L-R: Andrea Luliak, Perlie Petrillo, Becky Stack
Bottom row, L-R: (Andrea Luliak,) Ruth Anne Parker, and me

Dirty Dozen Fiber Artists: Live and On Stage - Favorites, Ellen Lindner, AdventureQuilter.com/blog

In addition to our quilts, we also had a table of 3D work. I’m sorry I don’t know exactly who made what. However, I think all these pieces were made by Gabriele DiTota, Marilyn Seibring, and Jill Brown.

Dirty Dozen Fiber Artists: Live and On Stage - 3D and mixed media, Ellen Lindner, AdventureQuilter.com/blog

What a creative group we have! We were very happy with our exhibit which included 47 quilts and about 10 3D items. We greatly appreciate the Seaside Piecemakers for offering us this opportunity.

Ellen Lindner
P.S. We’ll be offering our “Measure of a Woman” and “In the Style of” challenges as traveling exhibits. Need something special for your quilt show?

0

My Episode on “The Quilt Show”

I have to admit: it’s pretty exhilarating to be on an episode of The Quilt Show! It went live a few days ago and I’m really happy with the results!

Check out the trailer:
Ellen Lindner on The Quilt Show. AdventureQuilter.com/blog

In this episode I teach three different segments.
1 – Drawing inspiration from a photo. (But not reproducing it perfectly.)
2 – Design basics: focal point and balance
3 – A glued collage technique I call “Sticky Fingers.” It uses fabric, but there’s no stitching. Super easy!

The Quilt Show has an online membership format. If you’re a member you can view all the videos and other content at any time. If you’re not already a member you can sign up for a free 7 day trial. Either option will get you access to the episode.

Watching the episode I was reminded of how much fun we had that day. I hope you’ll get to enjoy it!

Ellen Lindner


2

Working on a New Class: Sticky Fingers

I’ve been BUSY getting a new online class ready to go. It’s called Sticky Fingers and it’s a glued collage technique. This is the class sample:

Sticky Fingers class project, taught by Ellen Lindner, AdventureQuilter.com

Sticky Fingers class sample. Teacher: Ellen Lindner, AdventureQuilter.com

I really love it.

For the purposes of the course I needed to make another one, so I could record it. And I chose pastel colors. VERY unusual for me, but I really like these bright and happy hues just as much.

Here it is, in-progress.

Sticky Fingers class sample. Teacher: Ellen Lindner, AdventureQuilter.com

Along with a very wet in-progress detail shot.

Sticky Fingers class sample. Teacher: Ellen Lindner, AdventureQuilter.com

And here’s the final result:

Sticky Fingers class sample. Teacher: Ellen Lindner, AdventureQuilter.com

Ooh, me likey! What do you think?
Which do you prefer?

This was really fun to make! (I have such a great job.) I’ll have the class published in a few days. Update: the class is now ready to en joy.

Full class details

I think you’ll really like it.

I’m getting excited!
Ellen Lindner
P.S. In case it’s not obvious: this is a non-sewing project. Anyone can do it!

6

Dirty Dozen Fiber Artists: “In the Style of…”

For our second self-portrait challenge, the Dirty Dozen Fiber Artists made quilts in the style of their favorite artists. These included abstract, pop, impressionist, and whimsical styles, to name a few.

These were made by Marilyn Seibring and Andrea Luliak.

Dirty Dozen Fiber Artists: Live and On Stage - In the Style of..., Ellen Lindner, AdventureQuilter.com/blog

These were made by me, (Ellen Lindner,) Sandy Shenker, and Becky Stack.

Dirty Dozen Fiber Artists: Live and On Stage - In the Style of..., Ellen Lindner, AdventureQuilter.com/blog

Jill Brown, Dij Pacarro, and Laura Ruiz created these quilts.

Dirty Dozen Fiber Artists: Live and On Stage - In the Style of..., Ellen Lindner, AdventureQuilter.com/blog

Gabriele DiTota, Kathryn Robinson, and Ruth Anne Parker made these pieces.

Dirty Dozen Fiber Artists: Live and On Stage - In the Style of..., Ellen Lindner, AdventureQuilter.com/blog

Can you find pieces inspired by “Whistler’s Mother,” the work of Peter Max, and Andrew Wyeth?

Ellen Lindner
P.S. See the associated posts about our other self-portrait challenges.

0

Dirty Dozen Fiber Artists: Live and On Stage!

I’m very fortunate to belong to a small art quilt group called “Dirty Dozen Fiber Artists.” The group consists of twelve very skilled and VERY creative fiber artists who don’t mind trying new things and taking risks. We LOVE to get together and share our passion for art quilting (and other fiber media!) We always have fun when we’re together.

Occasionally we give ourselves challenges, primarily so we can show our work to others in a cohesive way. This really worked to our advantage, recently, when the Seaside Piecemakers, of Melbourne, FL, invited us to take over the entire stage as part of their biennial quilt show. We had multiple challenges to show off and it made for an excellent exhibit! See what I mean, below.

Check out the quilts on the two left panels. They’re our self-portrait challenge called “The Measure of a Woman.” Each one is the height of the maker and no more than 12″ wide. They’re arranged by height. Isn’t that neat?

Dirty Dozen Fiber Artists: Live and On Stage - Measure of a Woman and Ellen Lindner, AdventureQuilter.com/blog

Here’s the left panel. L-R the quilts were made by me (Ellen Lindner,) Marilyn Seibring, Ruth Anne Parker, and Dij Pacarro.
(I’m always the shortest in any group.)
Dirty Dozen Fiber Artists: Live and On Stage - Measure of a Woman, Ellen Lindner, AdventureQuilter.com/blog

And the right panel. These were made by Laura Ruiz, Jill Brown, Sandy Shenker, Gabriele DiTota, Becky Stack, and Kathryn Robinson.
Dirty Dozen Fiber Artists: Live and On Stage - Measure of a Woman, Ellen Lindner, AdventureQuilter.com/blog

I just love this idea and so did our viewers. We got lots of comments and questions. It was fun to interact with quilt lovers and tell them about this challenge.

Ellen Lindner
P.S. I have many more photos to show you from this exhibit. Stay tuned.

1

Going Back and Making Changes

Last summer, I made a quilt called Beet Salad. I put a lot of work into it, including dyeing all the fabrics especially with this quilt in mind. This was the final result.

Beet Salad, an art quilt by Ellen Lindner. AdventureQuilter.com

Beet Salad

Although I liked it, somehow it didn’t quite meet my vision. I wasn’t sure what it needed. Recently, (when I finally put it away,) I studied it again and decided the color contrast was just too harsh. Especially with those yellow circles.

So, I removed them, and this is the new rendition.

Beet Salad, an art quilt by Ellen Lindner. AdventureQuilter.com

Beet Salad

I like it SO much better! It was a little bit of a technical challenge to remove the yellow circles, but I think it was worth it.

What do you think? Do you like it better?

Ellen Lindner
P.S. Have you ever changed something after it’s completely finished?

0

“Floral Improv” with the Arizona Quilters Guild

Floral Improv is such a fun class. The students learn a lot AND accomplish a lot in a relaxed atmosphere. The gals in Arizona had just such an experience, and made some fantastic quilts!

(I only got photos of a few.) Victoria’s dark background really created a lot of contrast and drama!

Cindy reversed the values on her poppies to great effect. Her quilt is so happy!

Audrey made good progress and was able to add black stitching to her poppies. Can you see (just barely) how it adds a lot of definition?

Kathy used an unusual combination of colors that made her quilt very lively. (There’s that poppy stitching again.) See the floating circles? They’ll become flowers once Kathy stitches on delicate stems for them.

During class Lynda completely finished stitching her quilt and even FRAMED it!!! She was so pleased.

Oh, I can see this gal’s face, but I can’t recall her name. (Please tell me if it’s you.) This piece is very successful thanks to the high contrast, black stitching on the poppies, and ORIGINAL leaves. I love the shape she came up with.

Finally, Vicki’s smile echoed the joy that everyone felt with their fun quilts. Isn’t hers great?

I sure had fun with this group and I think the feeling was mutual. Maybe your guild would live to give Floral Improv a try, as well.

Ellen Lindner

0

Over Painting Dyed Fabrics

The thing about using fabric dyes is that they’re translucent. They give beautiful results, but it’s impossible to add light colors at the end. For that paint is needed. So, I decided to use some  fabric paint and see if I could improve a couple of dyed fabrics.

This was my starting point:

Dyeing: How 'Bout Some Orange? Ellen Lindner, AdventureQuilter.com/blog

I decided to paint on blue and blue-green ovals.

Over painting dyed fabric. Ellen Lindner, AdventureQuilter.com/blog

Over painting dyed fabric. Ellen Lindner, AdventureQuilter.com/blog

I think it helped. This will be a very usable fabric.

Next, this red/pink fabric.

Learning about Dyeing - Still. Ellen Lindner, AdventureQuilter.com/blog

I thought it needed some white, so I held my breath and stamped some on. It was a little heavier than I would have liked, but I still thought it was viable.

Over painting dyed fabric. Ellen Lindner, AdventureQuilter.com/blog

The finished fabric:

Over painting dyed fabric. Ellen Lindner, AdventureQuilter.com/blog

Yes! I like it a lot and I can’t wait to use it!

Each of these are 45″ long on the longest side.

Ellen Lindner
P.S. I use translucent ProFab fabric paint . (This paint is more translucent than opaque paint, but more opaque than dyes.)

0