
Lights, Camera, Color
Copyright 2009 Lisa-Marie Sanders, Guest Author
Did you know that color is a property of light? This is one of the few facts I retained from a college class I took eons ago called “The Physics of Photography”. What stuck in my brain and has governed my photography since that time is a simple axiom: proper light = best color. This simple equation is important not only to the family vacation photos, but to your quilt photographs as well.
My light/color axiom may seem like a “no duh” comment, but the challenge isn’t to know that lighting determines color, it is to know how to manipulate lighting to render the best color. Do your photos ever look like this?

Or this?
Do your pictures accurately represent the details and colors of your subject?
The camera is a great tool for capturing artistic inspiration, exploring alternative designs and documenting the results of our efforts, but it can be frustrating when our camera fails to record things as we think we see them. If you are entering your quilt into a juried contest, a good photograph can make the difference between being chosen or not. Today, automatic cameras do much of the thinking for us, making judgments about light and focus. These judgments are based on averages and, as I tell my business clients, average decisions yield average results.
There are several ways to override the decisions of your camera and supplant them with your own desires. Perhaps the most common tool used to control photo lighting is the flash. Cameras come with various flash modes and understanding how and when to use them will greatly improve the quality of your photos.
Proper light = Best color
 Adjusting the flash mode is such a common technique that most manufacturers include a button on the exterior of the camera to control flash settings. Look at the exterior of your camera and try to locate the flash symbol. (See right.) When the camera is on, press the button to scroll through the various flash modes. Flash modes allow you to specify how and when the flash fires. The three most prevalent flash modes are described below.
Fill-in Flash
The lightning symbol is used as the general flash symbol and also to indicate the fill-in flash. Use the fill-in flash to force the flash to fire regardless of conditions. It is most useful in back-lit environments or where the subject requires additional illumination.

No Flash

With Flash
Do you notice more color in the second photo above? Not only is the subject properly lit, but the background colors appear richer, more true. The following photos illustrate how the fill-in flash can also be used for effect, even when there is sufficient lighting on the subject. The photo on the left has good light and color but forcing the flash in the second photo creates a different intensity: it accentuates the palm in the foreground and sharpens the color of the space shuttle plume. Experimentation is the best way to discover these nuances and understand the visual impact of changing your camera settings.
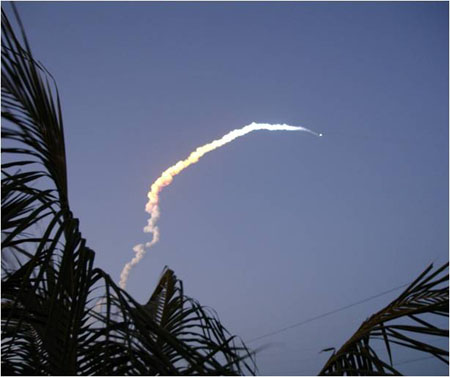
No Flash
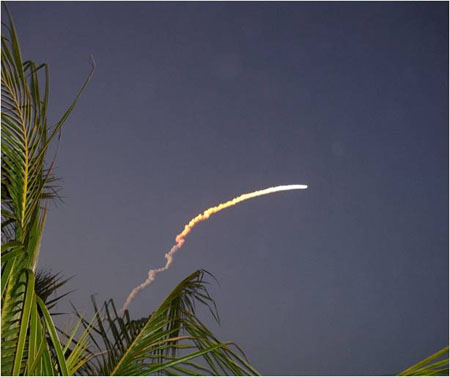
With Flash
 Flash Off
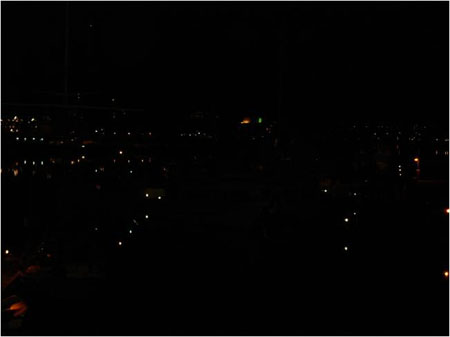
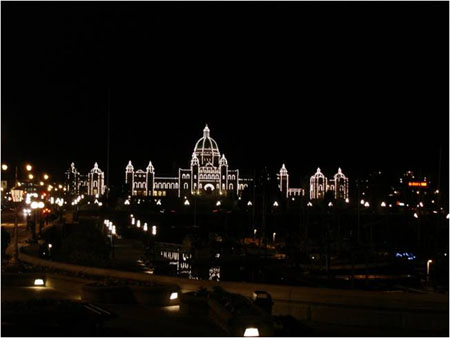
Turning off your flash allows you to take dramatic night pictures. It also allows you to capture true color rather than the harsh white light or washed out color that can result when the flash is used. Since the flash reflects off glass, turning off the flash will also avoid unwanted reflections. In dusk or low light conditions, the flash may fire automatically and diminish the rich color of the scene. This is also true when photographing images at a long distance in low light. Turning off the flash allows you to capture the scene as you see it.

With Flash
No Flash
With any low light or night photography, be sure to use a tripod or steady the camera against a fixed object such as a wall or balcony rail. (Hand held night photography will be blurry because we are unable to hold the camera completely still for much longer than 1/8th second. Night scenes usually require > 1 second exposure to capture the image.)
This pair of photos, below, was a surprise to me. It was dusk and I wanted to capture the evening light on the palms below our window. Turning off the flash allowed more light in, which made the picture brighter and clearer. It seems counter intuitive, but it works: in these conditions, no flash = more light.
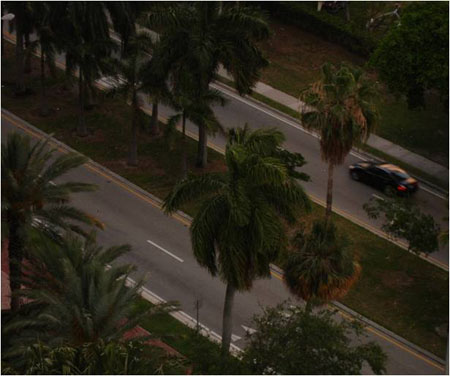
With Flash
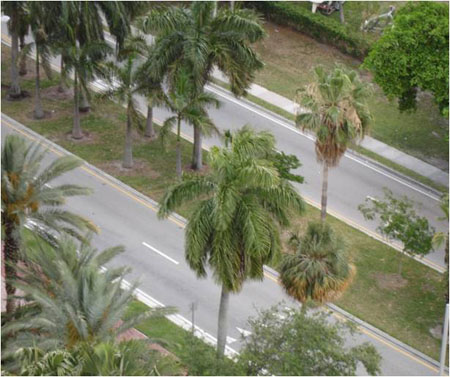
No Flash
 Red-eye reduction flash
You are probably familiar with the problem of red pupils when you use your flash to photograph people or animals. Computer software has made it easy to correct this phenomenon, but why take an additional step when you can avoid the issue from the start? The red-eye reduction flash does just that.

Red-eyes result from the flash reflecting in the pupil. The red-eye reduction flash emits several rapid bursts of light before firing the final flash and snapping the picture. These flickers cause the pupil to contract and the reflection is eliminated or greatly reduced. Be sure to describe this process to your subjects before you shoot so they will stay still and keep their eyes open until the final flash.
Going forward…
Now that you have some new techniques, experiment with your camera. (You don’t need a fancy camera. All the photos in this article were shot with a typical automatic digital camera.) Take a photo, review it, change your settings and take another photo. Review and compare. Which do you like best? Pull out your owner’s manual and see what other techniques are available to manipulate the lighting of your photographs. Do you have other flash modes? What do they do? See if your camera has White Balance and Scene modes, experiment with them. Enhanced knowledge of the camera improves us as artists because it increases our ability to see and capture life around us. Go forth and conquer!
In Summary:
 |
Flash Symbol – used to navigate through flash modes AND Fill-in-Flash – used to force flash to fire, regardless of conditions. Useful if subject is backlit or photo needs additional illumination. |
 |
Flash Off – used to prevent flash from firing, regardless of conditions. Useful in night photography, to avoid reflections or when flash provides too much or too harsh light. |
 |
Red Eye Reduction Flash – used to force flash to flicker or fire in bursts before final shot is taken. Prevents red eye by making the subject’s pupils contract prior to the photo. |
Lisa-M arie Sanders runs The Human Dimension, Inc., her own leadership consulting business. She is also a fiber artist, author and photography aficionado. Her most recent book, Quilting with Aliens humorously explores the journey of a newcomer into the language, culture and traditions of quilters. You can read an excerpt at www.QuiltingWithAliens.com
If you found this information useful, you may be interested in my other free articles, online classes, and e-books. Full directory