Dyeing On a Larger Scale

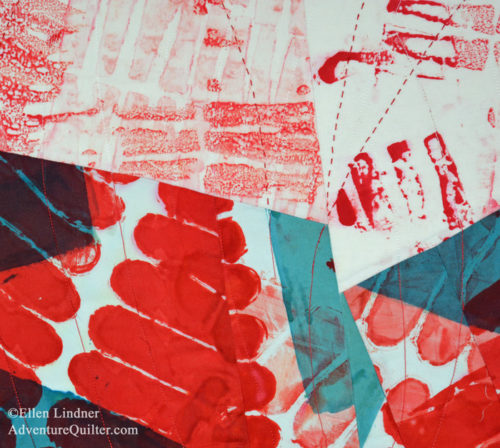
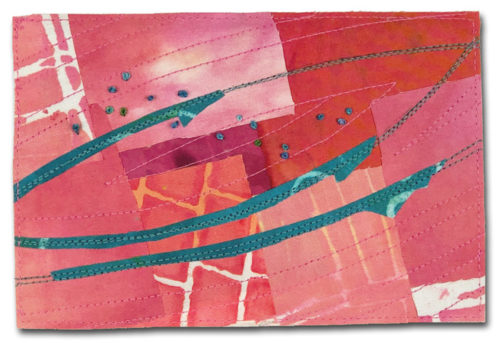
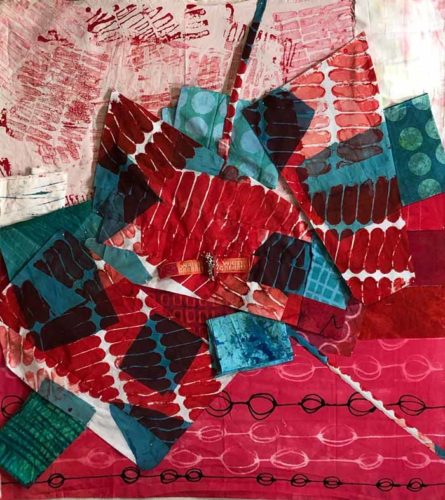
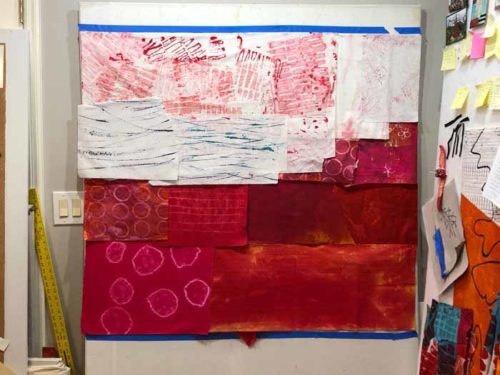
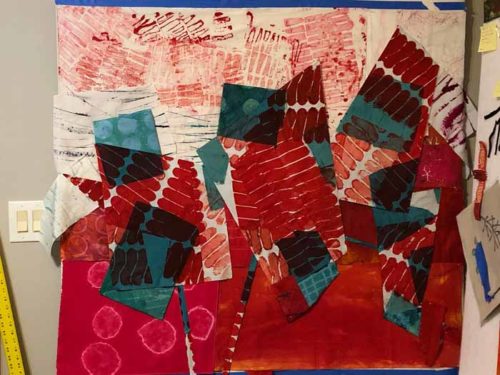
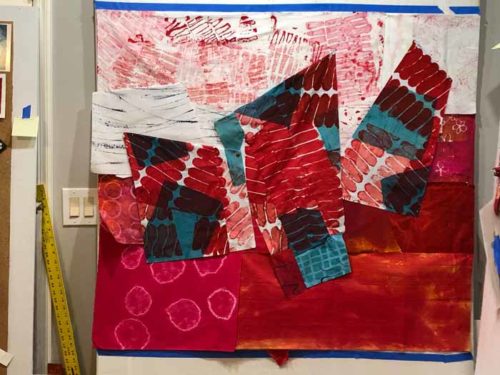
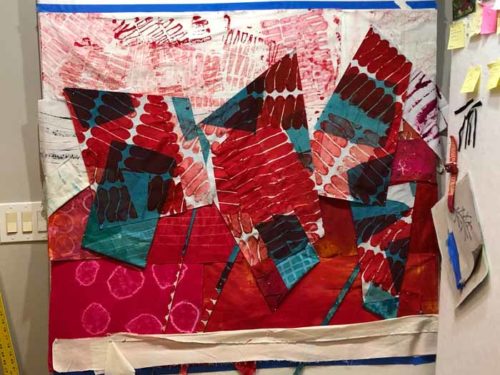
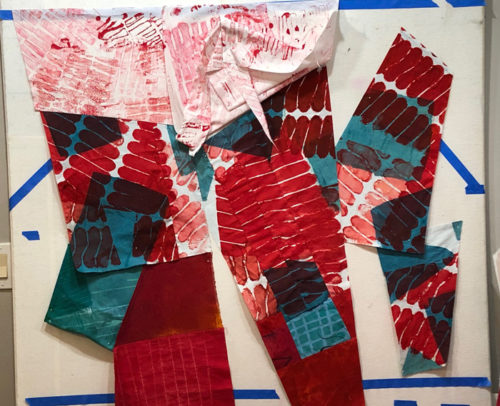
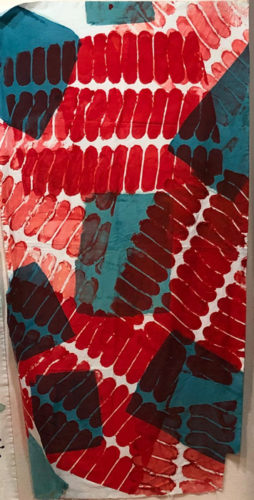
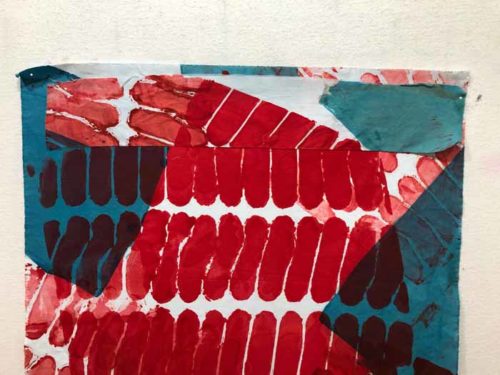
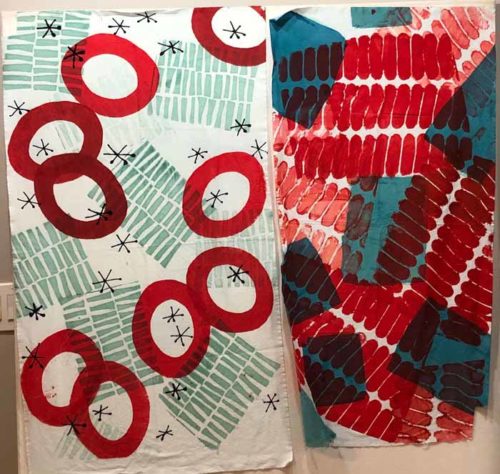
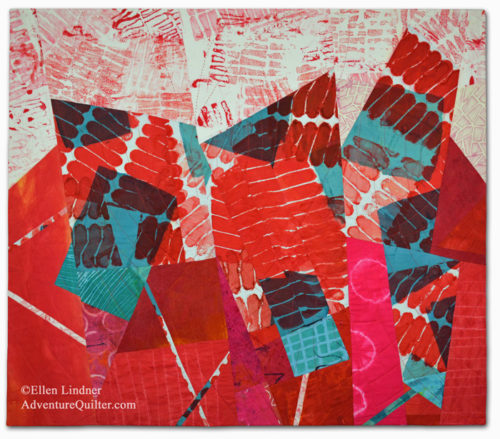
Lately, I’ve been trying to dye fabrics to a larger scale. I feel like I succeeded with the one on the right. I screened red on through some construction fencing, and then added some blue-green squares. It should be very usable.

Dyeing at a Larger Scale. Ellen Lindner, AdventureQuilter.com/blog

I like the large red circles on the left one, but the design reads a little  Christmasy. It will probably need further attention.

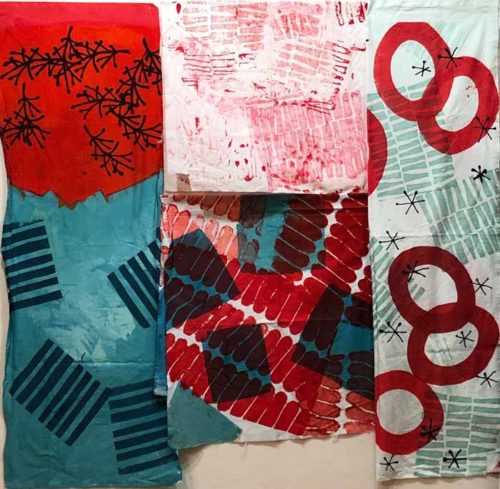
I’m drooling over the orange and blue “twiggy” fabric, below left. It will take a good bit of thought, I imagine, to figure out what to  do with it while till maintaining the “twigginess.” The pink and white fabric below was made as a “ghost print” from some red screening. I think it will work with some of these, too.

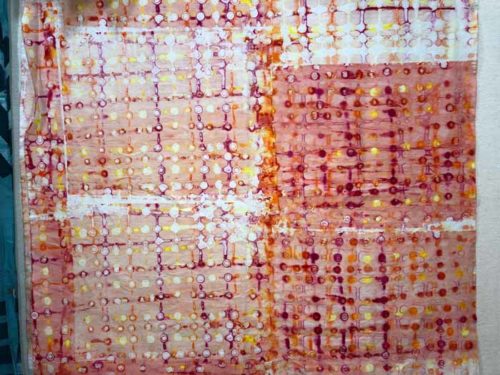
I also did some deconstructed screen printing. With it you let dye dry onto a screen and then later screen a color or clear paste through it. The original dried dye initially acts as a resist and later breaks down, adding its own color to the mix. With this one, I drew on horizontal and vertical lines using all my warm dyes: yellow, orange, red, and fuchsia, and let it dry (over 2 days!) I screened clear paste through, which eventually took on t he other colors and finished to a nice peach.This is detail shot. 

I don’t normally work with pastels so I’ll have to dye a few more to go with this one. I’ve got lots of fun stuff to think about!

Ellen Lindner
P.S. Each of these fabrics is about 43″ on the longest side.

10

Composing with an Eye Toward Value

These were the fabrics I selected as I started on an abstract quilt with NO plan.
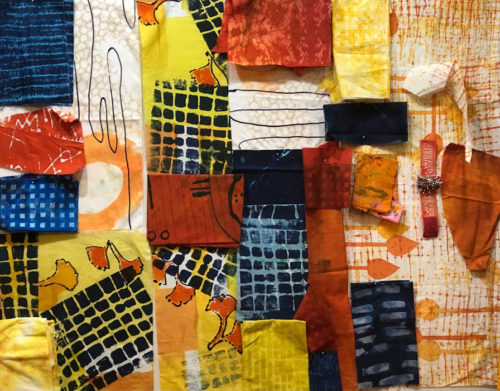
Working with Dwindling Fabrics, Ellen Lindner, AdventureQuilter.com/blog

Although I didn’t have a plan, I did have a goal. I wanted to use the last of my favorite fabric, the navy and yellow grid, and to let it be the star of the show.

BTW, can you see how the scale of that one print greatly affects the scale of the overall piece? I wouldn’t want to cut it into tiny pieces, for instance.

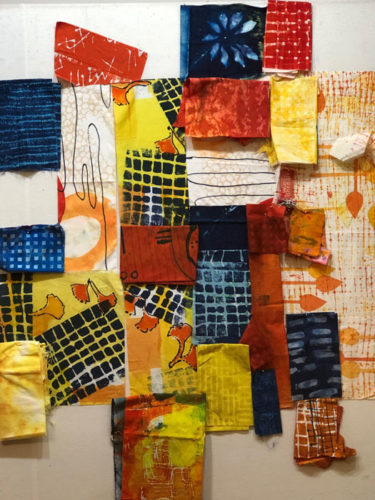
I had two lengths of the favorite fabric and I wanted to cut it as little as possible. I cut one piece into about a 1/3 – 2/3 split, so I had 3 pieces.. Since this fabric has the highest value contrast (light vs. dark) of all the other fabrics, I knew it would attract a lot of attention. Which was good.

Therefore, I moved everything else out of the way and created the first part of the composition with just these 3 pieces of fabric.
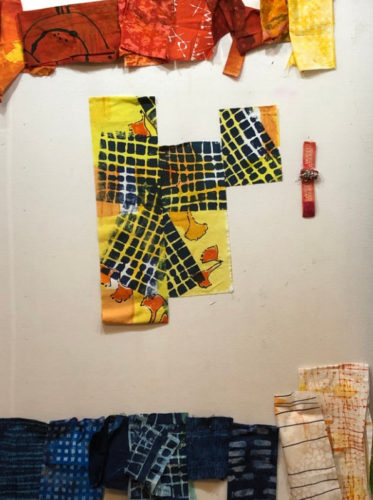
Composing with Value. Ellen Lindner, AdventureQuilter.com/blog

Because this fabric had a diagonal aspect to its design, it created a lot of energy. Plus, as you can see, I made sure to offset the pieces. I really liked this starting point! I knew I’d have to pay attention to the value contrasts that developed throughout the rest of the design, making sure that none of them drew attention away from it.

In the photo above you can probably tell that the left fabric is folded under at the bottom. I cut that off and added it to my starting composition, (see below.) I wanted to break up the large expanse of grid on the left piece and inserted a skinny orange strip (shown in the next photo.) I liked it a lot.

I let the fabric lead my next few decisions: adding more yellow and orange in their respective areas.
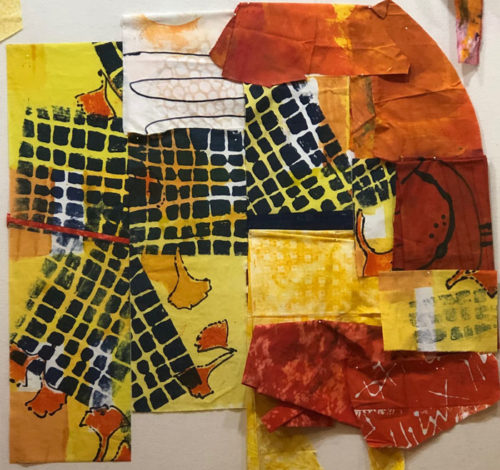
Composing with Value. Ellen Lindner, AdventureQuilter.com/blog

As you can see in the photo above, I didn’t have large pieces of orange, so I knew I’d have to piece those together. I thought I’d probably repeat the orange in the lower right, as well. Adding navy would be tricky. It would automatically create a very high value contrast, attracting attention. I’d have to consider it very carefully.

And what about that white in the top center of the photo above? Although I liked the fabric in the mix, it was right next to the navy grid, creating exactly the problem I was hoping to avoid. I did add some navy just right of center and I thought it worked there.

Next round. Navy top left: too strong!
Navy at the bottom: maybe.
White at the bottom right: maybe
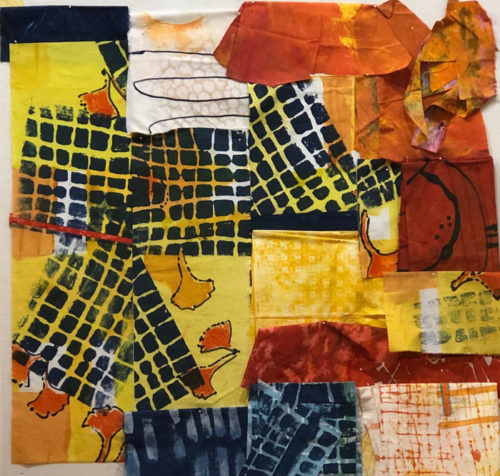
Composing with Value. Ellen Lindner, AdventureQuilter.com/blog

Next round. Replaced top left navy with yellow-orange: MUCH better! (Low contrast, right?)
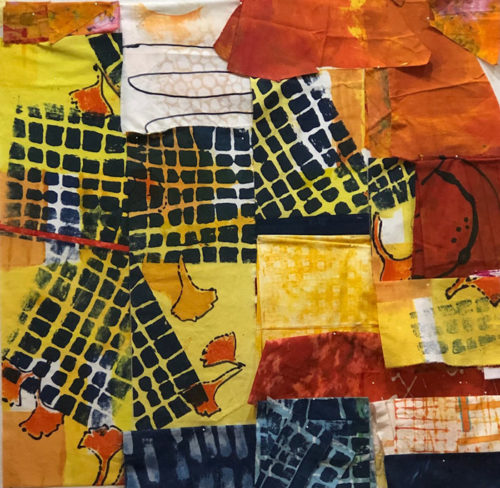
More navy at the bottom: probably. The navy is visually weighty which gives the piece some stability.
Composing with Value. Ellen Lindner, AdventureQuilter.com/blog

This hodge podge of scraps pinned to the design wall evolved only slightly as I began to figure out how to piece all of this. See the finished quilt in my next post.

Do you think about value this much? I find it very helpful, although sometimes I get seduced by a color or some such and forget to pay attention to the contrast.

Ellen Lindner


0

Working with Dwindling Fabrics
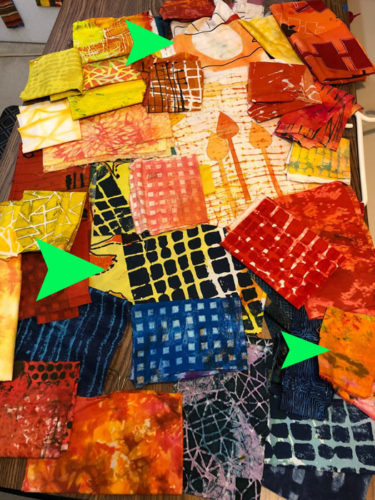
I was running low on a favorite hand dyed fabric when I decided to make a quilt with it. It’s the navy and yellow grid shown below, indicated by the largest arrow.

Working with Dwindling Fabrics, Ellen Lindner, AdventureQuilter.com/blog

I pulled every other hand dyed fabric that would go with it and this is the selection, shown above. Smaller arrows indicated two more fabrics that were down to fairly small pieces. I was loving the energy of these bright fabrics and excited to get started.

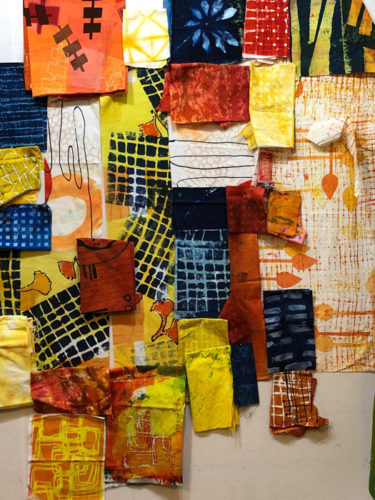
I pinned everything up on the design wall and began to edit. Now you get a better idea about the sizes of the pieces. Some of the fabrics had too much pattern and would draw attention away from my feature fabric.

Working with Dwindling Fabrics, Ellen Lindner, AdventureQuilter.com/blog

Some fabrics removed, I continued to study the combination. Still some competing fabrics.

Working with Dwindling Fabrics, Ellen Lindner, AdventureQuilter.com/blog

After deleting the “show stoppers” I thought this combination would be workable.

Working with Dwindling Fabrics, Ellen Lindner, AdventureQuilter.com/blog

I’d still need to edit and carefully consider as I proceeded. What about that near-solid navy? Will it be too strong? And the brighter blue grid on the left: too bright?

This was my starting point. These fabrics went on my work table, and all the others were moved out of sight. I didn’t have a design plan. My only plan was to feature that navy/yellow gridded fabric. All my decisions would be in support of it. I knew this would be challenging, but also invigorating.

In my next post, I’ll show you how I began to compose the design. It was fun!

Ellen Lindner
P.S. Do you ever work without a plan?

2

“Toast and Jam”

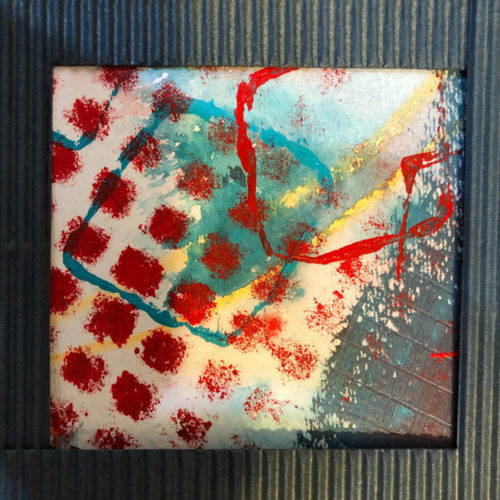
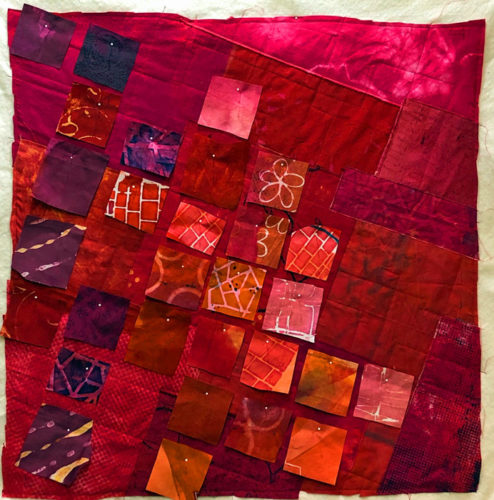
Remember that ugly exercise that I’ve been considering? This is the portion of my ugly painted which I selected as my inspiration for a small quilt.

Super Cool UGLY Exercise. Ellen Lindner, AdventureQuilter.com/blog

I played around with the individual elements in the computer and, at one point, accidentally colored the background red. Which I liked!

"Toast and Jam," and art quilt by Ellen Lindner. AdventureQuilter.com/blog

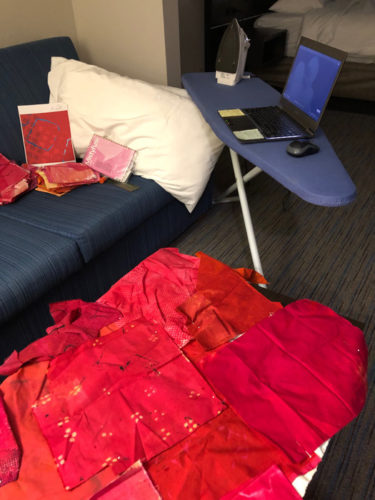
So, I started pulling fabrics and got to work. Actually, I got to work in a hotel room. This was my set up. Construction on the coffee table and Netflix on my laptop. With the iron at the perfect height, of course.

"Toast and Jam," and art quilt by Ellen Lindner. AdventureQuilter.com/blog

Once home, I stitched the background and fused up a bunch of fabrics for the background squares. (I fuse very seldom.)

"Toast and Jam," and art quilt by Ellen Lindner. AdventureQuilter.com/blog

I noticed that some of my lovely squares were attracting a lot of attention. I knew that wouldn’t work in the end, so I had to swap them out.

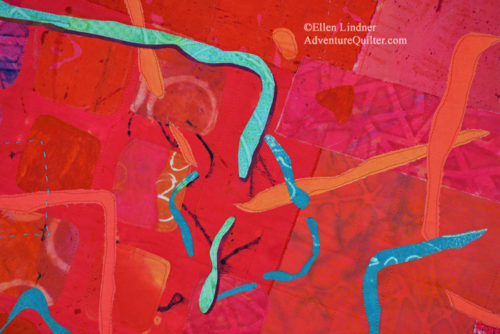
Eventually, I was happy with the background and started with the part I DID want to attract attention: the wonky open squares. This is a detail shot.

"Toast and Jam," and art quilt by Ellen Lindner. AdventureQuilter.com/blog

I added a little hand stitching, but that was difficult through the fused fabrics.

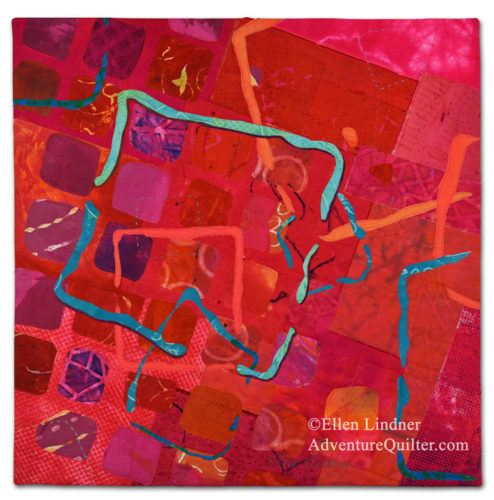
Here’s the full quilt, Toast and Jam, 24″ x 24″.

"Toast and Jam," and art quilt by Ellen Lindner. AdventureQuilter.com/blog

This was fun to work on, but I think I’m ready for something other than red!

This piece is available for $195 US. Contact me if you’re interested.

Ellen Lindner

2

Taking Chances, Learning New Things

I love to teach about art quilting and I consider my niche market to be traditional quilters who want some guidance as they move into art quilting. When I mentioned this on The Quilt Show, Alex Anderson was intrigued and we talked more about it on an episode of her podcast.

Ellen Lindner and Alex Anderson interview. AdventureQuilter.com

Video link. (A thirty minute video with me at about 6:30)

And since then, I’ve continued to think about it.

First, why learn new things?
– Humans are designed to learn. We enjoy learning. It’s exhilirating!
– New skills are useful, of course. But, the very act of learning enhances our creativity. We benefit from this activity even if we never actively use the new information!

Super Cool UGLY Exercise. Ellen Lindner, AdventureQuilter.com/blog

(What I learned from this ugly painting)

But, what about wasting fabric, time, and money?
– It’s not a waste. You bought that fabric to enhance your quilting journey. If it ends up teaching you something, but it doesn’t end up in a masterpiece, it was still useful to you! Just in a different way than you may have imagined.
– And the same goes for your time. You’re not taking time away from making “good” quilts, just because you spend time learning something new. In fact, you will gain skill, efficiency, and confidence due to that investment of time.
– And the money? Of course, you want to invest your quilting dollars wisely. Thankfully, there are many good and inexpensive classes available online and elsewhere. (#See resources)

Individual Retreat Projects. Ellen Lindner, AdventureQuilter.com/blog

My scraps at a retreat. You gotta make scraps to make a quilt! It’s not wasteful.

How do I select an appropriate class? And a skilled teacher? (#See resources)
– What is it you want to learn? Look for a teacher who’s routinely doing that.
– Ask your friends for suggestions on that topic and do some online searching. Read everything about the class, including the supply list, and the suggested skill level, if mentioned. Look for a gallery of student results.
–  Email the teacher if you have any questions!
– Look for a teacher with expertise. (And if learning via Zoom, check on the teacher’s experience with this, as well.) Has she been on a prominant quilting show? These shows do their homework and will likely choose the best teachers. Is his schedule pretty full, so you know he’s in demand? Can you find the teacher on one of the group teaching sites? (#See resources?)
– What can you learn from the teacher’s website? Are there student testimonials or student galleries? Are there social media posts about teaching?
– Again, email the teacher if you have any questions.

Dyeing with Pat Pauly. Ellen Lindner, AdventureQuilter.com/blog

I love Pat Pauly’s work, so jumped at the chance to take a 5 day class with her. This was my favorite fabric from the class, still wet.

Finally, EMBRACE this new experience!
– Do all the class prep required. But, don’t save it all till the last minute. Consider adding extra fabric.
– Go to class with an open mind. Remind yourself that the experience is worthwhile, not just the project you make.
– Trust the teacher. Follow her directions, even if you usually do things differently.
– Recognize that you’ll feel a little out of your comfort zone. That’s always true when learning isn’t it? It’s normal.
– Chances are good that you’ll be really happy with your class project. But if not, you’ll know that it taught you something, nevertheless. My favorite quote relates to this: “If you never fail you’re not experimenting enough.”

Can commercial fabrics be used for a "Slice and Dice" quilt? Ellen Lindner, AdventureQuilter.com/blog

A recent “failure.” I didn’t waste my time or fabric. They both helped me answer my question.

I LOVE to learn! (And to teach.) I hope you’ll take an exhilirating class and enjoy it immensely. And if you do, I’d love to hear about it.

Resources:
Global Quilt Connection: This directory is geared toward guilds, but you’ll find LOTS of capable teachers, all with listings of their offerings.
Craftsy on-demand quilt classes
My own on-demand classes

Enjoy your learning adventure!
Ellen Lindner
P.S. See me on The Quilt Show, episode 3007. (You have to be a member, but there’s a free 7 day trial)
P.P.S. If you can afford a multi-day class I highly recommend it. Check out Quilt Surface Design Symposium (OH,) Quilting by the Lake (NY,) and Empty Spools Seminars (CA.)


0

Turning Leftovers Into a Meal

After making Potager Garden, I had quite a few scraps left over, so I decided to use them to make a small quilt. This is what I had to work with.

Turning Leftovers Into a Meal. AdventureQuilter.com/blog

I began to move them around to see how they might fit together. I didn’t like this first version, though. I thought it needed more yellow, if I could find some in my stash.

Turning Leftovers Into a Meal. AdventureQuilter.com/blog

Plus, the colors in the first version (above) were pretty evenly scattered about. That works for wallpaper, but not always for art. I remembered what I had recently learned about massing a color and switched things to this.

Turning Leftovers Into a Meal. AdventureQuilter.com/blog

Much better! And I didn’t change it much after that.

This is the finished quilt, I Hope You Like Peppers.

I Hope You Like Peppers, an art quilt by Ellen Lindner. AdventureQuilter.com

Here’s a detail shot.

I Hope You Like Peppers - detail, an art quilt by Ellen Lindner. AdventureQuilter.com

See larger images and purchase information.

Ellen Lindner


2

Textures and Tales in Ormond Beach

The “Stitched, Stamped, and Sculpted” exhibit, currently on display in the Ormond Memorial Art Museum, has some really fabulous work.

Liz Canali has several felted and highly textured pieces in the show. They are all done in neutral colors of cream and grey. This is her piece The Lore of the Stones – Granite.

Texture and Tales in Ormond Beach. Ellen Lindner, AdventureQuilter.com/blog

And a detail shot.

Texture and Tales in Ormond Beach. Ellen Lindner, AdventureQuilter.com/blog

Pretty cool, right?

Normajean Brevik’s embellished piece is also very intriguing. It’s called Seeing Red Again #5.

Texture and Tales in Ormond Beach. Ellen Lindner, AdventureQuilter.com/blog

The most mixed-media and 3D piece in the show is Gertrude, by Sandy Shenker. This piece is about 5′ high, with a gourd as a head, fabric-covered PVC pipes as legs, and many more unusual and ingenious uses of materials.

Texture and Tales in Ormond Beach. Ellen Lindner, AdventureQuilter.com/blog

Sandy has also included a photo book showing how it was all put together. It’s very informative and definitely worth perusing.

My art group, Dirty Dozen Fiber Artists, was invited to show our group work, Measure of a Woman. These are self-portraits, each the height of the maker. The museum did a fabulous job hanging them, as you can see. Being the shortest in any group, mine is the red one on the left. (See a better image)

Texture and Tales in Ormond Beach. Ellen Lindner, AdventureQuilter.com/blog

L-R artists: Ellen Lindner, Marilyn Seibring, Ruth Anne Parker, Dij Pacarro, Laura Ruiz, Jill Brown, Sandy Shenker, Gabriele DiTota, Becky Stack, Kathryn Robinson

On opening night the audience was very interested in the art. Here, Regina Dunn is talking with a few admirers about her Transformation pieces.

Texture and Tales in Ormond Beach. Ellen Lindner, AdventureQuilter.com/blog

But, this photo gives you a better idea of the energy and enthusiasm in the room. (This is one of four rooms in the exhibit space.)

Texture and Tales in Ormond Beach. Ellen Lindner, AdventureQuilter.com/blog

The exhibit will be up through August 14th. I hope you get to see it!

Ellen Lindner

0

Story Telling Through Textile Art

At the current “Stitched, Stamped, & Sculpted” exhibit, in Ormond Beach, FL, many of the pieces tell stories.

Some of my favorites were made by Teddy Pruett, who works exclusively with vintage clothing and linens. Just look at this piece, called Whatever Happened to Baby?

Each block features vintage baby clothing. Teddy has added a little story telling with text, and each of the panels are held together with diaper pins.

Story Telling Through Textile Art. Ellen Lindner, AdventureQuilter.com/blog

Story Telling Through Textile Art. Ellen Lindner, AdventureQuilter.com/blog

Here’s another of Teddy’s pieces, featuring a Christening gown. Isn’t that a special thing?

Story Telling Through Textile Art. Ellen Lindner, AdventureQuilter.com/blog

It’s called I Have a Birb on Myself. (Yes, that’s the correct spelling.) The writing is childlike. Can you see the “birb?”

There was so much to see in these detailed pieces! I know I didn’t look long enough.

Other artists also showed off their narrative chops. The museum hung these works together which increased their impact. These were made by Maggie Dillon, who loves to use vintage photos as her reference material.

Story Telling Through Textile Art. Ellen Lindner, AdventureQuilter.com/blog

Bobbi Baugh had five powerful pieces hung together.

Story Telling Through Textile Art. Ellen Lindner, AdventureQuilter.com/blog

It was fascinating to see these works up close and to read the artists’ statements. I  hope you’ll visit these artists’ websites and see more of their creations.

Teddy Pruett’s website
Maggie Dillon’s website
Bobbi Baugh’s website

Ellen Lindner

0

Opening Night for “Stitched, Stamped, and Sculpted”

I was really impressed with the “Stitched, Stamped, and Sculpted” exhibit opening, which was recently held in Ormond Beach, FL.

The pieces were hung nicely and lit beautifully. And, in most cases, all the work by one artist was shown together. This made for a lovely and interesting display.

Here I am with a couple of my pieces, Bounty Down Under and Croton Trio.

Opening Night of "Stitched, Stamped, & Sculpted" was a Success! Ellen Lindner, AdaventureQuilter.com/blog

Plus Cantilever.

Opening Night of "Stitched, Stamped, & Sculpted" was a Success! Ellen Lindner, AdaventureQuilter.com/blog

This was my view as I posed for the photo above: two more of my pieces in the far corner. And don’t you love the Temperature Quilt by Audrey Butler? What a colorful room!

Opening Night of "Stitched, Stamped, & Sculpted" was a Success! Ellen Lindner, AdaventureQuilter.com/blog

Here I am with my remaining two quilts. This one is called Indian River Fruit.

Opening Night of "Stitched, Stamped, & Sculpted", Ellen Lindner, AdaventureQuilter.com/blog

And A Little Bit Tart.

Opening Night of "Stitched, Stamped, & Sculpted", Ellen Lindner, AdaventureQuilter.com/blog

There were MANY interesting pieces in this exhibit. Stay tuned and I’ll show you more in upcoming posts. (Or go see it in person by August 14th.)

Ellen Lindner


4

Great Student Work

I recently taught Double Reverse Applique (via Zoom) for a guild in Concord, MA. As usual, the students had awesome results. Just take a look.

Concord, MA students in Ellen Lindner's Double Reverse Applique class. AdventureQuilter.com/blog

They really did a great job!

Here are some more great student pieces that I’ve been remiss in showing you:

Susan Newsom’s project from Floral Improv
Susan Newsom's Floral Improv project. Made in a class with Ellen Lindner, AdventureQuilter.com/blogShe did a great job with floppy flowers, contrast stitching, and that crossword background.

In Design Your Own Nature Quilt, John Ming Mark REALLY got creative with his quilt! This was his inspiration photo. To me, it wasn’t very exciting. But, I could see potential for some interesting diagonal shapes and lines.

 Great Student Results, Design Your Own Nature Quilt with Ellen Lindner. AdventureQuilter.com/blog

This is what he did with it, called “Enchanted Forest.” Isn’t it wonderful? I was amazed at the colors and shapes he brought to his piece! I think it’s very successful.

Great Student Results, Design Your Own Nature Quilt with Ellen Lindner. AdventureQuilter.com/blog

Gabriele started with a favorite photo of lupines on a shoreline.

Great Student Results, Design Your Own Nature Quilt with Ellen Lindner. AdventureQuilter.com/blog

Then, she interpreted the shapes loosely and made a wonderful composition, which she calls “Lupines.”

Great Student Results, Design Your Own Nature Quilt with Ellen Lindner. AdventureQuilter.com/blog

See what I mean? Her flowers are even more interesting than those in her photo! And check out the foliage in the foreground. This is a good example of letting the fabric do the work for you. If I remember correctly, she only used two fabrics in this area.

I have SO much fun working with students and we’re always ALL thrilled with their results!

Ellen Lindner
P.S. Many of my classes are available on-demand as self-paced online options.
P.P.S. I’d love to do a zoom or in-person class for your guild. See my selections.

0