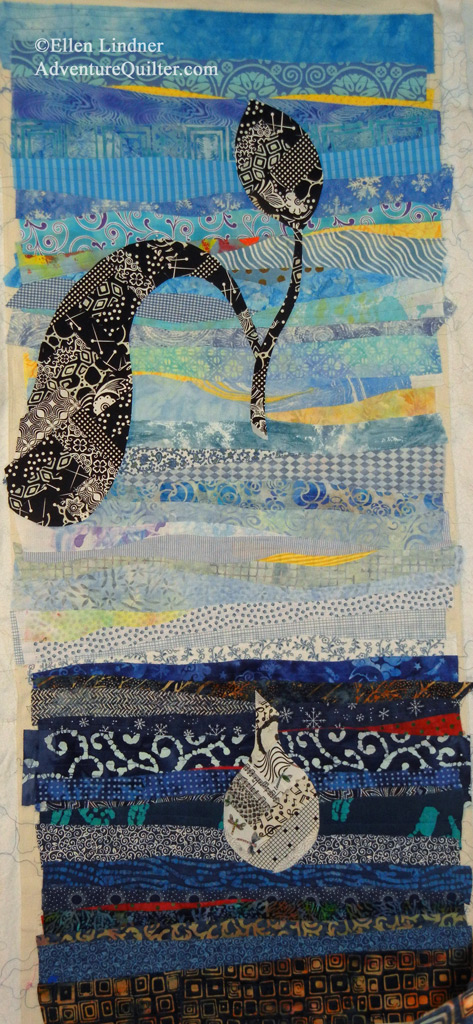
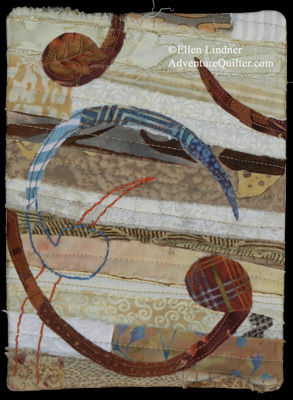
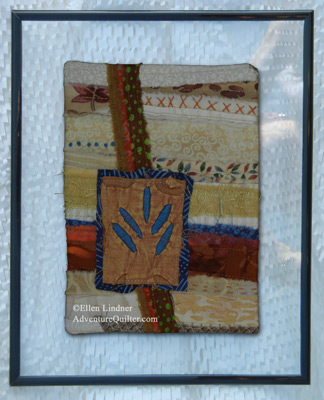
“Dancing Toward the Sun”

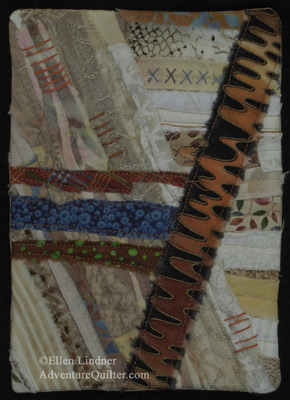
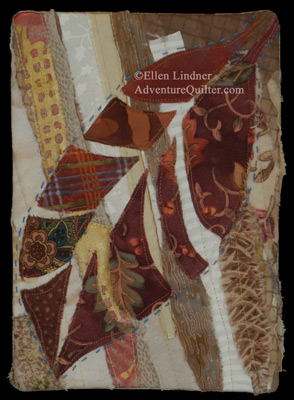
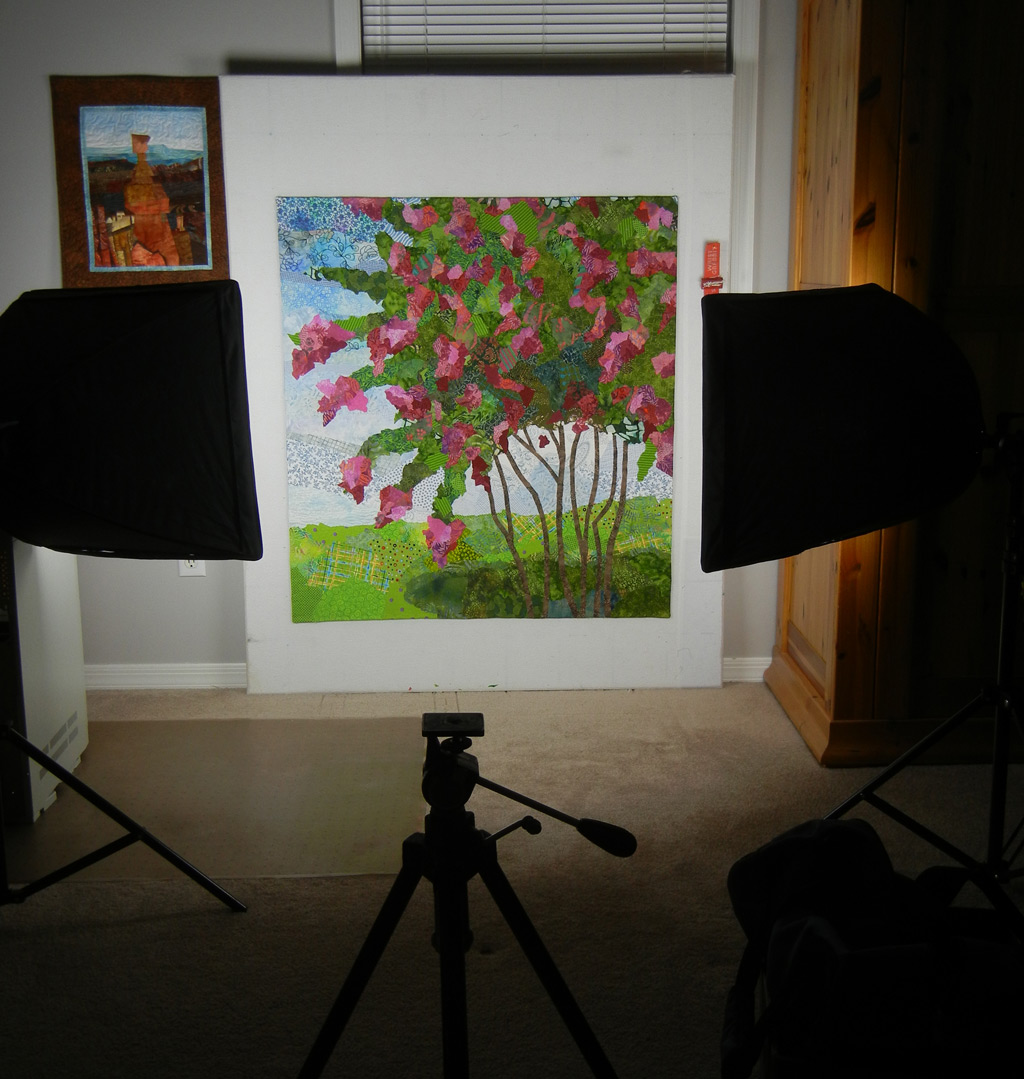
Here’s my latest quilt, “Dancing Toward the Sun.”  I’m quite happy with it.
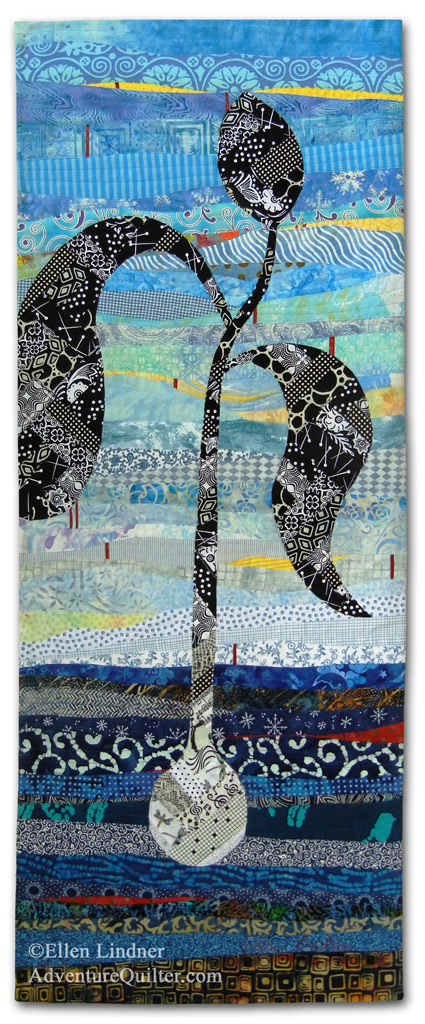
"Dancing Toward the Sun," an art quilt by Ellen Lindner.  AdventureQuilter.com/blog

50h x 19.5w, $895

Click on any image for a much larger view

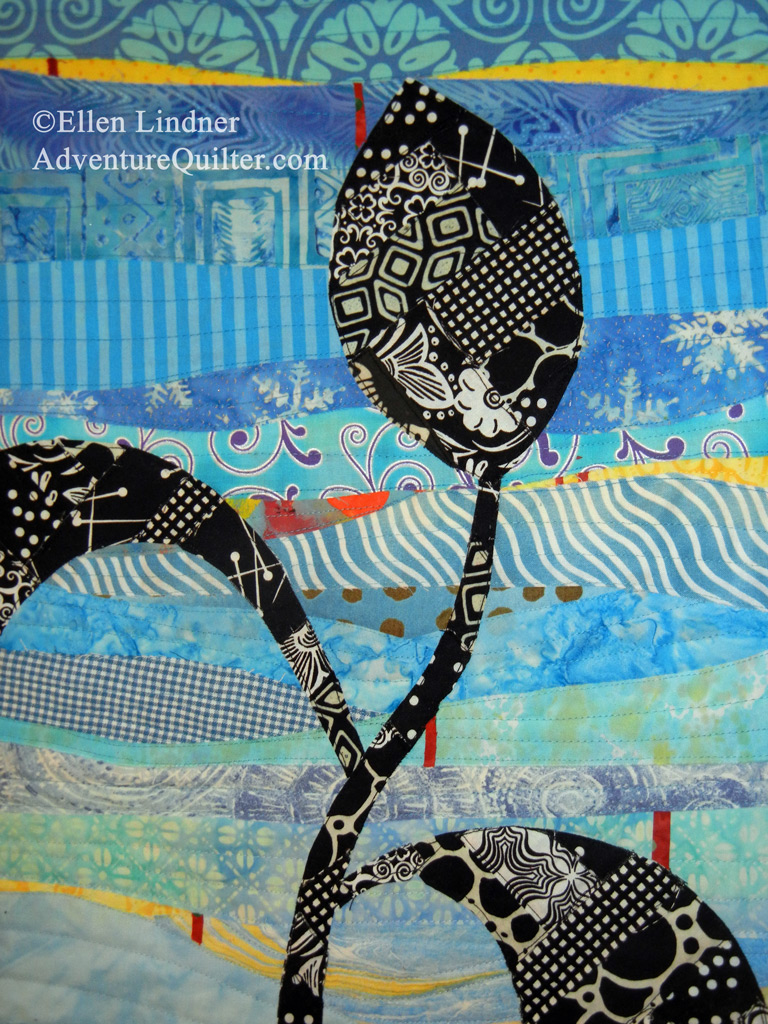
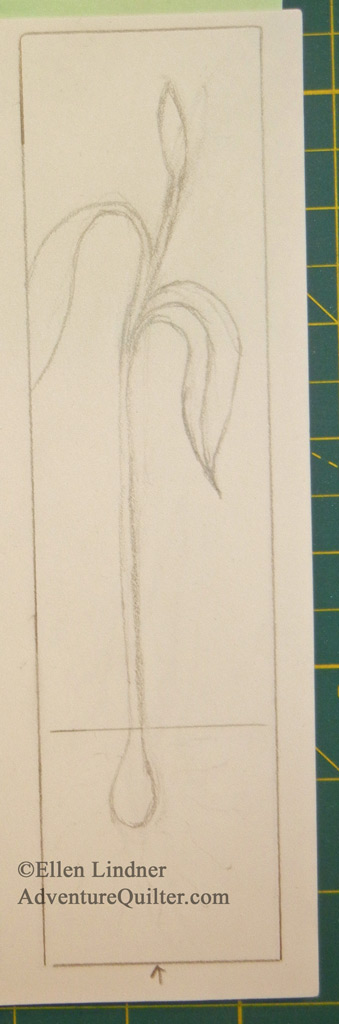
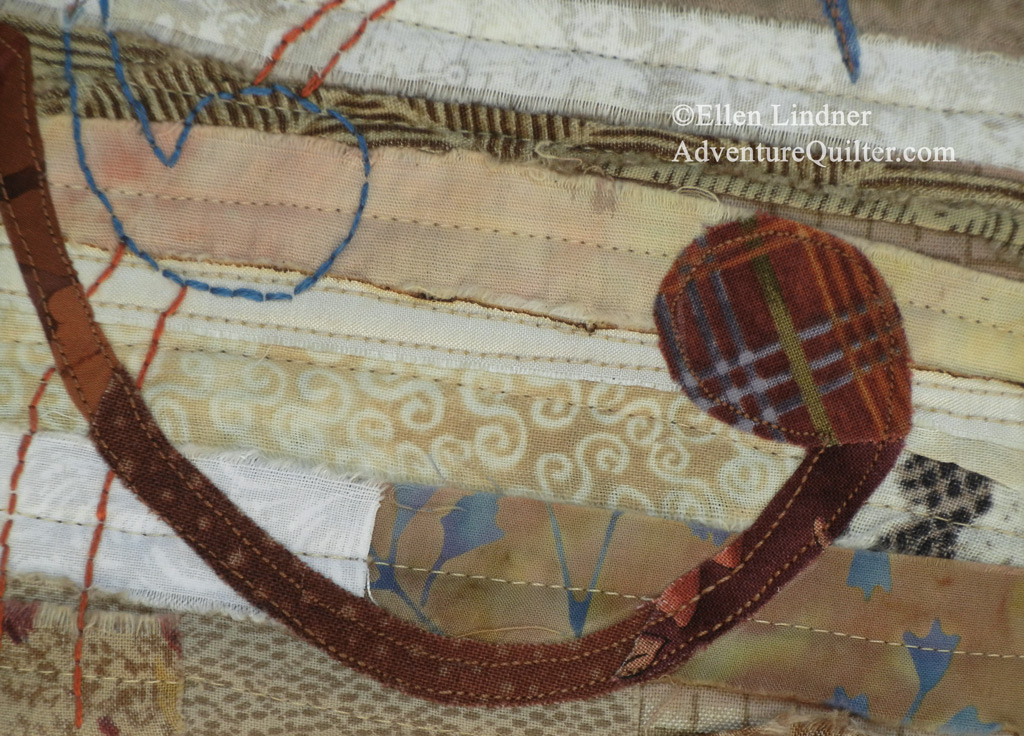
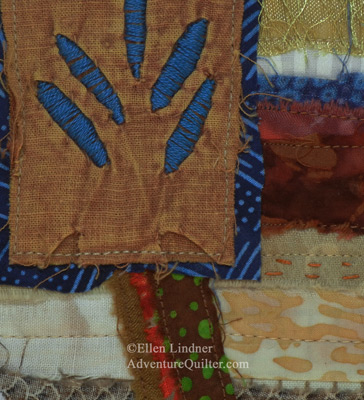
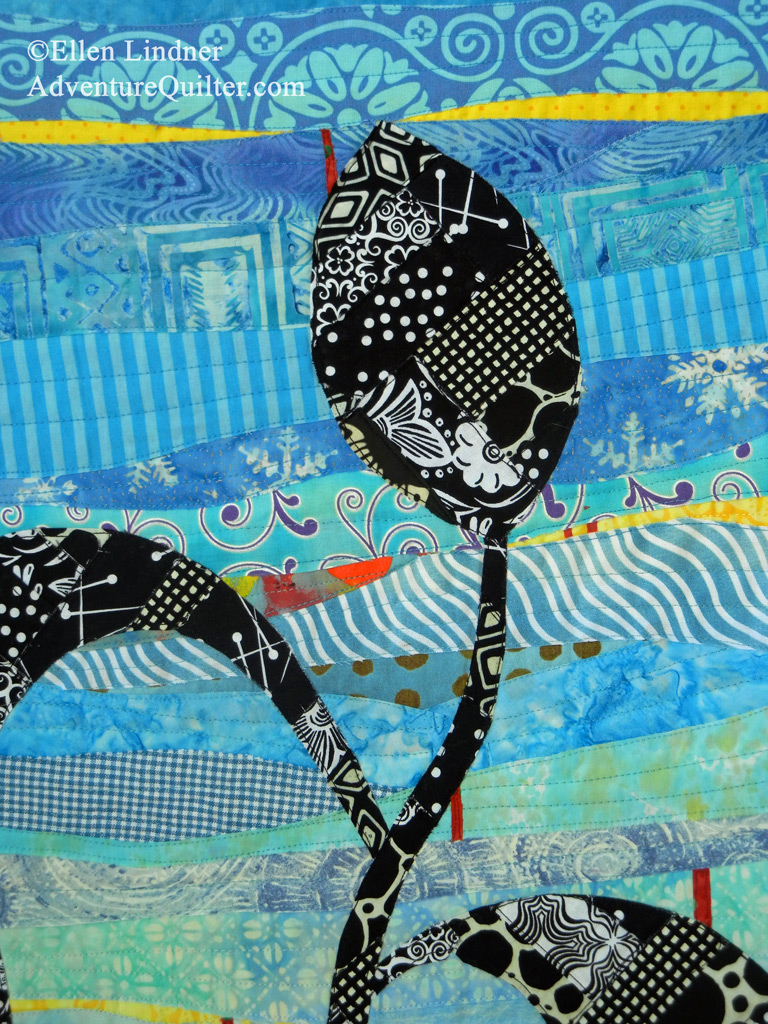
I love the personality of the piece.  To me, the little sprout is moving and
grooving as it basks in the warm rays of the sun.  You can see that, right?

"Dancing Toward the Sun" detail, an art quilt by Ellen Lindner.  AdventureQuilter.com/blog

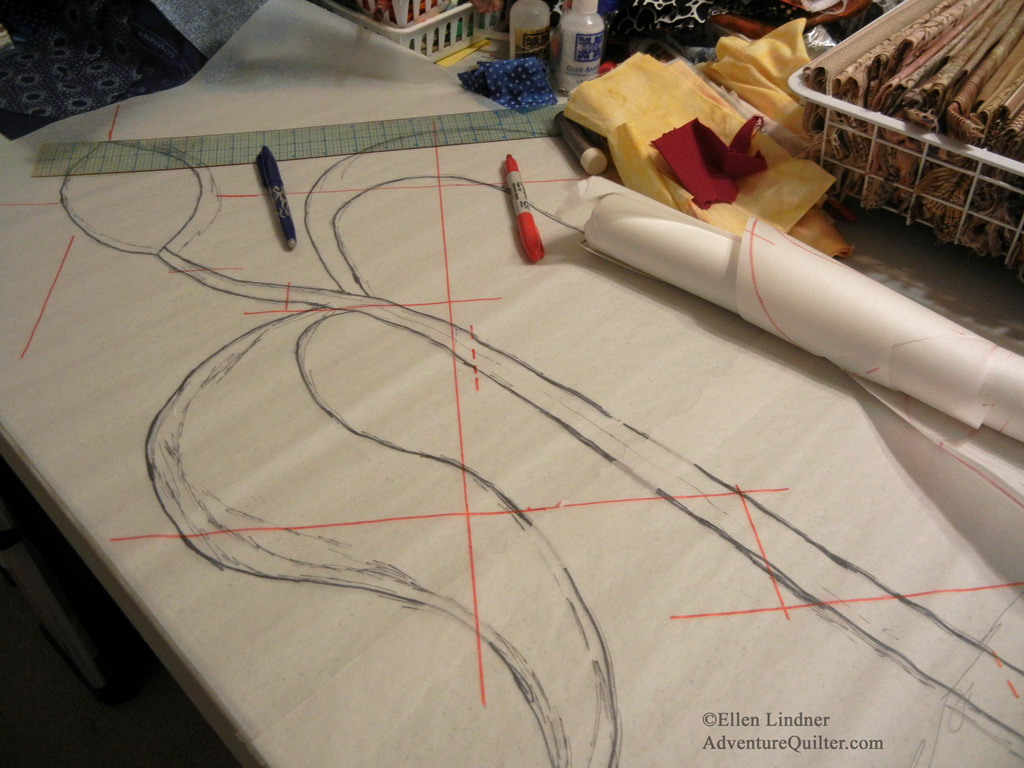
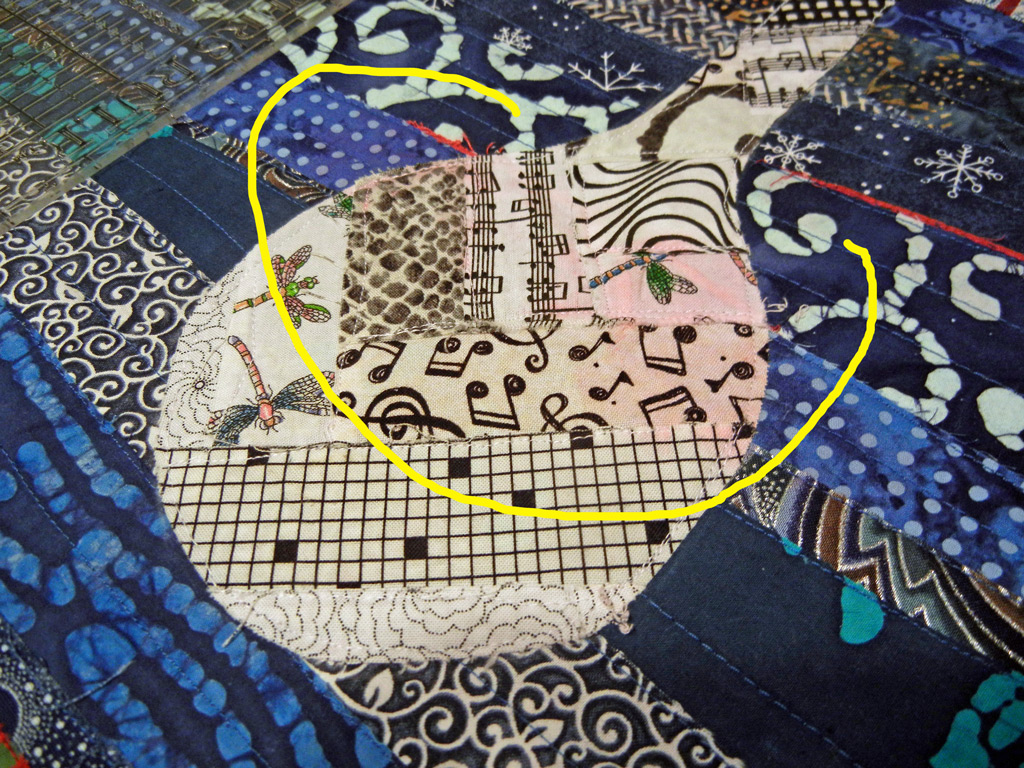
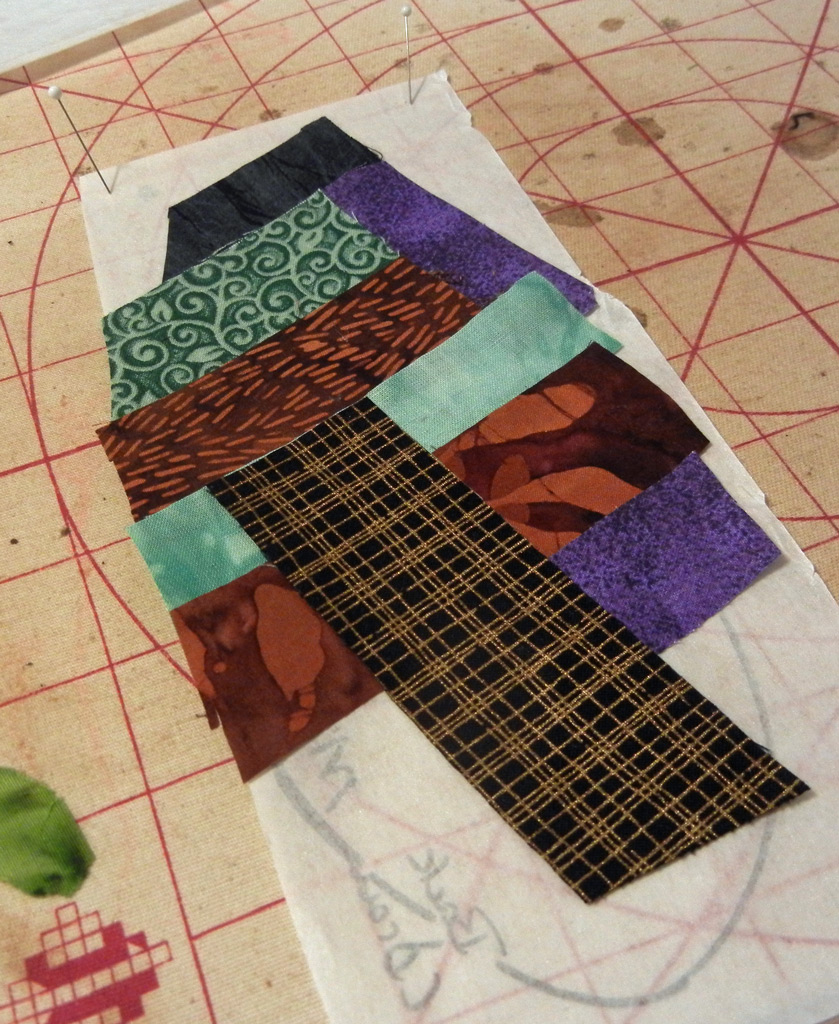
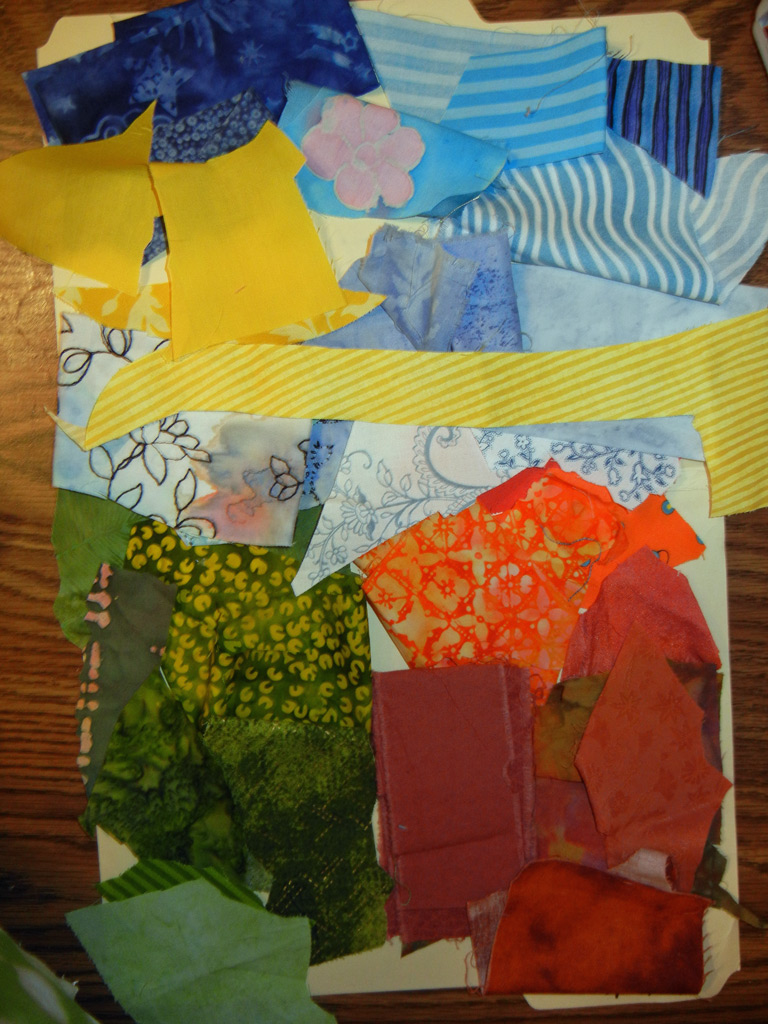
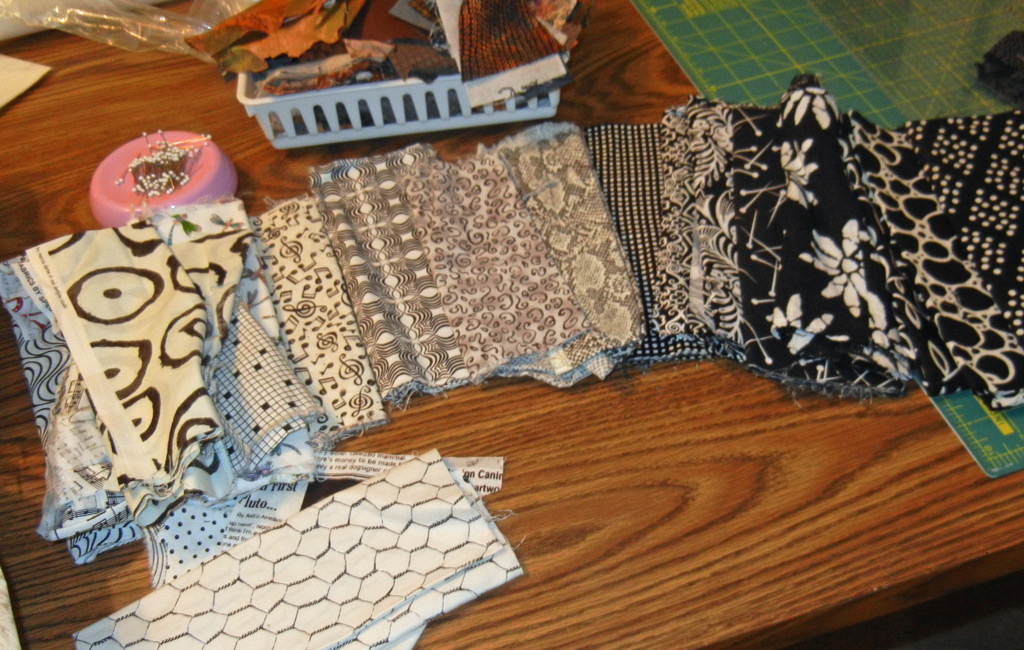
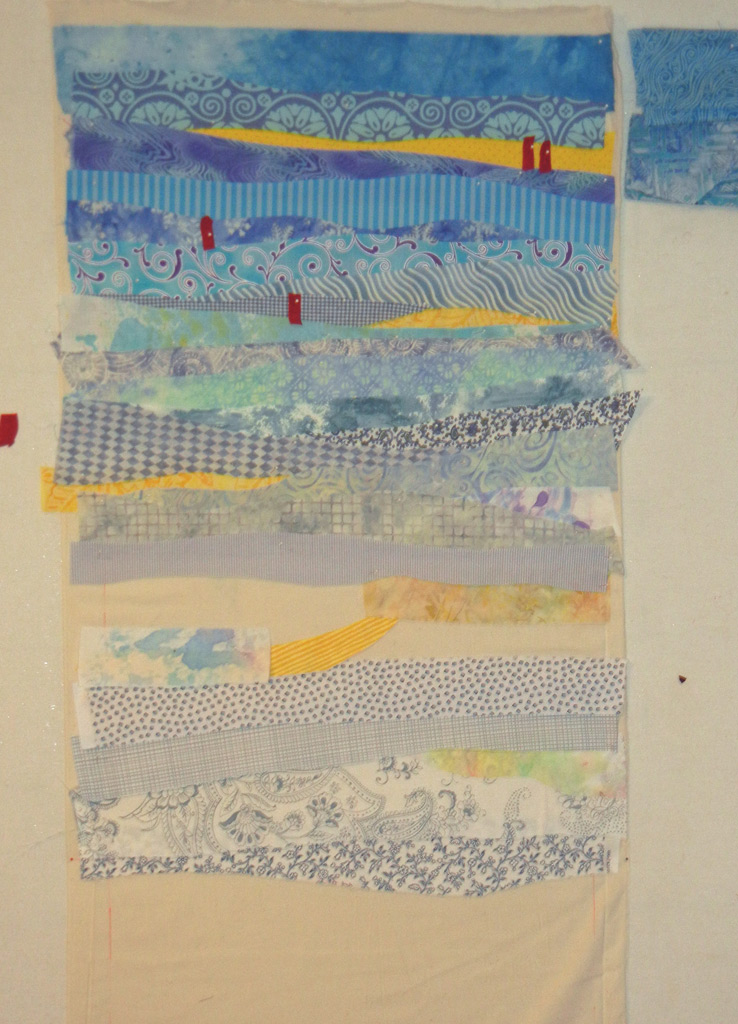
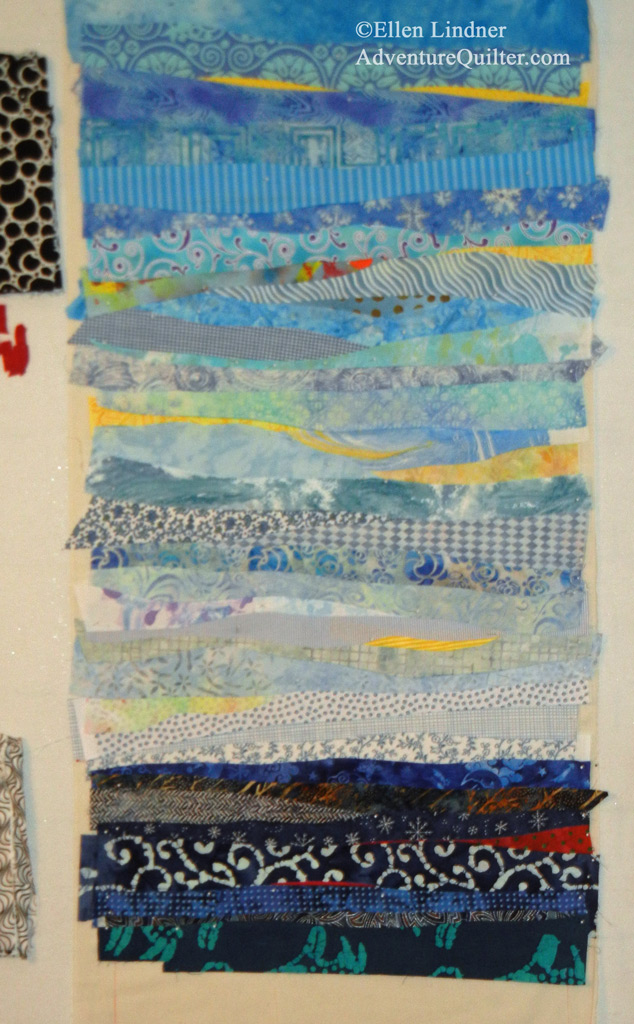
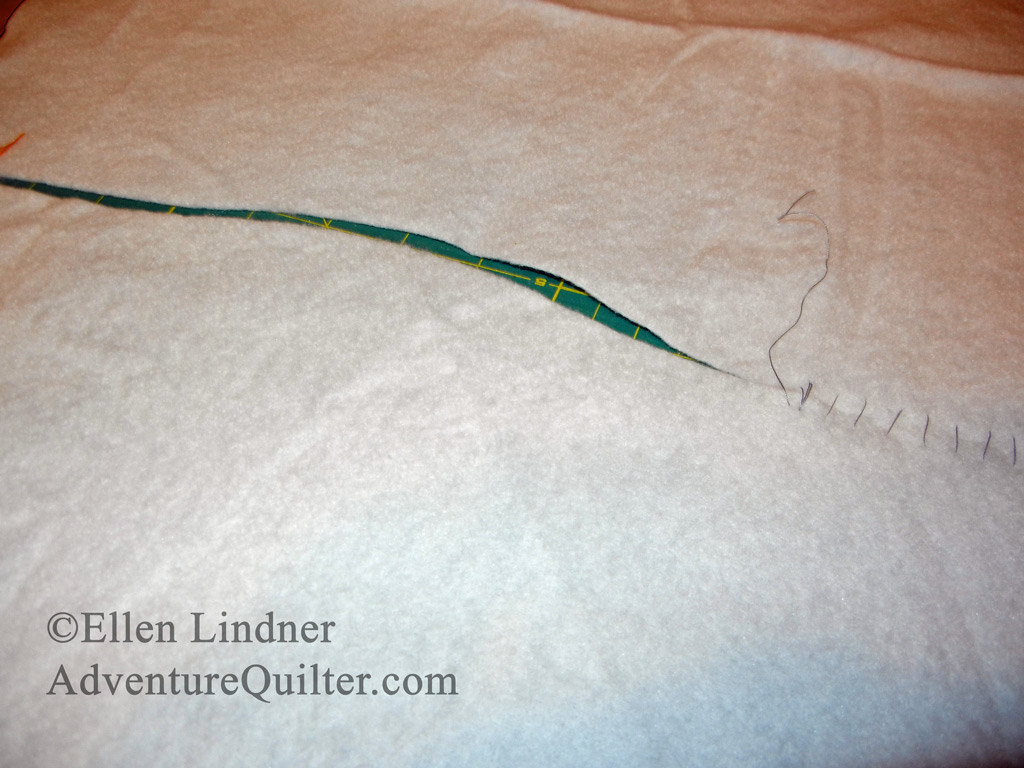
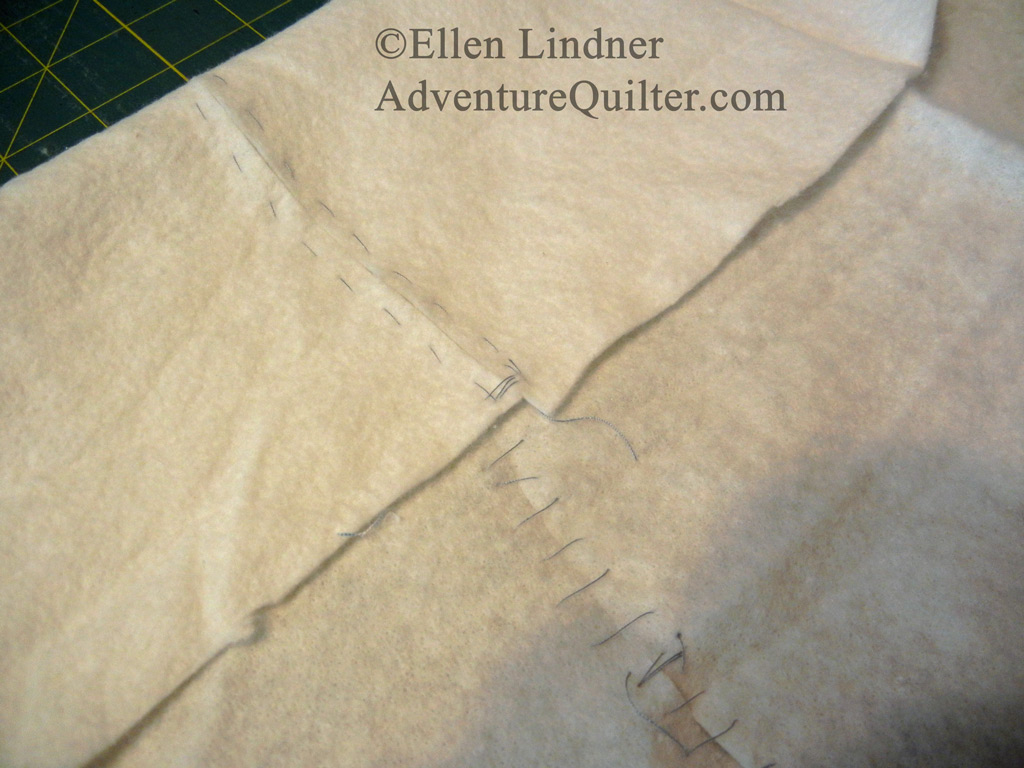
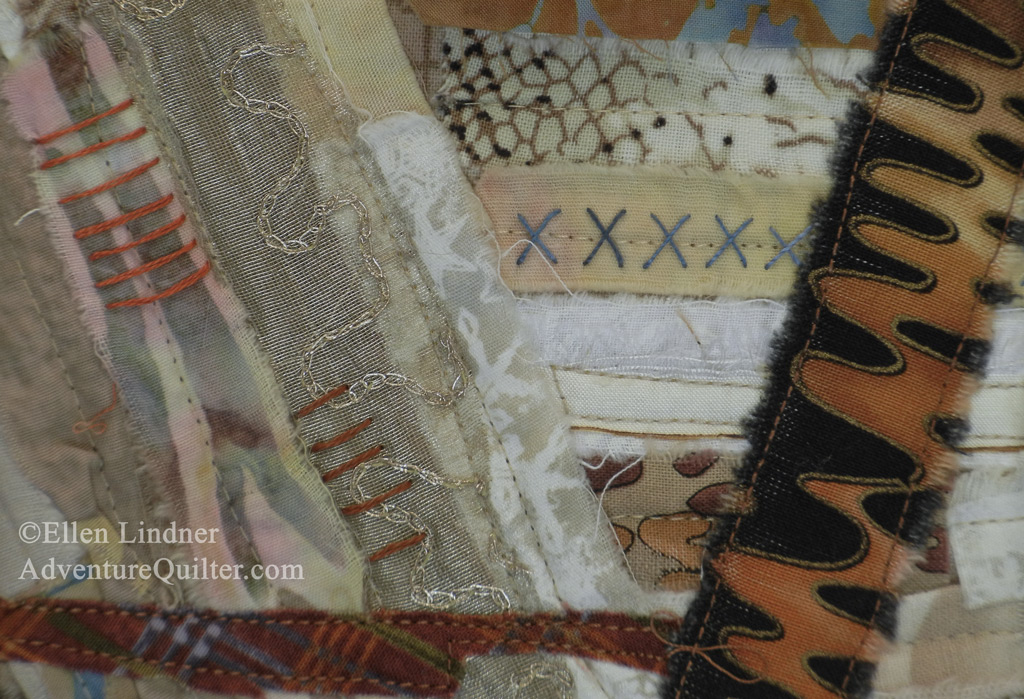
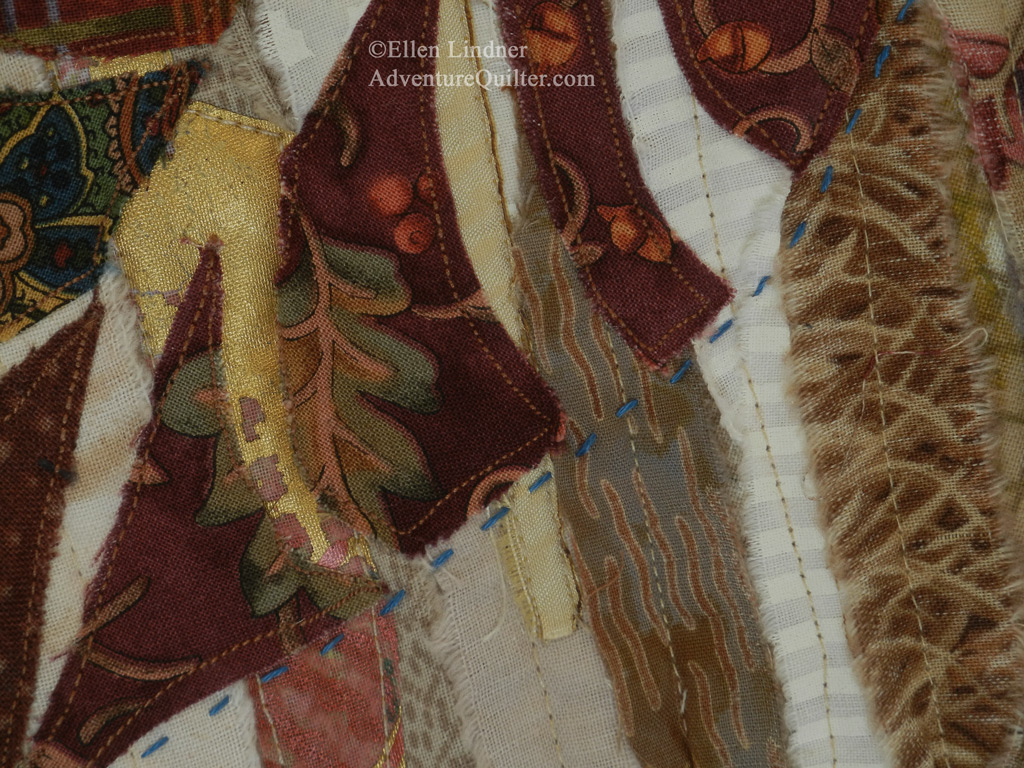
In addition to being pleased with the look of this piece, I also enjoyed the process.  I tried some new techniques that were a little bit faster and it all came together easily.  (Which is often not the case!)

A few local friends have seen this piece in person and they have really loved it.  Based on that, and the ease of construction, I’m thinking about offering a smaller version of this project as a class.  I’d call it “New Growth.”  Because of the imagery, but also because of the potential for artistic growth as students try new things.  What do you think?

Ellen Lindner
P.S.  Read about the making of this quilt in the three previous posts.
P.P.S.  Find out how to audition this piece in your home.

Black and White and Fused All Over: Part Two

After experimenting with a new fusing technique, I was ready to try it on my quilt.

Click any image for a larger viewManaging small pieces of fabric with fusible web. Ellen Lindner, AdventureQuilter.com/blog

After drawing the needed shapes on paper backed fusible webbing, I began to place and fuse small pieces of black and white fabrics.

"Dancing Toward the Sun," progressing.  Ellen Lindner, AdventureQuilter.com/blog

Then, I could place the larger shapes on my quilt.  It all worked beautifully.

"Dancing Toward the Sun," progressing.  Ellen Lindner, AdventureQuilter.com/blog

Soon, I was auditioning tiny pieces of red fabrics to add as accents.  Things were progressing really well!

Until I washed out some markings.

"Dancing Toward the Sun," progressing.  Ellen Lindner, AdventureQuilter.com/blog

Yep, the red fabric underneath bled.  WHEN will I learn to prewash red fabrics?!?  (They’re the only ones that ever give me problems.)

Thankfully, my collage technique allows me to just add new fabrics right on top of the old ones.  No need for ripping out beforehand.  So, it was a pretty quick fix.

I’m very happy with this piece.  I’ll have final photos for you soon.

Ellen Lindner
P.S.  No, I don’t normally prewash my fabrics.  I know that’s breaking a quilt making rule.  But, since I’m making wall hangings, my quilts will never be washed and I can get away with it.  Usually.  Here’s a glued collage where a red fabric also bled.  In that case, I decided I liked it and added more “bleeding” with paint.


Black and White and Fused All Over: Part One

After completing the background for a recent quilt, I was ready to tackle the primary motif.  I had decided to compose it with a wide variety of small black and white fabrics.  The question was how to best manage that.

Click any image for a larger viewEllen Lindner's "Dancing Toward the Sun," in-progress. AdventureQuilter.com/blog

I had seen something online about creating a large shape with fusible webbing, and then fusing smaller pieces to it.  That seemed like it would work well for my purposes.  I tried it on a small leaf shape.

Managing small pieces of fabric with fusible web.  Ellen Lindner, AdventureQuilter.com/blog


Managing small pieces of fabric with fusible web.  Ellen Lindner, AdventureQuilter.com/blog

Voila!

After my successful experiment, I was ready to proceed with my actual quilt design. First, I drew it on freezer paper.  (Just because that was the paper I had in the right size.)  I then traced individual sections onto my fusible web and I was off and running.

Managing small pieces of fabric with fusible web.  Ellen Lindner, AdventureQuilter.com/blog

I love it when a plan comes together!

Ellen Lindner
P.S.  The “black and white” part will show up in the next blog post.


In a Different Style

After completing my last quilt, I didn’t have a strong idea about what I’d like to do next.  So, I pulled out my old sketch book, in search of inspiration.  I found it in this little sketch.  This stylized plant is pretty different my usual style, which I thought would make it fun.

Click any image for a larger viewEllen Lindner's "Dancing Toward the Sun," in-progress.  AdventureQuilter.com/blog

I pulled out fabrics to decide on a color palette.  Although I wanted the sky area to be blue, I decided to add interest with some tiny slivers of yellow.

Ellen Lindner's "Dancing Toward the Sun," in-progress.  AdventureQuilter.com/blog

I wasn’t too sure about the ground, though.  Maybe green or rust?  Some thought was needed.

I selected black and white fabrics for the sprout.  I had an idea about an appropriate construction technique, but some experimenting would be needed.

Ellen Lindner's "Dancing Toward the Sun," in-progress.  AdventureQuilter.com/blog

The sky began to take shape quickly.  I set up a rotary cutting station and ironing station right next to my design wall.  I was able to iron a fabric, quickly cut it, and pin it in place.

Ellen Lindner's "Dancing Toward the Sun," in-progress.  AdventureQuilter.com/blog

Very early on I got the idea of adding little bits of red to the background.  Something to experiment with as things progressed.

After initially making the bottom section green, I just didn’t like it.  I switched it to dark blue and, this time, added little slivers of red.  Much better.

Ellen Lindner's "Dancing Toward the Sun," in-progress.  AdventureQuilter.com/blog

In the photo above, the background was nearly complete.  My goal was to make it interesting all by itself, and I think I succeeded.

Ellen Lindner

*

Working Loosely with Paper Collages

In my class, “Design Your Own Nature Quilt,” I show my students about making paper collages as a way to interpret a photo loosely.  I was introduced to this by Cherilyn Martin, and I’ve used it several times.  It’s a fun and easy project, and it there’s NO WAY to be overly exact with it.  Just what our brains need, at times.

As I prepared for a recent class, I decided to make another example of this process.  This was my inspiration photo, although  I decided to omit the trees on the left.

Great luminosity, don’t you think?

Click any image for a larger view
Japanese Ti Plants.  Ellen Lindner, AdventureQuilter.com/blog

Here’s the assignment: Tear magazine pages/papers and glue them in place to interpret your photo at  a size of 8 1/2″ x 11″.  The combination of the small scale and the tearing mean you’ll only be able to capture the largest and most important shapes.   You’ll HAVE to work loosely!

Here’s my background.

Working loosely with paper collage, Ellen Lindner. AdventureQuilter.com/blog

Then, I added some bright orange foliage.  These established my composition, even though they had rather wonky shapes.

Working loosely with paper collage, Ellen Lindner. AdventureQuilter.com/blog

Finally, I added a few dark petals.  But not in a realistic color.  Instead, I made them dark purple.  And that’s enough, I think.

Working loosely with paper collage, Ellen Lindner. AdventureQuilter.com/blog

Voila!  I love the wonkiness.

I hope you’ll give it a try.  And if you do, I definitely want to see your results!  (Send me photos and I’ll show them here on my blog.)

Fun, right?

Ellen Lindner

Piecing Batting Together

Well, it finally happened.  I ran out of batting at an inconvenient time.  Running to the quilt shop wasn’t an option, but I remembered hearing about piecing batting together.  So, I decided to give it a try.

First, I overlapped the two batting pieces and cut them both with a curvy line.  My hope was that the curve would help me line up the two pieces, and it did work well.  (Although now I’m wondering why it matters.  A straight-lined join, even if it was a little mismatched, would still work wouldn’t it?)

Click any image for a larger viewPiecing batting together.  Ellen Lindner, AdventureQuilter.com/blog

I joined the pieces together with a rather messy ladder stitch.

Piecing batting together.  Ellen Lindner, AdventureQuilter.com/blog

The ladder stitch looks just like a whip stitch from the front.  The difference is the way the needle travels on the back side.  Click on photo above to see.  It’s better than a whip stitch because it doesn’t draw the fabrics together so much.

Here’s how to do it.
– Take a stitch left to right, across the fabric seam, connecting the two pieces of fabric.
– Travel under the fabric, parallel to the seam and moving away from you.
– Take a stitch right to left, across the fabric seam and continue.

This stitch is often used to close up the seam of a stuffed toy or other small item.  This tutorial from “NannyNotes” shows an example.

BTW, this was very quick.  (Faster than going to the store.  Hah!)  I’ll definitely do it again.

Ellen Lindner
P.S.  Have you ever pieced batting together?  Do you have any related tips?

Notes for a Friend #16 & 17

Here are the Notes for a Friend, #16 and #17.  These are part of the group that started life as an ugly quilt.

Note #16, shown on black background

Note for a Friend #16, by Ellen Lindner.  AdventureQuilter.com/blog

Detail.  Click for larger view

Note for a Friend #16 - detail, by Ellen Lindner.  AdventureQuilter.com/blog
Note #17,
Note for a Friend #17, by Ellen Lindner.  AdventureQuilter.com/blog
Detail.  Click for larger view
Note for a Friend #17 - detail, by Ellen Lindner.  AdventureQuilter.com/blog
These small pieces are a BIG improvement over the original quilt!
Find purchase information here.

Ellen Lindner

Notes for a Friend #14-15

Some months ago, I cut up an unsuccessful quilt and used the pieces as the starting points for another set of Notes for a Friend. 

These are the first two resulting quilts.

#14, photographed against black:

Notes for a Friend #14, by Ellen Lindner.  AdventureQuilter.com/blog

#Detail. Click to enlarge

Notes for a Friend #14 - detail, by Ellen Lindner.  AdventureQuilter.com/blog

#15.  Click to enlarge

Notes for a Friend #15, by Ellen Lindner.  AdventureQuilter.com/blog

Detail

Notes for a Friend #15 - detail, by Ellen Lindner.  AdventureQuilter.com/blog

I especially like mounting these tiny quilts on framed glass.

Notes for a Friend #15, by Ellen Lindner.  AdventureQuilter.com/blog

I’ll show you two more in the next post.  Find purchase information here.

Ellen Lindner – Making Lemonade

“Summer in the South” Complete

My piece “Summer in the South” is now complete:

Click any image for a larger viewSummer in the South, an art quilt by Ellen Lindner, AdventureQuilter.com

Here’s a closer image:

Summer in the South, detail, an art quilt by Ellen Lindner, AdventureQuilter.com

If you’re a southerner, perhaps you can also feel the heat and hear the cicada bugs in the background.  All part of living in the south during the summer.

This piece is available for purchase.  Find more information here, including how you can audition it in your home.

Ellen Lindner

You might also like these similar pieces.  Click the image to go to the appropriate web page.

Ti Plants A-Glow-Glow


Garden Party

Great Photographs: So Close

Remember my new “mail” room that I’ve recently set up?  With storage and shipping features?  One additional hope I had for this room was a great photo set up.  So, I did a trial run to see how it might work.

Oh, it was fantastic!  I just moved my empty table up (vertically) against the wall, and I had a nice long sight line.  Then, I pulled out the two mega lights I had purchased some years ago.  And the tripod.  And brought my design wall in with my latest quilt pinned to it.  Voila!  I was ready to shoot!

Click any image for a larger viewEllen Lindner's attempt at great photos, AdventureQuilter.com

Ellen Lindner's attempt at great photos, AdventureQuilter.com

But, someone forgot to tell my camera.  I’ve owned it for a few years and this is the first time I’ve needed manual settings for shutter speed, etc.  Where did I find those features?  Nowhere!  My camera doesn’t have them.  Darn!  Drat it.

Back to shooting outside.

Ellen Lindner
P.S.  A few notes:
– I have two design walls.  Neither is attached to the wall.  They just lean up against it, allowing me to move them around.  Great for photography.
– Hand sewing needles make great invisible pins for attaching a quilt to a support.  (I was really proud of myself for thinking of that one!)