Under-the-Bed Quilt Storage

I’m LOVING my new quilt storage system!  I’m putting the larger ones under the bed.

Click any image for a larger viewUnder-the-bed quilt storage.  Ellen Lindner, Adventurequilter.com/blog

I’ve got them on a piece of thin housing insulation.  It’s rigid but lightweight and it all slides easily in and out.  The twin bed accommodated a piece measuring 40″ x 72″.  Large enough for nearly any of my quilts.

When pushed under the bed, it’s just barely visible.  If that bothered me, I could add a dust ruffle, but I’m opting for easy access, instead.

Under-the-bed quilt storage.  Ellen Lindner, Adventurequilter.com/blog

Perhaps you can tell that I’ve added a muslin dust cover.  Perfect!

Ellen Lindner
P.S.  I still have a few quilts wrapped on a pole and mounted high in my closet.  It works well, but moving them around is cumbersome.  Not to mention unrolling and rerolling them all the time.

It Used to Be His Bedroom

Oh, I’m a lucky girl!  I’ve got a new space for quilt storage and shipping!

It all started when I was trying to find yet another spot to store something quilt related.  This time it was easels and other display items.  I already had things wedged between the furniture and walls of my studio, as well as tucked into various closet corners.  Then, it hit me, “Andrew (our son) doesn’t use his room much anymore.”  (Because he’s away at college.)  Oh my!  My head was immediately filled with ideas of how I could use that space.  I was on to something!

After some family discussion, it was decided that Andrew’s bedroom would become a multi-functional space.  It needed to accommodate Andrew’s bed and some storage for him, a desk for my husband, quilt storage, a shipping table for packing quilts, and storage for shipping materials, quilt hanging rods, and more.  A kinda long list, but I thought I could make it work.

Click any image for a larger view Transforming a bedroom into storage for quilts and more.  Adventurequilter.com/blog

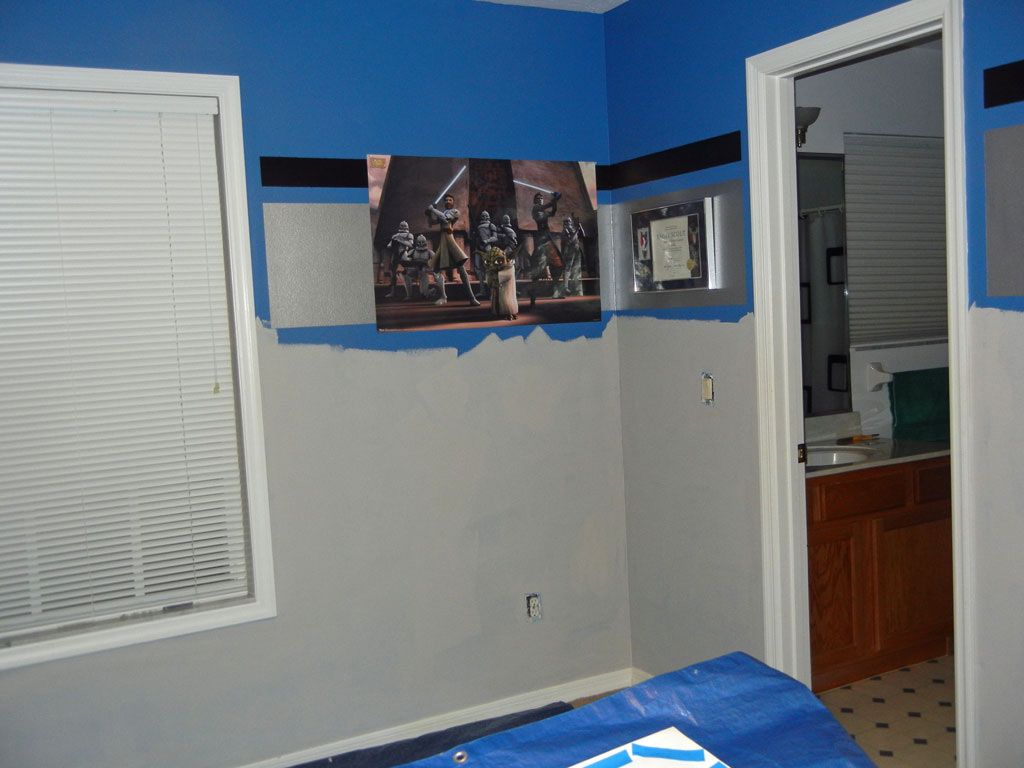
And so, it began.  Andrew helped me paint the room, (his only reservation about the whole process.)  Away went the strong blue and the Star Wars posters.  Along came a soft gray/taupe color.  One that would set off colorful quilts nicely.

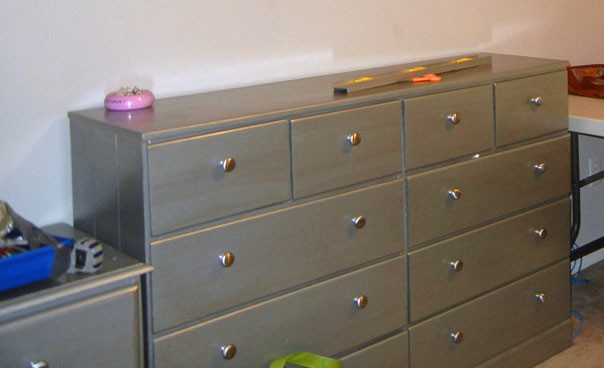
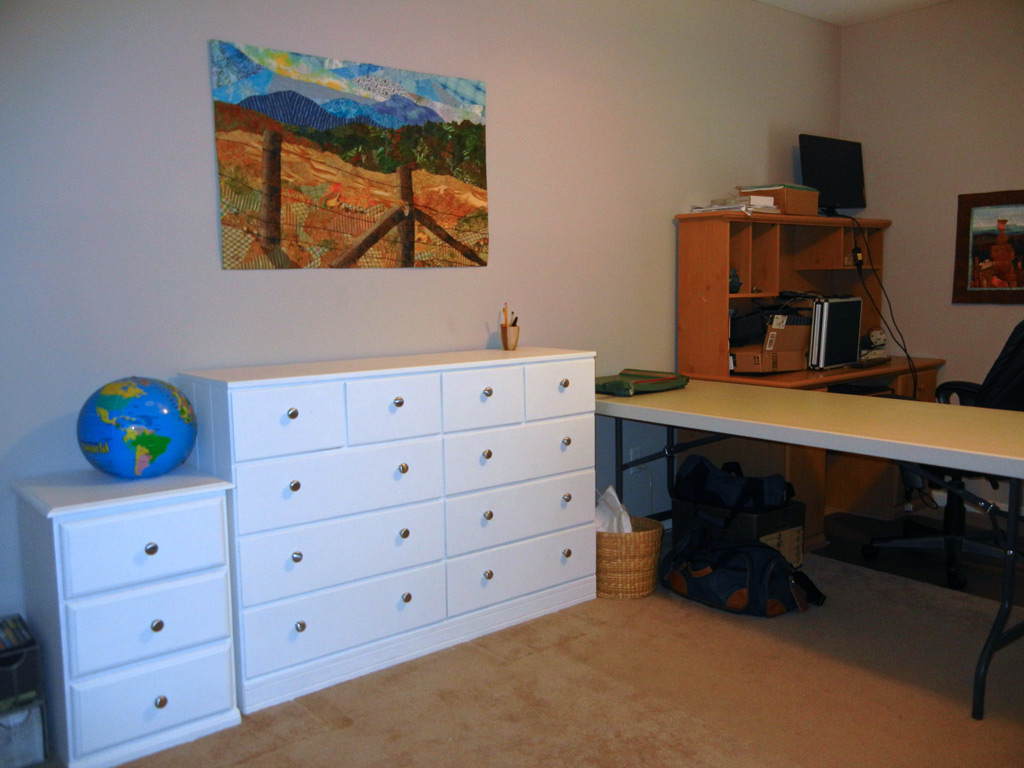
His metallic silver furniture got some paint too.  White, this time.

Transforming a bedroom into storage for quilts and more.  Adventurequilter.com/blog

Transforming a bedroom into storage for quilts and more.  Adventurequilter.com/blog

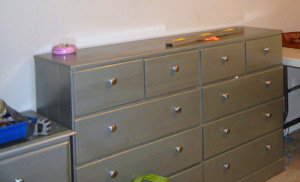
Mountain Meadow  fit nicely above all those wonderful waiting drawers.

The back corner (above) holds hubby’s desk.  Or, as we call it, his play station.  He also “owns” the space underneath the empty table.   The deal is he gets to leave it all as messy as he wants and I won’t complain about it.

http://www.adventurequilter.com/Quilt_Pages/Pictorial/Mountain_Meadow.html

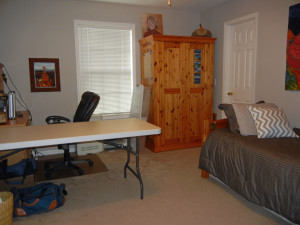
My idea was that this room would store quilts, hanging gear, and other support paraphernalia.  But not my actual art supplies.  The wardrobe (above) in the back corner is the exception.  It holds a variety of tools, but is only a few steps from my studio.

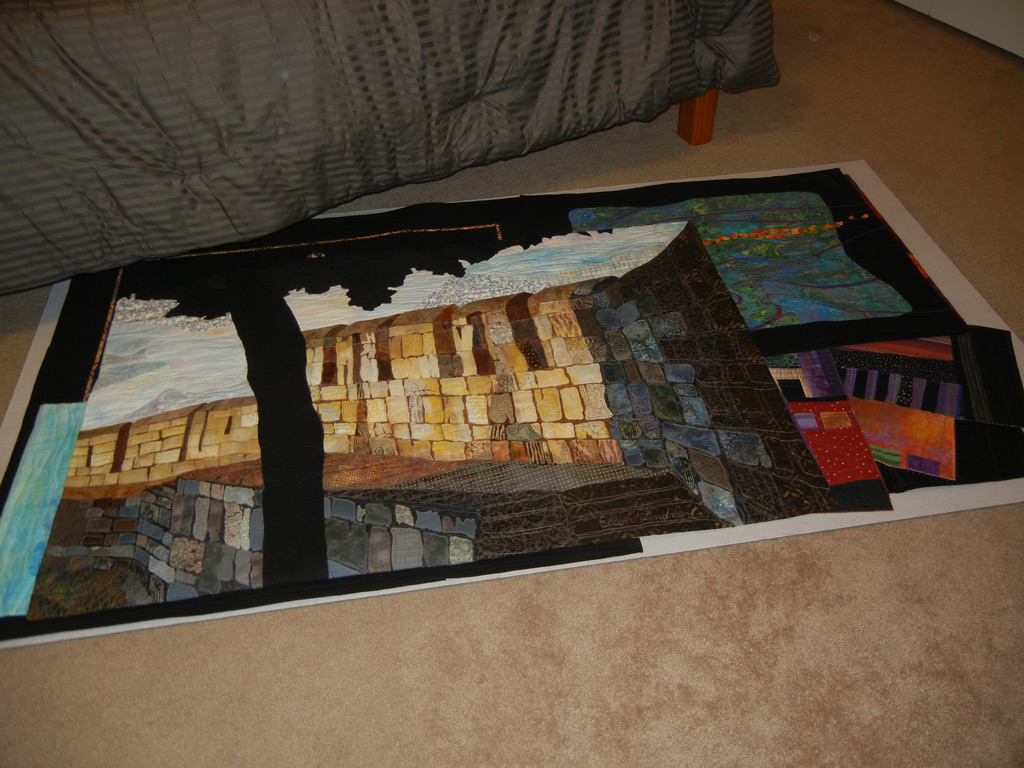
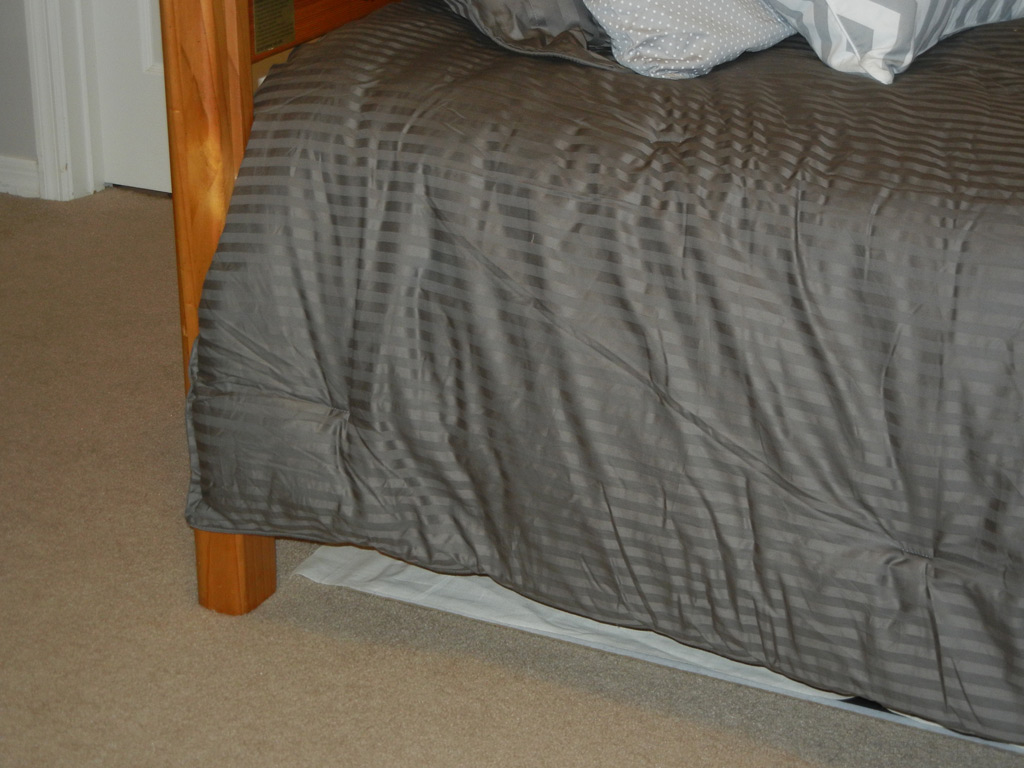
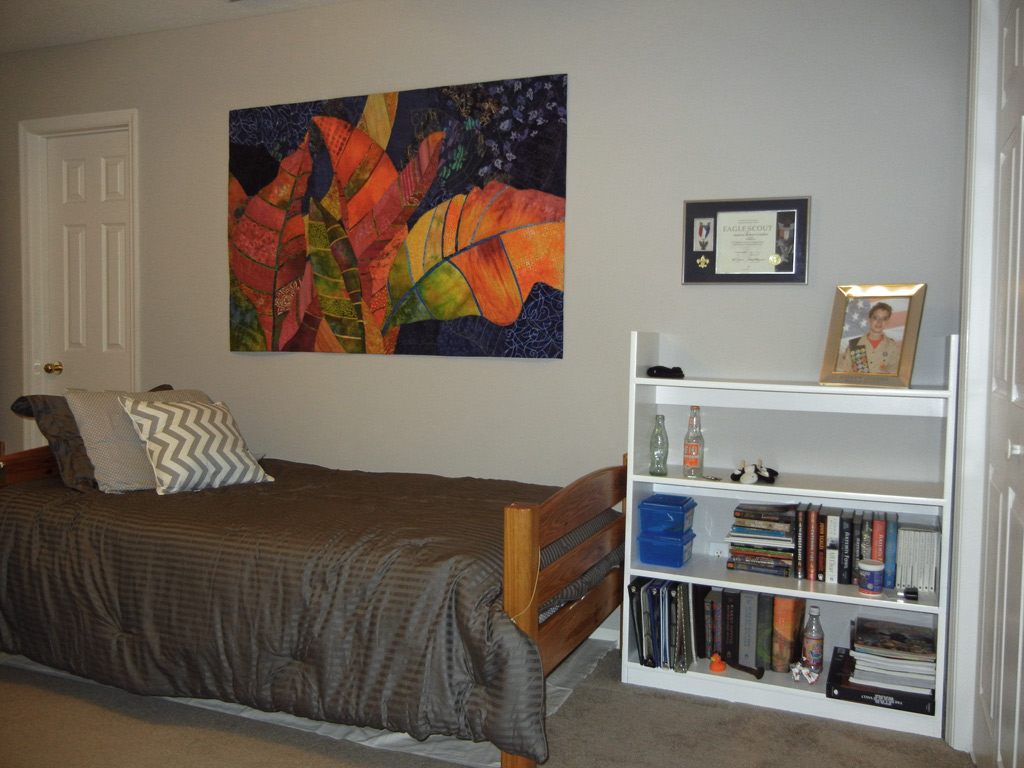
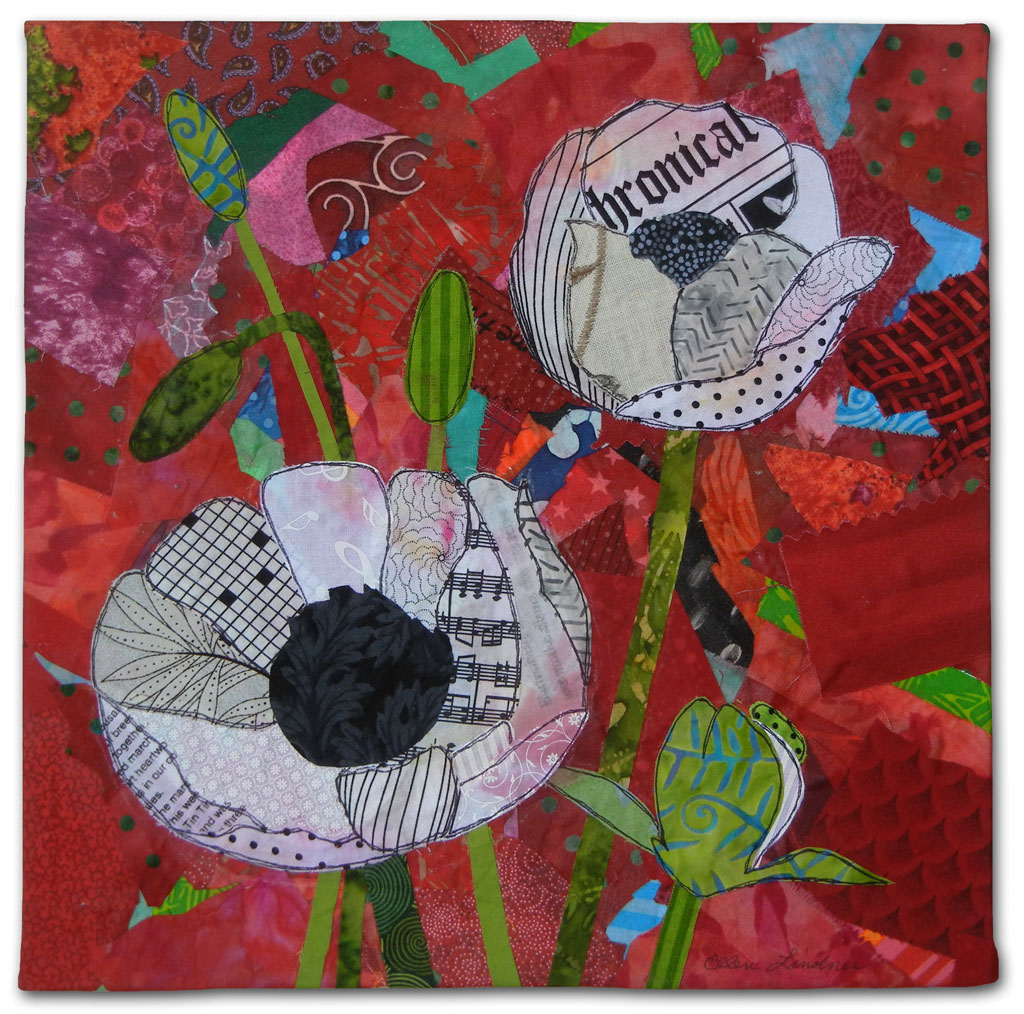
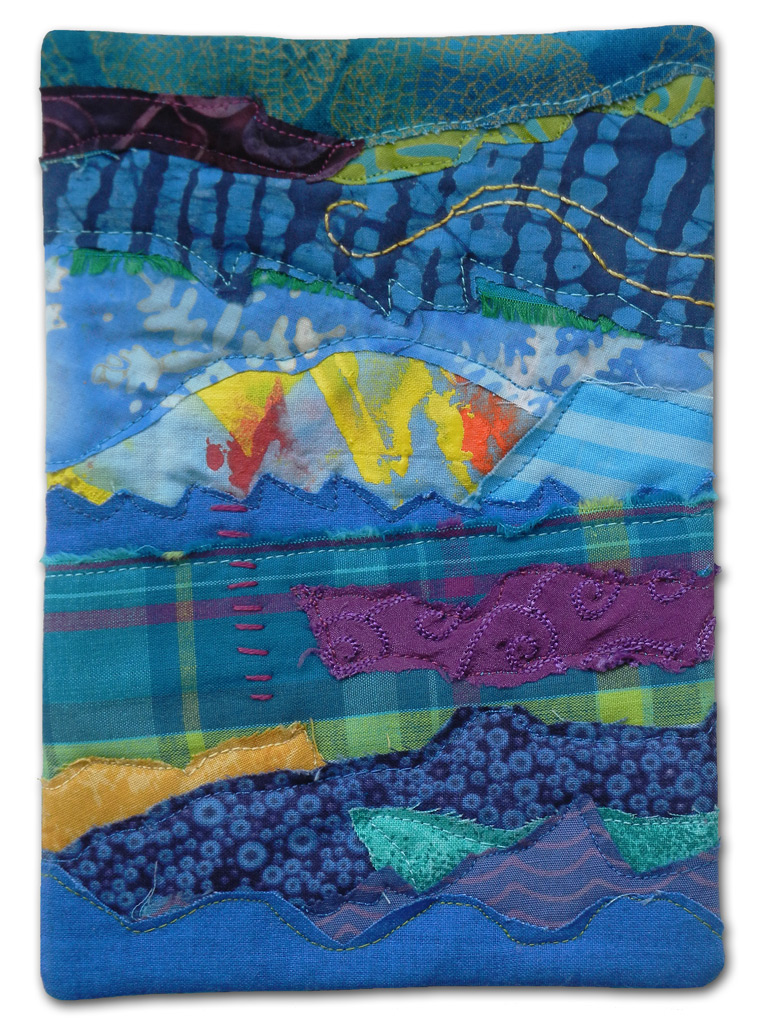
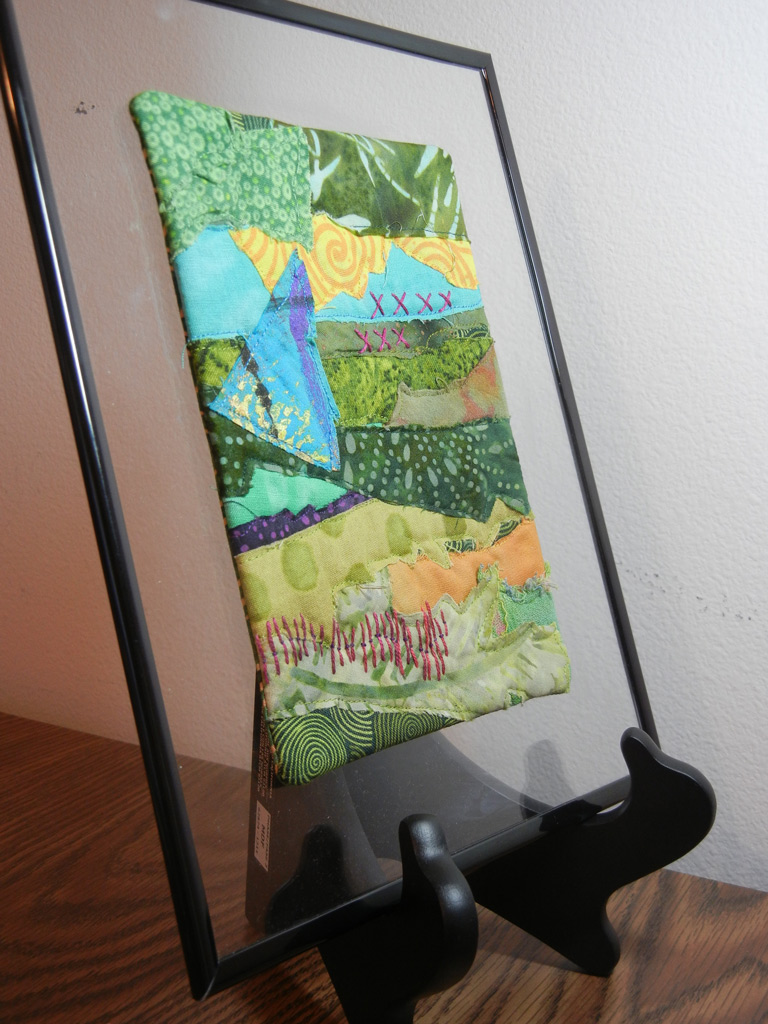
Andrew’s bed and bookcase are still intact, with some of his scout items displayed.  The quilt is Crotons, one of my favorites.

Transforming a bedroom into storage for quilts and more.  Adventurequilter.com/blog

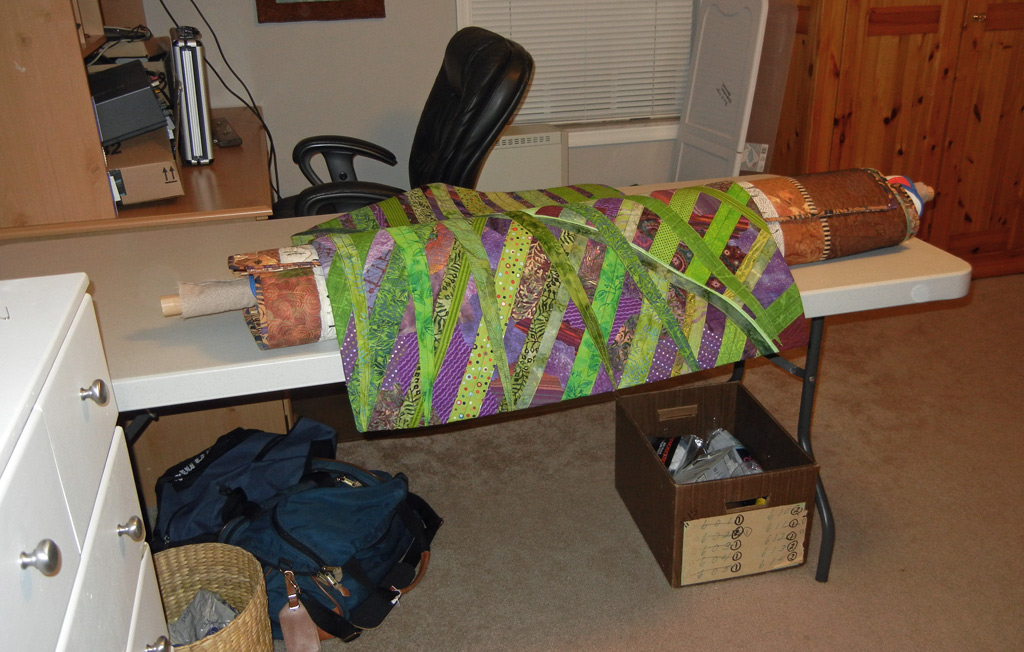
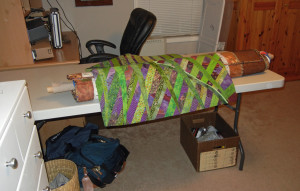
Are you wondering about the table in the center of the room?  It’s mine, all mine!  I’ll be using it to pack quilts for shipping, find the right hanging rods, etc.  I’ve already used it several times and it’s SO convenient.

My plan is to keep it empty so it’s always available for use.

http://www.adventurequilter.com/Quilt_Pages/Neighborhood/Crotons.html

In the closet and drawers I’ll be storing shipping materials, hanging rods, and display items.  That will need to evolve a little.  I’m also storing quilts in this room.  I’ll show you that system in my next post.

But, hey, got any idea what we should call this room?

Ellen Lindner

Patriotic Poppies?

Although I didn’t make my latest  collage as a patriotic piece, perhaps I can get away with using it in that way.  So “Happy Independence Day” to my American readers!

Click on any image for a larger viewWhite Poppies, a glued collage by Ellen Lindner, and class sample for "Sticky Fingers:  Poppy Power."  AdventureQuilter.com

White Poppies, above, with detail below.

White Poppies, a glued collage by Ellen Lindner, and class sample for "Sticky Fingers:  Poppy Power."  AdventureQuilter.com

This piece is entirely glued. It’s a great technique which requires no quilting, binding or hanging sleeves!  Here it is in-progress.

White Poppies in-progress, the class project for Sticky Fingers:  Poppy Power, with Ellen Lindner.  Adventurequilter.com

I’ve been teaching this “Sticky Fingers” technique online for quite some time, using an abstract project.  Now, I’m preparing a revised version of this class, with this poppy design as the class project.

Although I tend to sorta wing it in my artwork, I knew I’d need a good pattern for this.  Lots of figuring and drawing.  Pretty soon, I had tracing paper going in all directions.  I can’t wait to share it with others!

White Poppies in-progress, the class project for Sticky Fingers:  Poppy Power, with Ellen Lindner.  Adventurequilter.com

The class is called “Sticky Fingers:  Poppy Power.”  You can find out more about it, and sign up for advance notification here.

Enjoy your holiday and be safe!

Ellen Lindner

What to Do with an Ugly Quilt

This quilt is one of the ugliest I’ve ever made.  It’s called Bread and Butter and it’s made with torn strips of fabric.

Click any image for a larger view6c-bread-and-butter

Ugh.  I’m not sure it has any redeeming qualities.  But, I always like to learn from my mistakes, so I asked myself “If I had this to do over again, what would I do differently?”  In this case, I came up with several things:
– Make the skinny strips end at different places, in order to create an irregular edge.
– Change the alignment of the diagonal strips and the horizontal ones.  It would be more interesting, if the diagonal ones extended down below the horizontal ones.
– Use a lot fewer strips, so the background brown shows through in places.
– Add another diagonal grouping of strips.
– In short:  mix things up!

Do, I did.  I made another quilt with these concepts in mind.  I changed the colors, though.  And this is what I got.

#3 with an Eggroll, an art quilt by Ellen Lindner, AdventureQuilter.com

It’s called Number 3 with an Eggroll.  Can you see the similarities (and changes) in composition?  Much better, don’t you think?

I think I made that ugly quilt around 2003 and it’s been aging in my closet ever since.  But, age doesn’t seem to help quilts, so it was time to toss it or reuse it.  Since I’ve been making lots of Notes for a Friend, I thought maybe I could cut up this quilt to create small backgrounds for more of those.

I did, and this is what I got.

What to do with an ugly quilt, Ellen Lindner, AdventureQuilter.com/blog

Not overly exciting, but I thought I could work them.  And I really liked the little bits of metallic and sheers.

Next, I auditioned other fabrics to fill out the color palette.  Maybe some more metalics and sheers?

What to do with an ugly quilt, Ellen Lindner, AdventureQuilter.com/blog

Plus, maybe some rusts, browns, and blues?

What to do with an ugly quilt, Ellen Lindner, AdventureQuilter.com/blog

Yes.  That seemed good, and I set to work.

Ellen Lindner
P.S.  I made several quilts with torn strips.  This was the first one, Gold Strata.  The ones in this post came next.  Most of them have irregular edges.

What to do with an ugly quilt, Ellen Lindner, AdventureQuilter.com/blog


A Visit to Church in Seoul

Andrew had a lot of fun seeing the sights of Seoul with his friend, YoungSu.  She toured him around Insadong and Hongdae and had him try lots of interesting street food.

Church in Seoul, www.adventurequilter.com/blog

She also invited us to church.  Andrew and I accepted and headed out on the 1 hour subway trip.  The church campus was huge!  And the worship center was WAY at the top of a large hill.  I had to rest half way up, but the elderly Koreans didn’t even slow down.

On the way, we were greeted by these men who all bowed deeply.  (I wanted to get a picture of them bowing and waited for them to do so for the next group.  But, once they saw my camera they stood still and posed.)  They, and everyone we saw, were very friendly.

Church in Seoul, www.adventurequilter.com/blog

The worship service was fairly similar to the one we’re used to at home, except it was a little more elaborate, and much longer.  Two hours!  Every detail was very well-tended.  Like the female ushers who wore traditional habuk(I didn’t think it was appropriate to take photos in the sanctuary, so no photos of that.)

On the way down that large hill, I had enough breath to take some photos.  I was intrigued by the entrance to the children’s building, with shoes strewn in all directions.  (Protocol is to remove shoes whenever there’s a raised threshold.)

Church in Seoul, www.adventurequilter.com/blog

Of course, the Koreans got a big kick out of me photographing something so ordinary.  (It wasn’t the first time we entertained the locals.)

Ellen Lindner


How NOT to Make a Glued Collage

I‘ve been wanting to make a new sample for my Sticky Fingers class:  white flowers on a red background.  So, I glued up the background and started playing with loose flower shapes.

Click any image for a larger viewWhat not to do, Ellen Lindner, adventurequilter.com/blog

Although I sketched some flowers, I wanted to interpret them very loosely, so I didn’t make a pattern.  I just cut and placed petals.  The photo above shows the arrangement before gluing, along with my sketched flowers.

After deciding on the composition, I drew around each flower with a water-soluble black crayon.  Update:  I did this to mark the flower positions.  I figured it would disappear with my wet glue mixture.  Wasn’t that smart?

What not to do, Ellen Lindner, adventurequilter.com/blog

No, it wasn’t!  When I added the glue the black ran and make a mess of my lovely white flowers.

What not to do, Ellen Lindner, adventurequilter.com/blog

Grr.  I was kicking myself for not seeing that coming.

The only solution was to let it all dry and peel up the bad parts.  Here it is with the background restored, waiting for round two.

What not to do, Ellen Lindner, adventurequilter.com/blog

Live and learn.

Ellen Lindner
P.S.  You can now subscribe to my blog posts!  Sign up using the box in the top right corner, and each post will come to you via email.


Everyday Details in Korea

Being away from home for 10 days meant a trip to a Laundromat.  It turns out that they’re very scarce.  This closest one took 1 hour on the subway.  (We got smart and took a taxi instead.)  The proprietors were very nice.  They loaded our clothes for us and offered us water.  The shop was VERY small and we had the place to ourselves.

Everyday details in Korea, adventurequilter.com/blog

My husband ASSURES me that you’ll want to learn about the high-tech toilet in our hotel room, so here goes.

Everyday details in Korea, adventurequilter.com/blog

When you sit down a fan comes on.  Plus, there’s a seat warmer which you can adjust to your comfort level.  But wait, there’s more.  You can use all these buttons!  (But, be careful what you push.)

Everyday details in Korea, adventurequilter.com/blog

Not up on your Korean?  Thankfully, the hotel provided an instruction booklet with both English and Korean text.  If you click on this image you’ll see that some of the features are very interesting.

Everyday details in Korea, adventurequilter.com/blog

As high-tech as the hotel toilet was, the public plumbing was woefully lacking.  We won’t talk about that.

Speaking of toilets, do you have any idea what this is?  Located in the LADIES’ RESTROOM?

Everyday details in Korea, adventurequilter.com/blog

I saw several of these and they had me completely stumped.  Finally, I asked Andrew’s Korean friend and she told me they’re urinals designed for little boys.  Oh!

Ah, the joys of experiencing a different culture.

Ellen Lindner

Notes for a Friend, #10-12

Although it might seem like I’ve only had Korea on the brain, I’ve actually been doing lots of artsy things in the month since our return.

You may recall that I started a few new “Notes for a Friend” at an art festival, where I asked passersby to help me select fabrics.  I’ve now completed Notes #10-12 and I’m quite happy with them.

Please click on each image to see a much larger view

Note for a Friend #10:Note for a Friend, Ellen Lindner, AdventureQuilter.com

Note for a Friend, Ellen Lindner, AdventureQuilter.com

and #12:Note for a Friend, Ellen Lindner, AdventureQuilter.com

These little notes continue to be a lot of fun to make, and I’ve sold quite a few.  They’re available both unframed and mounted on glass with a narrow black frame.  I especially like the second option.

Note for a Friend mounted and framed, Ellen Lindner, AdventureQuilter.com

The frame is 8 x 10, which gives these small pieces more presence.  And I love the glass “matting!”  These come with their own acrylic stands for table top display, or they can also be hung on a wall.

(Click the title about each image for purchase information.)

I guess I’m addicted to these little guys.  Watch for more.

Ellen Lindner

Seoul’s Subway

The subway in Seoul is said to be the best in the world.  Based on my limited experience, I can’t argue with that.

One of the best things about it is the glass wall between the riders and the tracks.  Like the shuttle trains in airports.  This not only provides rider safety, but it also allows the platforms to be air-conditioned.  I love that!  Here’s Andrew waiting for a train.

Click any image for a larger view 15-andrewat-doorThe cars are also air-conditioned and both station and cars are generally clean.

Like Americans, Korean riders pass the time with naps and electronics.  Lots of electronics!

Seoul's subway, adventurequilter.com/blog

Korea is very accessible to those with handicaps.  The subway stations and sidewalks have what I call “yellow brick roads.”  These look like Lego pieces imbedded into the flooring.  They’re used to help blind people navigate:  rectangular bricks in the straight areas and round circles at stairs, roads, platform edges, etc.  Ingenious.
Seoul's subway, adventurequilter.com/blog
This I was not expecting:  gas masks and emergency supplies at every platform.
Seoul's subway, adventurequilter.com/blog
Along with instructions for use.
Seoul's subway, adventurequilter.com/blog
A side effect of having North Korea as a neighbor, I guess.
Young couples in Korea often dress alike.
Seoul's subway, adventurequilter.com/blog

Seoul's subway, adventurequilter.com/blog


And finally, there is this.  A common sight everywhere we went.  Ajummas wearing huge visors.  Ajumma technically means “aunt,” but it’s used to refer to women who are 55+.  This group delights in the preferential treatment given them due to their age.  Well, more accurately, they demand preferential treatment.


Seoul subway, adventurequilter.com/blog

And they REALLY like to wear these huge visors.  They’re big!  The bills must be 8+ inches long and the sides come all the way down to nose level.  They must not have any
peripheral vision.
(My advice: if you see one of these giant visors coming your way, give way.)
It’s so fun learning about other cultures.
Ellen Lindner

Folk Museum: Celebrations and Festivities

While exploring the Korean Folk Museum, we came across an engaged couple who were having pictures taken.  This was the perfect setting for photos of them wearing traditional garb.  They’ll most likely do more wearing Western wedding clothing.

Click on any image for a larger viewKorean Folk Museum, adventurequilter.com/blog

Korean couples take wedding photos well in advance.  Obviously, they’re not of the ceremony, but rather, of the couple in a wide variety of cute, romantic, and traditional poses.  Most brides wear Western gowns for their ceremonies, but traditional habuk for the reception.

There were several performances at the folk village.  These dancers were very athletic!  They did a sort of no-hands cartwheel, around and around.  All the while, twirling ribbons attached to their hats!  (The explanation was in Korean, so we missed most of it.)

Korean Folk Village

For most of the dance, those ribbons were perfectly synchronized.  They moved them with just the slightest twitch of the head.

Korean Folk Village

There was also an equestrian skills demonstration.  Oh my!  It was more like a circus act, because the riders could flip on an off, balance in all sorts of positions, and accurately shoot bows while riding.  Very impressive!
Korean Folk Village
A few family shots.
Korean Folk Museum, adventurequilter.com/blog
It was a delightful and interesting day.
Ellen Lindner
P.S.  Know why I didn’t step into the gazebo in the photo above?  It would have involved taking off my shoes.  Always the protocol when there’s a threshold, even outside.