National Museum of Korea

We started out visit to Seoul with a trip to the National Museum of Korea.  We hoped that it would give us an overview of the history and it served that purpose well.

Click any image for a larger view10 Story Pagoda, National Museum of Korea

One of the highlights of the museum’s collection is the”10 Story Pagoda,” on display in the central area.  Made of marble, it has many detailed carvings on each layer.  The pagoda holds Buddhist relics and is a religious shrine.

10 Story Pagoda, National Museum of Korea

As you might expect, there were many items depicting Buddha, including several large statues.  As part of our tour, I learned a few things about Buddhism.  This Buddhavista is a deity who has earned its way to Nirvana, but has not gone there, deciding instead to stay and help others reach a state on enlightenment.

Buddhavista statue, National Museum of Korea

Korea is known for its ceramics and there have been several different styles over the centuries.  One of the earliest is Celadon, known for its distinctive color. This intricate incense burner is an example.

Ancient celadon incense burner, National Museum of Korea

There were MANY more beautiful and interesting items.  This warrior’s armor caught my eye.  (I don’t remember details, since I just caught a quick shot as our  tour walked by.)

National Museum of Korea

National Museum of Korea

It’s very interesting to learn about a different culture!

Ellen Lindner
P.S.  No flash photography was allowed, so I was happy to get a few good shots, along with a few blurry ones.


Lanterns in Korea

My family is currently vacationing in Korea and greatly enjoying it.  On our first morning we explored our block and found everything from a Buddhist temple to a Dunkin Donuts.

The Festival of Lanterns runs throughout May and many shops have paper lanterns hanging from their awnings.  But look what the temple did!  This large tree is in the temple courtyard area.

Click an image for a larger viewLanterns on display near Korean Buddhist temple, www.AdventureQuilter.com/blog

As you can see, the display of colorful lanterns completely obscures the branches and leaves above.

There’s also an area of just white lanterns.  Very lovely!

Lanterns on display near Korean Buddhist temple, www.AdventureQuilter.com/blog

I hope to go back to tour the temple later today.

Ellen Lindner

You can also see photos from my trip to Paris’ fabric district.


Designing a New Quilt

For her 80th birthday, my mother-in-law asked for a small quilt to hang on her apartment door.  Of course, I was happy to comply!  She expressed a desire for something floral, but left all decisions up to me.

I hunted through my large collection of floral photos and decided on Black Eyed Susans as my subject.

Click any image for a larger viewInspiration photo for a small floral quilt.  Ellen Lindner, www.AdventureQuilter.com

I have several great photos of them.

Inspiration photo for a small floral quilt.  Ellen Lindner, www.AdventureQuilter.com

Next, I played around in Photoshop Elements (on my computer) to create a sketch.  I was able to isolate each flower and move them around to my liking.  I could also change their size and rotation/direction.  This was the first sketch I came up with.

Sketch for a small floral quilt.  Ellen Lindner, www.AdventureQuilter.com

But, then I decided it had too many details for the small scale of this piece, (only 10 x 14.)  So, I switched to only two flowers, greatly enlarging them.

Sketch for a small floral quilt.  Ellen Lindner, www.AdventureQuilter.com

MUCH better, I think!  I always like it when the subject runs off the edge.

Soon, I was ready to raid my scraps to create the background.  As usual, I collaged a lot of different fabrics together.  The brightest greens aren’t nearly so vibrant in real life (thankfully,) but I positioned them primarily behind the largest flower, just in case.  A little pieced scrap added interest in the top left area.

Work in progress on a small floral quilt.  Ellen Lindner, www.AdventureQuilter.com

Next:  flower fabrics.  Check back for my progress.

Ellen Lindner
P.S.  My in-laws’ apartment opens to an interior hallway, so there are no weather worries.
P.P.S.  I’ve done two other quilts featuring Black-Eyed Susans:  Natural Progression and Blessings Underfoot.

See a gallery of all my quilts

Student Work: “A Gardener’s Delight”


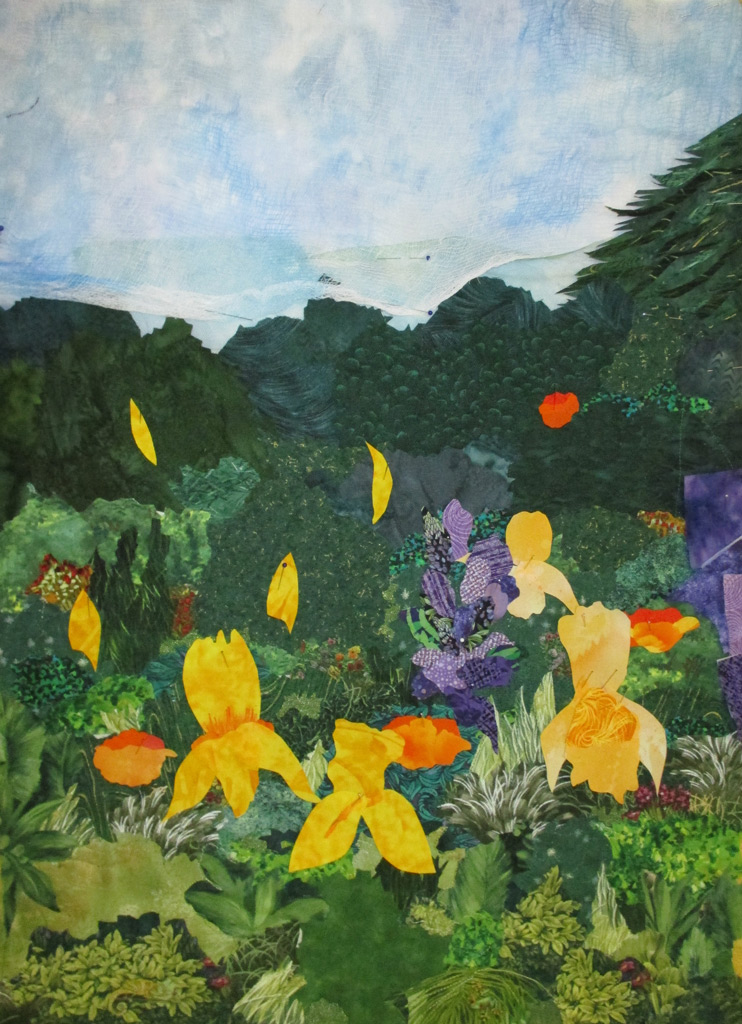
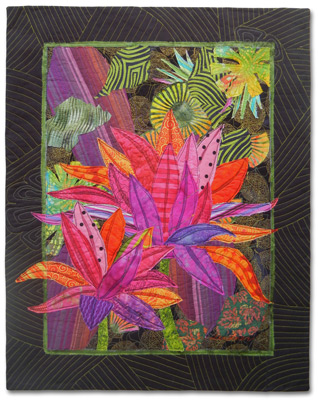
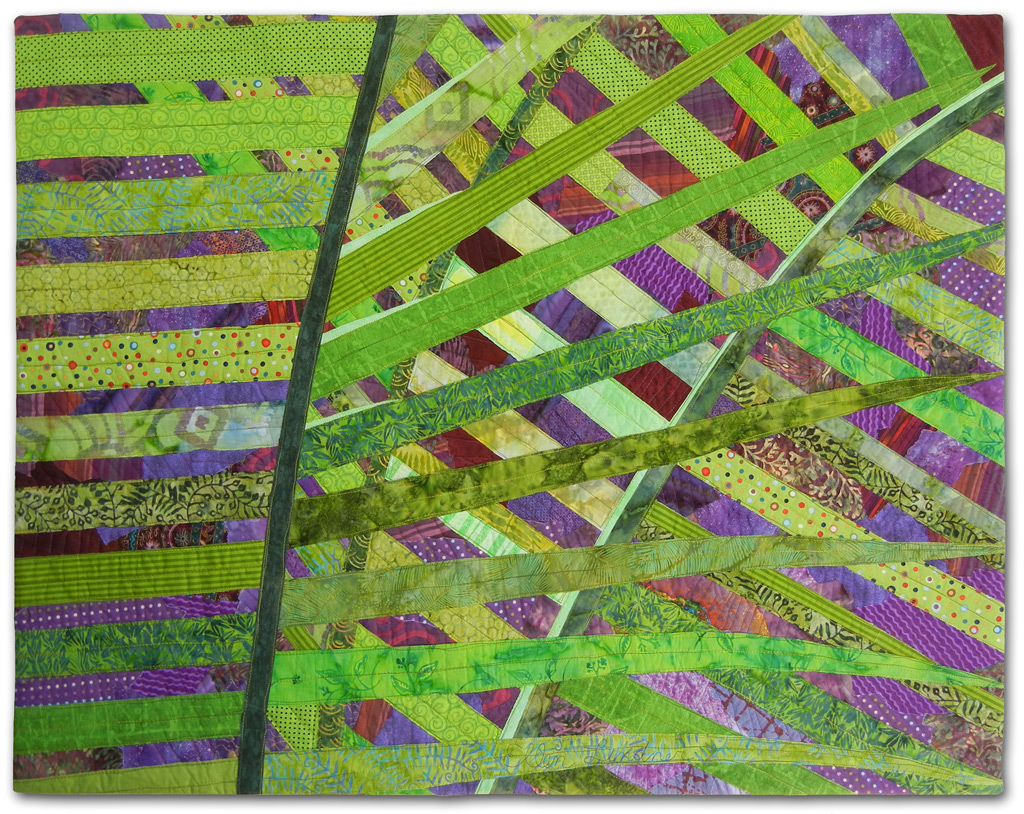
Check out the fabulous quilt made by Barb Gardener, called “A Gardener’s Delight.”  (Click on it to see the details.)  She created a wonderful composition, used color and contrast to create a focal point, and showed depth with the sizes of the flowers.  Wonderful!  And what about the shapes of the flowers?  Don’t they have personality?

Click any image for a larger view
"A Gardener's Delight," an art quilt by Barb Gardner. Made in Ellen Lindner's online class, Design Your Own Nature Quilt. LearnWithEllen.com

Barb made (or at least started) this quilt as a student in my “Design Your Own Nature Quilt” class.

The first word in the class title is “design,” so that’s where we start.  After learning about format (overall proportions,) balance, contrast, and focal point, the students are ready to tackle their own designs.

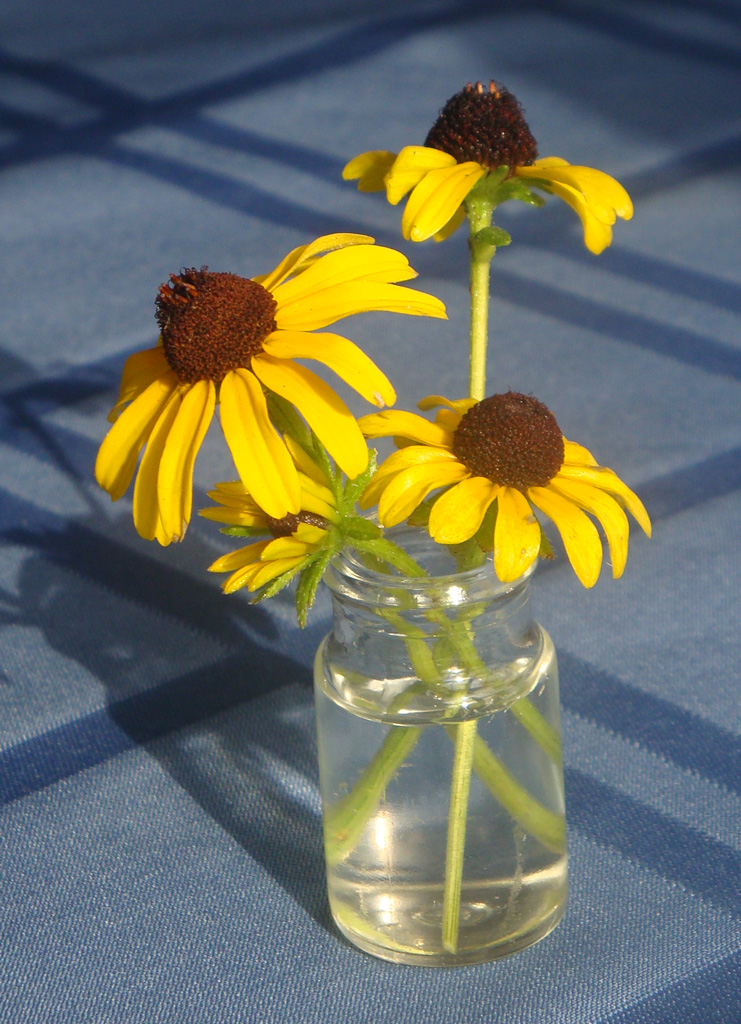
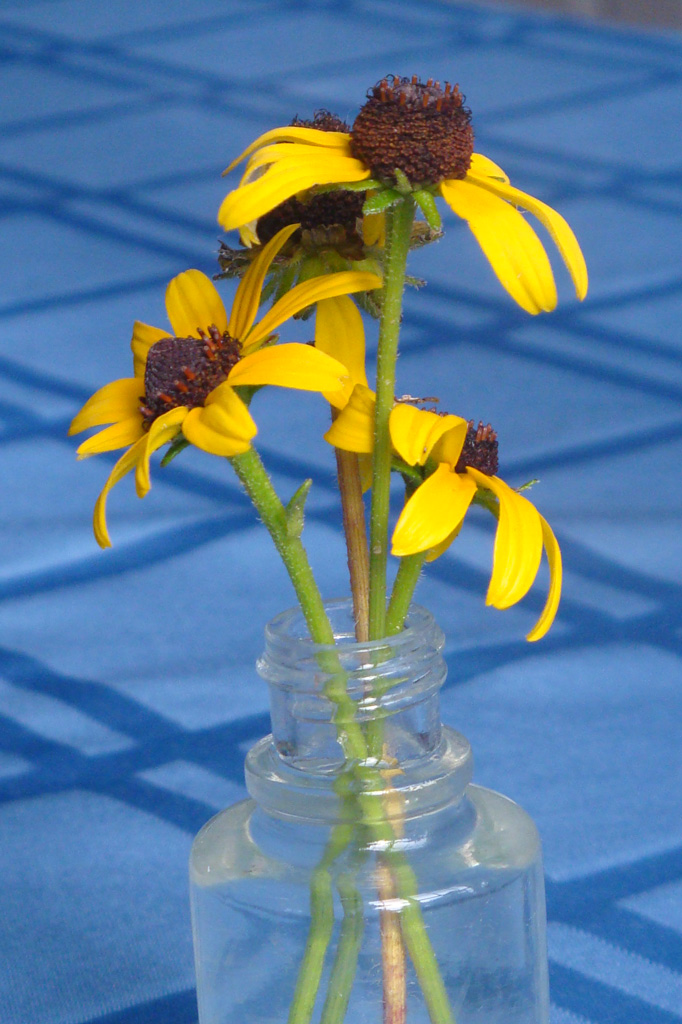
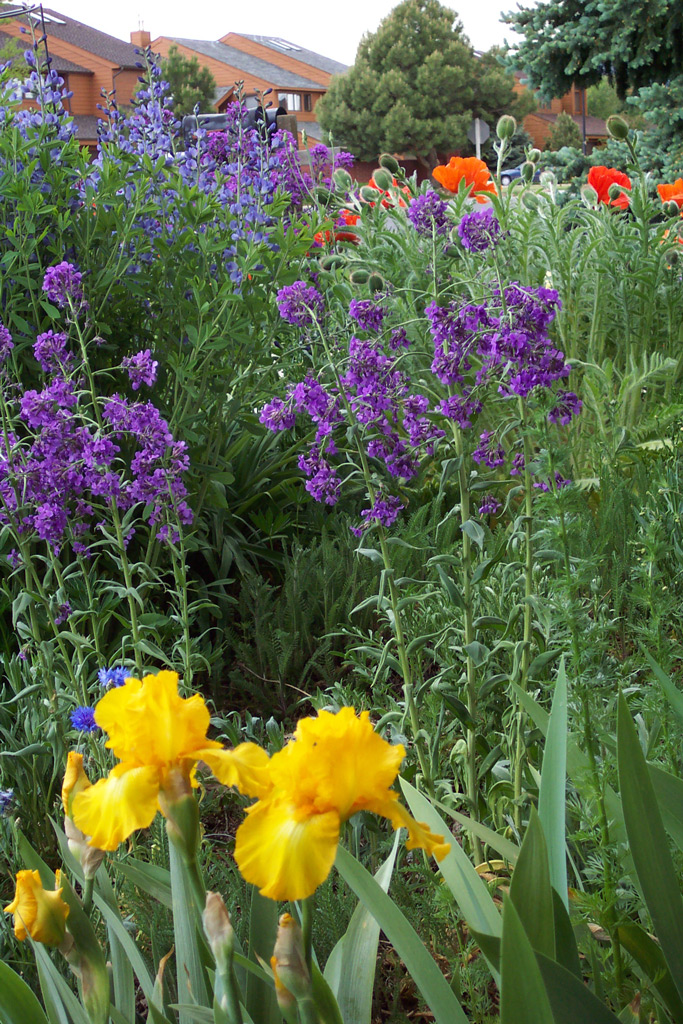
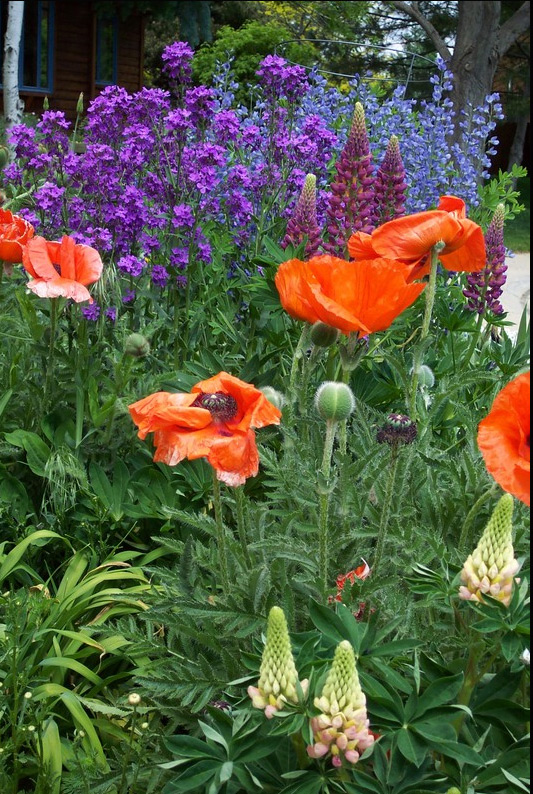
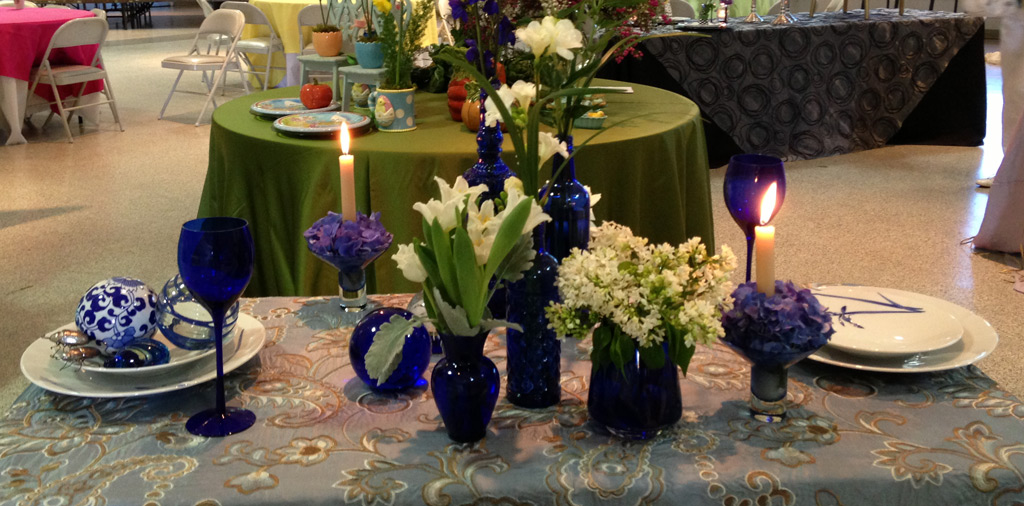
Each student provides her own inspiration photo(s) and Barb had some fantastic ones.

Barb Gardner's inspiration photo for "Design Your Own Nature Quilt" class with Ellen Lindner.  LearnWithEllen.com

Barb Gardner's inspiration photo for "Design Your Own Nature Quilt" class with Ellen Lindner.  LearnWithEllen.com

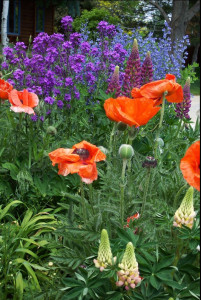
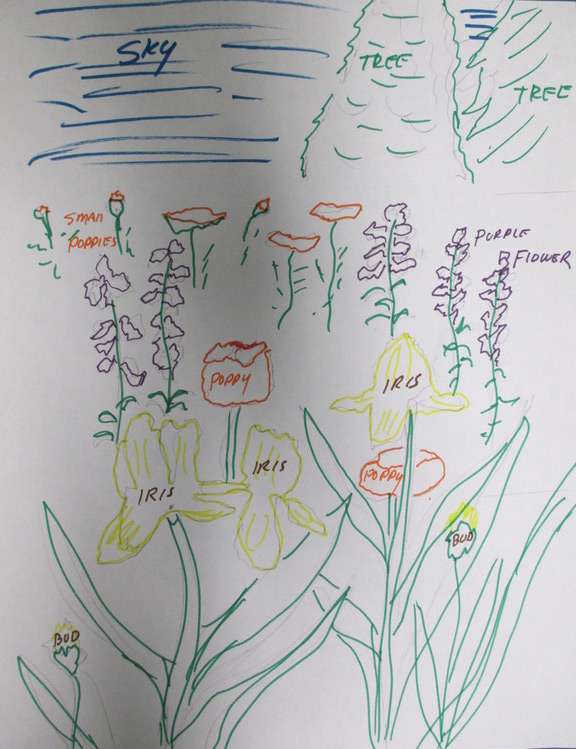
As a matter of fact, her photos were so fantastic they made it challenging to choose a direction.  This was evident in Barb’s early sketch, when the iris and poppy flowers were sort of competing with one another.

Barb Gardner's sketch for "Design Your Own Nature Quilt" class with Ellen Lindner.  LearnWithEllen.com

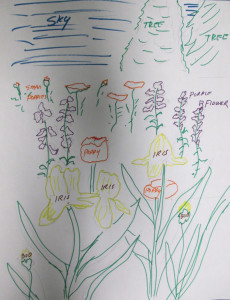
This is where our class theme came in:  “Be inspired by your photo.  Not controlled by it.”  We discussed the idea of omitting a few flowers, and making the foreground ones MUCH larger.

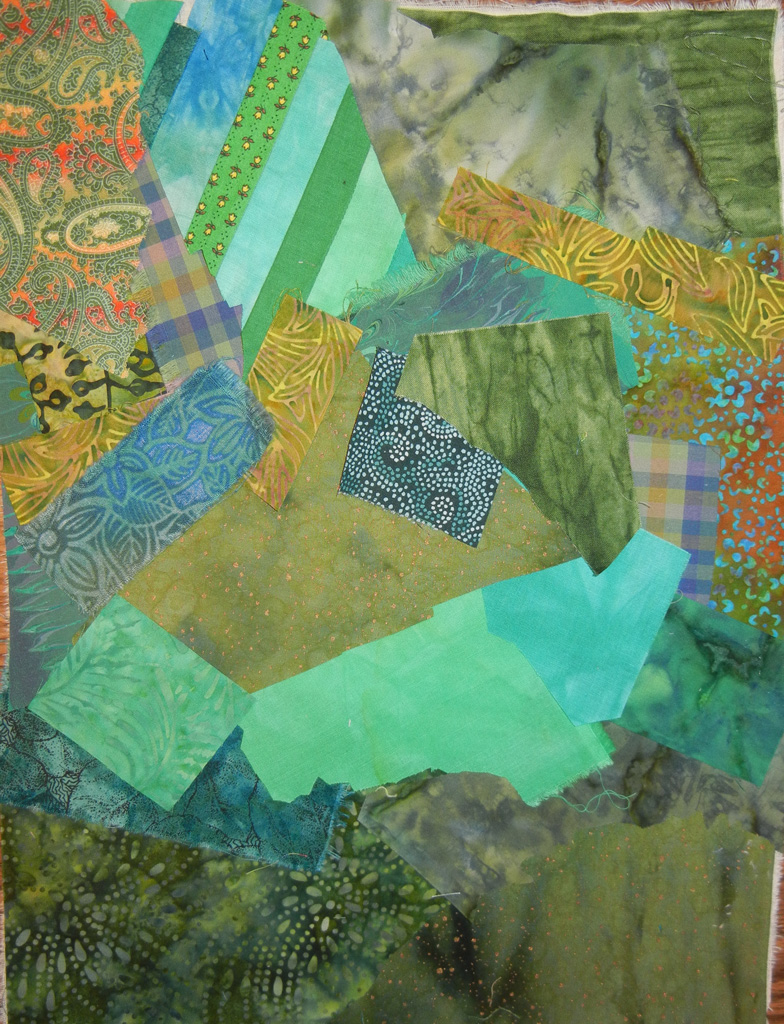
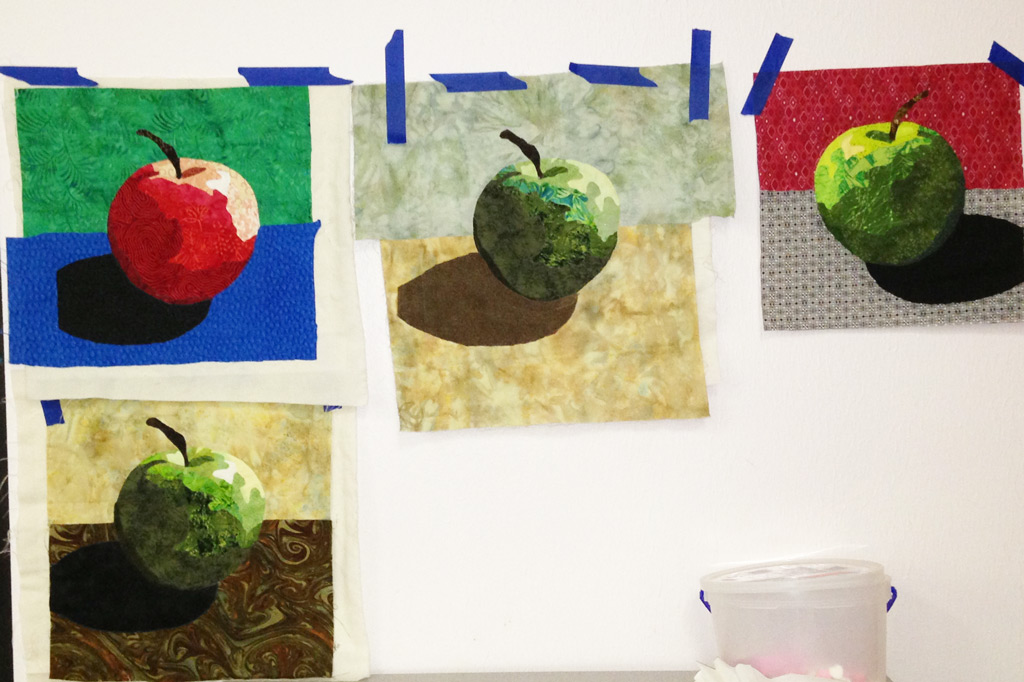
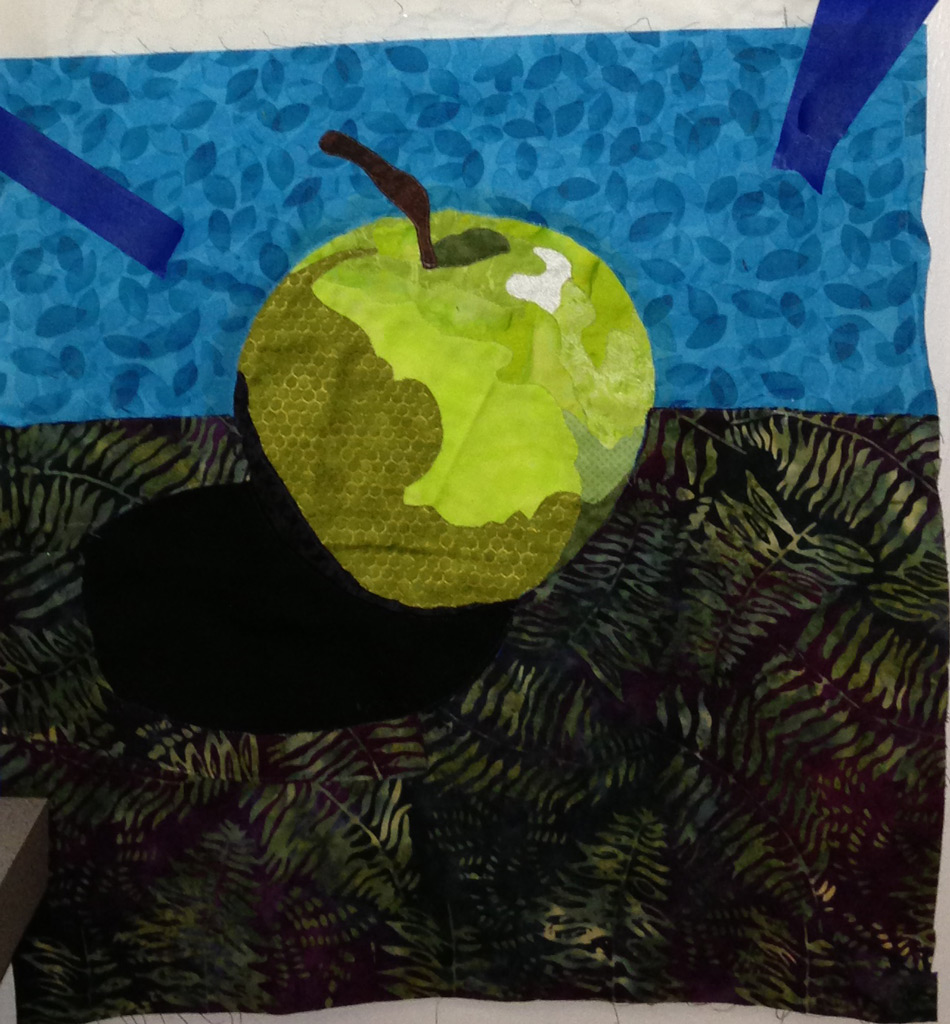
While considering that, Barb got to work on her background.  Lots of busy green prints were called for.  She cut them jagged, with a technique I taught the students, and the loose quality of those cuts gave it a nice quality.

Early background: Barb Gardner's in-progress background for "Design Your Own Nature Quilt" class with Ellen Lindner. LearnWithEllen.com

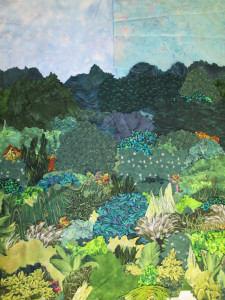
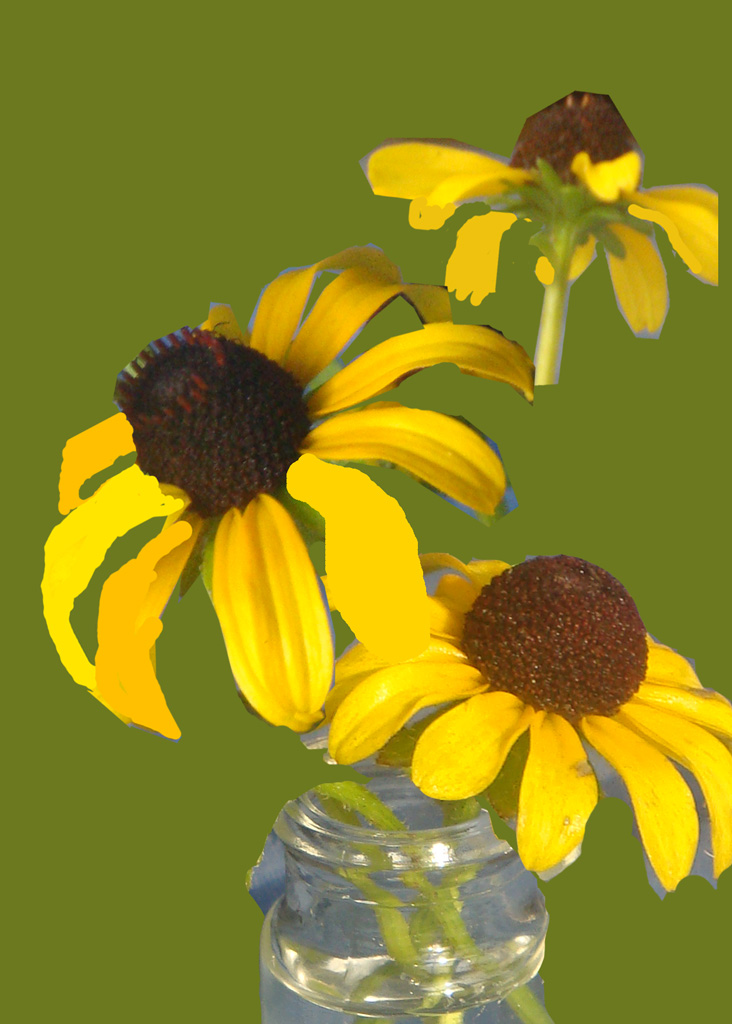
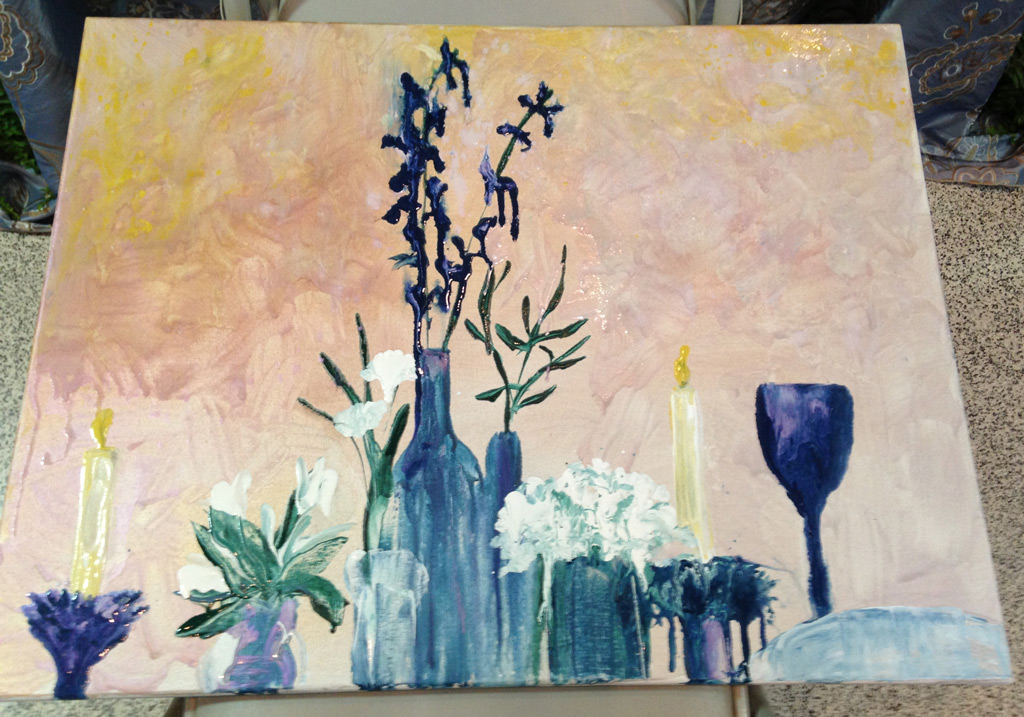
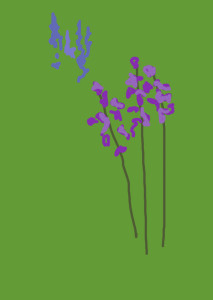
Soon, it was time for flowers, and I showed her how to use blobs of color to represent them.  Much easier than fussy cutting!  (Reference this photo to the first inspiration one.)

Flower sketching for Barb Gardner in "Design Your Own Nature Quilt" class with Ellen Lindner.  LearnWithEllen.com

Our class ended at about this point, so my participation did as well.  However, Barb had learned a lot and she still had access to the class lessons, so she forged ahead.

Still undecided about how many flowers to use, Barb auditioned both irises and poppies on her quilt. They were still fighting though.

 Notice, however, the large tree on the right.  The little bits of black added give it wonderful texture.  Wasn’t she smart to notice the need for shadows?  It’s very successful.

Barb Gardner's quilt in-progress during "Design Your Own Nature Quilt" class with Ellen Lindner. LearnWithEllen.com

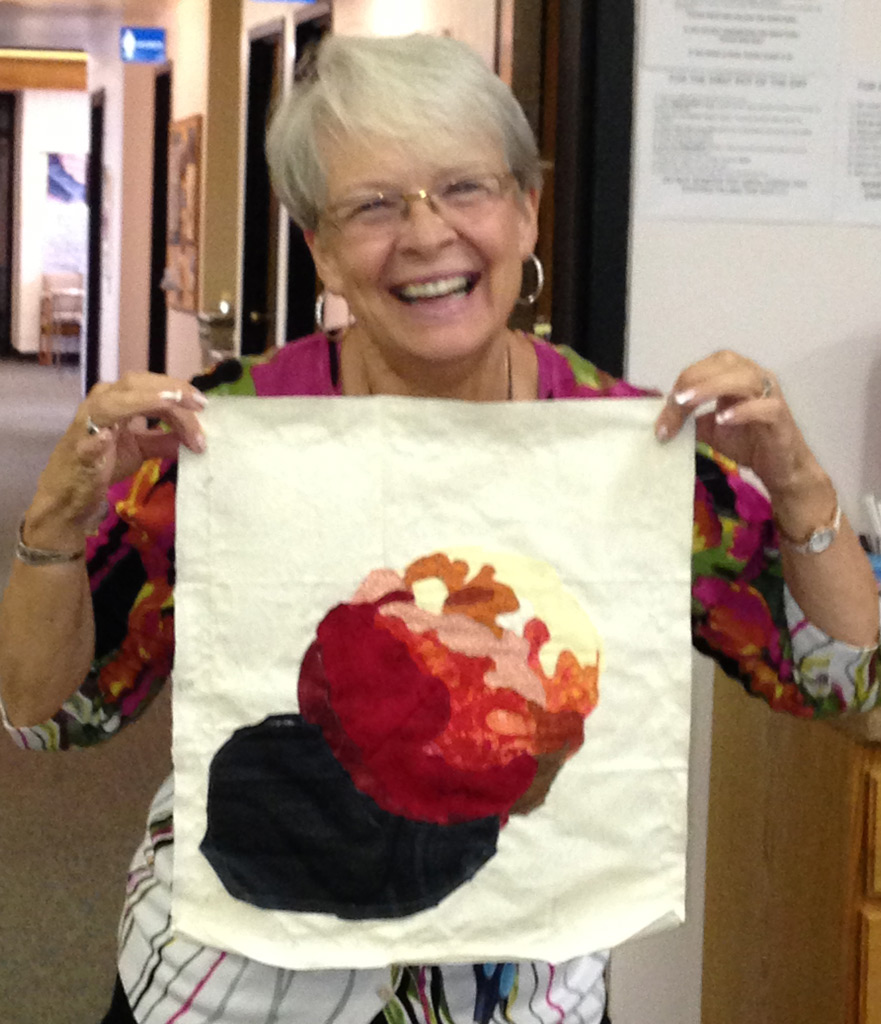
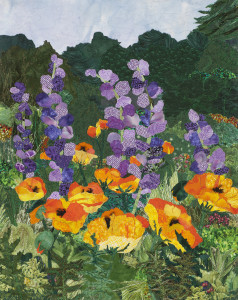
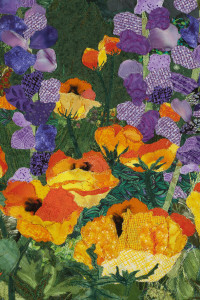
After some consideration, Barb rejected the idea of the irises and enlarged the poppies dramatically.  Excellent!  Now, THAT’S a focal point!

"A Gardener's Delight," an art quilt by Barb Gardner. Made in Ellen Lindner's online class, Design Your Own Nature Quilt. LearnWithEllen.com

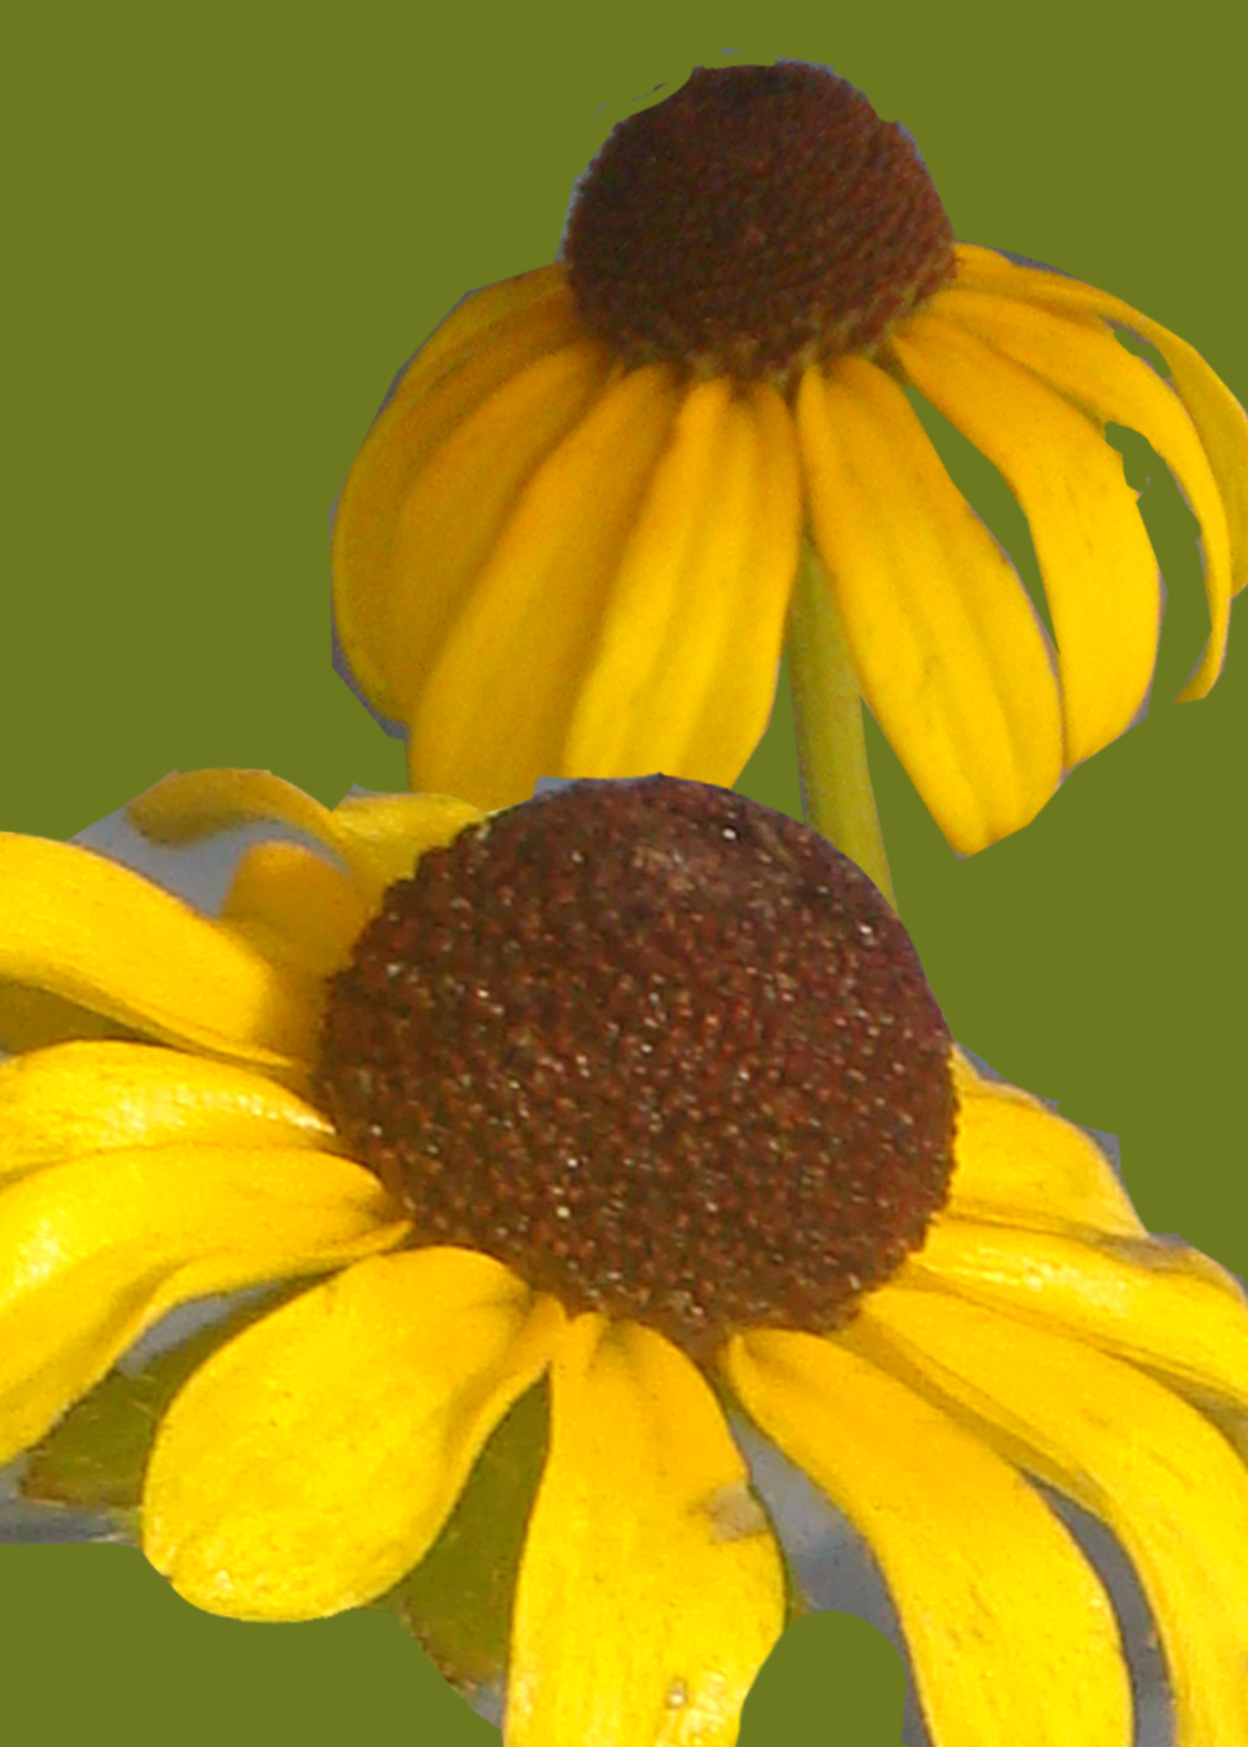
And here’s a detail shot.  Awesome!

"A Gardener's Delight" art quilt, detail, by Barb Gardner, started in "Design Your Own Nature Quilt" class with Ellen Lindner.  LearnWithEllen.com

Can you see why this class is so exciting for those who take it?  And for me to0?  Barb’s process, along with the resulting quilt, are good examples of what can happen in the “Design Your Own Nature Quilt” class.

It will be offered again on May 30th, 2014.  Perhaps you’d like to join in the excitement.  Find full details here.

And be sure to check out Barb Gardner’s website.  She’s a very talented quilt designer and teacher.  Thanks, Barb, for allowing me to showcase your quilt and your process!

Ellen Lindner

More Online Classes

Blue Tape and Blue Ribbons

I recently entered one of my quilts in an art show.  You know, the kind with paintings, sculpture, etc.  This was my first venture into an exhibit that wasn’t geared exclusively toward quilts.

In order to comply with hanging requirements, I had to figure out how to have each of my two entries hang on a single nail.  WITHOUT the hanging wire showing.  That took a bit of engineering, but I finally managed it.

I inserted the wooden slat (previously cut for this quilt) into the hanging sleeve, and used safety pins to secure it along the bottom edge.  Next, I put “knots” in either end of a length of hanging wire.  I stapled this to the slat, right through the sleeve fabric.  That kept the wire from showing.

Click any image for a larger viewEllen Lindner's solution for haning a quilt from one nail, AdventureQuilter.com

It was NOT an elegant solution, but it worked and the quilts looked good when displayed.

For the second quilt, I had a dowel with screw eyes the proper length, so I used it.  I covered the ends of the wire with blue painters tape, so there wouldn’t be anything sharp to catch anywhere.  Again, I stapled the wire directly through the fabric to the dowel.

Ellen Lindner's solution for haning a quilt from one nail, AdventureQuilter.com

My efforts paid off and “High Ti” won first place in its category!  Woohoo!  As a matter of fact, fiber art nearly swept the Fiber/Mixed Media/Collage category, winning three of the four prizes awarded.  Very exciting!

Ellen Lindner's award at Titusville Art League Show 2014, AdventureQuilter.com

High Ti, an art quilt by Ellen Lindner, AdventureQuilter.com

I’ll definitely be entering more art shows like this!  (But, maybe I need a more elegant hanging set up?)

How do you hang your quilts?

Ellen Lindner

See more of my quilts

Teaching in Sun City Center, Part Two

What fun we had in my Double Reverse Applique class in Sun City Center!  The students had excellent results!

Ellen Lindner's Double Reverse Applique class

What colorful produce!

Ellen Lindner's Double Reverse Applique class

This in-progress apple, below, shows a bit of the technique.  Early patches are sewn down over-sized.  Later overlapping pieces properly define the patches underneath.  With this process, the background fabrics are often the last ones to be added, which is the case here.  The top background fabric has been added, so the top half of the apple is nicely defined.  The lower half is still lumpy, waiting for the bottom background piece to properly overlap and shape it.

Ellen Lindner's Double Reverse Applique class

(The green fabric will also be cut away to reveal the stem.)

Here’s another example.  With no background fabrics sewn, the apple is lumpy.  The background fabrics will cover and reshape those wonky edges.

Ellen Lindner's Double Reverse Applique class

By the end of the day, everyone had basically finished their apples and some were working on their pears.  (As you might guess, the second project goes much faster than the first.)

Ellen Lindner's Double Reverse Applique class

I love teaching this class, because everyone is always so tickled with their results.  Me too!

I’d enjoy teaching for your guild, too!  You’ll find more information here.

Ellen Lindner
P. S.  I also teach this class online!

Dying Eggs with Onion Skins

I saw instructions online for dying eggs with onion skins, and I just had to give it a try!

These are the supplies that are needed:  eggs (uncooked,) onion skins, little flowers and/or leaves, thread or string, and a cooking pot.

Click any image for a larger view
Ellen Lindner dying eggs with onion skins

The idea is to capture the flowers and leaves against the egg with the onion skins, and then to tie it all up with string.  A third hand would definitely have come in handy, but I managed.

Ellen Lindner dying eggs with onion skins

Once wrapped, the eggs go into a pot of water, along with all the leftover onion skins.  (The novelty of wrapping eggs wore off after 5 eggs, but I added another one into the pot, just to see what would happen.)  Everything is boiled just as if you were making hard boiled eggs.  (My preference is 10 minutes after the boiling starts.)

Once the eggs have cooled a little, all the vegetation was peeled off and I got to see my results.  Pretty cool, right?

Ellen Lindner dying eggs with onion skins

The reddish-brown egg was done with red onion skins.  It also got the best  flowers imprint.

Ellen Lindner dying eggs with onion skins

Another 4 eggs were wrapped with the skins of yellow onions, and one more “control” egg was thrown in for good measure.  Isn’t it amazing how orange that egg got?

So now what?  Well, I’m enjoying looking at them in my refrigerator.  And, I think there are some deviled eggs in my future.

Ellen Lindner dying eggs with onion skins

I know eating boiled eggs can get a little old at this time of year, but I had so much fun with these I want to do more!  The orange egg has got me inspired.  What other colors could I get with beets, tomatoes, spinach, etc.?  And what if I left them different amounts of time, to get different levels of color?  And, and what if I wrapped them in cheesecloth?  My mind is spinning with the possibilities!

In the meantime, wanna come over for deviled eggs?

Ellen Lindner

If you want to try this, you’ll find the instructions I used here.  There’s also a link to this tutorial and others on my Pinterest board about DIY projects.   Have fun!


Teaching in Sun City Center, Part One

In February, I got to teach for the Kings Point Quilters, in Sun City Center, FL.  They’re an extremely creative  group!  The display board below gives you an idea.  It shows 6″ x 6″ quilts  they made for display in a local library.

Click any image for a larger viewKings Point Quilters 6 x 6 display

The guild is also very enthusiastic.  They meet every week!  And, they gave me one of the warmest welcomes I’ve ever received.  After my lecture, “Playing with Fabric,” MANY people came up to talk to me and we were still at it 45 minutes later!  Oh what fun!  It was easy to see that we’d have fun in class the next day.

Just as expected, a great group showed up and got right to work.

Students at work in Ellen Lindner's Double Reverse Applique class

Before long, finished apples were showing up all over the room.

Ellen Lindner's Double Reverse Applique class

As is always the case with this class, it was fun to see the variety of apples created from the same pattern.  Aren’t they great?

Ellen Lindner's Double Reverse Applique class

I get a big thrill when they start to go up on the wall.  Actually, we all do!

Ellen Lindner's Double Reverse Applique class

4c-show-1

Awesome students and awesome results!  Check out the next post for some in-progress photos and more great apples.

Ellen Lindner
P.S. I bet your guild would enjoy this class, too.  Find more information here.


Champagne Brunch and Tablescapes

When I was vending at EGAD in Bloom, a champagne brunch was held as part of the festivities.  I got to see the room afterward and it was clear that much fun was had!

The stage was set with a variety of designer tables around the perimeter of the room.  Some of them were functional, but others were purely whimsical.  Like my favorite one created by Steve Lomazzo and Donna Goff.  It went from floor to ceiling!

Click any image for a larger viewTablescape by Steve Lomazzo and Donna Goff

The table was covered in burlap with an old tire in the center.  Click the photo to notice all the other unexpected touches:  an oil can, a wrench as a utensil, old bottles, and vintage fabrics.  SO very creative! 

Tablescape by Steve Lomazzo and Donna Goff

 Steve is, among other things, an assemblage artist.  (He puts stuff together to make art.)  So, of course he had to make a mobile.  I didn’t recognize many of the suspended objects, but one of them is a hub cap!

Tablescape (moblie) by Steve Lomazzo and Donna Goff

After a performance by a jazz band, champagne (of course) and the brunch, it was time for the main entertainment.  Local florist extraordinaire, Link Johnsten, created six different tablescapes right in front of everyone.  The owner of Eau Gallie Florist, he can make some FAST and fabulous flower arrangements!  His first arrangement included cobalt blue vases, white flowers and other wonderful touches.  (Click to see.)

Tablescape #1 by Link Johnsten

 When he finished this table, things got REALLY interesting as painter Heather Everett stepped in.  She began to paint the tablescape above, while he continued making five more.  Awesome!

Of course, she didn’t have time to finish, but she really make excellent progress in the time allotted.  How cool is this?  (Still with very wet paint.) 

Painting by Heather Everett

 The tablescape below is intended for an anniversary couple.  The story Link told said the couple honeymooned in Aruba, which inspired the tropical motif and colors.  They have been married for 12 years, so there are 12 roses around the plate on the right.  The left plate features a Gerber daisy.  The kind you use for “He loves me, he loves me not.”  And sure enough, there are some plucked petals on the table.

Anniversary tablescape by Link Johnsten

Also on the daisy is a jeweled frog.  It’s meant to represent the decadent jewelry that the husband would present to his wife.  I love it!

Doesn’t this sound like a very fun and creative event?  I was very impressed.

Ellen Lindner

Titusville, FL Spring Art Show

My quilt, Crisscross, is one of two that I’m entering in this weekend’s Titusville, FL art show.

Click any image for a larger viewCrisscross, an art quilt by Ellen Lindner, AdventureQuilter.com

The second one is High Ti:

High Ti, an art quilt by Ellen Lindner, AdventureQuilter.com

This will be the first time I’ve entered my work in a mixed media show, so I’m very curious to see how it will be received.  Fiber IS mentioned in one of the categories, so that’s encouraging.

This year’s venue is the Police Hall of Fame.  I understand that it’s a nice setting.  (AND, if you haven’t been to the space center in a while, you’ll find that the two are extremely close.  A good opportunity.)

April Q1 13,
Fri 2-8, Sat. 10-8, Sun. 10-3
American Police Hall of Fame
6350 Horizon Dr., Titusville, FL
FREE Admission to the show and the Hall of Fame
I’ll be there Sunday around 3.  Hope to see some of you, as well!
Ellen Lindner
UPDATE 4-18-14:  High Ti won first place in the Fiber/Mixed Media/Collage category!  Woohoo!  (As a matter of fact, art quilts nearly swept the category, winning 3 of the 4 awards.  Very exciting!)