Haiku Quilt: Collaging and Hand Stitching

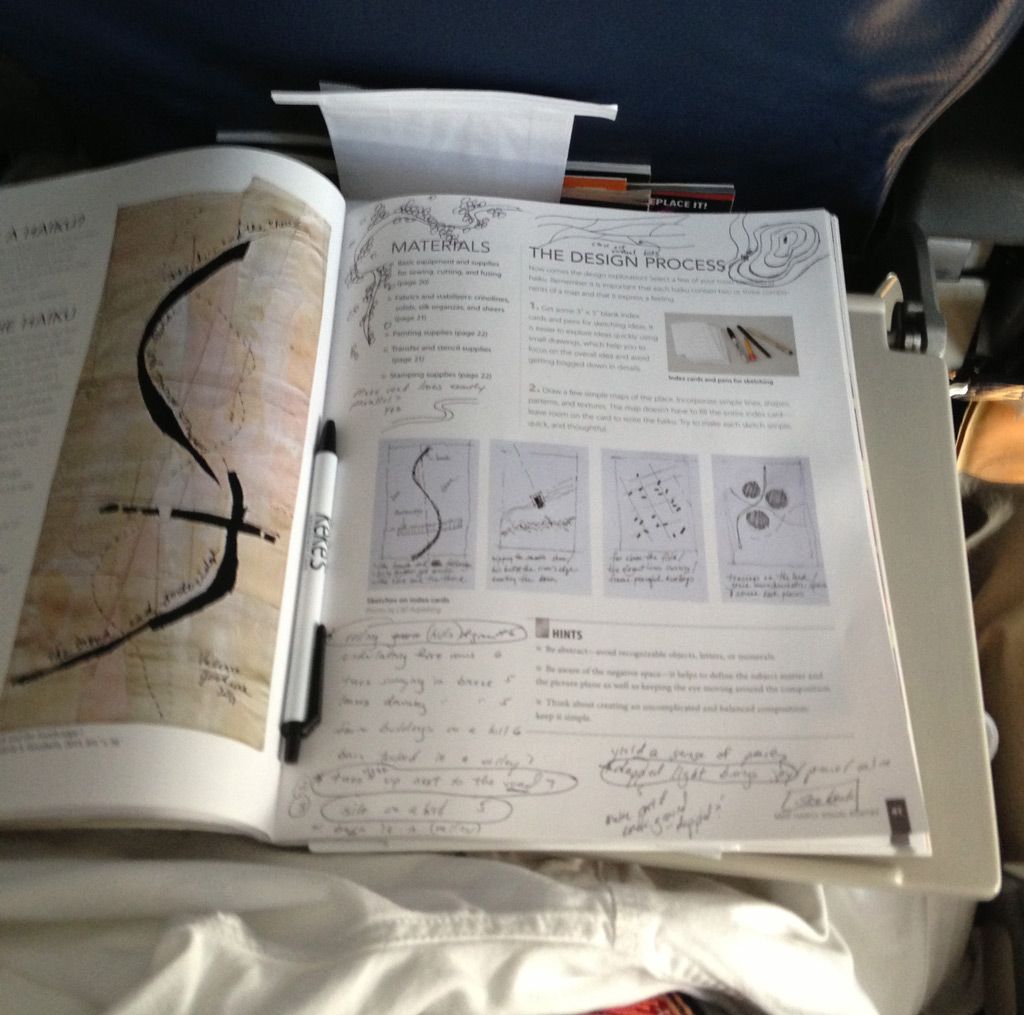
As I mentioned in my last post, I was very anxious to get started on a small haiku quilt, as explained in Valerie Goodwin’s book “Art Quilt Maps.”  Per her instructions, I had written a haiku about a favorite twisting country road.

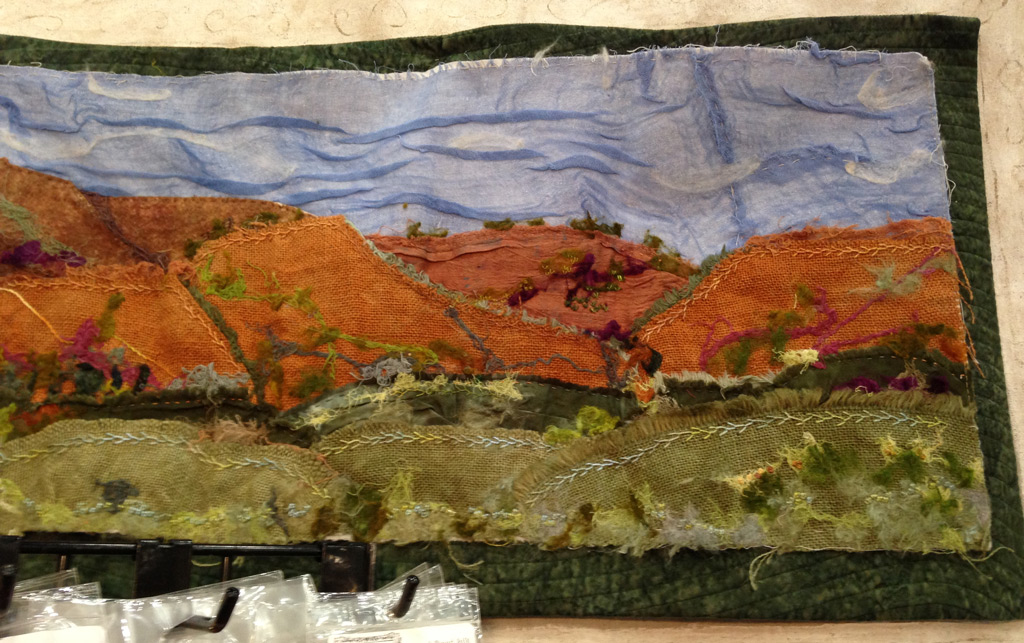
Following some of Valerie’s examples, I decided to visually divide my haiku into three sections:  gently rolling hills depicted at the top and bottom, with dappled tree light represented in the center section.

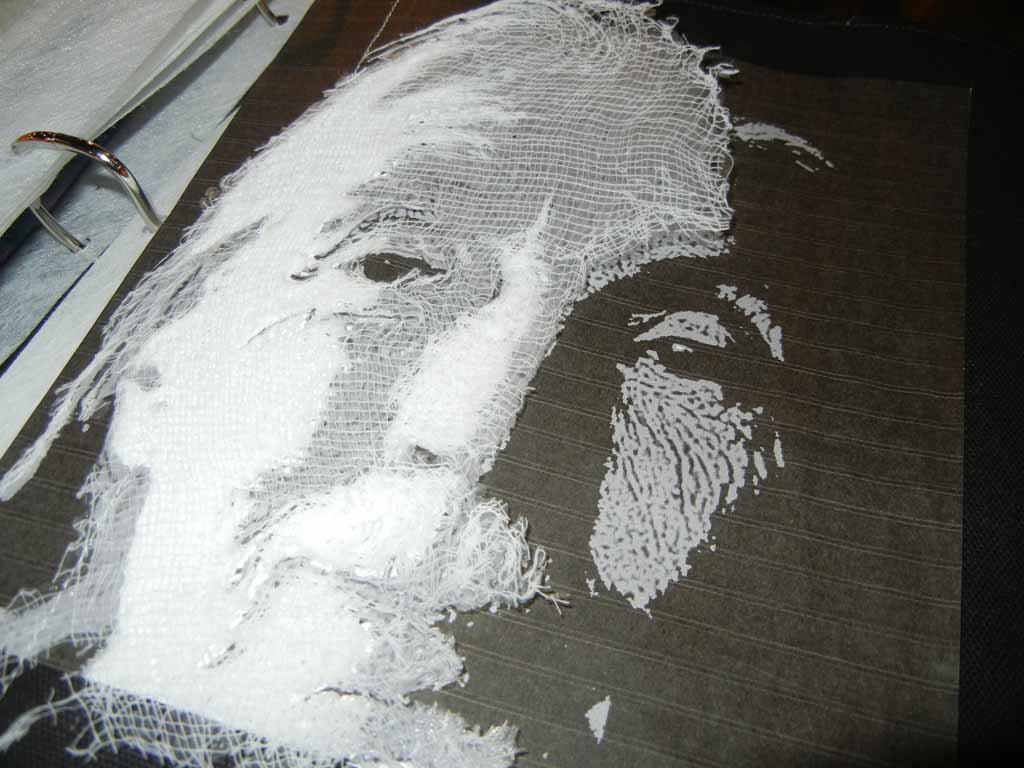
The first step Valerie describes is sewing (flip stitching) the background.  I took some liberties with that and collaged instead, in my usual fashion.  The photo below shows the center section complete.  (A great use of scraps!)

Click any image for a larger view

haiku-Trees-collaged

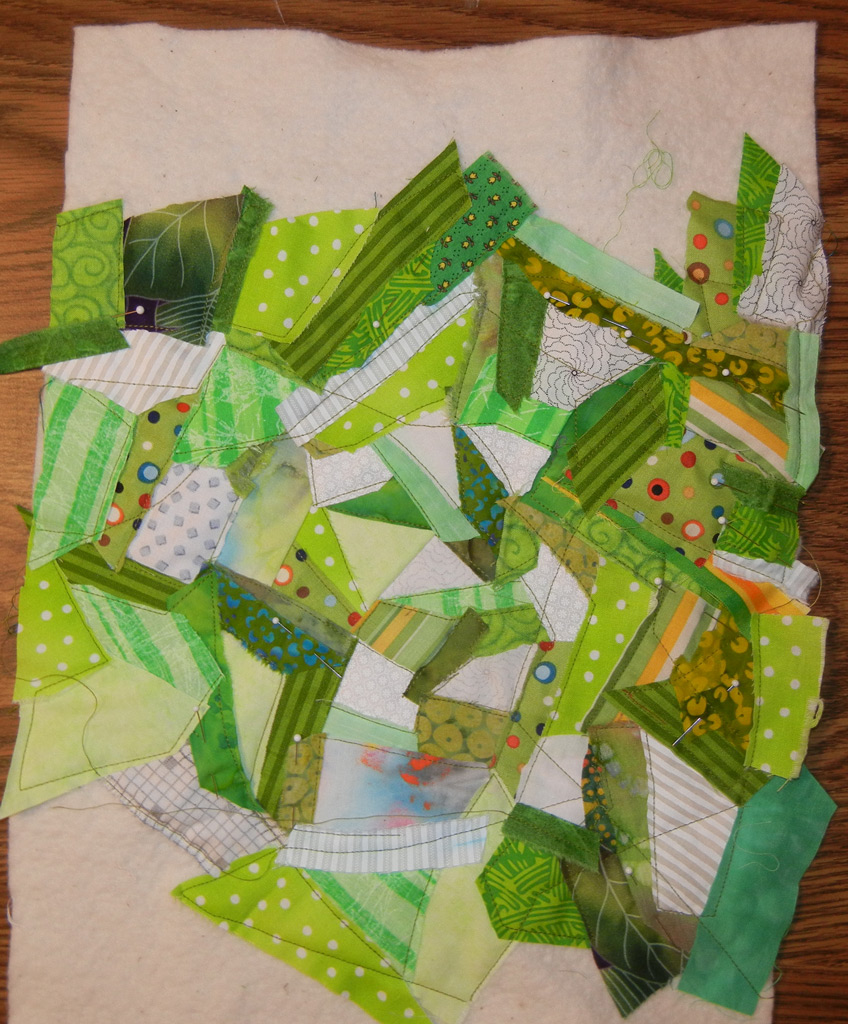
I knew the contrast was too strong in this first portion, but I wasn’t worried, since painting was coming soon.

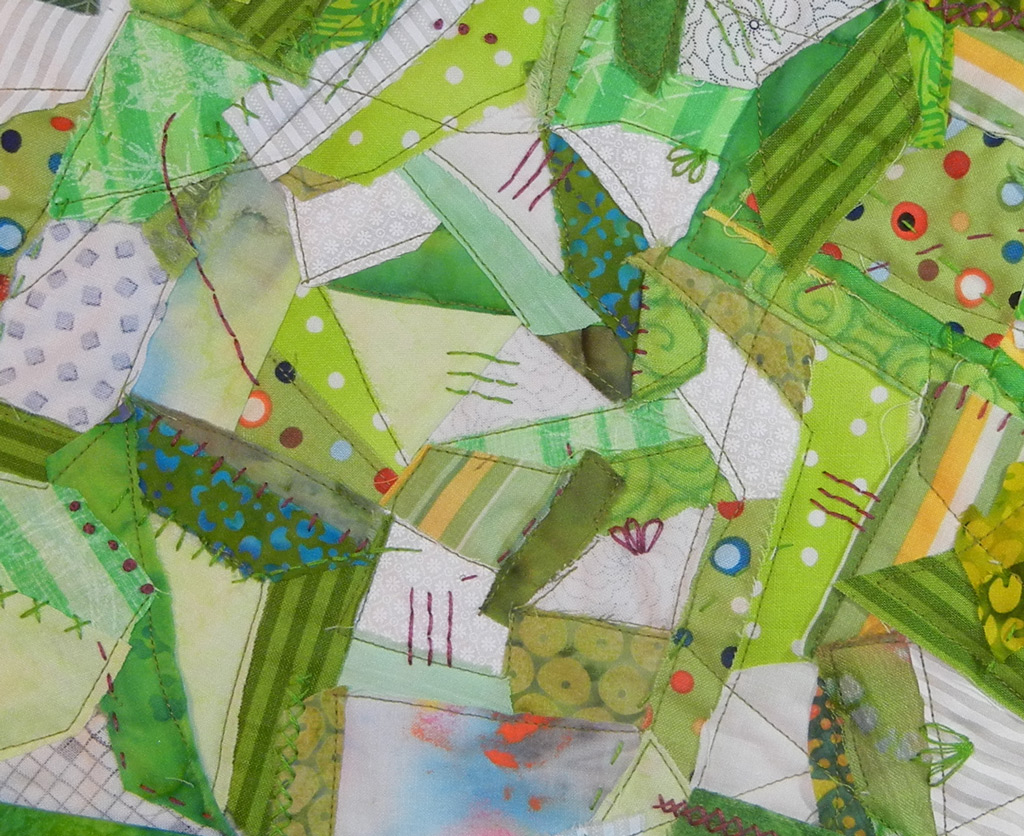
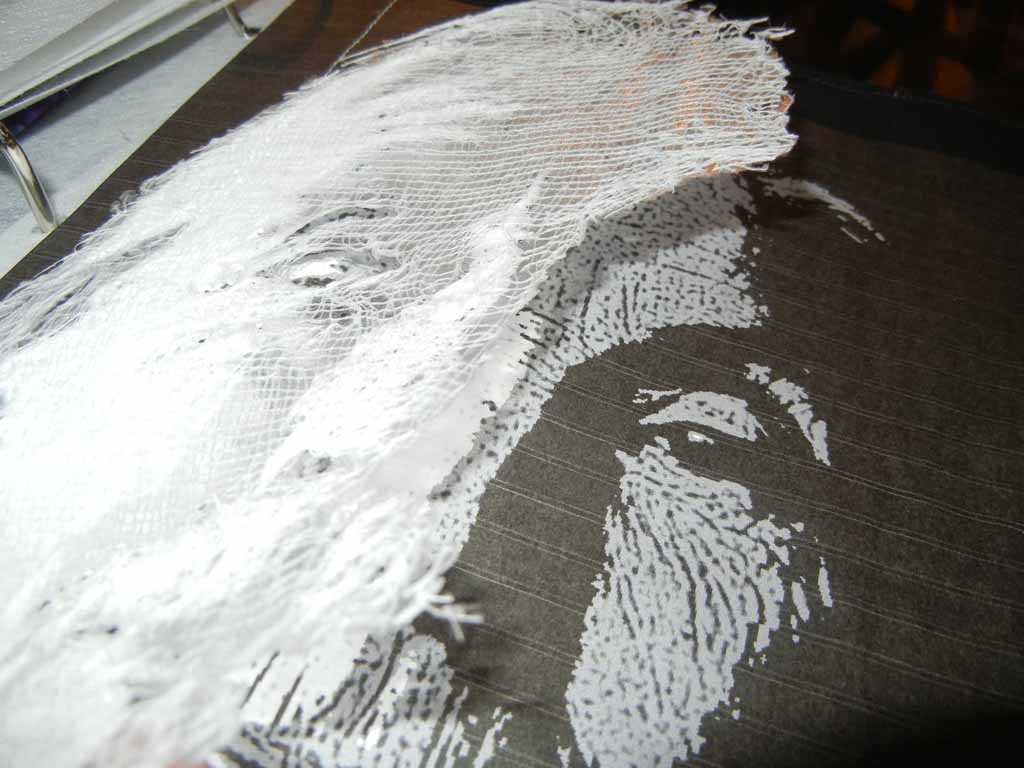
At this point, I deviated from the suggested sequence, just because I was anxious to add hand stitching to the first section.  (Valerie’s suggested second step.)

haiku-trees-hand-stitched-d

Next, I auditioned fabrics for the hills.  I decided to make the bottom hills darker to make the piece bottom heavy.

haiku-trees-collage-adn-han

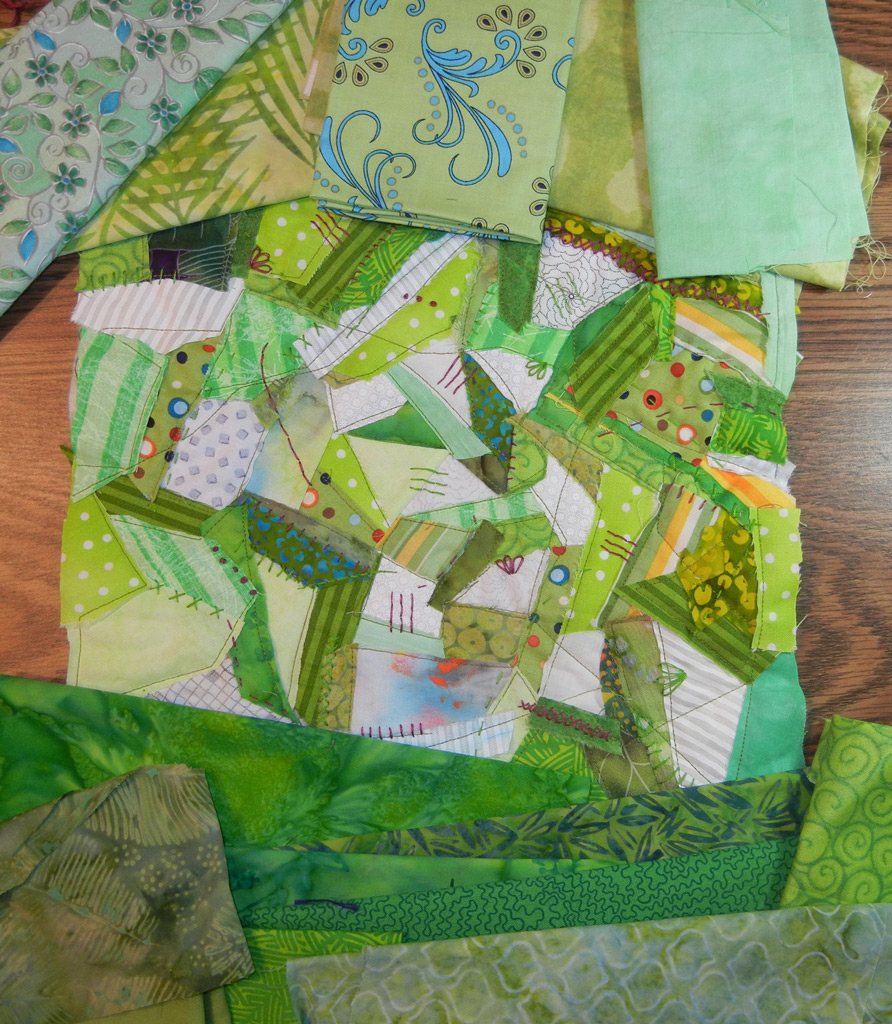
Once again, I used a collage techniqe to add the hills.   

haiku--hand-stitching-compl

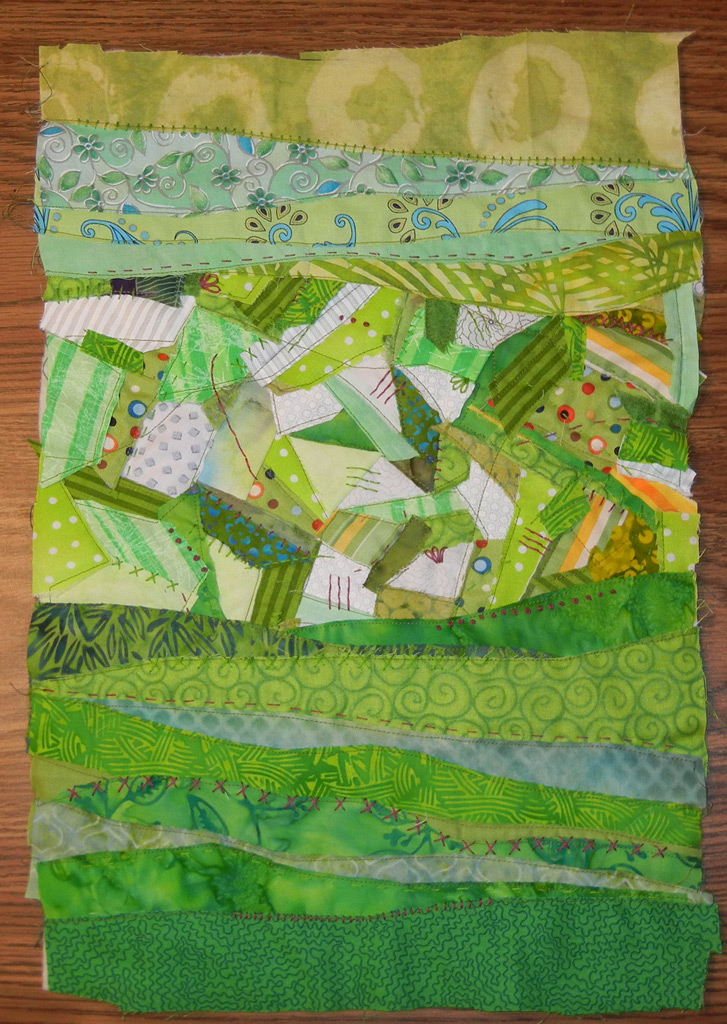
And added hand stitching to them, as well.

haiku-bottom-hand-stitching

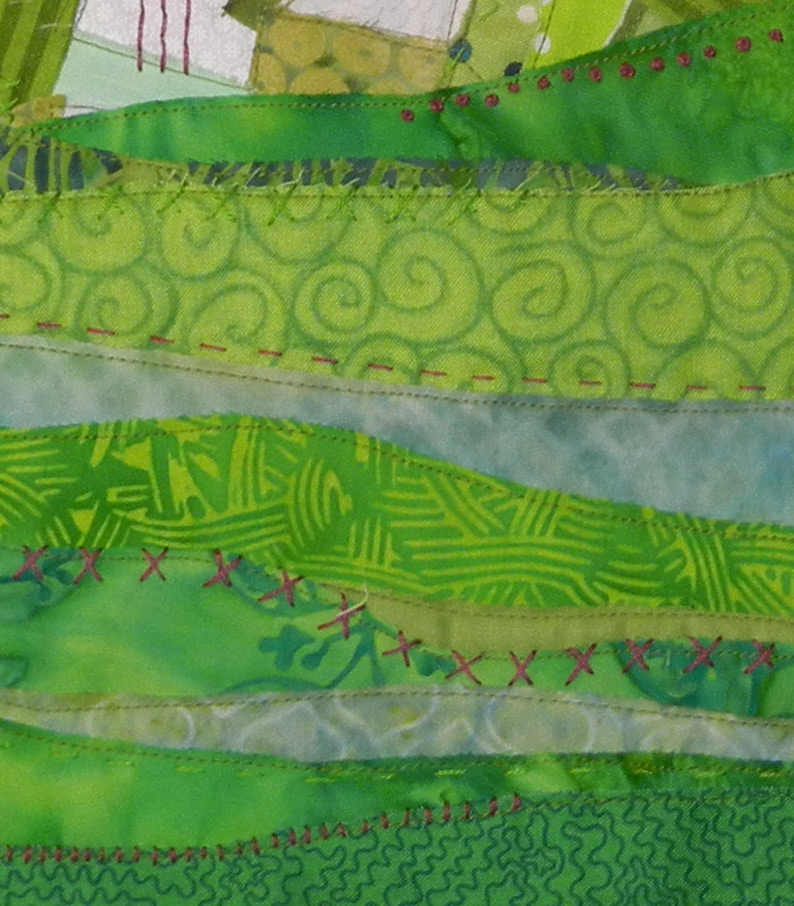
Did you notice that the hills covered some of my hand stitching?  Normally, that would be sorta painful for me, but when I’m experimenting like this I’m much better at going with the flow.  After learning the concept, I can always do better planning in the future.  No worries.

Next, I’ll paint over some of this!

Ellen Lindner

Keep up with my quilting adventures via my
monthly email newsletter.


“Art Quilt Maps”

I’m a sucker for art quilt books!  I love them, and they’ve taught me a lot.  My most recent purchase is “Art Quilt Maps” by Valerie Goodwin.

art-quilt-maps


I started reading it late on my last evening in Houston and then continued on the flight home the next day.  I was so anxious to get started that I began sketching right in the book!


qf-airplane-haiku
In one of the chapters Valerie discusses making haiku quilts.  About all I remembered about haiku was that it was a strange type of poetry.  So, I mentally rolled my eyes at the idea of making a quilt from such an unusual starting point.  But, by the time I got to the end of the book, I was excited to give it a try.

First, the haiku.  Do you remember?  The first line has 5 syllables, the second line has 7, and the 3rd line has 5.  (So, I  remembered CORRECTLY that it’s a strange type of poetry.)  Per Valerie’s suggestion, I decided to write a haiku about a place:  a winding country road with rolling hills on either side and trees crowding the road.

Rolling hills of green
Trees right up next to the road
Quiet dappled light

I’ve since started work on the corresponding quilt and I look forward to showing you the results.

Ellen Lindner
P.S.  My son recently told me a great haiku:

Haikus are  easy
But they don’t always make sense
Refrigerator

Exactly.

Interactions and Inspirations

If you’ve been reading my blog, you know that I had a fantastic time when I went to the International Quilt Festival in Houston.  Part of what made it so fun was meeting new people and drawing inspiration from new ideas.

One such idea came from  Cheryl Sleboda, who was teaching a brief Demo called “Cartooning for Quilters.”  Here’s Cheryl wearing an oh-so-cute-but-edgy t-shirt.

qf-cherly-sleboda

And here’s her cartoon version of Lady Mary, from “Downton Abbey.”

qf-lady-mary

Having recently struggled with facial features, I was really struck by the way she freely altered them to her liking.  Just what I needed to be able to do!  So, after the other attendees departed, I hung back and asked her about this skill.  Right way, she whipped out a page of eyes.

qf-cartoon-eyes

Bam!  Just what I needed to see!  And then we discussed hair.

qf-cartoon-hair

In answer to another one of my questions, she grabbed her drawing pad and said “Well, if I were drawing you, for instance…”

qf-cartoon-n-me

And so she did.  How cool is that?

I was really jazzed by this fun interaction and the useful information it provided.  I’ll definitely refer to these photos when I get back to the childhood memory quilts.

All of this was still rattling around in my brain as I flew home the next day.  I was excited to try my hand at cartooning while it was still fresh in my mind.  So, I put the back of my itinerary paperwork to good use.

qf=-irplane-cartoons

The gal on the bottom right is supposed to be Cheryl.  Not bad, right?

Ellen Lindner
P.S.  Thanks to Cheryl for sharing her photos with me.

Houston Vendors: Oh My!

Wow, the vendors at Houston were phenomenal.! I wasn’t too excited about them initally, since I went primarily to see the quilts. 

SILLY GIRL!  What was I thinking?  Once I ventured into the over stimulation of major eye candy and  lots of people, I discovered all sorts of wonderful things.  Several of which I’d never seen before.  (You HAVE to buy those, right?)

Such was the case with dyed-to-match burlap and cheesecloth.  Dyed burlap?  Who’d a thunk it?  I had to have some!

burlap

I found it at Fiber on a Whim’s booth.  They had wonderful dyed fabric swatches, various silk products, and dyed perle cotton, along with some beautiful samples and interesting books.

High on the wall was this beautiful sample by Jan Girod. 

Click any image for a larger view

F-on-Whim---Jan-Girod---pie

I’m not generally excited by the world of felt, but handbegfelts and Just Another Button Company shared a vibrant booth that stopped me in my tracks.  Their display was phenomenal.  It showed an abundance of ways to use felt balls, precut felt circles, and other items.  Like these adorable and easy-to-make pincushions.

pincushions

Quilt samples showcased more uses.

felt-flower-quilts

And these creative critters were just too cute!

felt-ornaments

Finally, I was very intrigued by some make-it-yourself fabric jewelry called Ficklesticks.  (See images here.)  I bought a starter kit which included covered wires and the metal tubes you need for turning skinny fabric tubes.  After covering the wires with fabric, they can be manipulated into any number of fabric knots and used to make all sorts of jewerly, etc. 

What an adrenalin surge I got from all this shopping!

Ellen Lindner

Hanging Quilts with No Nails

For my “Around the Neighborhood” reception, I needed to hang an abundance of quilts without making holes in my walls.  My first task was to find  hanging slats for each piece.

cg-slats

Since I have a bunch of these already cut, I was able to mix and match and I only had to cut a few more.  It did take a little hunting and figuring, however.  Since I took down some of the quilts and art usually on display, I was sometimes able to use those existing nails.  That usually meant drilling some new holes in the appropriate slat, but that was easily accomplished.

The big experiment was trying out Command strips for hanging the quilts.  Shirley Wooten wrote an article about this very thing, but I was still hesitant about how well the sticky strips would grip the quilts.  Not wanting to risk falling quilts, I decided to staple the strips through the hanging sleeves and into the wooden slats of each quilt.  It only took a couple whacks with my hand to decide that a light tap with a hammer was just as effective. 

Click image for a larger viewcg-attaching-command-strips

Once the Command Strips were attached to the quilts, I followed the instructions and it was very easy to hang them.  I haven’t tried taking them down yet, so I’ll give you some feedback on that when the time comes.  I can definitely see myself using this technique again!

Do you have any tricks for hanging quilts without nails?

Ellen Lindner
P.S.  I used Command product #17204, referred to as “Medium Picture Hanging Strips.”

“Around the Neighborhood” Studio Conversion

For my art reception, I needed to use my studio as display space.  Plus, I wanted to show my visitors a little about my process.

Wow, what a job!  Here’s the view of my studio after moving most of the stuff under the two tables.  You know:  light box, framed art, shipping boxes, portable ironing surface, video lights, tripod, and I forget what else.

As you can see, there’s still quite a bit of work to be done.
Click any image for a larger view

cg-studio-back-before

cg-studio-left-before

After also removing an ironing board, large table, and three rolling drawers sets, there was a LOT more room!  I added a few quilts to the design walls, an in-progress piece,some inspiration fabrics, and the room was finally ready.

CG--studio-back-wall

CG-small_design_wall

Where did all that stuff go?  Into my son’s bedroom, of course!   He’s away at college, so I took over.  Perhaps you can tell that the piles go beyond his bed, all the way to the window.  The dinning room chairs ended up in here, too.

cg-andrews-room

Of course, I left the ironing board accessible.  A quilter’s gotta have that, right?

I was surprised by how much time and effort all of this took.  But, I didn’t mind, because I was so thrilled by the reception idea.  A great “little” project for me!

You know, my son’s coming home for Thanksgiving.  I think I’d better get busy.

Ellen Lindner

“Around the Neighborhood” Home Gallery

I staged my “Around the Neighborhood” exhibit in my own home.  That meant removing some quilts that didn’t fit the theme, and adding others in their places.  It took some mental gymnastics to figure out what would fit (and look good) where, what hanging slat to use with what, what needed to have new holes drilled, and if Command strips would support the remaining quilts.  (They did.)

Here’s Crotons in the dining room.  Click any image for a larger view 

CG-crotons

There were about 20 pieces which fit the theme, and a few more miscellaneous ones. 

Maybe a Maple stayed in its usual spot in the foyer.  As with every quilt, I included a large sign showing the inspiration photo or idea, along with a sentence or two about the piece.  My visitors were very interested in this. 

CG---Maple

The living room played host to several quilts, (two of which live there anyway.)  Here, two quilts about ti plants are shown side by side:  High Ti on the left, and Ti Plants A-Glow-Glow on the right.

cG-2ti-plants

Crisscross was also displayed in the living room, near Flash of Green, in its usual location.

CG-crisscross

I also hung quilts in the guest bedroom/office.  Croton Leaves, The Last Few Dates, and Thorns and Berries (L-R) all found homes over the daybed.

CG-over-daybed

On the opposite wall, I was very happy to find a spot for Blue Roofs.  This quilt is difficult to ship, so I haven’t been able to show it very much.  It was inspired by the blue-tarped roofs prevalant in our area after two hurricanes in 2004.  This piece is actually made up of 23 little roof quilts, each mounted onto window screening.  Plexilgas slats at top and bottom are almost invisible.

CG-blue-roofs

Even the bathroom was put into service as display space!  Here, Lakeside Citrus has a prominent spot.

CG-lakeside-citrus

I also had quilts on display in the studio.  I’ll show you those in the next post.

I was really happy with the way these quilts looked “on exhibit” in my home.

Ellen Lindner
P.S.  If you’d like to see some of my landscape quilts and the photos that inspired them,
– check out this web article
– search this blog (using the box top right) for “photo inspiration”

“Around the Neighborhood” Art Reception

I had so much fun yesterday!  I hosted an art reception in my home and invited all my neighbors.  Quite a few enthusiastic people came and I had a great time talking about my art!  Even with these out-of-focus photos, I think you can tell the place was hopping.

CG-lots-of-people

I called the reception/exhibit “Around the Neighborhood” since I’ve made many pieces inspired by local foliage.  Including some that I photographed in my neighbors’ yards.

Even though fewer folks attended than I had hoped, the ones who came were VERY interested in the art.  They asked lots of questions and stayed for quite a while.  Add to that the camaraderie of neighbors who already knew one another, and the atmosphere was extremely social.

CG_carmen-looking-at-croton

Several of my yoga buddies came and they were very enthusastic.

CG-yoga-gang

I served light refreshments, but everyone seemed more interested in the art.

CG-2-men

They were enthralled with the in-process photos and samples I showed.  They even got excited about a bunch of fabric swatches!  I had pinned them up, showing that I was thinking about what I might do with them.  That generated lots of conversation.  Who knew?

CG-ellen-w-swatches

In addition to all this socializing, I received many compliments on my work.  What could be more fun than showing my art to new people and to have them be so enthusiastic about it?

Ellen Lindner
P.S.  I’ll keep the display up through November 24th, 2013.  If you live in the area, give me a call and you can come see it too.

Yes, More Quilt Photos

Can you belive I STILL have more quilt photos to show you, from Houston?  Well, I do!

There were several striking exhibits that did not allow photography.  That included two exhibits put on by SAQA:  “Text Messages”and “People and Portraits.”   The latter included a touch book.  It’s a book with pages from each of the artists with a small sample showing part of their process.  As the name implies, you get to touch them as you flip the through.  Fascinating!  AND, I was allowed to photograph to my heart’s content.

This is the page that really excited me.  It shows how artist Mary Pal creates her extraordinary portraits using cheesecloth.

Click any image for a larger view

M.Pal sample flatblog

The image above shows two layers:  the printed image on which the design is based, lying under a partially completed design.  Can you see the cheesecloth on the left, but not the right?

Now, check out this next image in which I slightly lifted the completed portion.  Due to the glue used, it was very stiff.  Can you see how the cheesecloth mimics the printed design below?  I thought this was completely fascinating and I even showed it to complete strangers!

M.Pal sample liftedblog

No rundown of Houston quilts would be complete without mentioning the wonderful exhibit of quilts made by Caryl Bryer Fallert-Gentry.  She had an exhibit called “30 quilts for 30 years.”  She’s been making art quilts for 30 years and decided to celebrate by making 30 new quilts (in a two year period.)  They were beautifully lit, so you could see every little stitch and the wonderful texture she creates with her quilting.  Each was more awesome than the one next to it!  (You know what I mean.)

CBF favoriteblog

Her quilt “Cosmic Feathers 1,” above, was my favorite.  (Although it was VERY hard to choose!)  The quilting adds a lot of interest.

CBF favorite detailblog

What’s with me noticing all this detailed quilting?  That’s not normally my thing.  Maybe it’s time for me to experiment with it some more.

Did you go to Houston?  What was your favorite quilt?  I think that’s probably an impossible question to answer, so let’s go with:  what quilt is still rattling around in your brain?

Ellen Lindner

Still More Quilts from Festival

Here are some more of the quilts that caught my eye in Houston.

You’ll definitely want to click on each image for a larger view! 

This is “You Are What You Eat,” by Kathy York.  Her deer is filled entirely with flowers, since that’s what it’s been eating!  This charming quilt won an Honorable Mention in the Art Whimsical category.

K. YOrk quiltblog

The photo below is a detail shot of Theresa Fetch’s “Renaisaance.”   Her statement explains that she first quilted and bound the quilt.  THEN, she dyed it and applied Paintstiks over the entire top.  Creative, brave, and fantastic!

T. Fetch quilt detailblog

Elaine Quehl won a blue ribbon in the Art Quilt Landscapes category for her quilt “Curtain Call 2.”  As you can see, the leaves practically glow.  And, I think the dark berry background color is the perfect foil for the strong yellow-greens.

Elaine Quehl quiltblog

Here’s more detailed quilting, below.  It’s featured on Helen Godden’s piece “Zen Mapgies.”  There are more than 100 different designs.  With black thread on a white background!  Now that takes confidence, and Hellen’s is well deserved.

H.Godden quilt detailblog

Her magpie was painted with acrylic fabric paint.

 Jan Reed’s “Ancient Echoes” used over 250 pieces of fabric!  She’s created a wonderful 3D image.  I’m not normally too excited about iguanas, but I thought hers was particularly well done.

J. Reed quiltblog

The judges clearly liked it too.  Her second place win was in the Art Quilts Pictorial category (I think.)

And, of course, my “Crotons” quilt was there too!  Always exciting for me.

my quiltblog

Whew, I’ve just gotten an adrenalin surge AGAIN, as I look at these photos!  It was truly exhilirating to see so much creativity!

Ellen Lindner