Size Matters (with prints, that is)

I recently started work on a fairly large quilt with colorful Croton leaves.

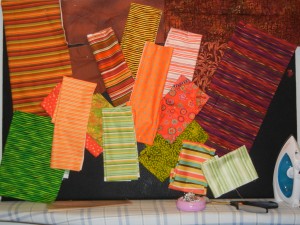
I auditioned fabrics that would help me achieve the striped effect of the heavily veined leaves.

Click any image for a larger view

Perfect, aren’t they?

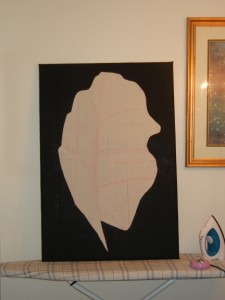
Then, I drew one very large leaf onto muslin and cut it out as a base for the first leaf.

Great shape, right?

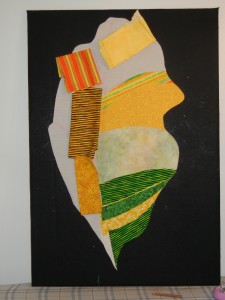
Then, I combined the two.

Ugh.  That’s when the wheels came off the bus.  Thankfully, I could tell right away that I had a problem, but it took me a little while to figure out why this was so bad.  Can you tell?

The problem was the scale of the striped fabrics.  They were just too small to work on this large scale. Although the stripes might work very well for a smaller leaf, they were actually an obstacle in this case.

Why didn’t I notice this issue when I auditioned the fabrics?  Because my audition didn’t show them in the proper scale.  A valuable lesson.

On to the next group of fabrics.  (Hand dyes:  MUCH better!)

Ellen Lindner

The Power of Stitching

I belong to a wonderful fiber art group, and we had our monthly meeting yesterday.  More like a “gathering,” really, with lots of show and tell, great ideas, some quilt critique, and lots of chatter.  Great for inspiration and creativity!

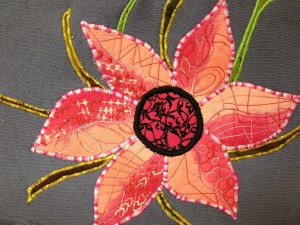
Bev O’Connell showed us some stitched flowers which were inspired by “Zentangle” drawings.  (More on Zentangle soon.)

These flowers are so vibrant and energetic! 

Click any image to see a larger version

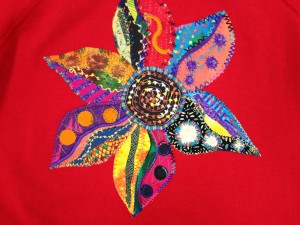
Bev also showed us a sweatshirt with two more flowers on it.  I was struck by what a difference the decorative machine stitching made.  See what I mean:

The stitching really adds a lot of definition and interest, don’t you think?    Bev does great work.  (And she’s VERY prolific!)

Ellen Lindner

New Books for a New Year

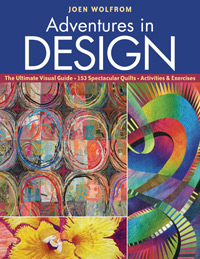
I’m a sucker for books about art, design, color, and art quilting.  For Christmas, I received two that I think will be fantastic.  Adventures in Designis by Joen Wolfrom, and it’s written for quilters.  She wrote an earlier book, Visual Dance, which really taught me a lot.  I think this one will be similar, which will be a good thing.

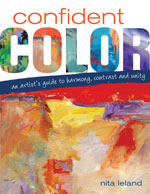
Confident Color is written for all artists, by Nita Leland.  Although it includes exercises about mixing paint, the lessons are appropriate for fiber artists as well as artists working with any medium.  Once again, Nita’s earlier book, Exploring Color,  was my primary teacher on the subject.

 I’m looking forwarding to revisiting these topics with these authors.  It should be great for getting my 2012 creative juices flowing.

Ellen Lindner
P.S.  I’ve been doing a lot of left brain tasks lately and have found that my creative side has suffered somewhat.  I’m glad for books and thoughtful exercises to get me back on track.  (Or is it “off” track?  Maybe that’s more like it.)

Flower Arranging Basics

Would you like to learn the basics of making a fresh flower arrangement?   It’s very easy, and you only need a few tips and supplies to get started.

First, you’ll need a container.  Something the size of a cereal bowl is about right.

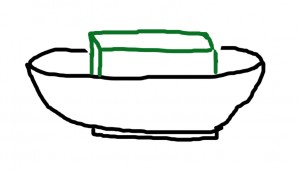
Next, you’ll need the key construction element:  Oasis floral foam  This green foam is sold in blocks at any craft store.  DO notice the type of foam you’re purchasing.  Oasis is designed to absorb water and you can press your thumbprint into it.  (Thre’s also a green foam used for arranging artificial flowers.  It looks more like Styrofoam and has no give.)

Cut the Oasis to fit your container.  Very important:  it should stick up above the top of the container about 1″ or so.  Completely submerge the foam in water, until it’s saturated.  (15 minutes or so.) 

Secure the foam in the container.  You may want to add some rocks around the edges to add support and weight.  Or purchase some floral tape and stretch it across in both directions.

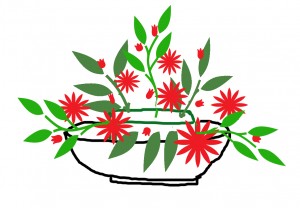
Select flowers and greenery with stems that are somewhat sturdy, and with lengths that are suitable for your anticipated size.  My Christmas arrangement  is a simple triangle shape and that’s what I’ll show you how to do.  (Mine is mostly greenery, with a few berry clusters, but I’m giving instructions for a more traditional flower-filled arrangement.)

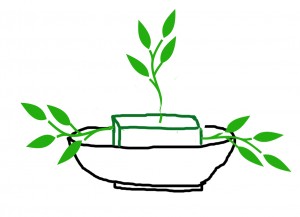
First, establish the height and width of the arrangement with greenery.  This is where the Oasis really comes in handy.  It allows you to insert stems horizontally.  Easy!

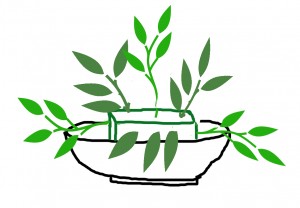
Next, add foliage at approximately 10:00 and 2:00 positions.  Let them lean forward and/or back, rather than being perfectly aligned. Add a few short pieces at bottom center, partially covering the foam.  (Yours will be fuller.  I’ve kept my sketch simple.)

Continue in this manner, adding greenery.  Add the first few flowers, in the approximate positions as the first three pieces of greenery. 

Continue filling in with flowers and additional greenery.  It often works well to place larger flowers near the bottom and smaller ones near the top.  If you have small filler flowers, such as Baby’s Breath, save them for last.  

Avoid having things too “perfect.”  Let it look natural, with some pieces closer to horizontal, others more vertical, some leaning forward, some back, etc

Water daily and enjoy!

Ellen Lindner

Could This Be My Best Christmas Gift Ever?

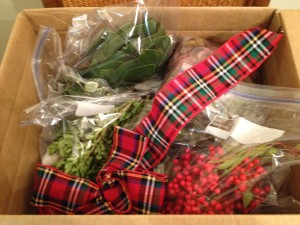
My mom rocks!  She sent me a box of greenery cuttings from the family farm, in Virginia.  Not only that, she included a container, floral foam, and all the supplies I needed to create an arrangement.  A big bow, too.  How cool is that?

Click any image for a larger view

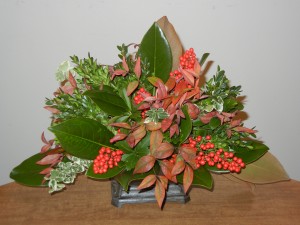
I gleefully unpacked Magnolia leaves, Boxwood, Nandina berries, and began to plan.  Working with these plants gave me a sense of nostalgia.  An unexpected bonus that made the gift even more special. 

Here’s my result:

Wasn’t that sweet of my mom to think of such a creative gift and to put in the time needed to cut and pack everything?  I got to enjoy her thoughtfulness, a little nostalgia kick, the fun of creating the arrangement, and the enjoyment of having it in my home.  For those reasons, I think this will rank as one of my all-time favorite gifts.

THANKS Mom!
Ellen Lindner

Unconventional Materials Anyone?

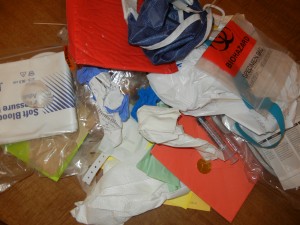
A couple of months ago, I came across a quilting challenge involving the use of unconventional materials.  That piqued my interest, and I began to consider what materials I might like to use.  Since I was spending lots of time in a hospital clinic, I gleefully decided to collect everyday objects for a week.  I really had fun hunting for these “treasures,” especially when I got the nurses to help me out.  They were very creative in what they offered me.

I ended up with a sling, a blood pressure cuff, a patient wrist band, a bio hazard bag, and much more.  Weird, huh?  What could I possibly do with such strange objects?

Ultimately, I decided that the thrill of the hunt was more intriguing than the actual construction of a new art piece.  Still, I think it’s an idea I might revisit one day.

And, of course, I have used some unusual items in my artwork over the years:  window screening, tea bags, clear vinyl, and a variety of papers.  What’s the oddest thing you’ve ever used?

Ellen Lindner


A Smocker I am Not

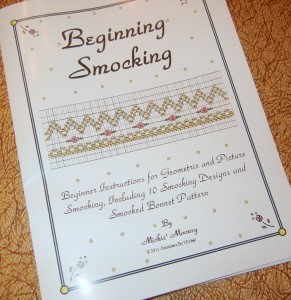
After seeing beautiful hand smocking recently, I decided to give it a try.  I bought the needed supplies, a book for beginners, and set to work.


That’s when I was reminded of a few things about myself:  1) I’m impatient, and 2) I like to do my own thing.  Following a smocking pattern conflicted with both of those.

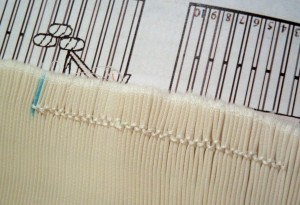
This is as far as I got before I got bored.  About 3 inches:


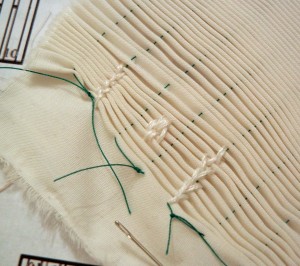
That was just way too planned and perfect for my liking.  I wondered if it was possible to purposely create waves and undulations in the pleats, rather than having them be perfectly parallel.  So, I did some free form stitching as I experimented with this  idea.  I liked this much better, but again, I found the process too slow.  So, I only did a little:

For now, my little pleating sample is packed away.  But, one day, it will probably be just what I need for a project.

What techniques have you tried but abandoned?

Ellen Lindner

Knitting Project: What is It?

It was great fun to knit together all my fabric strips. 

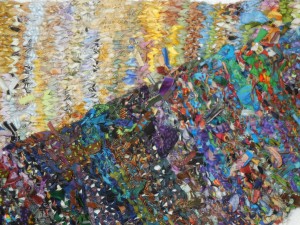
The resulting item is colorful and full of texture. 
Click any image to view larger

But at approximately 6″ x 60″ what is it?  (Before blocking, below.)

My original thought was that I was making a scarf.

And, I think it looks really good – and quirky.  But wait, what are those hairy threads doing all over my black coat?  That’ll never work.

Maybe I could turn it into some sort of 3D artwork.

Hmm.  Looks rather challenging. 

So, maybe I should just treat it like a long skinny swath of fabric.  If I stabilized it with stitching and/or interfacing, I could cut it into pieces, right?  I think the texture would be great as an inset in the front of a decorative pillow.  Something like this.

What do you think?  Any other ideas?

Ellen Lindner

Considering UFOs (Unfinished Objects)

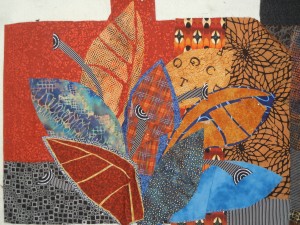
In my recent search for portable hand projects, I’ve been taking a new look at some of my unfinished items.  This one of Croton leaves was started in a class with Pamela Allen.  It has quite a bit of merit, don’t you think?

Click any image for a larger view

Things I like:
– the palette,
– the veins cut into some of the leaves (Pamela’s idea,)
– the overall composition.

Things I’m not so sure about: 
– the high contrast background print near top center,
– the bright blue leaf lower right,
– the weird spirally protrusions.
I think the focal point needs to be the tallest leaf, but since it’s one of the most muted, it actually gets less attention than the others.

Should I rework this piece?  Hmm.  Since most of this is lightly glued, I’m inclined to say “no.”  And since I want to work with some brighter colors right now, I think I’ll save it for later.

I’ve actually been thinking about making a Croton quilt for a while and have been collecting fabrics with that in mind.  Like these:

 They should work, don’t you think?  Especially the striped ones.  So, instead of reworking the old UFO, I think I’ll let it serve as a springboard for something new.

Have you had success reworking any UFOs?

Ellen Lindner

Late Night Improvisation: Knitting Edition

Do you ever get creative ideas late at night?  But then, you don’t have the fabric or supplies you need for your plan?  This happens to me all the time, and is frequently the catalyst for serious improvisation.

Take, for instance, my 11 P.M. decision to re-learn how to knit.  I had been thinking that it would be fun to try it again.  And since my sewing machine was unavailable, it seemed like a good opportunity to do so, (after a 30 year break!)

I went hunting for supplies and was surprised to find that I still owned 1 pair of knitting needles.  All I needed.  But, I didn’t have any yarn!  Hmm.  What could I use instead?  Twine or something?  Then, I spotted this bag on my sewing table. 
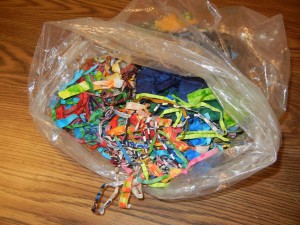
These scraps are from my local quilt store.  When they cut fat quarters, they trim a small amount from the creased edge and save the pieces in a bag.  When the bag is full, they sell it.  I love these little guys.  I’ve used them for gift wrapping, as stems for flowers (in a quilt,) and lots of other stuff that I don’t even remember.  I wondered if I could tie them together to make a long piece, just for learning.  (I mean, you wouldn’t want knots in an actual project, right?)
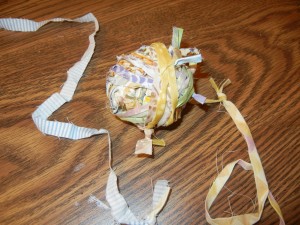
 

Not being a fan of stripes, I hunted for scraps that were all light.  (How weird.  I was willing to put up with knots, but not stripes!)

Next, I went online, found video tutorials, and relearned how to knit – knots and all.  (Notice how I lumped all of that into one sentence, as though it happened quickly?  Not true.  I spent a litle while dropping “yarn,” dropping stitches, and untangling my little mess.)  But, eventually, I made progress, and was having lots of fun with my little sampler, knots and all.
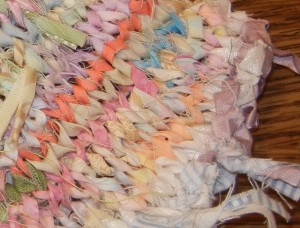
 Now that I’ve mastered the basics, I guess it’s time to buy some yarn.

What kind of improvisation have you had to do late at night?  (Or any other time, for that matter?)

Ellen Lindner
P.S.  See the quilt with the scrap stems.  (An interesting design note:  this quilt started with just the circles.  The addition  of stems turned them into plants.  And the angled, curvy nature of the stems added lots of interest and motion.)