Design Your Own Nature Quilt: August 1st in Melbourne, FL

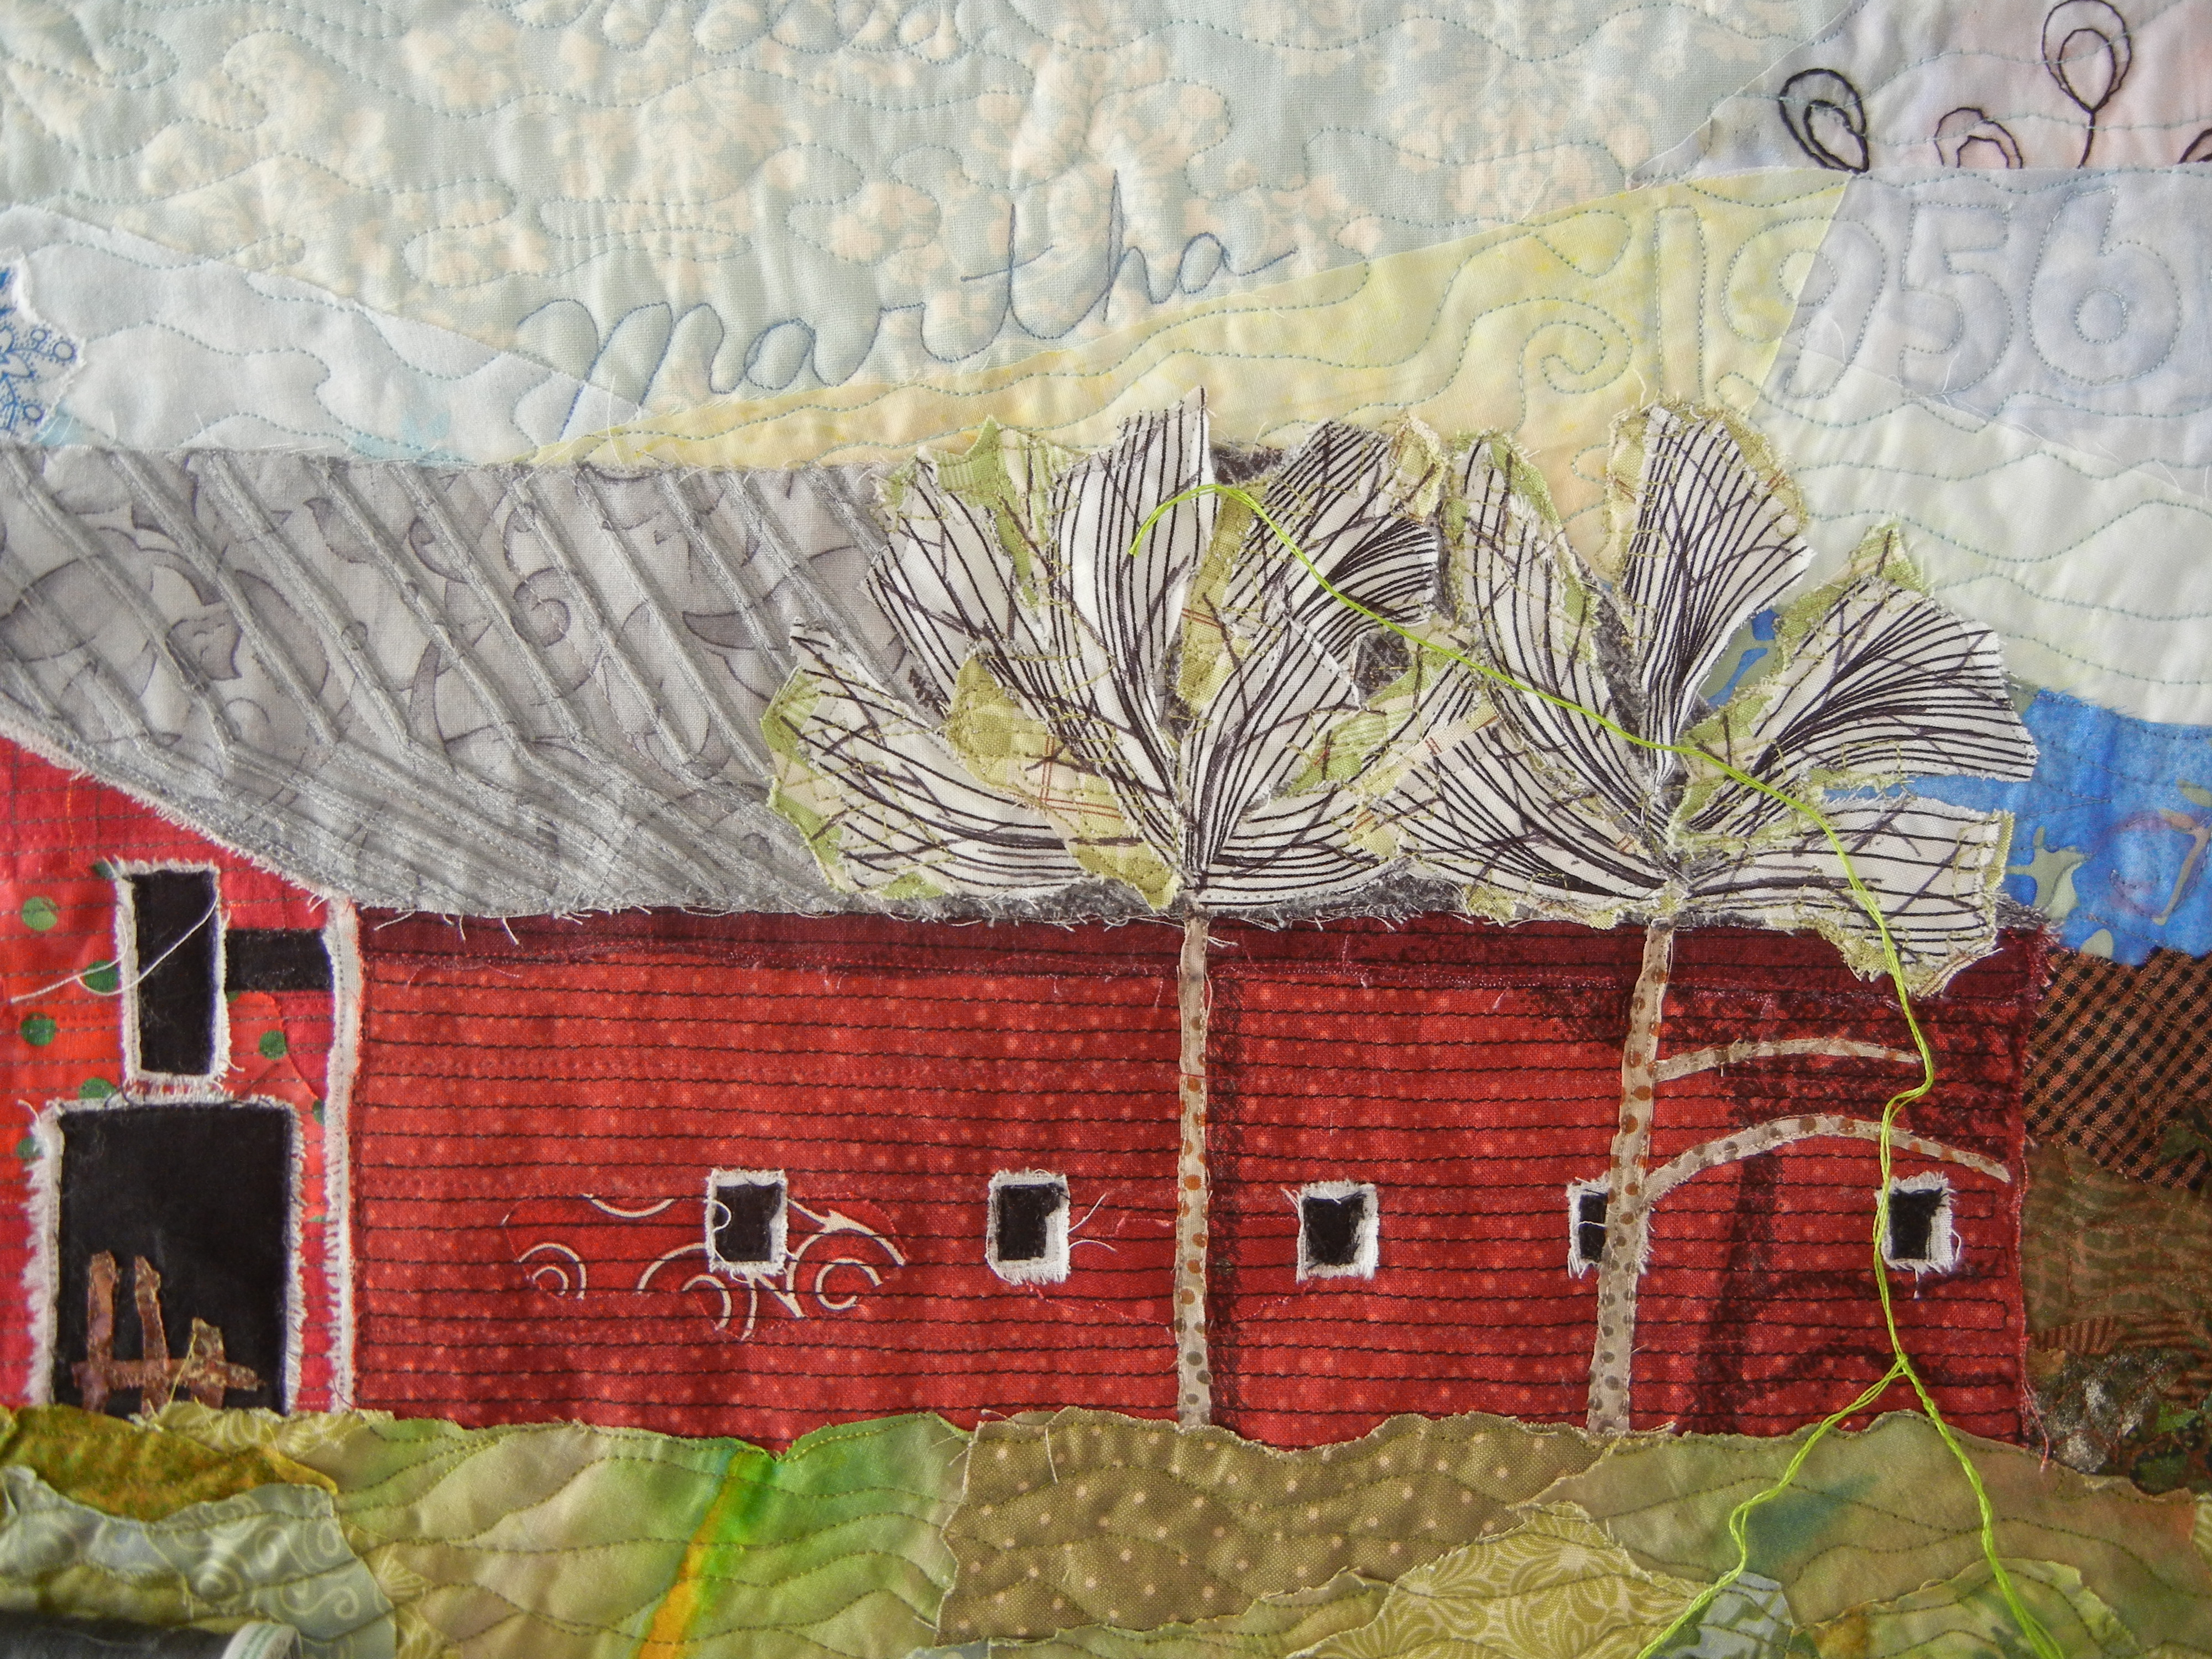
This is my favorite class to teach, because the students learn SO MUCH!  The morning is devoted to learning about design.  Working on individual and group exercises, you’ll learn about focal point, composition, and loosely interpreting a photo.  We’ll start with my own photos so there’ll be no pressure to get it perfect.

By late morning, you’ll have the skills and confidence you need to start working with your own photo.  After deciding on a plan you’ll be ready to start the afternoon by pulling out your fabric and beginning your composition.  This is exhilarating!  You will learn a raw edge collage technique which will ensure maximum flexibility and speedy results.

(Yes, it can be a little intimidating, but you’ll get the hang of it.  Just in case, be sure to pack your artistic courage.) 

Here’s an example of how a photo can be IMPROVED with the use of design principles.  The starting photo:

Click any image for a larger view

The resulting quilt, Ti Plants A-Glow-Glow.

Can you identify some of the improvements?  Here are a few:
– The image was cropped.
– The background was made darker and duller, to let the plants be the stars.
– The plants were simplified.  (Just count the leaves to confirm this!)
– Fabrics were used to add interest.
ALL of these are things you’ll learn in this class.  I get excited just thinking about the possibilities!

You’ll find full class details here.  But first, you may want to check some of the additional resources below.

– Wonderful examples of Student’s Results.  (DO look at these.  You’ll be amazed!)
– See some of Ellen’s nature quilts, along with the photos that inspired them
Supply List (One day class)

Time is running out, so sign up now!

Hoping to see you in class,
Ellen Lindner
P.S.  Use the Contact link at top to email me if you have questions.

Doll Artists = Fiber Artists

Several of my local fiber art buddies enjoy making art dolls.  And what extraordinary dolls they are!  As a matter of fact, I think the word doesn’t begin to do them justice.  Maybe we should call them “fiber beings” or something like that.  Just see what I mean.

This is Gabriel, made by Barbara Bilbo.

Click any image for a larger view
 
Isn’t he wonderful?

Barbara says, “I made this doll thanks to a class with Susie McMahon.  The head  is molded with paper clay, dried, painted a dark green, and then brushed over with a light paint.”

Ruth Anne Parker also makes fascinating dolls.  This is her Sea Goddess.


Ruth Anne says: “I have moved from quilter, art quilter and into mixed media and lately sculpted dolls.  My second attempt has a paper-clay head and cloth body which are covered with several coats of gesso, goop (a mixture and gel and light modeling plaster).  A layer of cheesecloth covers the head and also serves as cover for my Sea Goddess. I have dyed the cheesecloth and painted the body.   Susie McMahon, Sherry Goshon and Jean Bernard are some of my favorite teachers of the techniques used on this sculpture.  My love of fabric, texture and manipulation keeps growing. “

Isn’t it amazing how versatile fabric is?

Ellen Lindner

Mountain Flowers

Although I love the colorul tropical flowers of Florida, it’s refreshing to see different blossoms in other parts of the country.  On a recent trip to the mountains of North Carolina, I was greeted by flowers at every turn.  Even the “weeds” by the fence posts were note worthy!

A few favorites follow.  Click any image for a larger view.

What type of flowers do you have in your neck of the woods?  Big and bold or small and delicate?  Any pretty “weeds?”

Ellen Lindner

Exciting Quilt Auction!

Do you know about the SAQA (Studio Art Quilt Associates) fund raising auction?  Oh, it’s phenomenal!  Hundreds of artists have donated quilts approximately 12″ x 12″ which will be auctioned online in batches.

This is the one donated by my friend, Martha Wolfe, called Nasturtium.

Click image for a larger view

Martha constructed this piece entirely from sheer fabrics, a practice she often employs.  (She is the queen of this technique.)  You can see more of her work on her blog.

Now, go check out those awesome auction quilts.  There are six pages, starting here.  Enjoy.

Updated 7-22:  Or see this fabulous slide show.

Ellen Lindner

Depicting Trees, Part Two

In my previous post I showed you several examples of trees I’ve created over the years.  Now, we’ll take a look at tree trunks.  Again, there is no formula for this.  Just a consideration of what’s important about the trunks in question.

Here’s an early art quilt, Autumn Breeze.  Since it depicts Aspen trees, I took great care in selecting the fabrics.  (Click the image for a better view.)  Not only did I need the fabrics to help with the striations of the bark, but I also wanted them to create a sense of depth.  That meant the front trees would be the brightest and have the most contrast.

Click any image for a larger view.

I  did some experimenting to determine the best way to add marks to the trunks.  And auditioned some loose, chunky leaves.

Perhaps you can tell from the photo below that my experiments paid off.  I ended up using both the chunky foliage, and the stitching for the tree marks. I think you can also see that the fabrics used on the farthest trees were not over stitched.  They had enough wiggly dark marks to read as Aspen bark.  Cool!  (BTW, there’s a tiger print as part of those leaves!)

With my quilt, Ripening, the trunk served as the background for the vivid berries.  In that capacity, it just need to be fairly plain and not too attention getting.  (Same for the background, btw.)

I wanted the edges of the trunks – where they reach into the border – to be darker.  To achieve that, I overlaid and stitched two layers of tulle in those areas.  Very effective, don’t you think?  Oh yeah, I forgot to mention that I did the same thing for the entire border of Autumn Breeze.

Sometimes there’s a tree in my inspiration photo that ends up in my quilt composition, but it’s so abstracted that I’m the only who knows it’s there.  Such is the case with Snap Dragons, below. 

What, you don’t see the “tree?”)  It’s the dark, busy background.  In the original photo, the Snap Dragons were in front of a huge oak tree, which had little gaps of light showing through.  In my close up shots, the tree shape didn’t show.  It just looked like a big black mass with small light spots.  I thought that was the perfect backdrop for the bright flowers, so I incorporated it – loosely.  I love “going out on a limb” like that, and I’m really pleased with the effect! 

Ellen Lindner

Depicting Trees

Since I do a lot of quilts inspired by nature, I often need to depict trees.  But, I don’t have a set “formula,” since every situation is different.  Instead, I notice what’s important about the tree(s) and try to capture that.

In the Mountain Meadow, below, I just needed a mass of green with some texture too it.  But not too much contrast.  Easy.

Click any image for a larger view.

With Misty Morn, it was important to have a strong contrast between the trees and the background.  So, a black and white color scheme was used.

In the inspiration photo used for Misty Morn,  the trees were pines.  At first, I considered thread painting all the needles of those trees.  But wait.  What was I thinking??? Were exact needles important to the composition?  No!  Foliage: yes, but pine needles:  no.  Thankfully, I realized that and was able to use prints fabrics to represent busy foliage.  Perfect. 

In my current barn quilt, I’m including deciduous trees in early spring.  Which means I need to show lots of bare branches with maybe a hint of leaf buds. I need one tree just behind the barn on the left, and two in front of it on the right.

Although I could thread paint branches, my goal is to let the fabric do most of the work for me.  That’s automatically more abstract, which I think makes it more interesting.  The photo above shows the fabrics I’ve selected for the two trees.  Since the branches will be against the pale sky and barn roof, I selected fabrics with light backgrounds and darker lines/squiggles.  But, that’s just the beginng.  (At this point the one on the left still just looked sorta like sky, didn’t it?)

I added some dark branches with thread, and a sheer piece of blue to show the mountain better.

Wow, that did the trick didn’t it?  I love the ease and success of this!

On to the two trees on the right.  I’d already added green plaids and stripes to hint at spring green.   But, two people asked if the trees were palm trees.  Hmm, not what I wanted. So, I drew in some cross branches with an acid free marker.


That helped.  I also considered adding some hand stitching of little leaf buds.  However, after doing a test sample, I decided it was just a little too “perfect.”  I wanted it to be rather abstract, so the viewers could interpret things themselves.   (This piece will soon be getting a “haircut.”  Click on the image above to see why.)

BTW, can you see how much depth the shadow added?  I added it by making little dots with an acid free marker.

I hope you’ve found these examples to be useful or intriguing.  More tips for when you’re “up a tree” in the next post.  (Sorry, I couldn’t resist!)

Ellen Lindner


New Video: How to Make an Accordion Book

Making a simple accordion book is very easy.  I show you how to do it in my latest video.

In addition to a no-measuring way to make the basic structure, I show you had to add both hand and machine stitching to your project.

These little books are quick and fun.  I hope you’ll check out the video.

Click here for my video directory.  Scroll down for the new one, Episode 1102, Part One.

Enjoy!
Ellen Lindner

Announcing a Hometown Class

I’m trying something different. Rather than teaching for a guild, I’m renting a space in Melbourne, FL and personally coordinating all the class advertising and details.  Kinda exciting (and scary.)   

August 1, 2011

Design Your Own Nature Quilt 
6 hours, no sewing, $65, (includes $5 kit fee)

Class sample: Cosmo Cotillion

Find full class details here, but first, check out the awesome results my students have achieved.

I hope to see you in class!

Ellen Lindner
P.S. Almost forgot to mention:  this is my favorite class to teach!  (Check out my students’ results and you’ll see why.)

Working With Intent or Without?

I’m NOT a natural athlete.  Back when I was taking tennis lessons, I just aimed for the middle of the opposite court and was happy to keep it between the lines.  But, my instructor encouraged me to “hit with intent.”  To notice my opponent’s position and direction of movement, and to aim accordingly.

When making quilts I also do so “with intent.”  That is, I have a plan.  I usually have a sketch and a basic idea of where I’m headed.  Then, I allow, no encourage, no require myself to interpret the idea and alter the image as I’m creating.  But I really need that starting plan, (like the one below.)  I find that I just waste time without it.

Click any image for a larger view.

Yet, other artists work in exactly the opposite way.  Working abstractly, they proceed quickly, allowing things to happen almost randomly (at least at first.)  I even know of one teacher who encourages her students to “work without intent.”  Gee, that sounds intriguing (and kinda scary!)

Both approaches produce excellent art, so I’m wondering why some artists work better with one method and others with the opposite approach.  Does it have to do with our inate “wiring?”  Like being left brained or right brained?  

 My working preferences are clear.  The quilt below was made in a class in which the teacher encouraged us to initially place fabrics with absolutely no plan.  Gee, that was tough for me!  I like the finished quilt quite a bit, but I have to admit that it evolved only after I allowed myself to break the teacher’s “rule” and create a mental plan.  I guess I’m just not a go-with-the-flow kind of gal.

Still, the idea of creating without intent sounds rather exhilirating, doesn’t it?  Maybe I should try it again.
 
What approach do you use?  Have you ever purposely tried to work in a different way?  If so, what were the results?
 
Ellen Lindner
P.S.  See more about the progress of the first quilt in these earlier posts:  May 29, 2010 through September 1, 2010.

Accordion Book Sample

I’m currently editing my next video, which shows how to create a simple accordion book.  I thought you’d enjoy seeing a sneak peak of some of the screen shots.

Click any image for a larger view

These mixed media books are so fast and easy that they’re almost addicting.

I think both hand and machine stitching add a lot to these books. 

However, there’s a trick to hand stitching on heavy paper.  I’ll be sharing that in the video.  (I hope it will be ready soon!)

Ellen Lindner
P.S.  Have you seen my first video?  It also features a mixed media book: one about the perfect glass of iced tea.  See it here.