Smiles and Apples and Pears, Oh My!

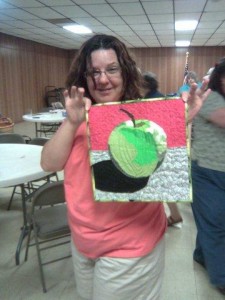
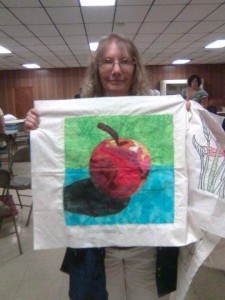
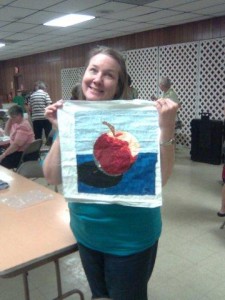
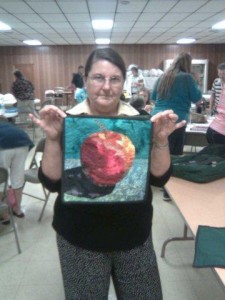
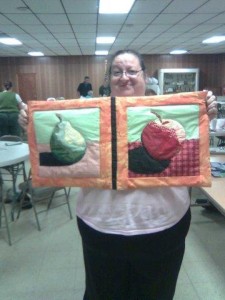
One of the exciting things about teaching is seeing my students achieve great results, and the joy they find in doing so.  These photos, from a recent Show and Tell in Jacksonville, FL, show Double Reverse Applique students showing off their work.  

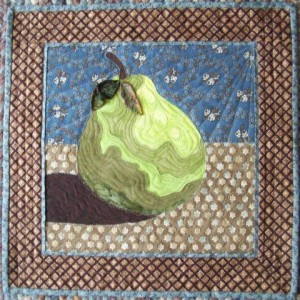
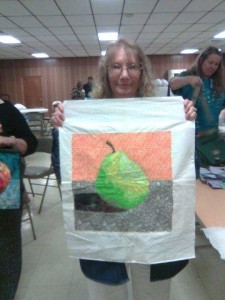
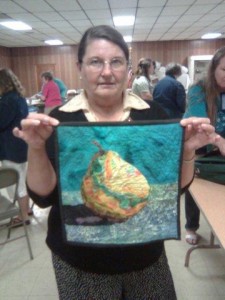
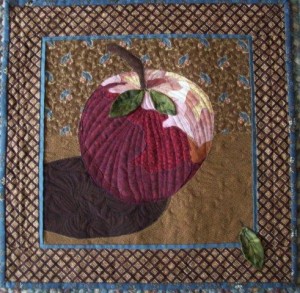
During the class, students made an apple using the very easy DRA technique.  And, several of them finished the class’s second project, a pear. 

Shirley's apple

Sara and her apple

Karen with her apple
Darlene and her apple

Joan with her apple

Sylvia with her apple and pear
Shirley’s pear

Karen with her pear

Joan's pear

See better photos of Joan’s apple and pear in the DRA gallery, on my website.

Joan, (shown above and below,) sent me the nicest email about the class.  Apparently, after seeing the class samples (and after having already signed up for the class,) Joan and Karen got a little nervous.  She wrote:
     “…I looked at karen and she had this look of pure horror on her face and said, “I ‘m not sure I can do this. I’m scared”. I replied right back to her, “Me too”. We both felt just by looking at the pictures of your examples that this was way over our head and very advanced so I said, “well, lets sit together and we can console each other”. So we did.

     Boy were we wrong. We both had no problems with the workshop and both turned out beautiful awesome apples. Thank you so much for this wonderful workshop. You made us all feel comfortable and at ease, yet you were so knowledgable. I have now finished the pear …[and] I am so proud of it !!  Now all kinds of ideas are swimming around in my head.”

Isn’t that great?  And what’s more, Joan and Karen BOTH immediately used the DRA technique on their own designs!  How awesome is that?  See them below. 

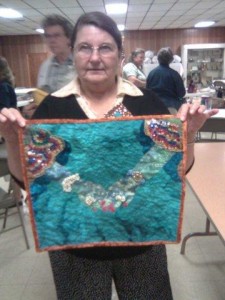
Joan with her Hands piece, which she designed

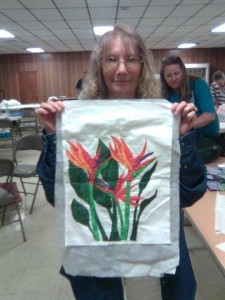
Karen with her Birds of Paradise - her original design!

See what I’m talking about?  How can I be anything but exhilirated with such wonderful results and enthusiastic students?

A big “thank you” to Shirley Wooten, for providing these photos.

Ellen Lindner
Additional resources: 
A gallery of Double Reverse Applique quilts, most made by students
An ebook on Double Reverse Applique 
An upcoming (online) Double Reverse Applique class
Barn Progress

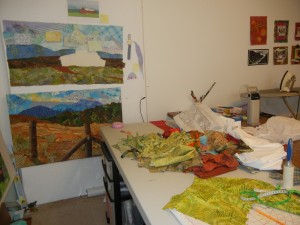
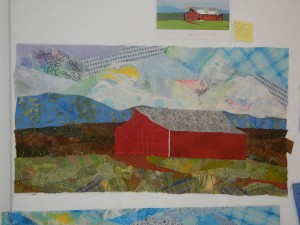
As you can tell from my messy studio, I’m still in the midst of the barn quilt.  (I don’t do much cleaning up or putting away until the end of a project.)

Click any image for a larger view.

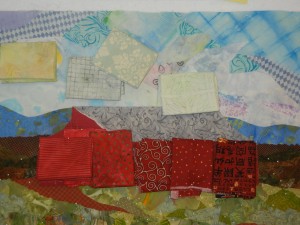
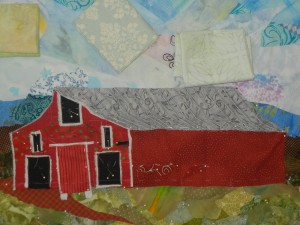
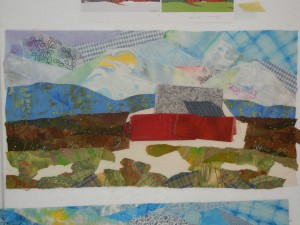
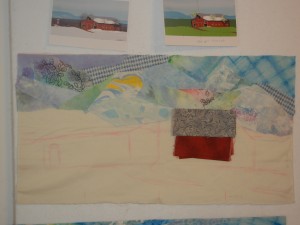
After buying all those new fabrics, I had to audition a few changes.  What about multiple barn fabrics?  That looks interesting.

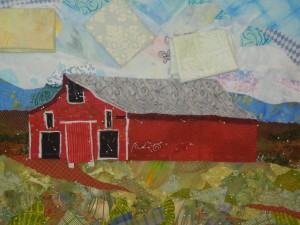
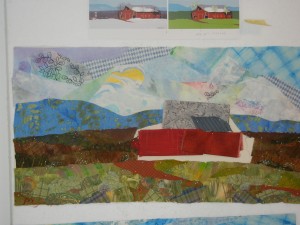
After pinning a few details to the barn I was a bit discouraged.  It looked a lot like, well, a cartoon, didn’t it?  I was rather slow to realize what it needed.

A shadow, of course!  That made ALL the difference.  A reminder of what I already knew:  shadows and highlights make an object look 3D.

I did intend to add a shadow, but I needed to do it earlier, to help me “see” it all properly.

Whew.  Now I’m feeling better about it.  No longer on shaky ground.

Ellen Lindner

I NEEDED More Fabric – REALLY!

I wouldn’t kid about needing fabric now, would I?  And, actually, I did. 

I’ve been working on my barn quilt, and decided that the sky needed something.  I liked the patterns near the top, but I thought the mottled fabrics at the horizon were a little boring.  But, I didn’t have more  patterned fabrics that were in the right colors and values.

Click any image to enlarge

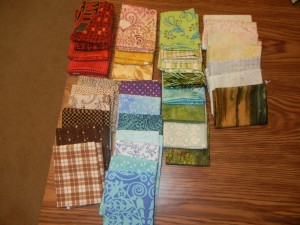
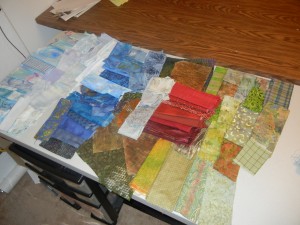
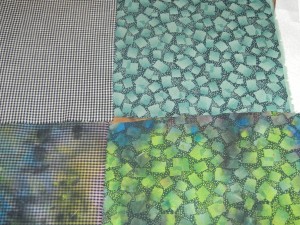
So, I HAD to go shopping!  (Hee-hee.)  Since I wanted more patterned pieces for the sky, I decided maybe I needed them for other colorways, as well.  I set off for the store with the goal of buying things with noticeable patterns.  Fabrics that I might not typically buy.  And this is what I came home with.

I’m pretty delighted with them.  I think I can use several of the blues (and greens and yellows?) in the sky, right away.  And maybe some reds in the barn.  If only I had owned that brown and black check when I was painting tree fabrics.  It would have been perfect without any additional effort.  Plus, I’ve got a few plaids and other fabrics.  These are the fabrics that are a) difficult to use, until b) you need a really specific something and then you’re oh so glad you own them!

You may have noticed the fabrics in the right stack.  They’re not especially patterned, except for the front one.  No, these meet another goal:  to buy light fabrics every so often.  It’s so easy to be seduced by the saturated colors of medium values, and overlook these needed pieces.  So, every now and then I buy them “just because.” 

And the striated one in the front didn’t meet either criteria.  I just bought it because I loved it.  A girl is allowed to do that isn’t she?

How do you decide what fabrics to buy?  Do you always buy for a particular project, or do you have a stash that’s built up for whatever you might need?  Do you ever buy fabrics purposely outside the range of your normal taste?  Or very light ones?  Rather dull, grayed ones, etc.?

Ellen Lindner

Barn Quilt Progressing

I’ve made quite a bit of progress with my barn quilt, and have been enjoying it a lot.  After completing the sky (more or less,) it was time for mountains and woods.  I cut the mountains from one fabric, but the woods are made up from lots of bits cut from fabrics I painted.

(I highly recommend clicking on these photos for a larger/better view.)

I’m really pleased with the way the tree fabrics worked out.  (I put potential red fabrics nearby to make sure I was maintaining enough contrast.)

On to the grass.  I wanted to suggest depth by using large patterns in the very near foreground, and near solid fabrics at the top of the slope.  It was great fun to play with bits of fabrics and rearrange them to my liking.  You can see it all developing in the photo below.

By the way, I was also auditioning the idea of stitching pin tucks into the roof fabric for the standing seams.

And the finished grass below.  I was really happy with it until…
 I did a preliminary barn placement and realized the grassy slope was too low! Can you see the problem below?  The top of the barn roof exactly hits the mountains.  Not what I want.

?

I wanted to raise the barn, which meant raising the grass.  Back at it.  (Good thing I like that part!)

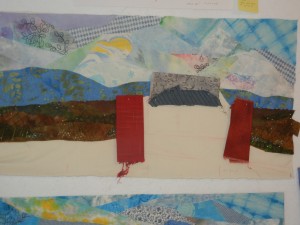
I’m constructing the barn as a stand-alone item for this very reason.  Now, I can easily move it as needed.  Later I’ll add the (much needed) details to it.

Ellen Lindner

When is a Scrap Too Small to Keep?

All artists working with fabric have to decide a few things about the storage of their fabric.  Things like:
– How will I store large pieces?  Small pieces?  Scraps?
– At what size does a piece of fabric change categories?  
– And when is a scrap no longer large enough to keep?

Answers will vary, of course, from artist to artist.  Decisions will be based upon:
– The size of quilts/art typically made.
– The number and size of fabric pieces typically used in a typical art piece.
– Amount of studio storage!

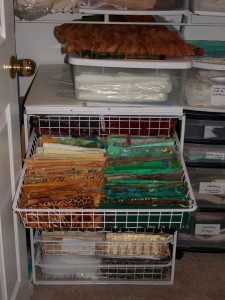
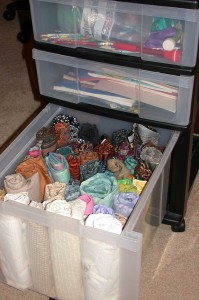
I like to work with a wide variety of fabrics, but I only use a little of each one in a particular quilt.  Therefore, most of my fabric storage is devoted to “fat quarters.”  These are 1/4 yd. pieces of fabric that are cut to an almost square proportion.  Here’s my fat quarter storage unit:

Click any image for a larger view

As you can see, the fabrics are sorted by color and value.  I have them folded and standing up so I can easily see what I have.  When a fabric is no longer large enough to show up among the other fabrics, it becomes a scrap.  Scraps are saved in a basket at the back of each drawer – still coordinated by color. 

Larger pieces of fabric are rolled and stored in a file-sized drawer.  Rolling them gives them enough rigidity to stand up so I can see them.  Again, they’re sorted by value, but all the colors are mixed.

But, back to those scraps.  I do use very small pieces of fabric sometimes.So, should I keep very tiny pieces of fabric?  My answer is “no.”  Sure, I might one day use them.  But, the space and energy required to store them in the meantime is more valuable to me than the little piece of fabric.  Therefore, I get rid of anything smaller than fist size.

But, I don’t physically thrown them away.  Instead, I save them for my friends. 

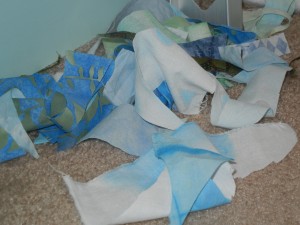
I let these little bits of fabric fall to the carpet as I’m working.  Later, I rake them up with my fingers, and my friends are delighted to receive little baggies filled with them.  We’re all happy!

How do you decide what to save and what to keep?

Ellen Lindner

It’s All Relative

I’ve just started on a new quilt.  It will feature a red barn, sitting on a hill, with mountains behind.  My reference photo was taken in the winter.  I’ll shift the season to very early spring, but I’ll keep the background colors a little subdued so the barn will be the star.

First, I pulled fabrics, to see what might work together.  Key word “together.”  It’s not enough to ask “what fabrics might make a barn?” or “what fabrics might make a sky?”  They all have to work together, so I need to look at them with that in mind.

This photo shows my rough draft collection of potential fabrics:

Click any image for a larger view

Sky fabrics at the left, then mountains, distance trees, foreground grass, and a red barn in the middle.  Questions/issues I was considering at this point:
– Sky fabrics with enough pattern to make things interesting.
– Lightest sky fabrics at the bottom, to contrast with the mountains.
– A bit of pink in the sky.  But would it clash with the barn?  Did I need to place it far from the barn?
– What should those nearly bare distance trees look like?  (I painted fabric to help address this.)
– What value should the gray roof be?  It has to contrast with the sky and with the mountains.
– Do I have fabrics that are not only the color of grass, but have enough pattern to depict very near grass?

There’s always lots to think about!

After some thought, I tackled the sky.  This is what I have so far.

Is it right?  I have no idea.  I think it’s fairly close.  Close enough for me to tackle the mountains.  But, I won’t know if each component is correct until I see it combined with all the others.  They’ll have to work together, and that often requires some tweeking.

As you can see, I’ve got potential red and gray fabrics showing, just to help me judge those relationships.

On to the mountains.

Ellen Lindner

“Write Me a Note”

Do you have a family bulletin board?  Yeah, we do too.  But, it has mostly long term things on it like phone numbers.  The more pressing “to do” list items end up…well, on the microwave.

What?  You don’t do this?

At only 5 feet tall, I realized that the microwave was at my exact eye level, and it was easy for me to notice sticky notes there.  Soon, I had my family “trained.”  If they wanted me to remember something, they knew they’d be hearing me say “write me a note.” 

What’s funny is that a hierarchy has even developed.  Low priority items are posted near the hinges, with higher priority ones closer to the handle.  And, if something gets really critical, the note hangs off the bottom!

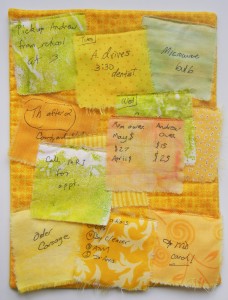
What does any of this have to do with art?  Well, I recently read about a magazine challenge in which the small quilts (8.5 x 11) are supposed to include text.  My microwave immediately popped into my head and I quickly made a quilt representing this idea.

As you might guess, it’s called Write Me a Note. 

Click any image for a larger view

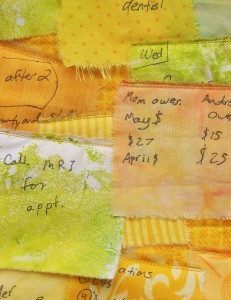
Detail:

It was really fun to depict this little bit of home life in quilt form.

Have everyday events ever inspired one of your quilts?

Ellen Lindner
P.S.  The messages are actual ones found on my microwave during the first week of May 2011.  I traced them onto fabric, to reproduce the various handwritings.


Altering Fabrics: Oil Sticks and Paint

All the cool stuff Bev gave me got me thinking about stamping and other surface design techniques.  This was timely, since I needed fabrics to depict a distant forest in early spring.  I was looking for small scale, low contrast prints in browns and greens.  As you might guess, there was nothing in my stash like that.  So, I went to work.

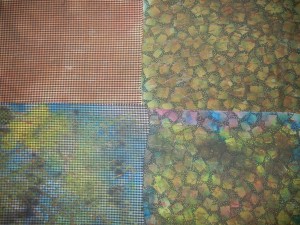
First, I selected fairly small scaled prints, some of which had previously been painted.

Click any image for a larger view

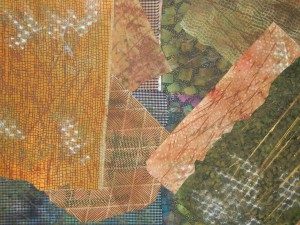
Then, I hunted for stamps and other things to help me depict busy branches.  I found what I needed to do rubbings with oil sticks in green, brown, and white.

Later, I over painted in green and brown.

Several other fabrics got the same treatment, so I think I now have what I need.

I’ll get to work on this new piece pretty soon.  That’s always exciting (and maybe a little bit intimidating, too.)  It all gets better after I make the first few decisions.

Ellen Lindner

A Gift from Bev

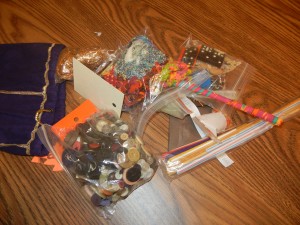
The Dirty Dozen Fiber Artists, to whom I belong, have recently added a new policy:  anyone having a birthday in a given month is expected to bring gifts to everyone else.  Well, that IS fun!  The gift can be anything from a piece of gum, to fabric, to whatever you can think of.  I’m really glad I got to go first, because some of the recent gifts have been extraordinary.  Like this one from Bev O’Connell.

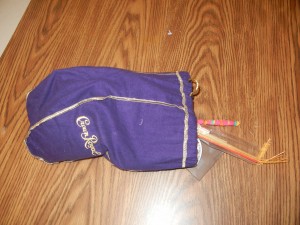
She brought each of us a big Crown Royal bag full of goodies.  Of course, we were drooling over the bags before we even saw the contents.

Click any image for a larger view.

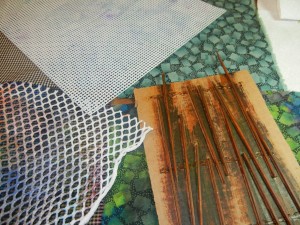
And the contents did NOT disappoint!  They included long skewers, a big bag of buttons, metallic tinsel (sorta,) a wide variety of stamping products like Dominoes and puzzle pieces, a LONG fabric bead, little knitted ribbon pieces,  an artist trading card, and more!

Ooh!  My head started buzzing with ideas, and by that evening, I was reaching into the pile of goodies.  Stay tuned to see some of my experiments.

Ellen Lindner

Cutest Project Ever!

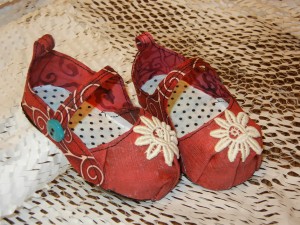
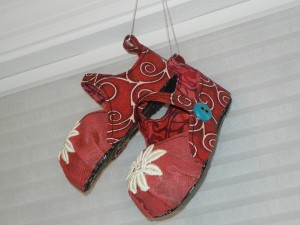
What do you think of these cute little Mary Janes?

Click any image for a larger view

Aren’t they adorable?  They’re made, primarily, with fabric covered cardboard.  Plus, there was lots of glue, some paint, vintage lace, and a large dose of patience.  Although construction was pretty involved, I love these little shoes!

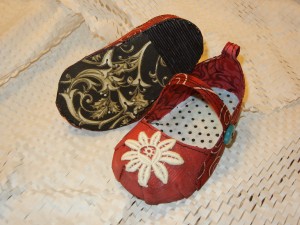
Of course, I had to decorate the bottoms, too.

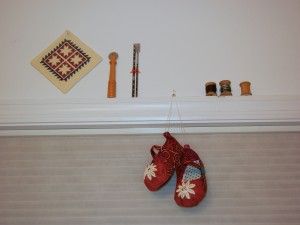
Now, what do do with them?  Well, enjoy them of course.  (Not to wear.  Just to look at.)  For starters, I’ve hung them from my studio window.

I may audition some other locations, as well.

It was fun to play around with different techniques and materials.  Now, I’m ready to get back to more familiar territory.

Ellen Lindner

P.S.  If you’d like to make your own little shoes, see the March/April 2011 issue of Cloth, Paper, Scissors for the article “Step into a Story” by *Gail Walker.  Note:  my paper mache eggs wouldn’t come off the forms.  Instead, I created the toe cap by stitching and forming upholstery fabric, then stiffening it with glue.