Challenge: Mixed Media Art Book

I recently challenged my fiber art group to make mixed media art books.  Although I’m pretty new to this myself, I’m really intrigued by the creative possibilities they provide! 

One way to make such books is to alter an existing book.  That’s what I’ve done on the two I’ve created thus far.  My first altered book started with a child’s board book.

Click any image for a larger view.board-book-web

For a recent project, I used a small bound blank book as a starting point.  I cut a window from the first 20 or so pages, creating a recessed area.  Then, I glued all the pages together.  (What was I thinking?  That took forever!)

Book interior collage

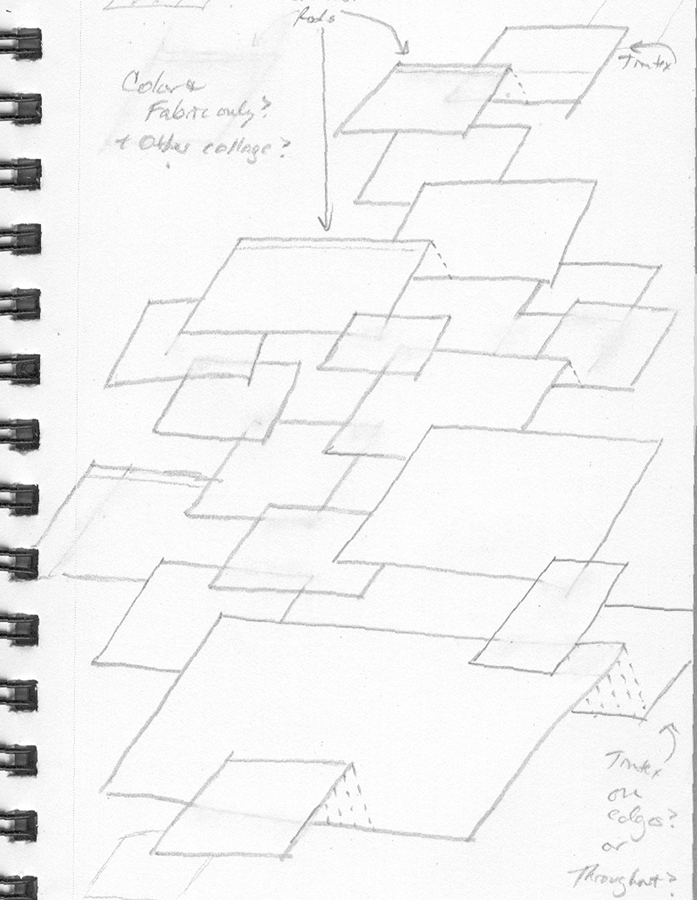
Another way to create a support for a book is to build one from heavy paper. 
An accordion (or concertina) fold is an easy way to do this.

DSC05663

The most popular book format among quilters is to use fabric.  (See links at end of article.)  Of course all these media, plus a variety of surface design techniques, can be combined for wonderful effects.  And this is what my group hopes to achieve!

Maybe you’d like to join us.  If so, these are the criteria and suggestions I’ve outlined for our group.

Challenge criteria:
–          Make a mixed media book, using a variety of media, including fabric and/or fiber
–          The book must have a cover, a back, and two interior “pages.”  (Example:  glorified note card.)  It does not need to close.
–          The book should “read” as one related “story.”  (Pages and covers should relate to one another.)
–          (Optional, but suggested)  Make the book stiff enough to stand for display, or create another interesting way for it to be viewed. 

Construction options:  Alter an existing book, create a book from fabric (stiff, if possible,) create a book with heavy paper 

Things to consider: 
–          A variety of textures
–          Sheer fabrics and/or papers
–          Unusual construction (such as concertina)
–          Interactive aspects, such as pockets, peep holes, pop ups, etc.
–          Ephemera such as photos.  They can be painted with a transparent paint to add unity
–          Altering colors with paint, etc.  All manner of surface design
–          Embellishments: 3D, protruding like a book mark, etc.
–          The title can go on an attached bookmark or embellishment, if desired.

Tips:
–          Construct the base of your book first.
–          If stitching is used, plan for the fact that it will show on both sides.
–          If machine stitching is used, do it when the book is small and/or folded, so it will fit under the arm of the machine.
–          Think outside the box for definitions of a book and how they can be displayed.

 DSC05665

We don’t have a firm deadline for this challenge, but we’re hoping to collectively finish at least a few in the next month.  In next year’s exhibit, we’ll plan to show them.  But you don’t have to wait!  If you make a mixed media book and send me a photo, I’ll post it here on my blog.

I’m excited about trying this new endeavor, and hope you’ll consider joining me!

Ellen Lindner
P.S. Check out these websites for lots of examples and techniques.

Book galleries:
Lots of good examples:  http://karenswhimsy.com/altered-books/ (Karen Hatzigeorgiou)
More good examples:  http://jennysartspace.com/alteredbooks/ (Jenny Taliadoros)
Altered fiction book:  http://www.logolalia.com/alteredbooks/
More:  http://artsheal.com/ (Karen Bartimole)
Little accordion books: 
http://lizcreates.blogspot.com/2010/05/so-much-has-been-happening.html (Liz Berg)
Books and more: 
http://runningwithscissorsstudio.blogspot.com/2010/07/roxanne-padgett.html (Roxanne Padgett)

Techniques:
Altering a board book: 
http://www.creativity-portal.com/howto/artscrafts/altered.books.html
Concertina book (more elaborate folding:)  
http://lizplummer.com/blog/notable-posts/how-to-make-a-concertina-book/ (Liz Plummer)
Honeycomb concertina fold, you tube video: 
http://www.youtube.com/watch?v=PQ6hTGl6AzQ (Mary Anne)

Painted Quilt Finished

I really enjoyed working on this painted quilt.

Click any image for a larger view
Painted1__6x5_300dpi

I’m very happy with the combination of the textures, the layers of color, and
the little bit of embroidery.

Painted1_detail_hi_res

I’ll definitely make a quilt in this style again.  But the next time, I’ll plan better!

I had a very hard time thinking of a title for this piece.  Finally, after much consideration, that’s exactly what I named it:  After Much Consideration.

I hope you’ll click on the images, so you can see the great textures and details.

Ellen Lindner
P.S.  See earlier posts showing this piece in progress here (first post) and here (second post.)

“Blue Roofs”

Recently, I had some older work professionally photographed.  Since this piece is not currently on my website, I thought you would enjoy seeing the results.  It’s called Blue Roofs. 

Click any image for a larger view.
Blue_Roofs_web600

This piece was inspired by the hurricane season of 2004.  My area was hit by two of them, three weeks apart.  A huge recovery effort was launched, and within a few months, things looked almost normal.   But, the abundance of blue tarped roofs could still be seen in all directions.

This “quilt” is actually 23 roof shaped quilts mounted to painted window screening.

Blue_Roofs_detail_hi_res

As you might imagine, this involved quite a technical learning curve.  When I first designed the quilt, I had no idea how I’d integrate the 23 components.  But, I liked the idea enough to forge ahead, assuming that I’d figure something out.B.roof, roof colors plus blue 2

So, I created the 23 quilted roofs, while considering my options.

IP 3, ready for blue

top finished except for painting

After deciding on window screening as the background component, I experimented with painting it.  Since the paint strokes showed, I used them to create a subtle swirling pattern, like the winds of a hurricane.

Painting experiments

Finally, I added clear sleeves, top and bottom.

I’m quite happy with my Blue Roofs.  Not only visually, but also because of all the technical challenges I overcame while making it.  It was a very good learning experience!

This piece is available for purchase.  Don’t you think some Florida insurance company needs it?

Ellen Lindner

Fractured (Sliced) Quilts

Have you seen the great pictorial quilts made by several different quilters? Although each quilter is working from the same photo and pattern, their individual choices of fabrics and techniques make these quilts very interesting and unique. These quilts, called fractured or sliced, are lots of fun to make. However, they also pose some unusual challenges concerning ownership, construction, scheduling, and more. I’ve written a website article providing tips and options for addressing these issues.

Here’s an example of the steps taken when four quilters created “Fractured Hibiscus.”  First, my own photo:

Click any image for a larger view.HIb. photo, small

Next, a full-sized pattern:

Hibiscus drawing, sections, small

Each person made one section of the quilt, referencing the color photo.  The owner, (in this case, me,) joined them together to create the finished quilt:

! Hibs, all 4 quad. IP

As you can see, the quadrants don’t match perfectly, and that’s part of the charm of these quilts.  You can read the full article on my website.

Ellen Lindner
P.S.  Perhaps you’d be interested in the directory of all my website articles.  They include lots of good tips and information.

Dirty Dozen Fiber Artists’ Exhibit

There was lots of excitement in Melbourne, FL, yesterday, for the opening of Dirty Dozen Exposed 2010!  This is the annual exhibit of the Dirty Dozen Fiber Artists, of which I am a member.  We had a whopping 86 pieces on display this year!

I’ve put most of the photos on my Facebook page, but I’ve got some special things for you here.

Our group takes a pretty light hearted approach to many things.  (After all, we named ourselves the Dirty Dozen!)  The photo below shows Elizabeth King’s sense of humor.  Click on it to see her free standing 3D piece, bottom right.  Our exhibit challenge was called “Tall and Thin.”  But, at approximately 5’2″, Elizabeth decided to also create a tongue-in-cheek visual rebuttal of sorts.  Thus, she created “Short and Stacked.”  Don’t you love it?

Flowers

Although there were many fabulous pieces in the show, one had me really drooling.  It’s called “Tall Poppies,” and it was made by Martha Wolfe.

Click any image for a larger view.
Martha full+

Isn’t it fantastic?  The composition and subtle coloring of this piece are mesmerizing.

Matha detail1

Martha really kicked it up a notch when she added abundant French Knots.  She placed these perfectly, so they enhance the design beautifully.

Martha detail 2

I love this piece!  You can read more about how Martha created this piece on her blog.

Ellen Lindner
P.S.  Check out the Facebook page for lots more photos.  You don’t have to be a member of Facebook to see it, (or one of my “friends” either.)  I hope you’ll like it!


Dirty Dozen Exposed 2010!

This is a rather racy name for a very tame (but still exciting) event.  It’s the annual exhibit showcasing the work of the Dirty Dozen Fiber Artists, in Melbourne, FL.  The opening is this Saturday, October 2nd, with a reception from 2-4 P.M. 
(Details below.)

DDFA Postcard 2010

From October 2nd through October 31st,
Boutique 4 Quilters 

The Dirty Dozen Fiber Artists will transform the Boutique 4 Quilters
classroom into an exhibit of over 50 original fiber art pieces,
made with a variety of exciting materials and techniques. 

In addition, two group projects will be featured.  

Reception October 2nd, 2-4 PM
General viewing during regular store hours

 Boutique 4 Quilters is located at
2945 W. New Haven Ave., West Melbourne, FL 
Store hours are M-F 9:30-5, Sat. 9:30-4.  Phone 321-768-2060

 Dirty Dozen Fiber Artists: Barbara Bilbo, Jill Brown, Paula Furgason,
Peggy Horsfield, Elizabeth King, Ellen Lindner, Bev O’Connell, Dij Pacarro,
Ruth Anne Parker, Lisa-Marie Sanders, Irene Watson, Martha Wolfe

I hope to see you there!

Ellen Lindner


Mixed Media Book Complete

I really enjoyed working on this book, which I’m calling Anticipating (Good) Health.

book_exterior

To create it, I used a variety of techniques and materials.  Please click on the image above to better view the layers of paint, textures, hidden words, cheesecloth, sheer fabrics, and hand sewing.

The interior includes a paper flower with Tyvek leaves, a braided stem, and an encouraging bible verse.  (Jeremiah 29:11)  (Click on the image below for a better view.)

Book_interior

The tassle-style “bookmark” tells the story of this little book.  I started it when my husband and I were away from home for a month, while he received medical treatment.  I worked on this book to help me focus on the results of the medical procedure, specifically that of enjoying outdoor activities.

Thankfully, my husband is now doing very well and we’re reaping the rewards of our summer “adventure.”

Ellen Lindner


Elizabeth Nelson Exhibit in Orlando Area

I am in love with the vibrant paper collages created by Elizabeth St. Hilaire Nelson!  Just take a look at these pieces, (even though my photography doesn’t begin to do them justice:)

Click any image for a larger view.
DSC05525

DSC05526

Elizabeth currently has a solo show, called Exquisite Harmony, on display
at the Maitland Art Center, near Orlando.  I was very fortunate to attend
her recent gallery talk there.  Her use of color and texture is breath taking!

Elizabeth is shown below, standing near
one of  her favorite pieces.

e. w. painting

The photo below shows the right shoulder of the piece above.  VERY cool lace!

DSC05484

The theme of this exhibit is music, including a composition called “The Carnival of the Animals.”  Therefore, there are lots of animal pieces.  This donkey was my favorite.  He seemed to have a very lazy and gentle gaze.

DSC05491

DSC05492

I hope you’ll click on some of the images above, so you’ll get  a
better view of them.

Elizabeth’s exhibit will be up through October 24th.  If you’re near Orlando, I think you’d enjoy it immensely.  And if you can’t see her work in person, be sure to check it out on her website.

Ellen Lindner
P.S. I own one of Elizabeth’s collages.  You can see it here.

More Quilts from the Foothills of NC

The Foothill Quilters of Shelby, NC accomplished a lot in our recent “Design Your Own Nature Quilt” class.

Like the rest of the class, Laney, Rachel, Peggy, and Carolyn applied the new principles to paper, before tackling fabric.

Click any image for a larger view.Rachel+

Karon provided me with a challenge, as she worked in VERY subdued colors.  Although this is not my usual palette, I really enjoyed the challenge of doing something different.  Karon had a very clear vision and stuck with it.   Later, she’ll add a horizon line and some trees in the distance.

Karon's

Several people worked from the same photo of a spiky pale purple flower.  For hers, Ingalill used soft colors similar to the photo, shown in-progress below.

Ingalill

However, Leah cropped the same image, abstracted it,
and kicked up the colors.

Leah's flower

It’s always interesting to see how different people interpret the same inspiration source.  Both of these will be very effective!  (BTW,  Leah was my chauffeur for the weekend, and she’s also a very talented machine quilter.)

Harriette did a fantastic job with her photo of a southwestern landscape.

Harriette

I had a great time working with these ladies.

Ellen Lindner
Online Resources:
Teaching schedule
More information about this class
Leah Day’s blog post about the class
Leah Day’s website

Design Fun in Shelby, NC

This past weekend I got to teach “Design Your Own Nature Quilt” to a motivated group of women in Shelby, NC.  In the morning  they learned about balance, focal point, and working loosely.  After lunch, they took their lessons to  heart, as they created fabulous compositions.

Click any image for a larger view.
Kathy worked on a morning composition exercise:

Kathy working

And later created this wonderful piece!

Kathy

Laney spent quite a bit of time creating contrast within her all-red flower.

Laney at work

She was able to create some contrast and shading with her fabrics. Later, she’ll complete the look with contrasting stitching.  It’s going to be fantastic!

Laney's flower 

Peggy created very dramatic tree/forest imagery, to which she’ll be
adding lacy leaves in yellow.  Wonderful!

Peggy's trees

I’ll show you more progress from these Shelby quilters in my next post.

Ellen Lindner
Online Resources:
Teaching schedule
More information about this class
Leah Day’s blog entry about the class