Prepping for Sticky Fingers Demo

On Saturday, March 13th, I’ll be doing a demonstration of my “Sticky Fingers” technique, in conjunction with my guild’s local quilt show.

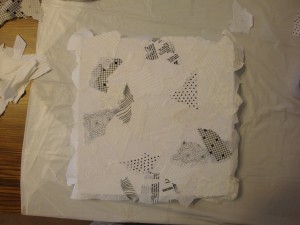
In preparation for that, I’ve been working on a sample background, which I’ll paint as part of the demo.  The fabrics are mostly white-on-white, with a few black and white thrown in.  Click to view larger.

WoW background

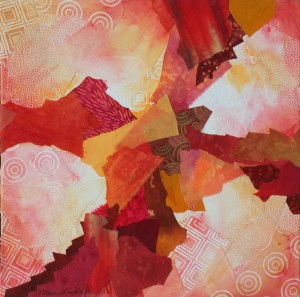
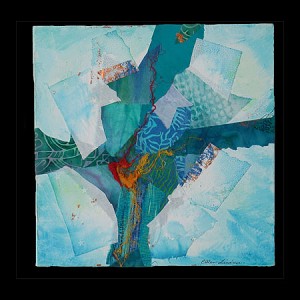
When I paint the white-on-white fabrics, something very magical happens.  The plastic-like design part resists the paint, so that only the background fabric picks up the color.  This creates a wonderful, but subtle,  patterned effect.  Like the background of this piece:

Cruciform_2 copy

Click the photo above, to see how really cool this is!

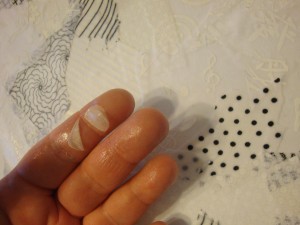
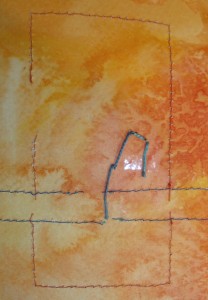
I call my glued collage class Sticky Fingers for good reason.  After making the background above, the glue had dried to my fingers and I was ready to peel it off.  After getting started, it occurred to me that you might like to see what this looks like, so I took a picture for you.  In the photo below, I just started to peel dried glue away from the crease of my finger.   It looks like peeling skin, huh?  It comes off pretty easily.

gluey fingers

I’m looking forward to my demo on Saturday.  If you’re in the Melbourne, FL area, I hope I’ll see you there.  More details here.

Ellen Lindner
P.S.  I haven’t tried black and white fabrics as a glued background before.  I’m hoping they’ll provide an interesting effect.

A Ribbon!

My local quilt guild has a show coming up this weekend, and I have several quilts in it.  I recently received word that Security won a second place ribbon in its category.  That’s always nice!  Click any image for a larger view.

Security+

Above:  Security
Below:  detail

Security_detail

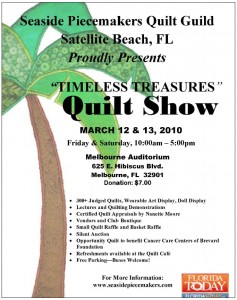
Here’s the show information.  Click to enlarge.

quilt_show_flyer

I always enjoy attending this local show. 
The quilts (and the socializing) are always great!

Ellen Lindner

More Note Cards

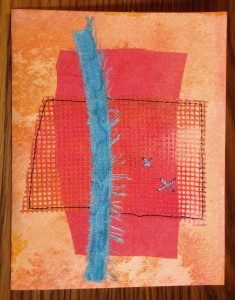
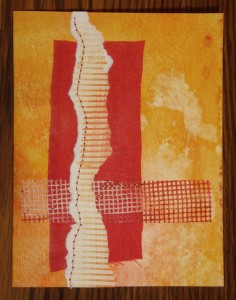
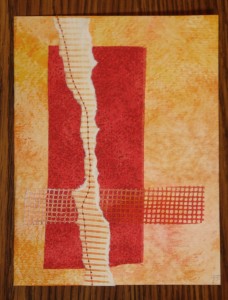
Did I mention that these cards are addicting?  Since I had the appropriate collection of materials out in front of me, I thought I might as well make a few more of these.  With this group, I enjoyed adding the complementary color of blue and I tried out some hand stitching.

Card 4

Click any image for a larger view.   The card above included silk, “painted”
needlepoint canvas, cotton, machine stitching, and hand stitching with Pearle Cotton. 

The hand stitching was new for me, and I really like the effect.  There’s a trick to it though:  after making the first diagonal of a cross stitch, you can’t tell where to start the next diagonal.  At least from the front, that is.  If you’ll look inside, you can see exactly where you needle goes for the next stitch.

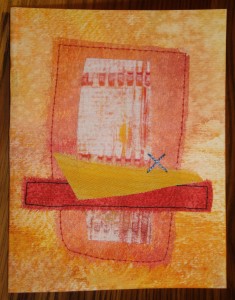
Card 5

Above: Painted interfacing, cotton fabrics, machine and hand stitching.

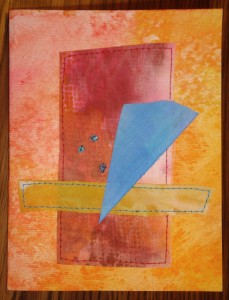
Card 6

More of the same.  This group is my favorite and I had a lot of fun with them!

I encourage you to try making some of your own cards.  If you decide to use hand stitching I recommend avoiding knots.  Instead, secure the ends with a little packing tape, as shown below. 
Hide the threads by gluing a piece of paper over everything.

Inside_thread_tape

Find further tips for making these cards here.

Ellen Lindner

Tips: Making Note Cards

Would you like to make your own note cards?  They’re fast, easy, and a great way to use little scraps of paper, fabric, and novelty items.

Start by painting the paper for the card bodies.  Select a fairly heavy paper that can handle getting very wet.  Paper intended for Watercolor or Wet Media is a good choice.  A size of 11″ x 15″ works well, and is large enough to create three cards.  Click any image for a larger view.
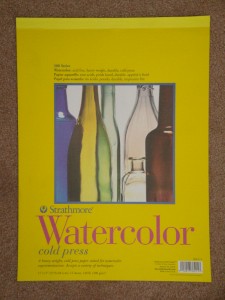
watercolor pad

Use your favorite paints and techniques to color the paper.  Remember that this is the background for your elements, so it can be fairly plain.  In my example, I used very watered down acrylic paints.  I slopped on several similar colors, letting them puddle and blend as they dried.  
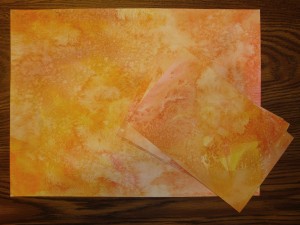
painted paper

After the first side dries, repeat the process on the other side.  If your paper buckles as it dries, you can later flatten it by leaving it under heavy books for several days.

Once your paper is flat and dry, you’re ready to cut your cards.  The size is equal to half a sheet of typing paper:  8 1/2″ by 5 1/2″.  (This size is important.)  You can get three cards from a sheet of 11″ x 15″ paper, by cutting it like this:
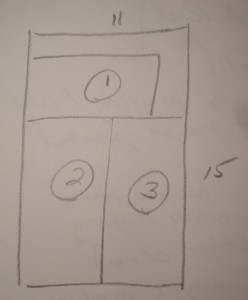
Cutting

Fold each card in half, creating a sharp crease. 

Now you’re ready to have some fun!  Reach for your fabric scraps, paper scraps, buttons, embellishments, and novelty items.  See card examples herehere, and here (scroll down.)

Consider some of these options:
– Sheer fabrics
– Purposely frayed edges
– Lace
– Crumbled tissue paper
– A little metallic
– Non-traditional items like onion bags, needlepoint canvas, candy wrappers, etc.
– Contrasting stitching, either by machine or hand

Keep your composition simple, since only a few items are needed.  Try some rectangles, as I’ve done, or use shapes such as leaves, circles, triangles, etc.

Most items can be secured with a simple glue stick.  However, a little machine stitching adds definition and interest.  When machine stitching, use a fairly long stitch length and don’t go backwards and forwards.  Leave a thread tail at both ends.  Later trim the tail to the correct length for the next stitch and glue it in place with a little glue stick.  Do this on both the front and the inside.

Hand stitching adds a wonderful quality.  Use Pearle cotton or other heavy thread and avoid knots.  Instead, secure the ends with a little packing tape.  There’s a visibility issue with hand stitching:  after making the first diagonal of a cross stitch, you can’t tell where to start the next diagonal.  At least from the front, that is.  If you’ll look inside, you can see exactly where you needle goes for the next stitch.

If desired, glue a piece of white paper on the right side of the inside, for better writing.  If the left side looks messy, you can do the same thing there.
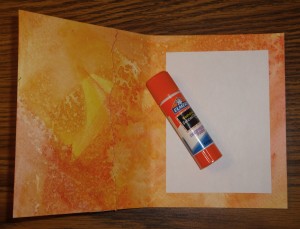
Inside

And, of course, sign and date the back!

Why was the size important?  Because envelopes are readily available for this size card.  They’re called Invitation, and they’re sold by the box at any office supply store.  These envelopes show off your handiwork perfectly.

Your recipients will love these!

I’d love to see some of your results.  Please send photos to ellen@adventurequilter.com .

Ellen Lindner
Breaking News – Melbourne, FL Demo March 13th

At the last minute, I’ve agreed to do a demonstration of my “Sticky Fingers” glued collage technique at an upcoming quilt show in Melbourne. I love to do this sort of thing, and hope to see many of you there.

Here’s an example of the kind of collage I’ll be showing. 
Click any image for a larger view.

Cruciform_1-web

Sticky Fingers Demonstration
March 13th, 2 P.M.

in conjunction with the
Timeless Treasures Quilt Show

quilt_show_flyer

Melbourne Auditorium – Interactive map

I’ll also have five quilts in this show.  Can’t wait for the fun!

Ellen Lindner

Note Cards

Whenever I need a fast or portable project, I often turn to making note cards.  They’re quick and easy and recipients always love them.

Here are some that I made recently.  Click any image for a larger view.

card 2

The one above includes:
– Painted background paper,
– A small piece of silk,
– Lightly painted corrugated paper (from the scrapbook department,)
– Needlepoint canvas “painted” as part of sun printing.

I liked that one so much I made another one almost just like it:

card 3

Then this one, which includes stamped interfacing,
hand painted silk, and more:

card 1

In my next post, I’ll share tips for making your own note cards.

Ellen Lindner
“Dressmaking” Collage Complete

Continuing with my mixed media collage, I darkened the strip of corrugated paper, added a grosgrain ribbon (which I’d previously painted,) and began to audition the placement of the last few collage items.  Click any image for a larger view.

DSC04005

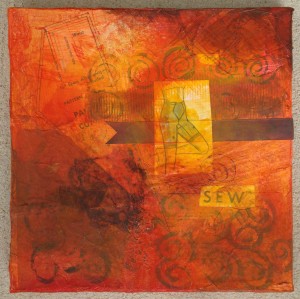
 Later, I darkened some spots, which I think was very important.  I also overpainted the collage items to integrate them into the collage.  (I decided not to use the flower stamp.)  This WAS the finished version:

Sewing collage finished

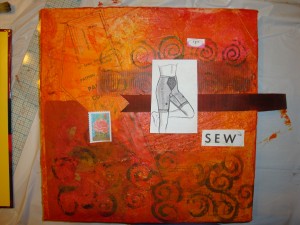
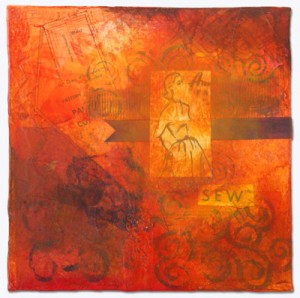
Eventually, though, I decided I just wasn’t happy with a girdle as the
focal point for the piece.  (Can you blame me?)  Fortunately, I had
some other old patterns, so I replaced it with a dress.  

Sewing_Collage-HIGH-sat.

That’s much better, (although the colors in this photo are a little dull.) 
I’m rather happy with this first mixed media collage, which I’ve named Dressmaking Circa 1950. 

I think I’ll definitely be doing more of this sort of thing.  Several things really intrigued me about it:
– The idea of using TRANSPARENT paint to recolor an item,
– The way that paint unified all the elements,
– The importance of the dark spots.

I’m also pondering how these same concepts might be useful in a fabric collage.  Hmm.

You can see a better image of this collage, along with a link to a detail shot on my website.

Ellen LIndner


Mixed Media

I’m a big believer in the value of artistic experimentation.  So, when I recently discovered a great book on mixed media, I decided to give it a try.

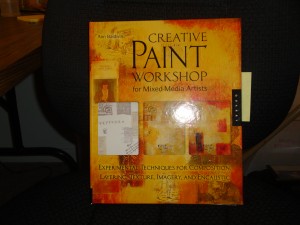
This is the book, Creative Paint Workshop for Mixed Media Artists, by Ann Baldwin.  Ann is primarily an abstract painter.  Thus, her mixed media pieces include a lot of paint and glazes, to create cohesion among the elements.  Although I’d played with paints here and there, this was something I’d never tried.
DSC04097
Click any image for a larger view.
 
I DID NOT know what I was doing, but I sort of mimicked the steps she showed in one of her examples.
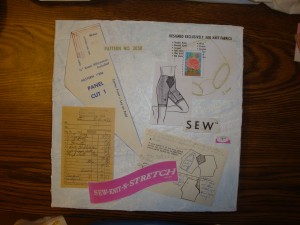
First, collage elements.  I once found old patterns for ladies under garments, and thought these would make interesting materials.  (Can you imagine making a girdle???)
DSC03998

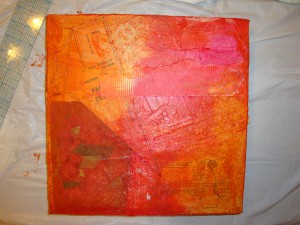
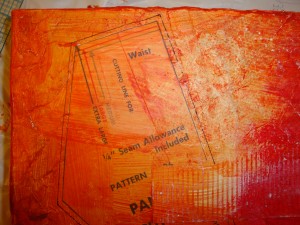
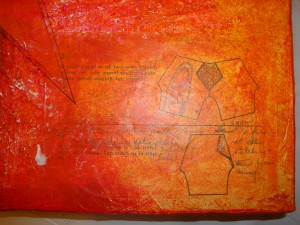
Per Ann’s instructions, I had too many collage items, so I omitted about half of them.  Next, it was time to decide which items would be in the background and which ones would later be focal points.   The background items were glued down, along with a scrap of handmade paper.  Then, everything was covered with thin paint.

DSC04000

That certainly helped!  See these details:

DSC04002

DSC04001

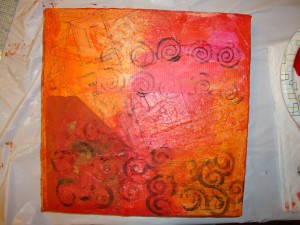
Next, I did some stamping with dark paint.

DSC04003

I’ll show you how I finished this piece in the next blog post.

Ellen Lindner
Professional Head Shots

I’m part of an upcoming exhibit, which will include a book.  How exciting!  However, the book calls for a professional head shot of each of the 24 artists.  Since many of us didn’t have one, the organizers set up a group photography session.

Gee that was fun!  Artists were encouraged to bring props appropriate to their medium.  Photographer Deborah Hamilton and “director” Judith Vaughn got us to act playful with our props and to pose in a variety of ways.  Since this was new to all of us, the whole process was a hoot!

Here are the three photos I received after the shoot:

Lindner head shot +med

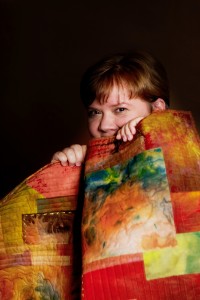
Although I’d love to blame the photographer for the chubby girl look, I’m afraid I’m the one responsible for that!  Even so, I think the photo above is the one I’ll use for non-quilting publicity.  For my website and blog, which appeal primarily to quilters, I plan to use one of these:

2010 head shot hiding +med

2010 head shot with 2 quilts-med

I think probably all three should be cropped. 
(Just ask my fiber art buddies.  I’m known for cropping!)

Which photo do you think I should use for my website?  (If you’re interested, it will replace the one on this page.) 

I’d greatly appreciate your comments!

Ellen Lindner
Knowing When to Say “When”

What do you do when your current project is just not turning out to your liking?  This happened to me recently, but not for the first time.  Over the years, I’ve had different approaches to this problem.  Usually, I continue with the piece, working to improve it.  Sometimes that improvement includes something very radical!

At other times, I just put the whole thing away.  I do so with a little frustration, but no sense of failure.  I know the PROCESS of making art is as important as the product.  I try to analyze what went wrong, so I can learn from it, and then I move on.

So, with that preamble, this is the story of the collage composition that I just removed from the design wall.

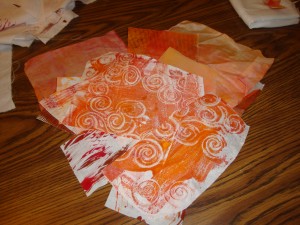
These were my starting fabrics, and the inspiration for the entire piece. 

fabrics

All of these were hand painted, some sheer, some textured.  A good starting point, although I knew I’d need a more diverse selection of values and colors.

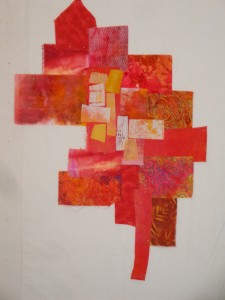
I played with the fabrics on the design wall for a while, just to get an idea of where to go.

fabric sketch

Hey, not bad!  I liked where this was going.  Bright colors and strong contrasts:  just my cup of tea.

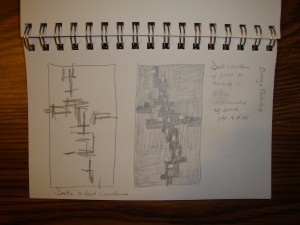
I even took the time to sketch the design:

sketch

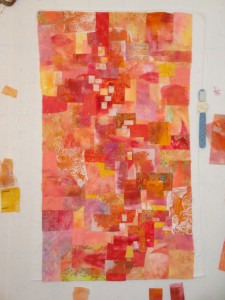
But, eventually, the whole thing looked over worked, and non-descript.  It just didn’t have enough contrast and interest.

Trust me:  the real thing doesn’t look nearly as good as this photo!

end result

I know exactly what it needs:  stronger contrast.  But to achieve that, I’d have to pretty much start over, and I’m just not that interested in this piece.  So, my orange fabrics are now sorted and stacked, waiting to be put away.

In the meantime, I’ve come up with several other ideas that DO excite me, so I’ll start work on one of those.  Mixed media collage maybe?

Ellen Lindner

How do you know when it’s time to say “when?”