Do Birds Like Glass Art?

While photographing the glass sculptures at Fairchild Tropical Botanic Garden, I
happened to capture a snowy egret coming to investigate.

Click any image for a larger view

Do snowy egrets like art glass?  Find out on Ellen Lindner's blog, AdventureQuilter.com/blog

He gave it a close inspection, looking for food, I’m guessing.

Do snowy egrets like art glass? Find out on Ellen Lindner's blog, AdventureQuilter.com/blog

Do snowy egrets like art glass? Find out on Ellen Lindner's blog, AdventureQuilter.com/blog

When he didn’t find it he curled his long neck in,  hunched up his
“shoulders” and  I think I heard him say “Humph.”

And then he marched off.

Do snowy egrets like art glass? Find out on Ellen Lindner's blog, AdventureQuilter.com/blog

I guess he’s not a Chihuly fan.

Ellen Lindner

A Boat Full of Baubles

Are you familiar with the work of glass artist Dale Chihuly?  This work is amazing and his installations in public gardens are truly awe inspiring.

I got to see his current exhibition at Fairchild Tropical Botanical Gardens in Coral Gables, FL, (Miami area.)  Wow!  Today, I am showing you just one of the fantastic pieces, in detail.

Click any image for a larger view

Dale Chihuly installation at Fairchild Tropical Botanical Gardens
Awesome, right?  In future posts, I’ll show you some more photos from my visit.  But, I thought you’d enjoy getting to “study” one in more detail.
Ellen Lindner

Second UFO Complete

This is God Bless You, the other UFO (unfinished object) I recently completed.

God Bless You, a small fabric collage by Ellen Lindner. AdventureQuilter.com

God Bless You, Ellen Lindner 8 x 8, $79

Like the first UFO, I worked on this one, primarily, in medical waiting rooms.  Fortunately, I got to know many others who were also waiting and I made some good friends.  One of them always said “God Bless You.”  And He did bless me – with her friendship.

It sure was nice to get support from new friends away from home! I chose bright colors to reflect that.

God Bless You, a small fabric collage by Ellen Lindner. AdventureQuilter.com

This one can be framed in a square frame, 10″ or 12″, or mounted on an artist’s canvas.

Ellen Lindner

See more abstract fabric collages here

UFOs No More

You know about UFOs, right?  Unfinished objects?  Like all quilters, I have my fair share.  The holiday break seemed like a good time to dig some out, rather than to start something new.  So, I worked on two very small collages, adding lots of hand stitching.

This one is called Making New Friends, photographed on black.

Click any image for a larger view

Making New Friends, a fabric collage by Ellen Lindner. AdventureQuilter.com/blog

Making New Friends Ellen Lindner, 10″ x 8″, $79


I worked on it during a long trial away from  home which included MANY hours spent  in medical waiting rooms.  But there was a silver lining, since we eventually made friends with  other people who were also waiting.  This was a HUGE blessing that I am still thankful for.

This gives you an idea of how this small collage it would look in a 14 x 11″ frame.

Making New Friends, a fabric collage by Ellen Lindner. AdventureQuilter.com/blog

The frame shown is called a floating frame, since it has glass in place of a mat.  A white mat would also look nice.

Ellen Lindner
P.S.  How are you coming with your won UFOs?

New Gizmos

I’ve recently discovered/rediscovered some products that are making my quilting life easier.  The most significant is Roxanne’s Glue-Baste-It.*

 Click any image for a larger view
New Gizmos:  Ellen Lindner, AdventureQuilter.com/blog

The great thing about this glue is the long skinny nozzle.  This allows me to add glue under fabrics that are already in place.  A BIG improvement over ALL THE PINS I’ve used in the past!

LOTS of pins in use by Ellen Lindner, AdventureQuilter.com/blog

I’ve also been on the hunt for the perfect marking tool for dark fabrics.  I think I’ve found it with the white Sewline mechanical pencil.**

New Gizmos:  Ellen Lindner, AdventureQuilter.com/blog

Finally, I recently had to quilt on a slightly slick fabric.  In search of a better way to control the quilt, I pulled out the machine quilting gloves I already owned – but wasn’t in the habit of using.  They really helped.

New Gizmos:  Ellen Lindner, AdventureQuilter.com/blog

BTW, does anyone know the best way to wash these?  Mine are beginning to look well loved.

It sure makes me happy when I find things that make life’s tasks easier!

Ellen Lindner
P.S. * I tried Roxanne’s Glue-Baste-It many years ago.  Although the glue worked well, the nozzle continually clogged.  A recent recommendation prompted me to try it again, and I’m SO glad this problem has been corrected!  (I’m not sure, but it might be important to buy the version that has the blue cap on the nozzle attachment.)
P.P.S. **The newest Sewline pencils have white lead, but the outsides are generally red or pink.

Inspired by the Fabric

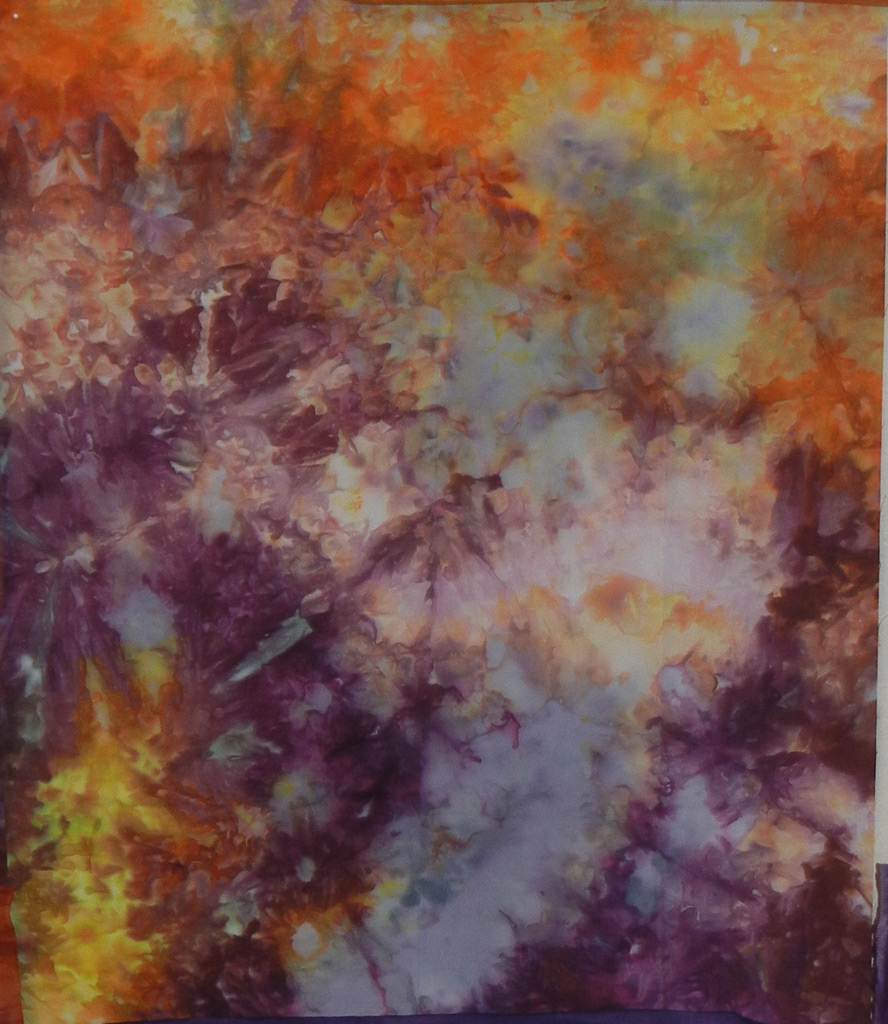
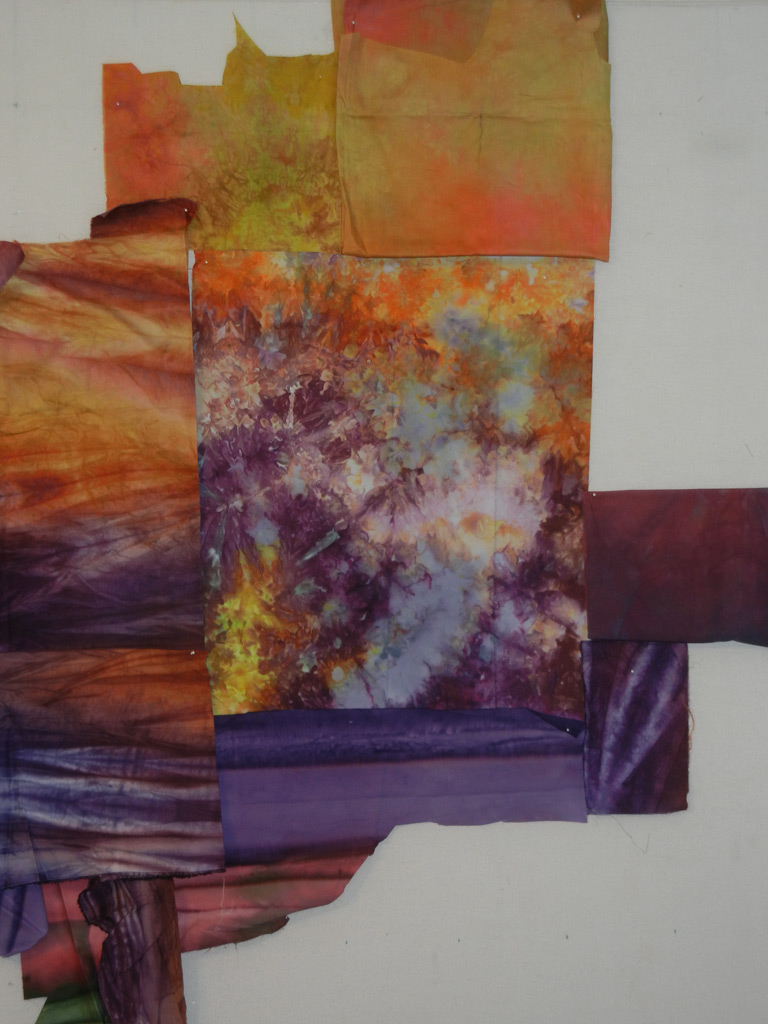
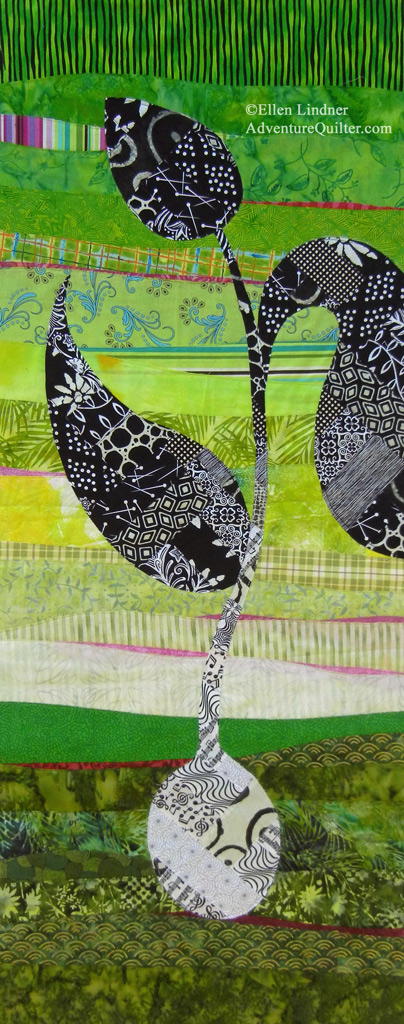
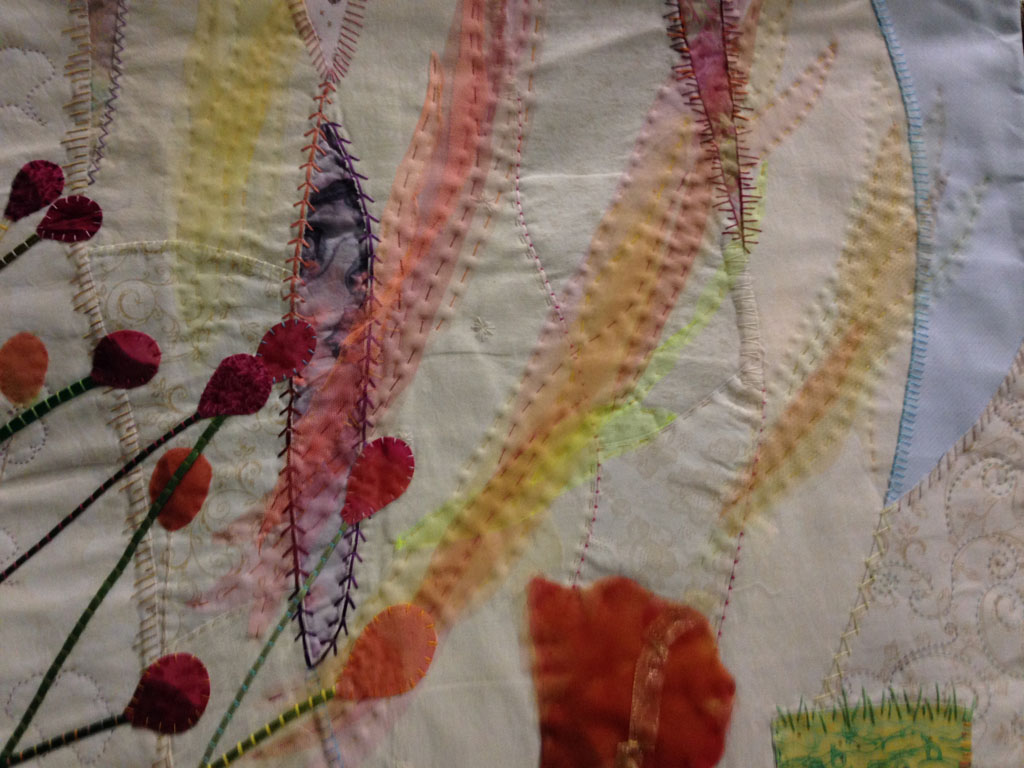
I recently purchased a beautiful hand dyed fat quarter, from Gabriele Bullard, of Fabrilish.

Click any image for a larger viewWorking with hand dyed fabric.  Ellen Lindner, AdventureQuilter.com/blog

Isn’t it gorgeous?!?

I spent a bit of time deciding how to best use it.  Certainly, it was tempting to keep it intact and to simply add other fabrics around it.

Working with hand dyed fabric.  Ellen Lindner, AdventureQuilter.com/blog

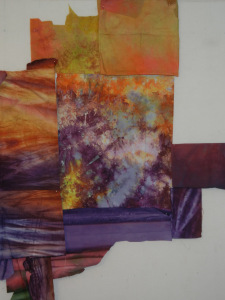
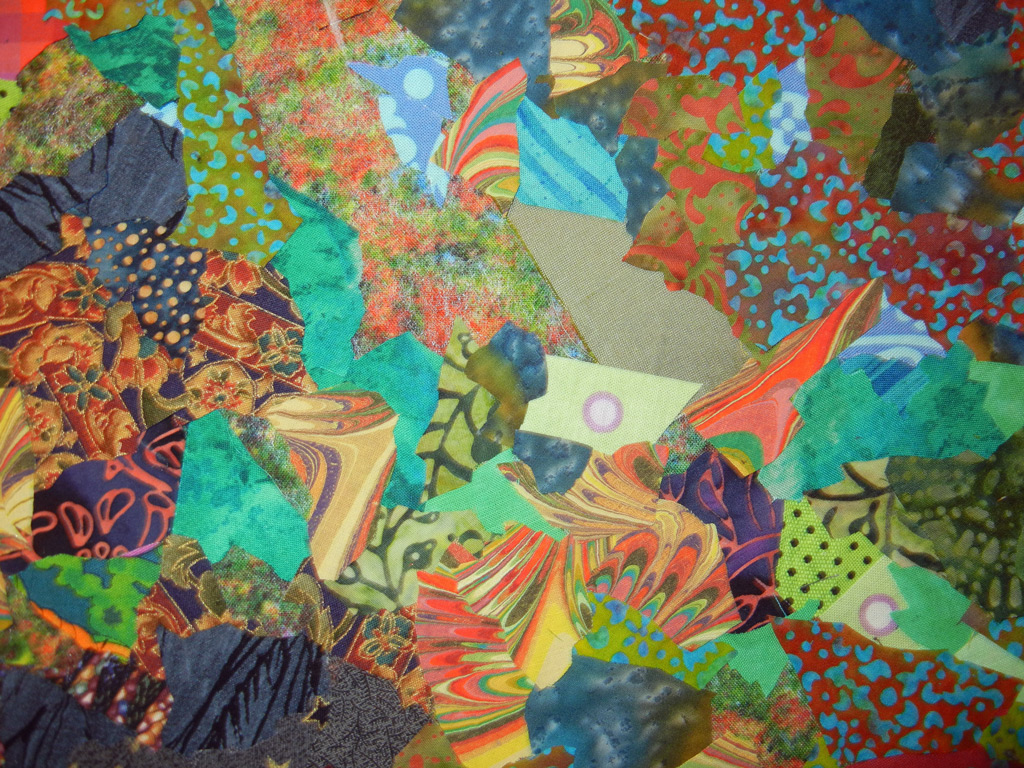
But, I wasn’t sure that would quite meet the full potential of this fabric.  What if I tore it up and added other fabrics in between?  I auditioned this idea on the computer and liked it quite a bit.

Working with hand dyed fabric. Ellen Lindner, AdventureQuilter.com/blog

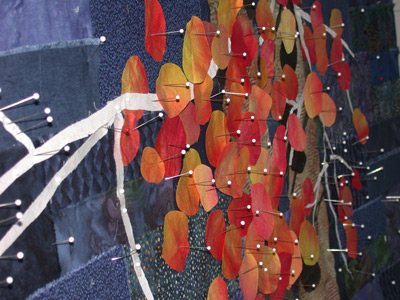
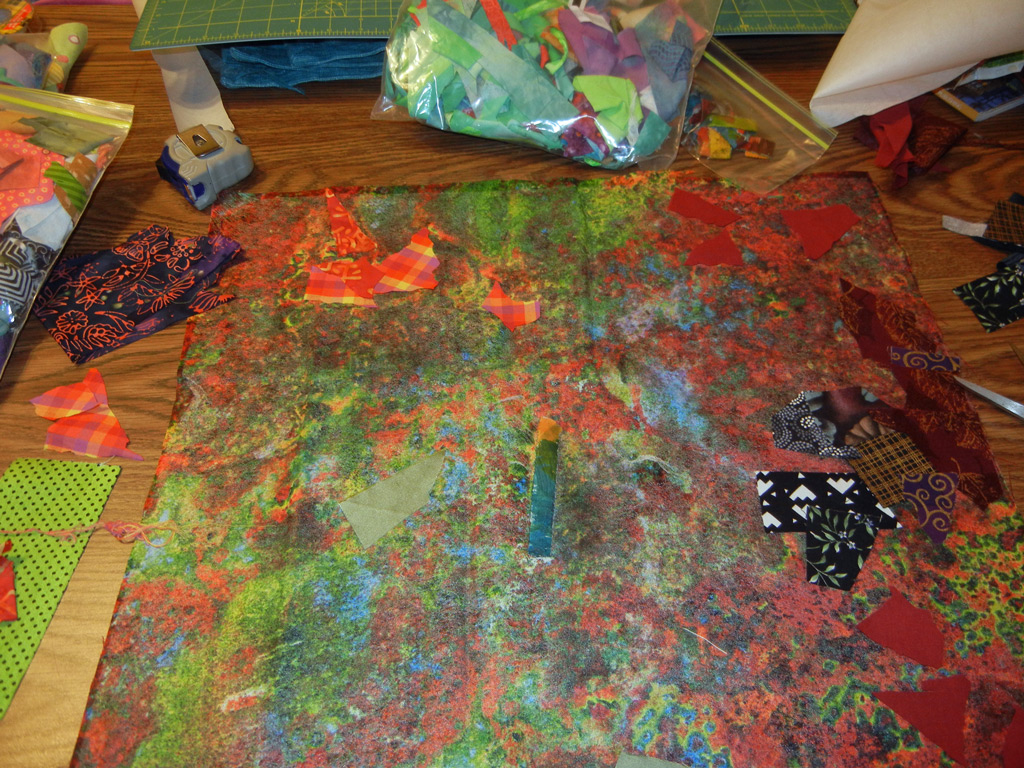
So, I started tearing into my beautiful fabric.  Literally.  I began to arrange pieces on a muslin base, adding contrasting fabrics around each one.  I had no plan for what went where or what size or shape it would take.  (Which make it both challenging and great fun.)

put a large muslin base on the design wall and

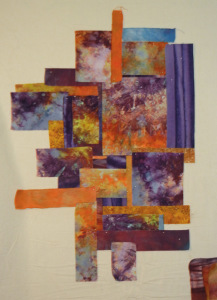
In the photo above, all the original fabric was used and I had a very odd shape.  I knew from experience that unusual shapes are hard to handle, so I wanted to fill in the corners to make a rectangle.  The photo below shows the two left corners filled in, and more underway.

put a large muslin base on the design wall and

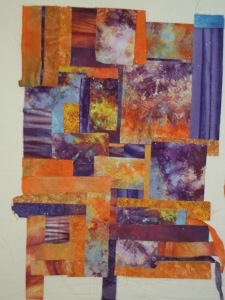
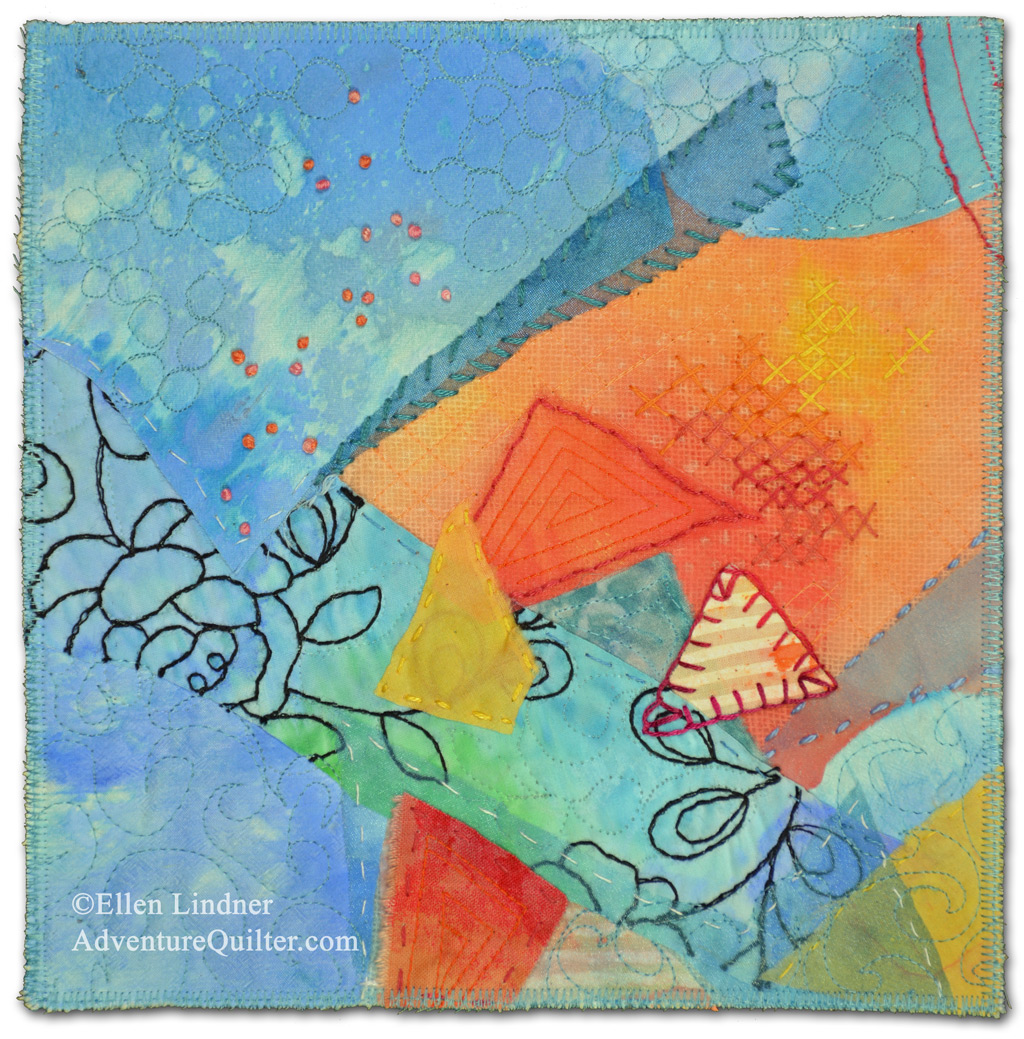
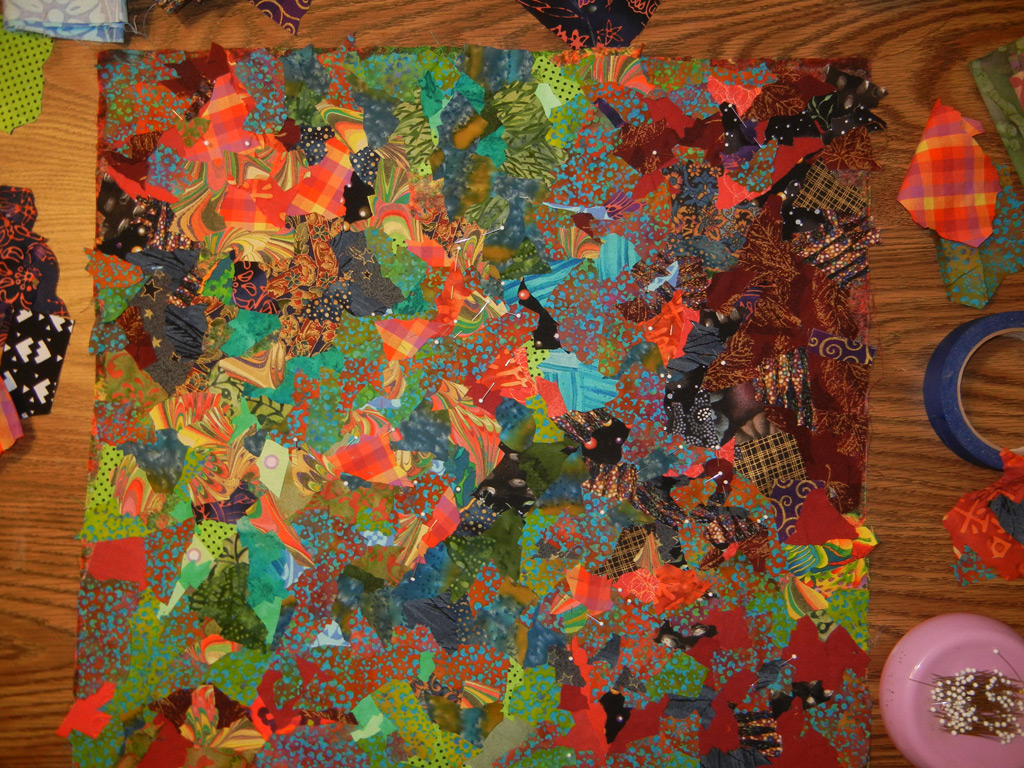
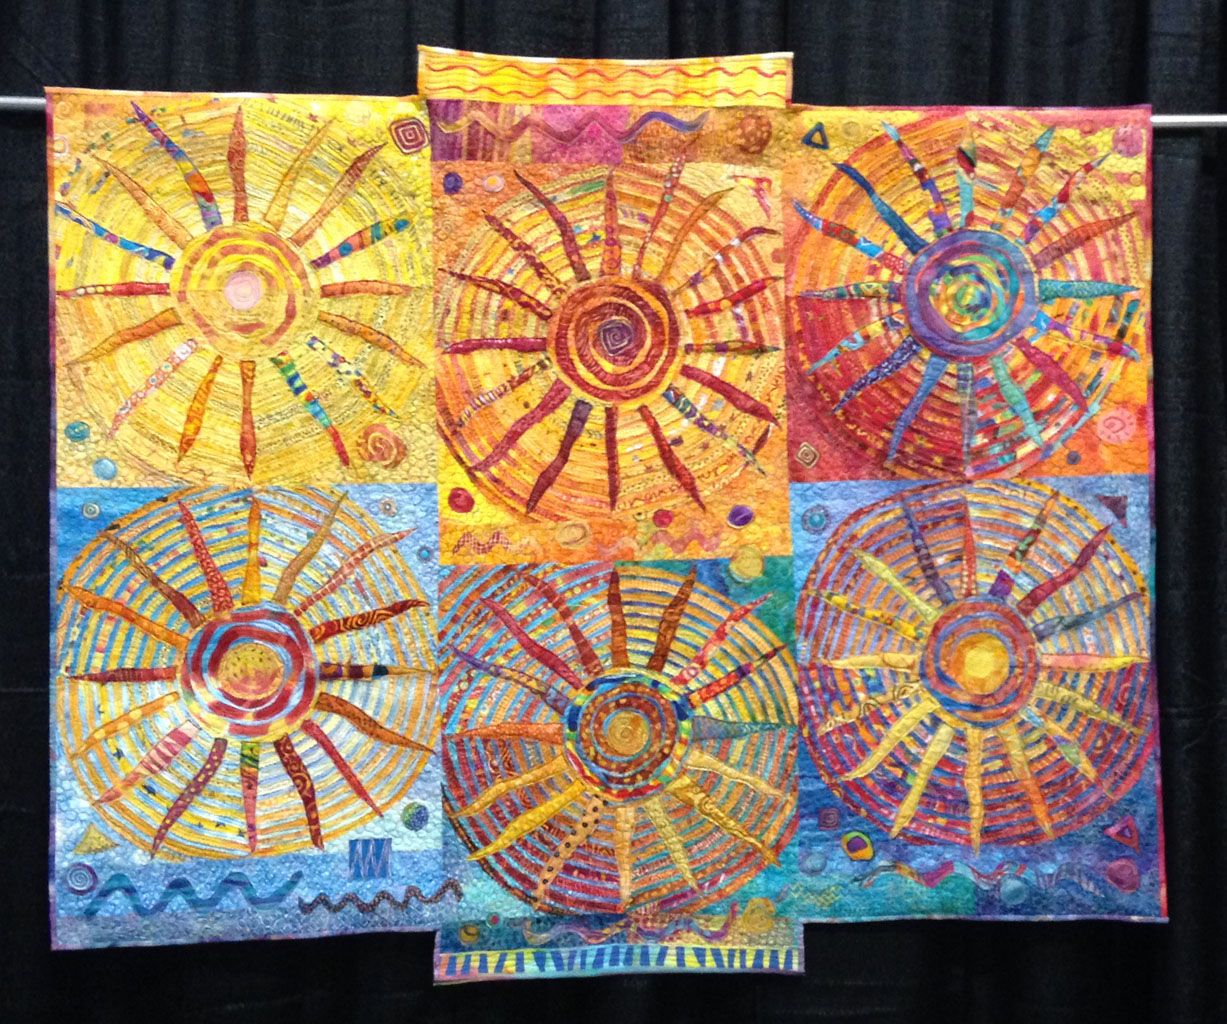
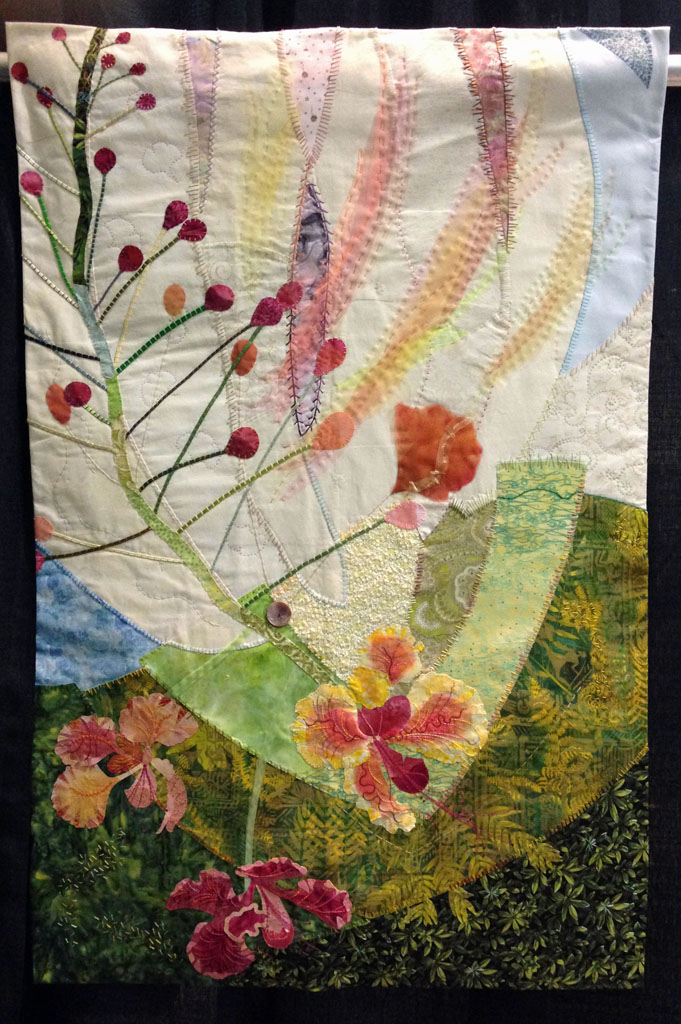
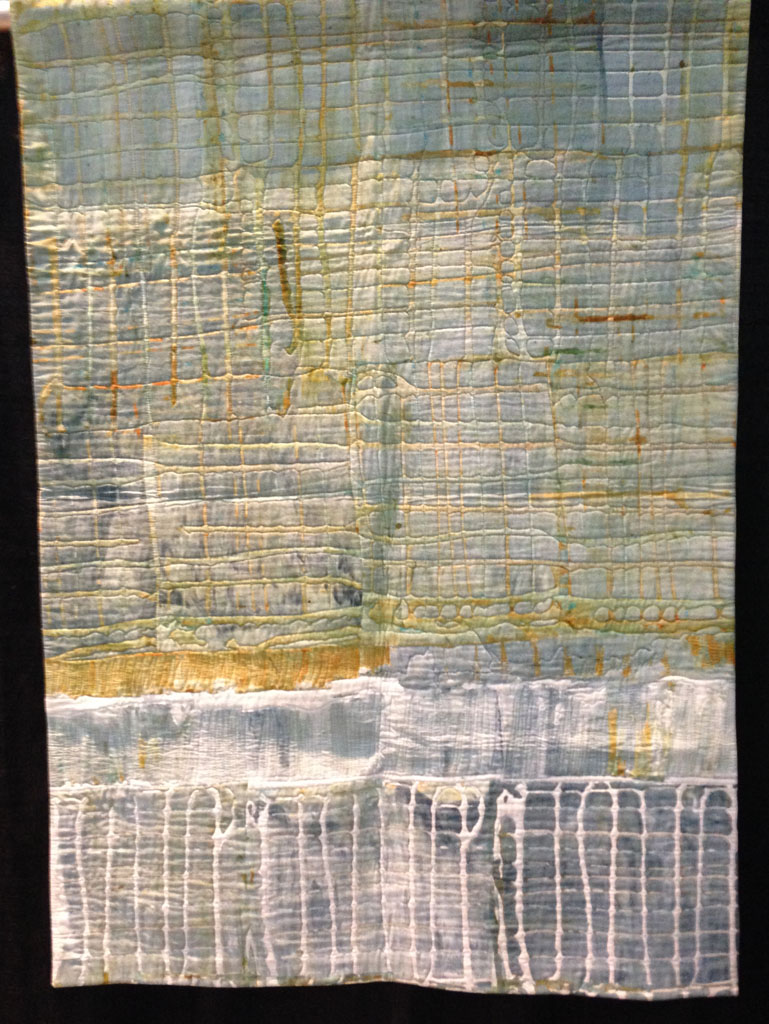
But, it wasn’t enough to just fill in the corners.  I wanted the pieces to have a lot of different sizes and proportions, and to contrast with one another.  I worked on creating interest in this manner as I continued to fill in corners, and this is where it stands now.

Working with hand dyed fabric. Ellen Lindner, AdventureQuilter.com/blog

See what I mean about adding interest?  Compare the “after” picture, above, to the “before” picture, two above.  Changes were made throughout most of the left side.

This quilt is not finished.  I want to:
– Add interest with many smaller pieces
– Add some curving lines
– Add a lot of texture with quilting, and
– Add hand stitching of some sort.

Plus, I’ll audition the orientation.  I think it will probably end up turned.

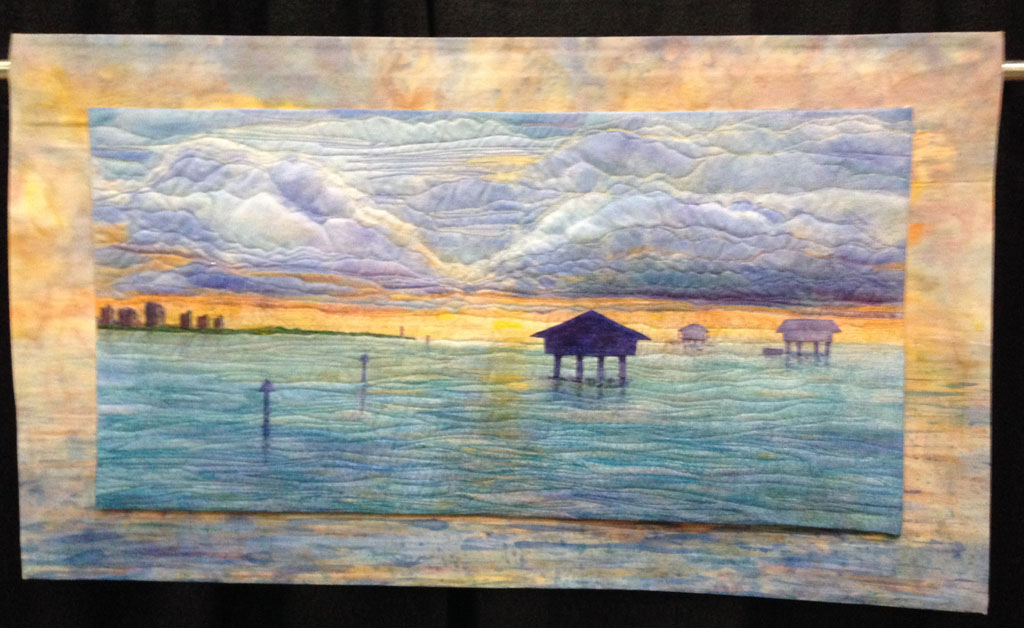
I’m also thinking about the theme and title of this piece.  Perhaps it has something to do with sunset through trees.  We’ll see.

I’m having fun with it!

Ellen Lindner
P.S.  This quilt reminds me a lot of the quilts my students make in the Instant Art Quilt class.  Check out the gallery.


A Wacky Way to Make a Background

I completed a quilt in mid-December and didn’t want to start anything major during the holidays.  So, I dug into my UFO (unfinished objects) drawer and my scrap bag for some small projects.

I got the idea of fusing scraps onto muslin in order to create a random background.  But then I thought, “Why do it on muslin and risk white fabric peaking through?  Maybe I should start with something else.”

So, I pulled this lovely fabric from my stash and cut a piece.

Click any image for a larger viewA wacky background by Ellen Lindner. AdventureQuilter.com/blog

 I fused a sheet of fusible web to the right side of this base fabric and got started.   Next, I decided that I would VERY LOOSELY imitate the color placement of the base fabric as I added scraps.  (Why, I don’t know.)

A wacky background by Ellen Lindner. AdventureQuilter.com/blog

Here’s a detail shot of the process.  The hazy areas are the background fabric with the fusible making it look that way.

A wacky background by Ellen Lindner. AdventureQuilter.com/blog

As you can see, I cut a lot of little pieces and used lots of prints to emulate the underlying fabric.  Not sure why I created such a task for myself, but it was keeping me entertained.

And this is the finished background.  It’s DEFINITELY not a finished quilt design, but I think it has interesting possibilities as the start of something else.

A wacky background by Ellen Lindner. AdventureQuilter.com/blog

I might try to merge the colors with paint or tulle.  Or maybe I’ll cut it up as the start of several small works.

But for now, it will go back in the UFO drawer, because another project has caught my attention.  I kinda figured that would happen.  No worries.  Any time spent creating induces more creativity.

What wacky ideas have you acted upon lately?

Ellen Lindner


New Online Class: Grow with the Flow

The online version of “Grow with the Flow” is ready to go, starting on January 23rd.  Since online student’s have more time and space than participants in the live class, their project is larger and the proportions are taller and skinnier.  Like this:

Click any image for a larger view

Sample for Ellen Lindner's online Grow with the Flow class.  AdventureQuilter.com
But the fun process and dramatic project remain!  Students will go with the flow as they make a dramatic background using free rotary cutting.  Then, they’ll master “fussy fusing,” a process which makes the handling of tiny fused pieces much easier.

Sample (detail) for Ellen Lindner's online Grow with the Flow class.  AdventureQuilter.com

Find all the class details here.

BTW, I named this quilt Dancing with Delight.  Hope to “see” you in class!

Ellen Lindner
P.S.  You can also book the live version of this class for your guild.
P.S.  Scroll back a bit to see the student results from the first live class.

West Palm Beach Quilt Show 2015 – More Photos

Here are a few more eye catchers from the West Palm show.

Susan Rienzo does a wonderful job of combining colors.

Click any image for a larger view

World Quilt Show FL 2015. AdventureQuilter.com/blog

Sunshine State of Mind, by Susan Rienzo

I thought Eyvonne handled the water reflection beautifully in this next quilt.

World Quilt Show FL 2015. AdventureQuilter.com/blog

I See You – detail, by Eyvonne Smith


World Quilt Show FL 2015. AdventureQuilter.com/blog

A Newborn Star, by Atsuko Matsubara. Best Use of Color in the World Quilt competition.

Even though I got an arm in this photo, I thought you’d enjoy seeing the quilt.

Ellen Lindner with her quilt, Carefree. AdventureQuilter.com

Peeking In, by Anne-Marie Miro

Perhaps you can tell:  Einor’s flowers and lily pads are, indeed, floating.  Very dimensional and lovely.

World Quilt Show FL 2015. AdventureQuilter.com/blog

Floating Flowers, by Elinor Dickinson

I’ll see you at next year’s show!

Ellen Lindner
P.S.  I’ve also had other quilts win awards in previous years.  See Ripening and Crotons.

Best Pictorial!

I was thrilled to win Best Pictorial at last week’s World Quilt Show – Florida, in West Palm, FL.  My quilt, Carefree, did the trick.

Click any image for a larger viewEllen Lindner with her quilt, Carefree.  AdventureQuilter.com

It was a lot of fun to visit the show, accept a few compliments, see all the great quilts, and – of course – visit the vendors!

Here are a few of the pieces that caught my eye:

World Quilt Show FL 2015.  AdventureQuilter.com/blog

Daybreak in my Garden, by Elsbeth Kooyman

This quilt was part of a group exhibit from Curacao.  Each quilter copied the style of Leslie Gabrielse, who is an excellent Dutch quilter/painter.  He uses large stitches to finish the edges of each piece, which these quilters did as well.  I love the sheers in the background.

World Quilt Show FL 2015.  AdventureQuilter.com/blog

A group of quilters from Miami had an exhibit, which featured images from that city.

World Quilt Show FL 2015.  AdventureQuilter.com/blog

Stiltsville Too, by Sandra Marietta

Janet McCallum’s piece was done with deconstructed screen printing.  Very subtle and beautiful.

World Quilt Show FL 2015.  AdventureQuilter.com/blog

Pebble Beach, by Janet McCallum

I don’t normally study the traditional quilts too closely, but the TINY yo-yos making up this piece were definitely worth further investigation.

World Quilt Show FL 2015.  AdventureQuilter.com/blog

Stars and Hearts – detail, by Debra Cathy Linsley

Don’t you love a quilt show?  I’ll show more photos in the next post.

Ellen Lindner