Fractured Quilts: Snips and Tips
Have you seen the great pictorial quilts made by several different quilters? Although each quilter is working from the same photo and pattern, their individual choices of fabrics and techniques make these quilts very interesting and unique. These quilts, called fractured or sliced, are lots of fun to make. However, they also pose some unusual challenges concerning ownership, construction, scheduling, and more. This article provides tips and options for addressing these issues.
Ownership:
Determining who will own the finished quilt deserves great thought. Since the final quilt is only viable with all its parts joined together, the quilt – in it’s entirety – should belong to just one person or organization. There are several ways to approach this:
Decide, in advance, to give the completed quilt to a worthy organization. This might be a charity which will use the quilt as a fund raiser. Or your group might decide to give the quilt to an organization that has been helpful to the group: perhaps the quilt shop, church, etc. which allows you to use its facilities.
- Fair warning, though: Don’t assume the finished quilt will be given a place of honor. If you expect it to hang in the front lobby, this should be coordinated with the receiving entity well in advance. And remember that once given away, you no longer have control over it.
An alternative is to make as many quilts as there are participants. This way each quilter gets to keep a completed quilt. Of course, such a plan will affect the imagery and size of the completed quilts. There are two basic approaches:
- Have everyone use the same image and pattern for making her quilt top. Later, slice all the tops in the same fashion and distribute the sections. Each quilter keeps one of her original sections and receives enough from other participants to complete her quilt top. This is the approach my fiber art group, Dirty Dozen, used with our very loose “Flower Power” challenge, shown below.
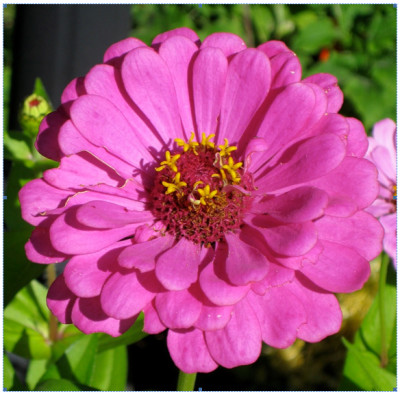
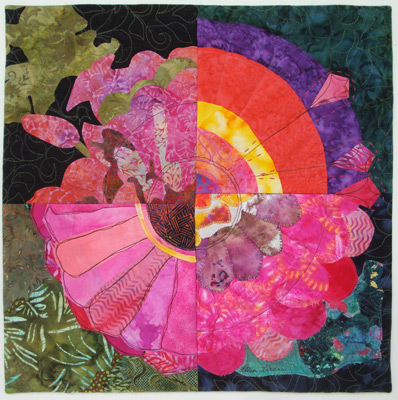
* Swap tip: When exchanging quilt sections, this works really well. (In this example, let’s assume each quilt top was cut into four quadrants.) Have everyone sit in a circle, with their four quadrants, each of which has their name visible on the back. Everyone stands up and each person puts piece #1 at their starting spot. Next, everyone moves to the left and leaves piece #2 in that spot. The group continues moving and deposits pieces #3 and #4 in the next two spots. Finally, all participants return to their starting points, where they’ll find one of each quadrant.
Another idea, which I recommend, is to limit the number of participants. (A group of four works well.) In this case, a quilt will be custom made for each person. The recipient selects the inspiration photo for her quilt. She provides all participants with a color photo and a correctly sized pattern for her assigned section. Each participant constructs her portion as a quilt top and gives it to the recipient. The owner assembles the pieces, quilts it, and finishes it. Meanwhile, the group is working on the quilt for the next person. This new project uses a different photo and may also have some different instructions.
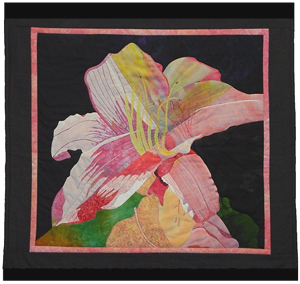
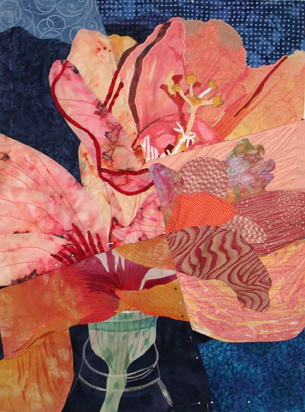
This was the way Elaine Chord, Barbara Bilbo, Peggy Strauchman, and I made a fractured quilt for each of us. Elaine’s quilt is shown at the top of this page. Mine, called Fractured Hibiscus, is shown at right.
Accuracy
How accurately do you want to reproduce the photo? Most groups aim for a high degree of accuracy. Others aim for accuracy primarily at the seam lines, which was the case with the quilt at left.
Still, some groups decide that anything goes. This is what my fiber art group decided for our Flower Power challenge. We created some guidelines for size and proportion, but otherwise decided that our pieces need only be inspired by the original photo. Also, we realized that some of our work would be lost in the seams, but did nothing to avoid that. We just had fun improvising!
The expected accuracy needs to be agreed upon before the challenge begins and all participants should be aware of the policy. A decision also needs to be made in answer to the question, “How much can I alter your portion after receiving it?”
Copyright and Usage
Although fractured quilts are typically undertaken by groups of friends, it still doesn’t hurt to address things like who owns the copyright, who should be listed as the maker(s), etc. Usually, all participants are listed as makers and holders of the copyright.
Dividing the Image
When deciding how to fraction your photo into sections, consider options other than evenly spaced vertical and horizontal lines. Look at the image to see what type of diagonal or uneven lines would enhance the image. It’s often effective to have the seams go right through primary subject matter: a petal, building, tree, etc. See an example, below left and center.
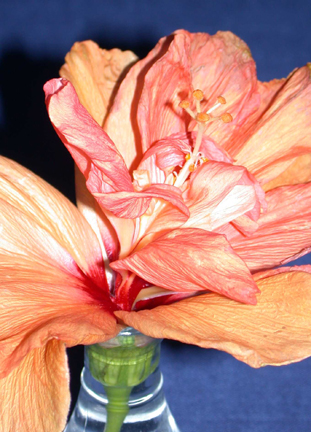
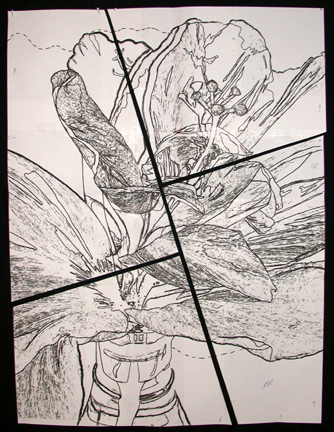
There’s another advantage to dividing an image like this: the four quadrants don’t meet at a central point, therefore avoiding the bulk that goes with that. It may also provide an opportunity to add excitement to some sections. Participants who would otherwise be stitching background only will appreciate this.
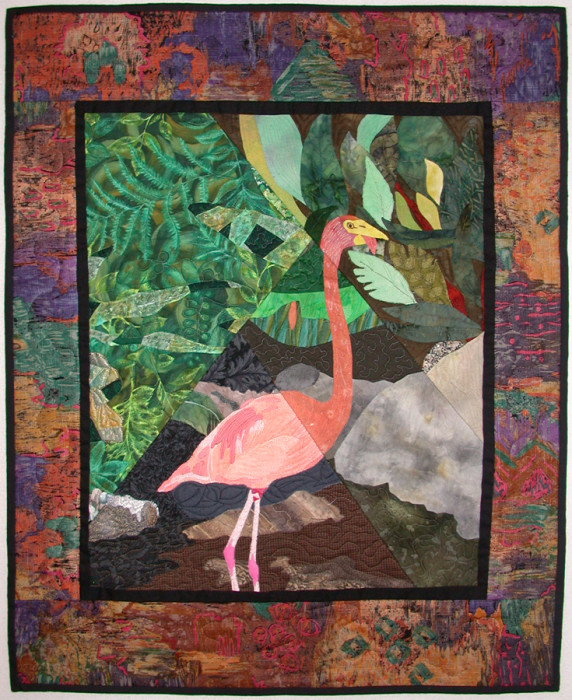
Notice these examples of angled seams: El Floringo, above right, and My Lily, My Lily, at the top of the page.
.
Patterns
Obviously, groups who decide on a high degree of accuracy, will need a full size pattern. This can be created with the help of a computer photo editing program, such as Photoshop Elements. Several features can help create a drawing. Some examples are posterizing, find edges, and artistic sketch.
Participants in such a project will need to add a healthy seam allowance to their pattern pieces.. 1/2″ works well for this. NOTE that the imagery should NOT stop at the seam allowance. Instead, it should be continued, by eye. This will help greatly when the sections need to be joined.
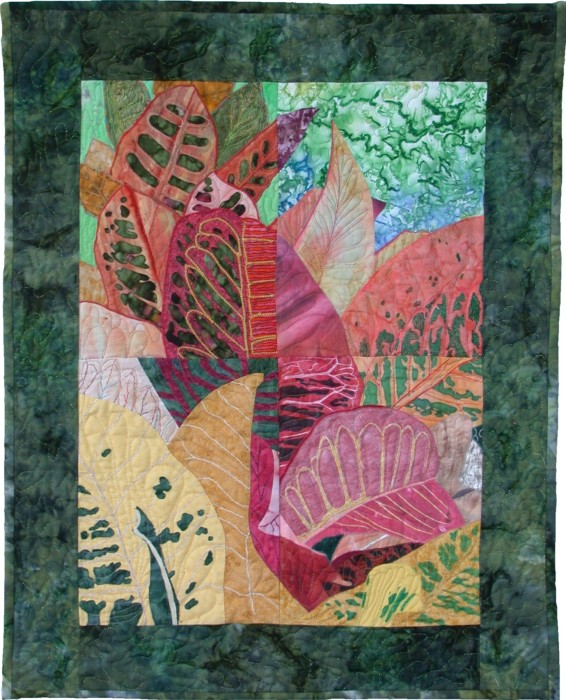
Peggy Strauchman’s quilt, Fractured Foliage, at left, definitely needed a pattern. It was made by the same group of four previously mentioned.
Assembly
Most groups gather and assemble the quilt top portions before any quilting is done. This definitely makes construction easier! Remember that they may not match perfectly and this is part of the charm of these quilts.
More Examples
There are many beautiful fractured, (or sliced,) quilts online. Check these out for even more inspiration.
Judy Zoelzer Levine created three sliced quilts for Gilda’s Club in Milwaukee.
Corky Ledbetter participated in a floral project orchestrated by Tomme Fent. More examples.
Tomme Fent coordinated another fractured challenge project.
Lyn Wolf Jackson helped make a quilt depicting Becker Lake.
SAQA’s Central Canada region created Laurentain Foothills, inspired by an Anne Savage painting.
Kathie Briggs and three others reproduced a scene with colorful fishing buoys.
Robbie Payne made two sliced quilts, along with a friend.
The Miami Art Quilters created a fractured quilt showcasing Burano, Italy.
A group of 17 from Almonte, Ontario, Canda created a unique mounted piece, inspired by the art of J.E.H. MacDonald.
The Aussome Fiber Group stitched two-person sliced quilts.
These quilts are not only fun, but also truly wonderful. Why not gather some friends and give one a try? And, if you send me a link I’ll add you to the list!
If you found this information useful, you may be interested in my other free articles, online classes, and e-books. Full directory
