“A View Within”

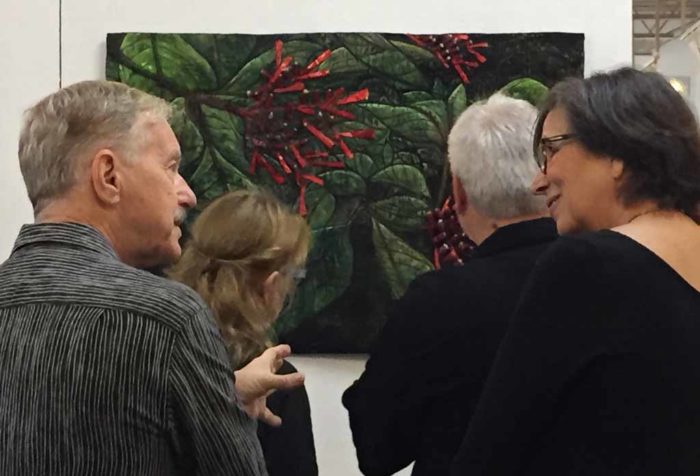
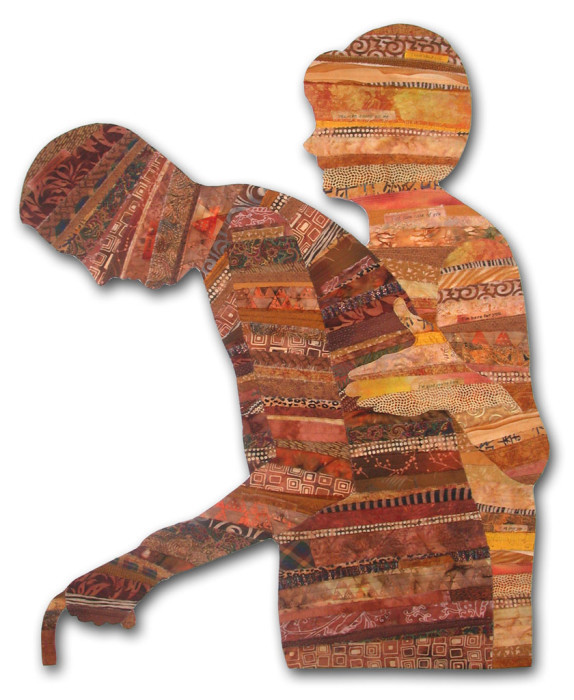
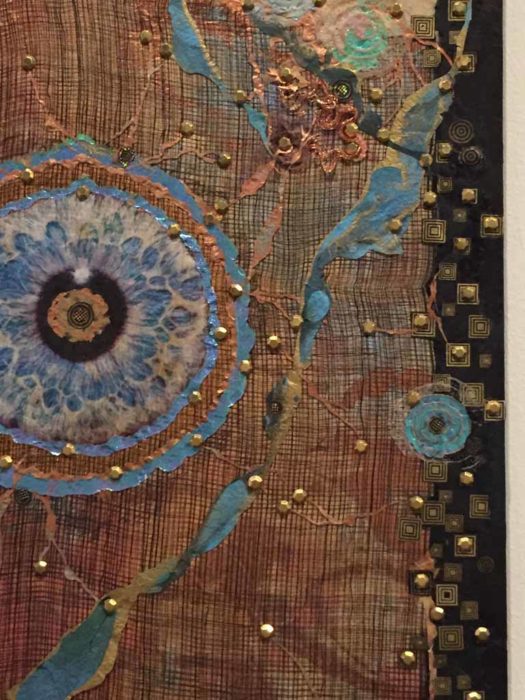
A View Within is an art quilt exhibit currently on display at the Ruth Funk Center for Textile Arts, in Melbourne, FL.  It features the work of Paula Chung and Karen Rips.  Paula likes to interpret MRIs and other medical images in her work.  Karen has riffed off the same images and ideas but in her own unique way.  It’s interesting to see two different interpretations of the same subject.

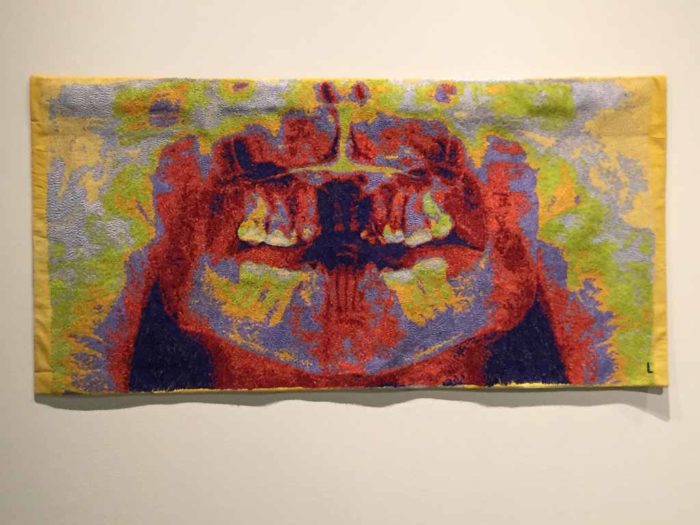
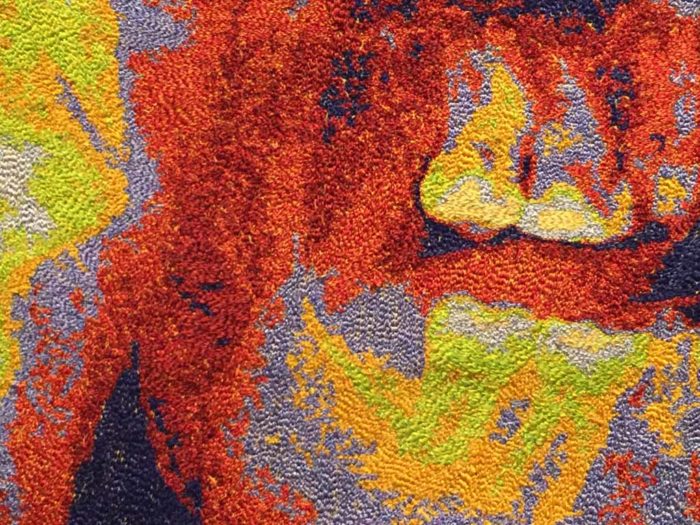
This is Mary III, by Paula Chung.  Can you see the purple jaw and the yellow teeth?

A View Within exhibit. Ellen Lindner, AdventureQuilter.com/blog

Her pieces are VERY heavily machine stitched.  Amazing, right?

A View Within exhibit. Ellen Lindner, AdventureQuilter.com/blog

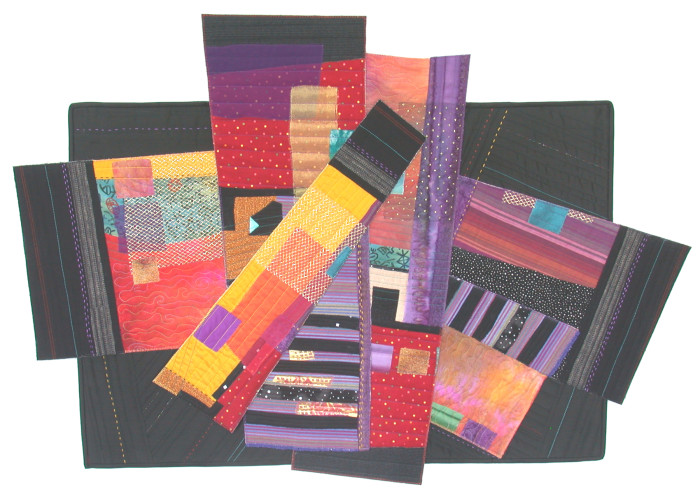
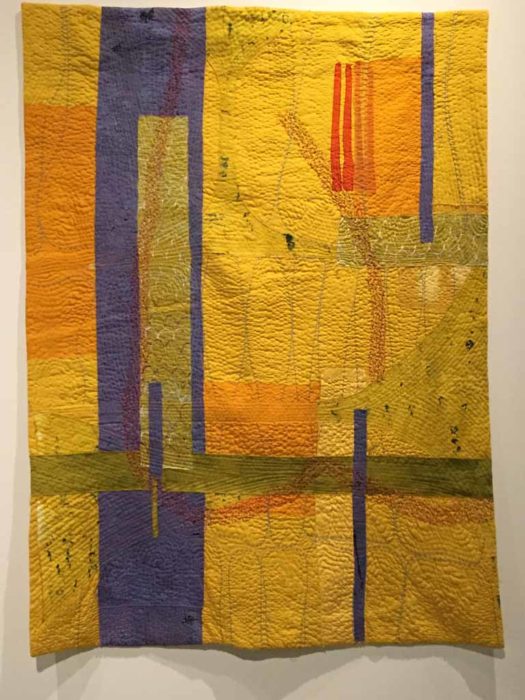
Karen, on the other hand, took an entirely different approach to the subject with her piece Teeth.  If you look closely, you’ll see the vertical stitched teeth shapes.

A View Within exhibit. Ellen Lindner, AdventureQuilter.com/blog

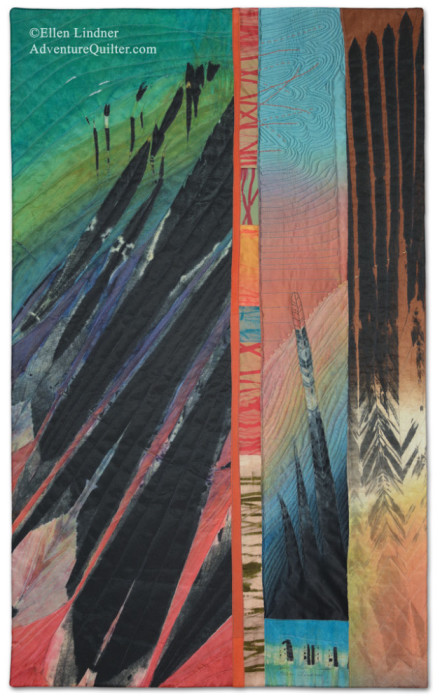
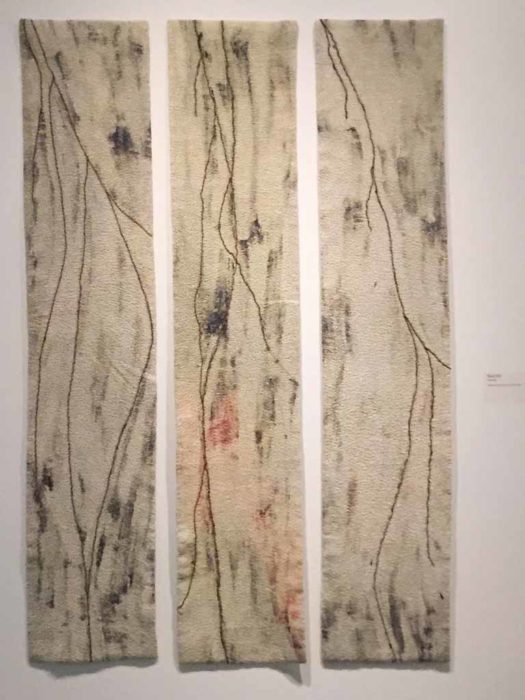
When Paula depicted an MRI of the head and neck in neutral colors, Karen created this piece, Road Trip.

A View Within exhibit. Ellen Lindner, AdventureQuilter.com/blog

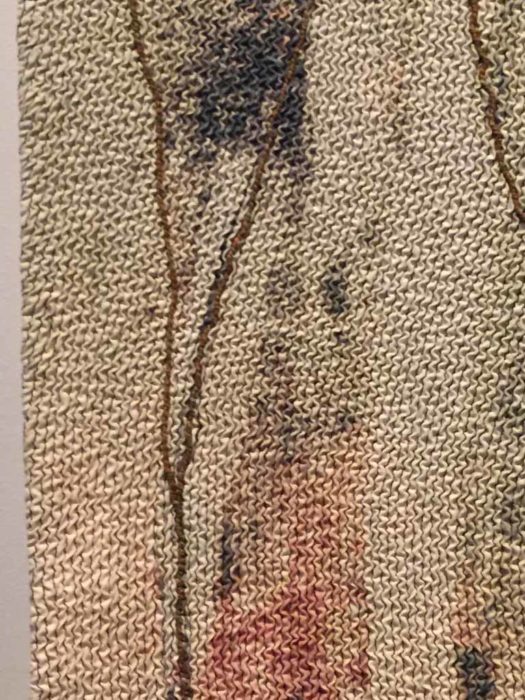
The close up view is amazing, because the entire piece is heavily puckered into rows and rows.  It’s a very interesting and appealing texture.

A View Within exhibit. Ellen Lindner, AdventureQuilter.com/blog

These are just a few of the images from this exhibit.  It will be on display, along with the Radical Elements exhibit through August 27th.

Ellen Lindner
P.S.  While you’re checking out art be sure to check out the Dirty Dozen Fiber Artist’s exhibit on display at the Eau Gallie library.  See earlier posts for images.

0

Two Art Quilt Exhibits

We’re very lucky to have the Ruth Funk Center for Textile Arts right here in Melbourne, FL.  This is a state of the art facility which brings in extraordinary textile exhibits all throughout the year.

Every summer they host an art quilt exhibit.  Right now they have two:  Radical Elements and A View Within.

Radical Elements is a juried invitational* exhibit, curated by the great folks at SAQA (Studio Art Quilt Association.)  It’s all about the elements of the periodic table.  Each artist got to select the element she wanted to use and then made work appropriate to that element.  Artists were encouraged to use very non-traditional materials.

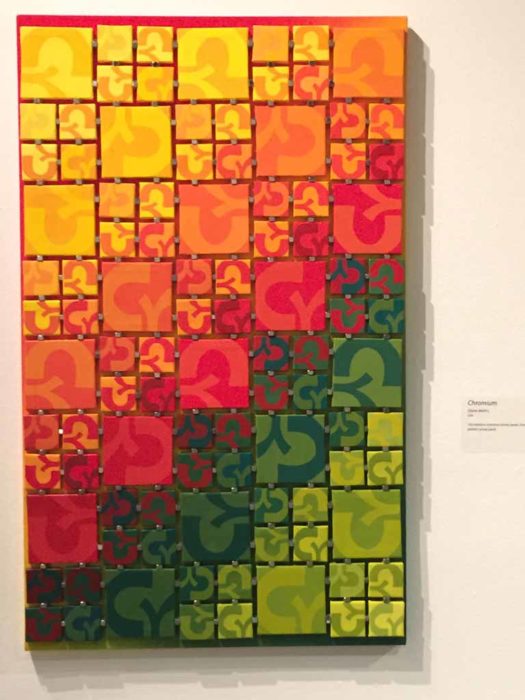
This is Chromium, by Diane Melms.  It’s composed of artists’ canvases that have been painted and stacked.  It definitely pushes the definition of a quilt, but this sort of thing is allowed per the SAQA definition of a quilt.

Radical Elements exhibit. Ellen Lindner, AdventureQuilter.com/blog

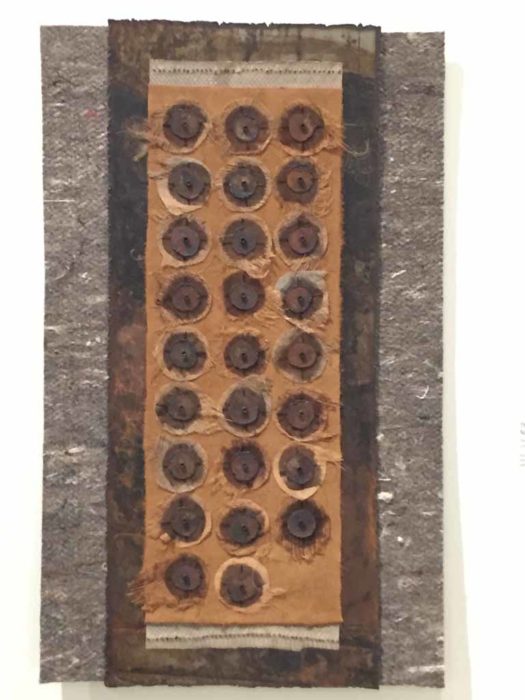
Trisha Hassler selected iron as her element.  She calls her piece
The Irony of it All Was Not Lost on Her.

Radical Elements exhibit. Ellen Lindner, AdventureQuilter.com/blog

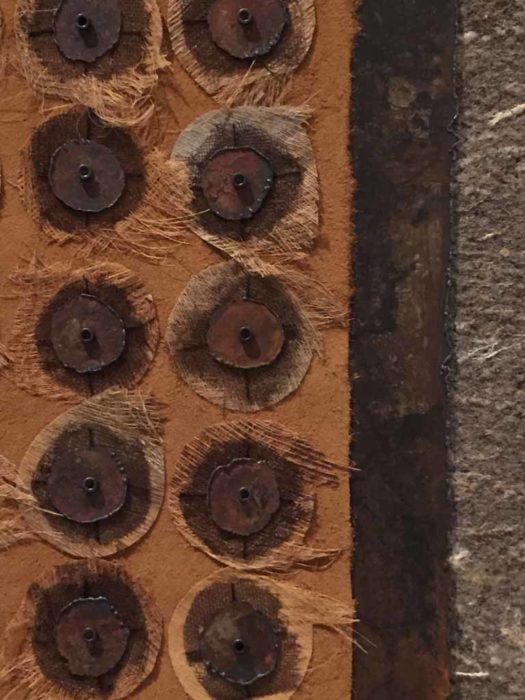
She used a wide variety of materials, including steel and snake skin!

Radical Elements exhibit. Ellen Lindner, AdventureQuilter.com/blog

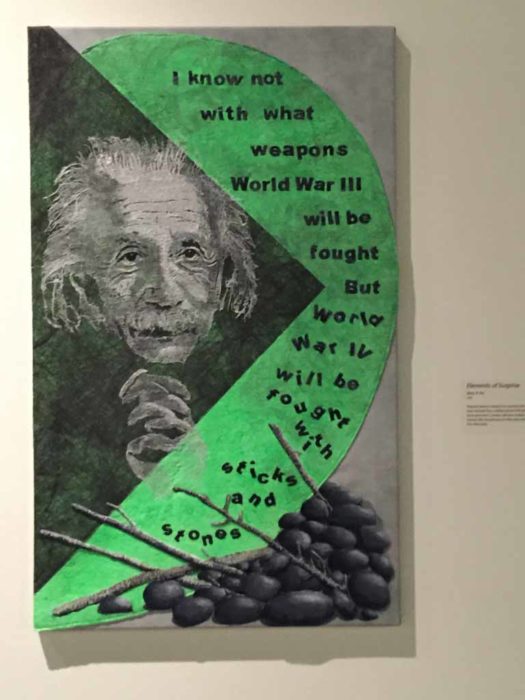
Mary Pal did one of her wonderful cheesecloth portraits to portray Albert Einstein.  She calls it
Elements of Surprise.

Radical Elements exhibit. Ellen Lindner, AdventureQuilter.com/blog

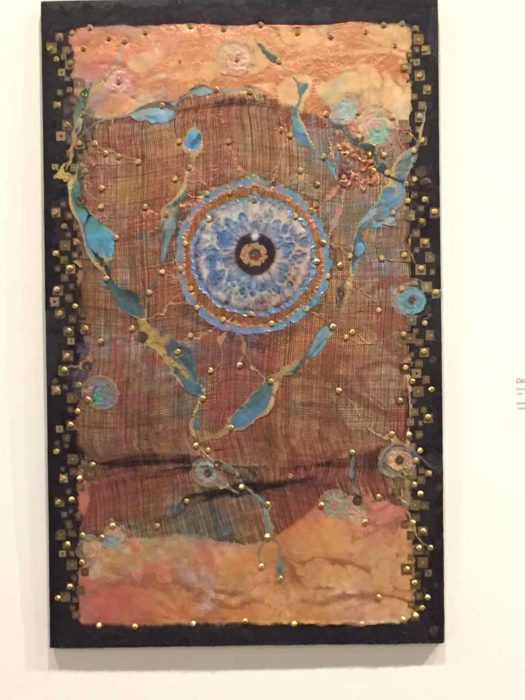
Darkness Into Light II is the title for Grace Harbin Wever’s piece.

Radical Elements exhibit. Ellen Lindner, AdventureQuilter.com/blog

It has really wonderful details.

Radical Elements exhibit. Ellen Lindner, AdventureQuilter.com/blog

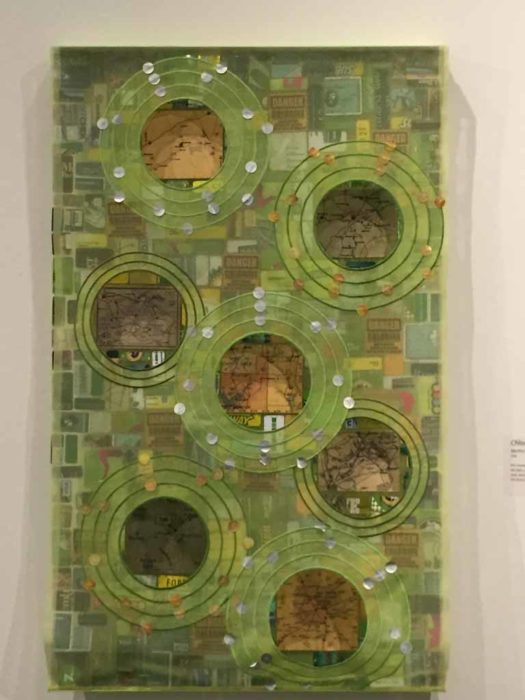
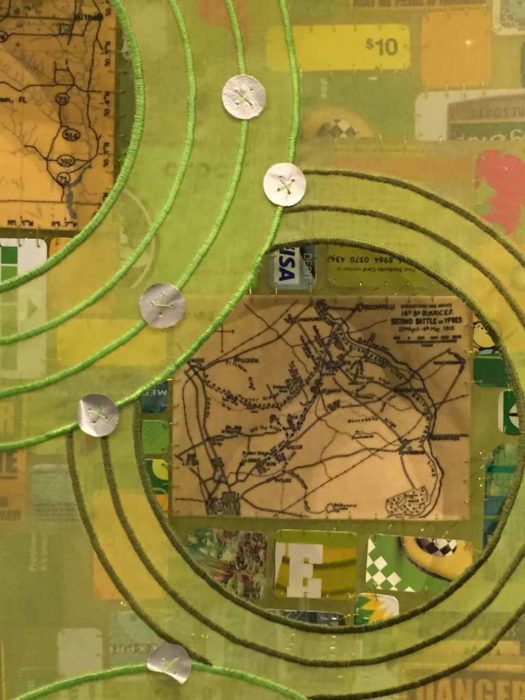
Chloros was a very interesting piece by Martha C. Hall.  As you can see, it’s double layered with holes cut in the front layer.

Radical Elements exhibit. Ellen Lindner, AdventureQuilter.com/blog

I think Martha must have had fun collaging paper and other items to create the first layer.

Radical Elements exhibit. Ellen Lindner, AdventureQuilter.com/blog

This exhibit will be on display through August 27th.  I hope you get the chance to see it.

In the next post I’ll show you images from the second show.

*(I’m not sure my term”juried invitational” is exactly correct.  What I mean is that people apply to be invited, without actually making any work.  If the juror likes their portfolio they’re invited to make a piece specifically for the exhibit.)

Ellen Lindner
P.S.  If you want to see more of what the RFCTA offers, click on Old Blog above and in the search box type “Ruth Funk.”  You’ll find a wealth of posts about exhibits there.

2

Fiber Art in Melbourne, FL

The public library in Eau Gallie, (Melbourne) FL has beautiful views of the Indian River, and now, beautiful views of  art made by the Dirty Dozen Fiber Artists.  (She says unashamedly.)

Here are some more photos of the exhibit.
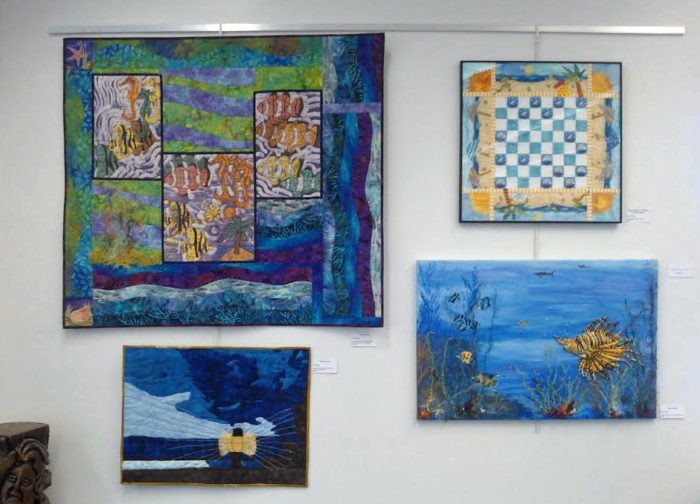
Fiber art exhibit in Melbourne, FL. Ellen Lindner, AdventureQuilter.com/blog

Pieces on this wall (starting top left and going clockwise) were make by Dij Pacarro, Susan Rienzo, Terri, Drake, and Jill Brown.

One of the spaces available to us was a small study room.  Unfortunately, we had to hang the work while a tutoring session was going on!  Thankfully, they were very gracious (and complimentary.)

The wall and door have large glass panels so people can see in, but that glass made it hard to get a good photo without a reflection.  Here’s my best shot.
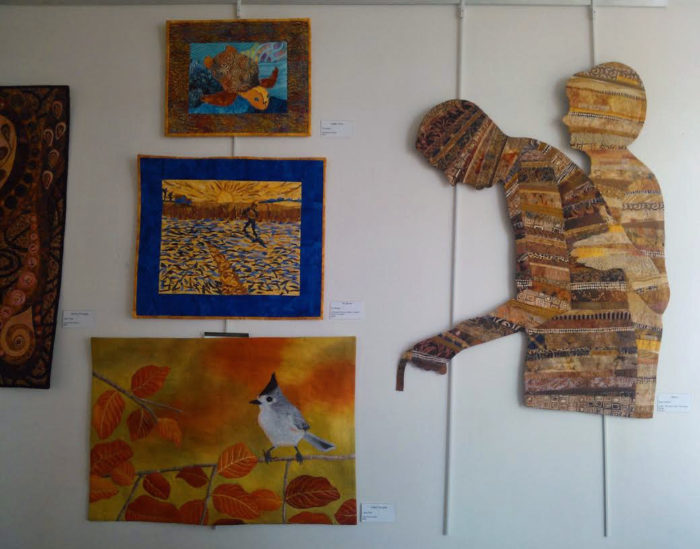
Fiber art exhibit in Melbourne, FL. Ellen Lindner, AdventureQuilter.com/blog

Clockwise from the people on the right, these quilts were made by me, Laura Ruiz, Laura again on the barely visible piece, and Dij Pacarro for the last two.

You wouldn’t think the copy corner was a great place to display art, but it was one of the larger spaces and very visible.
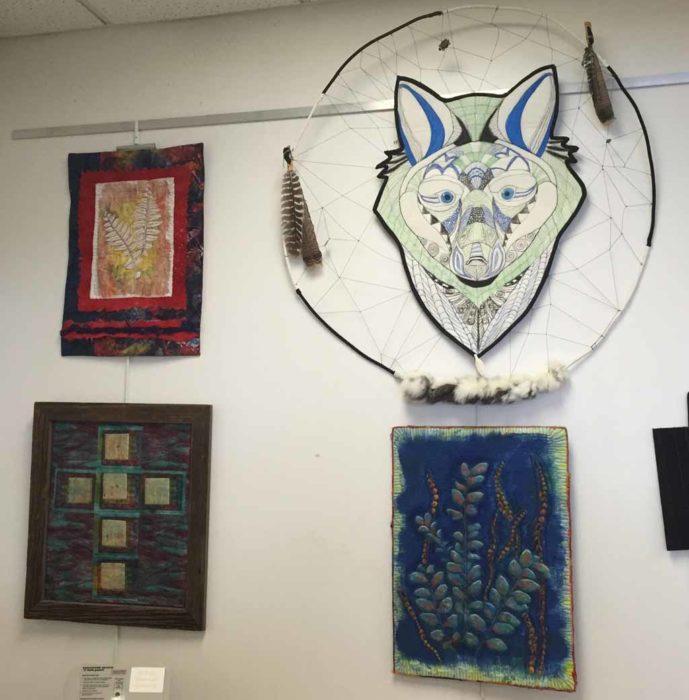
Fiber art exhibit in Melbourne, FL. Ellen Lindner, AdventureQuilter.com/blog

The left side of the wall is shown above.  Starting with the wolf and going clockwise, these were made by Terri Drake, Gabriele DiTota, Elizabeth King, and Gabriele again.

The right side of the wall is shown below.  The smallest quilt  was made by Elizabeth King, and I made the other two.
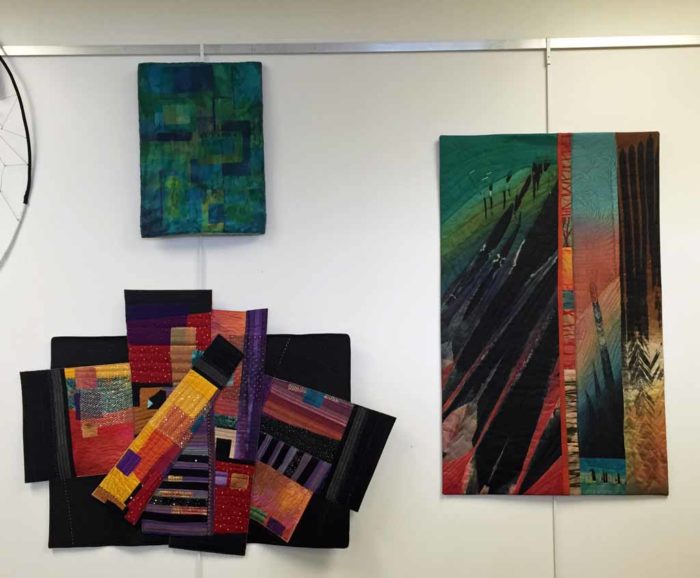
WEB - copy room right

A pretty great display, right?  I’m SO delighted to be part of this group.  We learn from one another, challenge one another, and have fun doing it!

The exhibit will be up through August 30th.  I hope you get to see it.  Here’s the info: Eau Gallie Public Library, 1521 Pineapple Ave., Melbourne, FL.  It’s open every day except Sunday.  See full hours in previous post.

Ellen Lindner
P.S.  If you want to see better pictures of my three exhibit pieces, use these links:
Caring
Taking Flight
Urban Sprawl
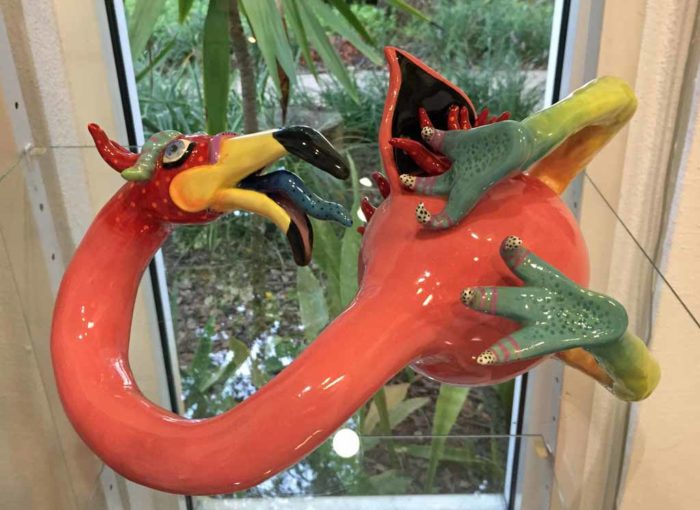
2

Hanging an Exhibit in Melbourne, FL

It always takes longer than you expect when hanging a show.  But, thanks to an efficient crew, the recent installation of our Dirty Dozen Fiber Arts show went very smoothly.

Our exhibit is at the Eau Gallie library, in Melbourne, FL.  It’s a nice building with a wall of windows looking out on palm trees and the Indian River.  A wonderful setting.
Fiber art exhibit in Melbourne, FL. Ellen Lindner, AdventureQuilter.com/blog

See what I mean?  Here’s a better view of the quilts shown above.

Fiber art exhibit in Melbourne, FL. Ellen Lindner, AdventureQuilter.com/blog

The largest piece was made by Ruth Anne Parker.  Jill Brown made the ice cream cone and Terri Drake created the bottom piece.

Rudy Pacarro, Laura Ruiz, and I did most of the ladder climbing, while Dij Pacarro and Andrew Lindner guarded quilts and managed signs.

Fiber art exhibit in Melbourne, FL. Ellen Lindner, AdventureQuilter.com/blog

Fiber art exhibit in Melbourne, FL. Ellen Lindner, AdventureQuilter.com/blog

These quilts are on the most visible wall, near the doorway.

Fiber art exhibit in Melbourne, FL. Ellen Lindner, AdventureQuilter.com/blog

Starting with the largest quilt and going clockwise, these pieces were made by Laura Ruiz, Susan Rienzo, Gabriele DiTota, Jill Brown, collectively: Dij Pacarro, Jill Brown, Paula Furgason, and Peggy Horsfield, and the last one was made by Susan Rienzo.

The exhibit will be on display through August 30th.  I hope you get to visit it.  Here’s the info:
Eau Galllie Public Library, 1521 Pineapple Ave., Melbourne, FL.

Hours of Operation
Sunday            CLOSED
Monday          12:00PM – 8:00PM
Tuesday            9:00AM – 5:00PM
Wednesday     9:00AM – 8:00PM
Thursday          9:00AM – 5:00PM
Friday                9:00AM – 5:00PM
Saturday           9:00AM – 5:00PM
I’ll have more pictures for you in the next post.

Ellen Lindner
P.S.  There’s a “poke-stop” (is that what it’s called) just outside the library.  It was very popular.

2

“Ray Turner: Population”

You wouldn’t think that three galleries of “head shot” portraits would be that interesting.  But, it really was.  In the hands of painter Ray Turner, each person not only looks different, but in many cases, their personalities shine through.

This grouping was on the main wall at the Foosaner Art Museum, in Melbourne, FL.

Can you see how the background colors shift slightly?

"Ray Turner: Population" exhibit in Melbourne, FL. Ellen Lindner, AdventureQuilter.com/blog

As with every exhibit he does, the center column and center row are portraits of local “celebrities” and museum personnel.  The very center portrait is of Anthony Cantanese, the  outgoing president of our local college.  To the left are his wife and the incoming president.  You get the idea.

"Ray Turner: Population" exhibit in Melbourne, FL. Ellen Lindner, AdventureQuilter.com/blog

The portrait below was photographed from several feet away.

"Ray Turner: Population" exhibit in Melbourne, FL. Ellen Lindner, AdventureQuilter.com/blog

It was intriguing to come in close and notice the details.  There was quite a bit of texture in the paint.  Also, because each portrait was painted on special glass that’s 3/8″ thick each one had  an unexpected depth, as well as a shadow.

"Ray Turner: Population" exhibit in Melbourne, FL. Ellen Lindner, AdventureQuilter.com/blog

The artist also experimented with how little information he could provide and still have the face be recognizable.

He tried one with no color.

"Ray Turner: Population" exhibit in Melbourne, FL. Ellen Lindner, AdventureQuilter.com/blog

And another with just a little yellow.

"Ray Turner: Population" exhibit in Melbourne, FL. Ellen Lindner, AdventureQuilter.com/blog

Could you tell that both of those last two were the same person?  I’ll bet you could.  It’s amazing how little information is really needed to convey an idea.

I always enjoy a visit to an art museum.  I hope you’ve been able to visit one or two this summer.

Ellen Lindner

4

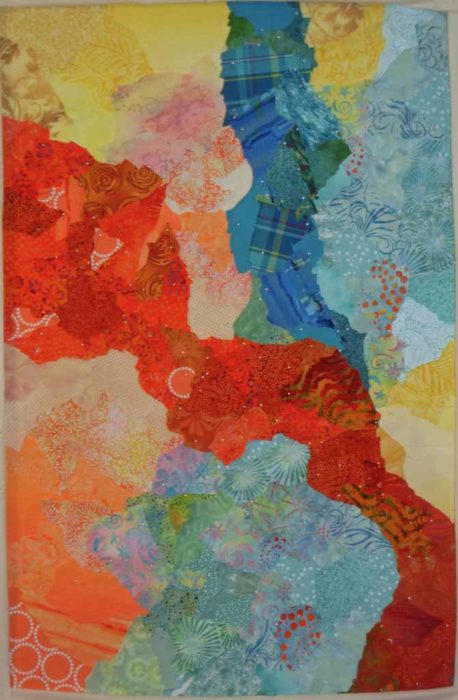
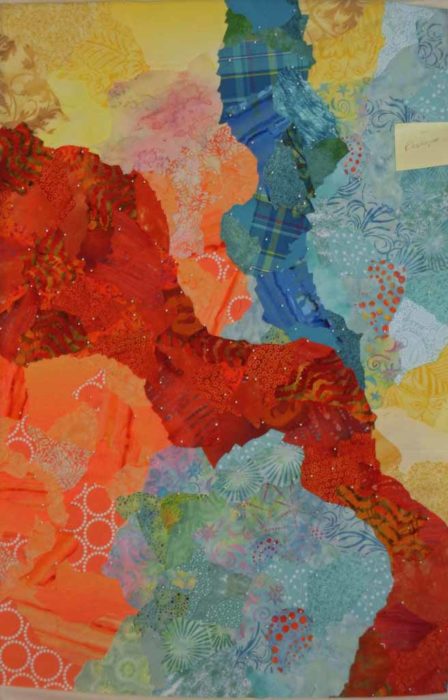
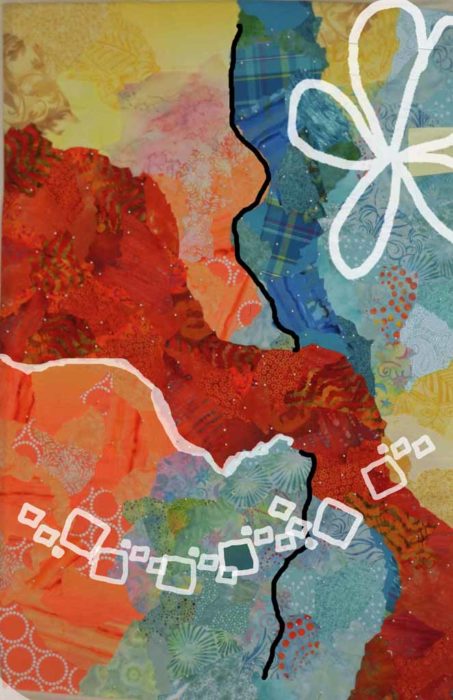
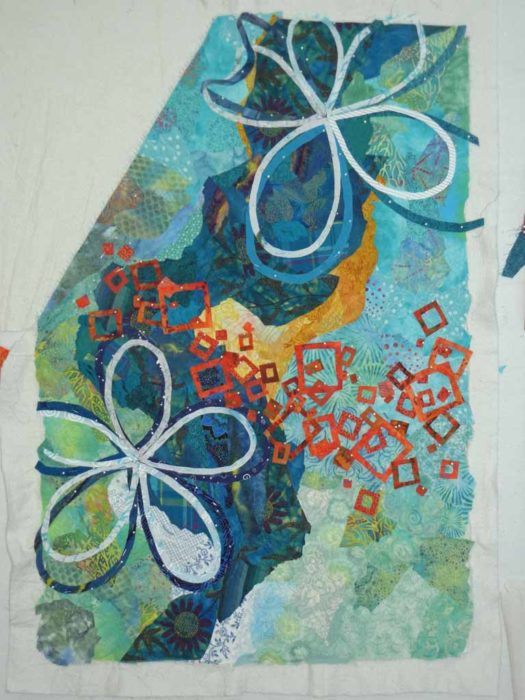
New Abstract Under Way

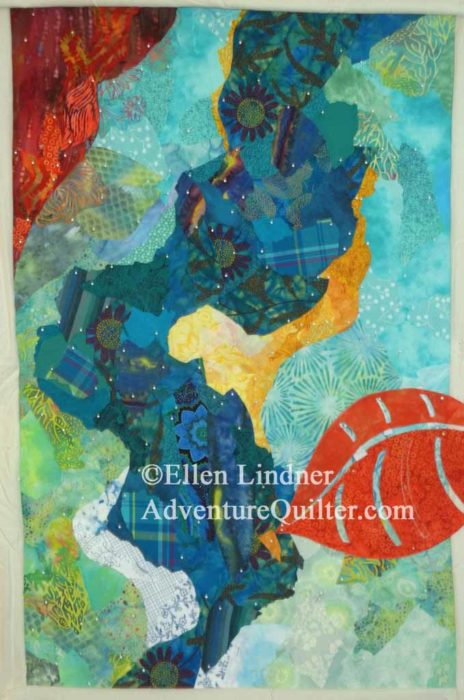
After having so much fun on the last abstract quilt, I’ve started on another one.  I’m allowing the first to inspire the second, but making LOTS of changes.

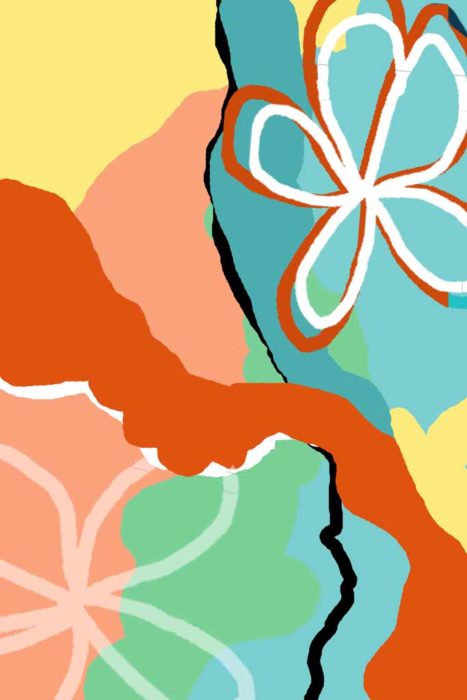
This was my starting sketch.

Ellen Lindner's color experiments. AdventureQuilter.com/blog

I thought I’d probably ROUGHLY copy the background, but with plenty of alterations as they occurred to me.  Right off the bat, I knew I wanted to add some undulation to the central vertical shape, and I also thought it would benefit from the addition of some yellow.  I spent  a little time studying the background, then I put the sketch away.  After all, I didn’t want to copy it!

I started construction by using scraps to create the central shape.  I left all the odd points in place, thinking they’d help me decide where to take the undulation.

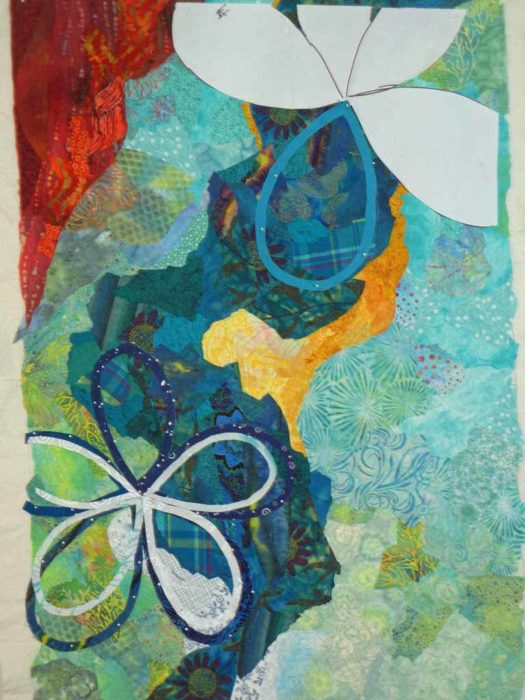
An abstract art quilt under way. Ellen Lindner, AdventureQuilter.com/blog

That was just the start.  Next, I added more fabrics – this time very purposefully – to create the undulation I wanted.

An abstract art quilt under way. Ellen Lindner, AdventureQuilter.com/blog

MUCH more interesting, don’t you think?

Next, came the left background.  I used a couple of print fabrics to create a sort of soft/fuzzy edge where the two orange/rust and blue-green met.  (Sorry for the pathetic focus.)

An abstract art quilt under way. Ellen Lindner, AdventureQuilter.com/blog

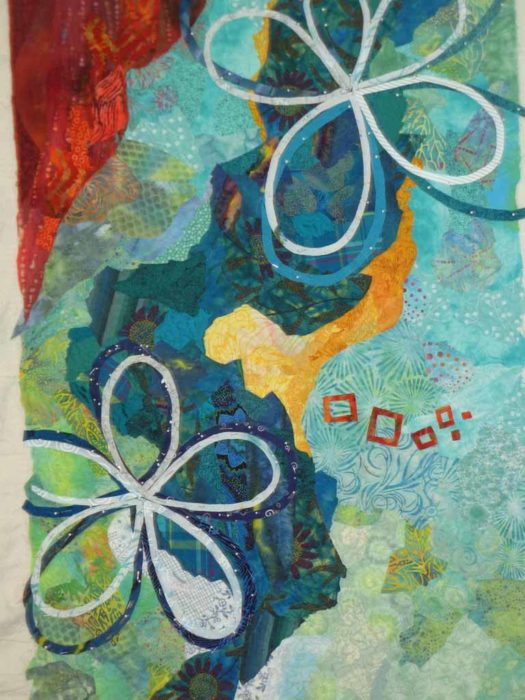
After making progress on the left side, above, I auditioned some additional elements as well as color placement for  the background.  The skinny navy line and the orange squiggle near it did not make the cut!  I was doubtful that they would, but you have to make visual decisions visually.  You HAVE to do some trial and error!

I added white and yellow and worked on the background on the right side.  It was coming along nicely.

An abstract art quilt under way. Ellen Lindner, AdventureQuilter.com/blog

I finished the background, but wanted to add some little squiggles of color.

An abstract art quilt under way. Ellen Lindner, AdventureQuilter.com/blog

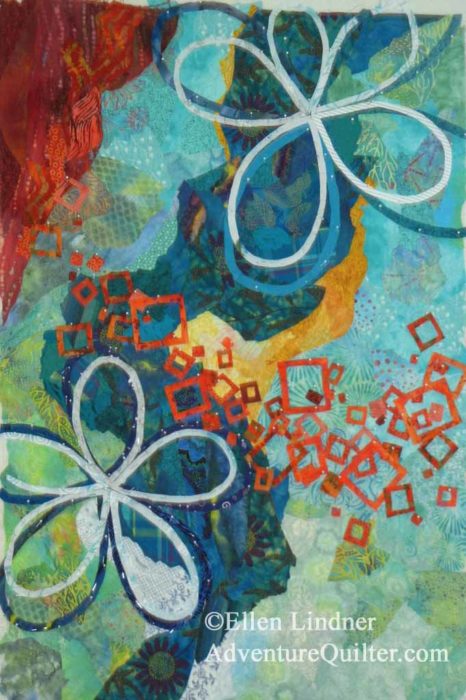
However, the orange above took over.  Not a good choice.

How about yellow?

An abstract art quilt under way, by Ellen Lindner, AdventureQuilter.com/blog

Ah, yes.  That’s much better!
Did you notice that I changed the shape of the yellow on the right, too?

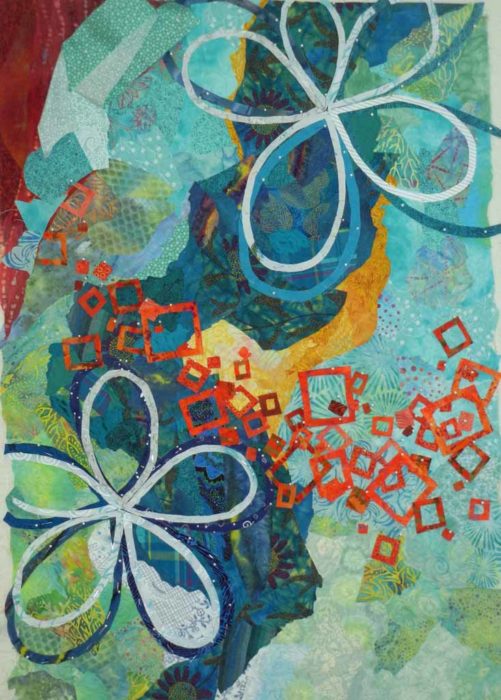
At this point I considered the background complete.  It was time to consider the design elements.  Clearly, I’d need to repeat the white and orange.  Per the sketch, I thought I’d need a good bit of orange in the bottom right corner, to balance that in the opposing corner.

Ellen Lindner
P.S. Just for kicks, scroll back to the top of this post to see how much I deviated from the sketch.  But, that’s FINE!  As a matter of fact, it was my plan.  The sketch – especially with abstract designs – is meant to be the starting point only.  All of this is very fun.

6

Will This Pear be Famous?

Will this green pear be famous?  I certainly hope so!

A Double Reverse Applique sample by Ellen Lindner. AdventureQuilter.com/blog

It’s the sample I’ll be using when teaching Double Reverse Applique on Quilting Arts TV!  That’s right, I’m going to be on TV!!!  To say I’m excited is putting it VERY mildly!

I’ve been spending lots of time making samples and “step outs,” practicing, and timing myself.  (Right now I’m too long, so I’ll have to work on that.)

A Double Reverse Applique sample by Ellen Lindner. AdventureQuilter.com/blog

This technique is only one of three I’ll be doing!  The other two are on Design Tips and Using a Photo as Inspiration for a Quilt.  All 3 of these are close to my heart, and I’m super excited to be working on them.

Taping is in September, but I have to have my ducks in a row much sooner.  What fun projects!

Ellen Lindner
P.S.  Learn more about Double Reverse Applique with these resources:
DRA Gallery
Ebook
Online class description
Live class description
Blog Post


14

Fabric Twig

Sometimes you just need to wrap a twig in fabric.

Fabric-wrapped twig. Ellen Lindner, AdventureQuilter.com/blog

Fabric-wrapped twig. Ellen Lindner, AdventureQuilter.com/blog

Fabric-wrapped twig. Ellen Lindner, AdventureQuilter.com/blog

Fabric-wrapped twig. Ellen Lindner, AdventureQuilter.com/blog

Update:  Degen asked about my technique, so here’s some more information:

At my local quilt store they save the tiny strips cut from fabric as they create fat quarters.  Then, they bag them up and sell them.  These are what I used, which means they’re cut on grain.  I didn’t use any glue.  I started like a bandage:  lay the strip down in the area you’re about to cover and start wrapping.  When I changed colors, I’d leave a tail of the first color and cover it in the same fashion with the new one.  At the ends, I had to tie a few knots.

I’ve also used these fabrics for knitting.  See this post.

Ellen Lindner

8

Liquefy and Crop

Are you playing along with me?  If so, you’ve printed out the liquefied image from the previous post and you’ve found some small compositions within it.

I found ten, but I’m only showing you four of them.

Ellen Lindner's color experiments. AdventureQuilter.com/blog

Ellen Lindner's color experiments. AdventureQuilter.com/blog

Ellen Lindner's color experiments. AdventureQuilter.com/blog

Again, any one of them would be a great start to an abstract quilt.  What did you find?

Later, I wanted to select one or two of my compositions for the next stage of experimenting.  The first thing I did was to turn them all upside down.  That gave me a new perspective.

I chose two and cropped them SOME MORE!  Maybe you can find their points of origin in the images above.

Ellen Lindner's color experiments. AdventureQuilter.com/blog

Ellen Lindner's color experiments. AdventureQuilter.com/blog

Finally, I began to play with the image above and to turn it into a viable sketch.

Maybe this?

Ellen Lindner's color experiments. AdventureQuilter.com/blog

Or, with slightly altered colors:

Ellen Lindner's color experiments. AdventureQuilter.com/blog

Hmm, yes.  I think that’s a good starting point.  As with Brainstorm, I won’t try to perfectly replicate the sketch.  I’ll use it as reference to get me started, but then – once again – take plenty of detours.  I’m already thinking I’ll add a little yellow.  We’ll see.

Ellen Lindner

0

Taking Detours

When I’m in experimental mode, my plan is to take every creative detour that pops into my head.  What an Adrenalin surge that is!

After completing Brainstorm I wanted to continue to work in the loose, experimental way I had when creating it. First, I wanted to play with colors.  I figured I’d probably use the same ones I’d used in Brainstorm, but perhaps in different proportions.  Hmm, how to best audition my options?  Since my Brainstorm fabrics were still strewn all over my work table, I could have easily pinned them to my design wall.  But, I decided to do some coloring on the computer, instead.  (I used Photoshop Elements, but you could do lots of this with colored pencils and paper.)

I opened a picture of Brainstorm and digitally “sampled” the most prominent colors.  That is, I copied them.  I loaded my digital paint brush with each one in turned and slathered them onto a plain sheet of digital paper.  I tried to do it without a lot of thought.  I used the same size brush throughout and my only criteria was to spread the colors around.

Well THAT was fun!

Ellen Lindner's color experiments. AdventureQuilter.com/blog

As you can see I also drew on a few motifs that I thought I might use at some point.

Ellen Lindner's color experiments. AdventureQuilter.com/blog

I was pretty floored at this point, because either of these could be tweaked a little and turned into a wonderful quilt background.  Wow, what a concept!

Next, I decided to make blocks of color in a computer file that I could fill in with the colors.  I didn’t intend to make a blocky quilt; I just wanted to play with proportions.

Ellen Lindner's color experiments. AdventureQuilter.com/blog

Woah, another good result.  What’s going on here?  I like these proportions a lot.

But, as I said, I didn’t want a blocky quilt, so I did some digital magic.  I “liquefied” the above image.

Ellen Lindner's color experiments. AdventureQuilter.com/blog

Also very cool.  But, I don’t want to make a quilt with that much action in the background.  No worries.  I’ll go back to that recent exercise where I found small compositions within the larger piece.  Now, doesn’t that sound like fun?

All this play would be more fun with some playmates.  Would you like to join me?  You could do something similar with one of your favorite quilts as a starting reference.  Or, I tell you what:  I’ve made the image above copyright free.  You can print it and play with it to your heart’s content!  To find compositions, use two L-shaped pieces of cardboard to create a frame.  Move them around, adjust their size, and tilt them some too.  You’ll find many intriguing little designs.  Draw them on your image and cut them out.  I suggest cropping way in and getting 3 or more compositions from this.  But, that’s up to YOU.  I sure hope someone will join me.  My enthusiasm is getting hard to contain!

Preview:  Of course, after finding a composition I like I’ll take some more detours. 🙂

Ellen Lindner
P.S.  If you want to work with a larger version of this image, go here.


2