Designing in Orlando: Part One

This past weekend I taught “Design Your Own Nature Quilt,” in Orlando, FL.  The supply list included “artistic courage,” and the students brought it in abundant supply.  We spent all morning learning about design, which then gave them the skills they needed to sketch their own design plans.    Most had never done this before, but they all did a fantastic job! 

Finally, we pulled out the fabric and dove in.  (A time issue gave them only 2 hours to work with fabric, but they still accomplished a lot.)

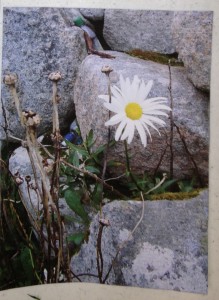
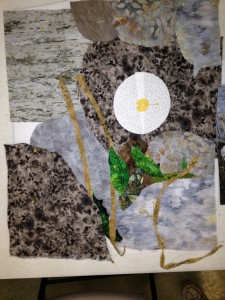
Joyce really cut loose and took a lot of artistic liberties with her photo of a delicate flower.  She kicked up the colors which added drama, and she also added many small details.  She will add some pleated fabric for the wispy top parts of the flower yet to come.

Click on any photo for a larger view
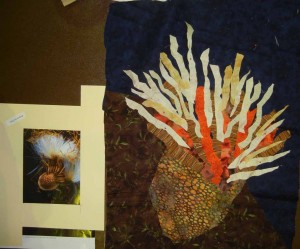
 

Notice how she visually cropped her photo with two L-shaped pieces of cardboard.  This is a very effective way to find the best composition.

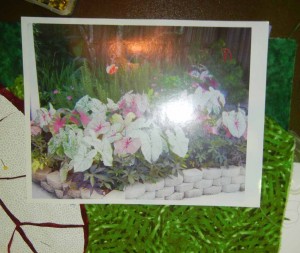
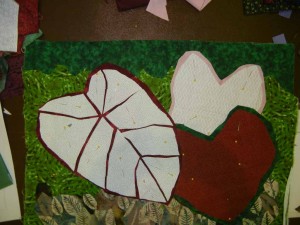
Dianne worked from a photo of caladiums.  

 She was smart enough to enlarge just a few leaves, rather than trying to represent the entire patch of plants.  This allowed her to focus on the beautiful veining and to show a wonderful level of detail.  She’ll use a similar treatment on the remaining two leaves.

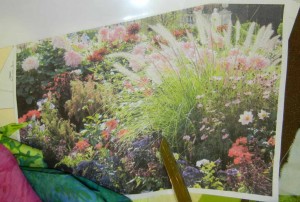
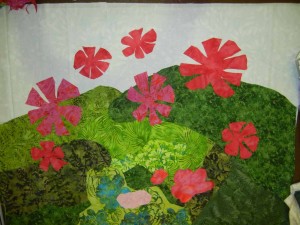
 Kathryn worked from a photo showing a busy garden scene, with LOTS of little details!


She decided to preserve the curve created by the delicate white flowers, but to replace them with big bold pink ones.  Very dramatic!  She’ll represent many of the other flowers with little irregular snippets of fabric.  (Even smaller than the one shown.)

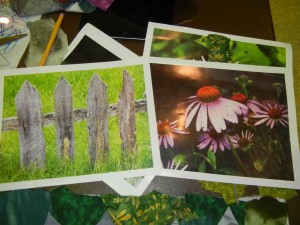
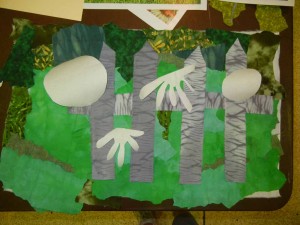
Tami used two photos for her inspiration:  a weathered fence and cone flowers.

She selected the perfect shibori fabric for the fence.  Because she only had a small piece, she modified the design to accommodate this.  The photo below shows her early plans for flower placement.  Some flowers will be in front of the fence, and others will be behind.

These quilts are going to be great!  Many more photos to come!

Ellen Lindner
P.S.  I somehow missed photographing Linda McClelland’s quilt in-progress, but you can see the finished version in the student gallery!
“Crotons” Receives Praise

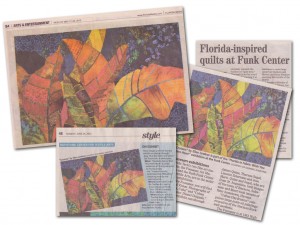
My quilt Crotons  was very well received at the recent “Florida in Fabric” exhibit.  It even won viewers’ choice!  My prize was several WONDERFUL books, CDs,etc. AND a one year membership to the Ruth Funk Center for Textile Arts.  Love that!

Our local art editor, Pam Harbaugh, did an excellent job of covering the exhibit:  four articles in two months.  And my quilt was shown in three of them!  This is what she said about Crotons:

But you can’t get any more beautiful and skillfully executed than Ellen Lindner’s “Crotons.”  Rightfully hanging on the show’s title wall, it takes a vivid and keen look at something rather common – crotons.  You’ll never look at one of those ubiquitious plants the same.

Gee-mi-nee!  Can you say “adrenalin surge?”  Of course, I love the praise, but I’m also excited about any publicity that features quilts as art.

Ellen Lindner


SAQA Auction Starts September 10th

Do you know about the annual fund raising auction held by the Studio Art Quilt Associates (SAQA?)  Oh my!  It’s a wonderful opportunity to purchase a small (12 x 12) quilt.

You can see all the beautiful quilts and learn about the auction process here.

Ellen Lindner

“Summer Fields” Complete

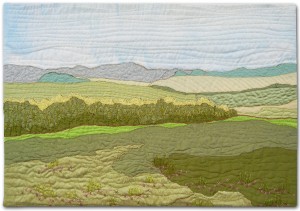
Summer Fields is the name I’ve given my latest small quilt. 

Click any image for a larger view


It was inspired by the farm view from my parents’ driveway.  Perhaps you can pick out the field of “corn”, with golden silks across the top of the plants.

I really enjoyed working with burnt silk and hand embroidery.  It’s been a long time since I’ve done much hand work, but I think it adds a huge impact to the piece!  You can do a lot with a simple straight stitch.  And, of course, I had to add a little color, too.

Ellen Lindner
P.S. This quilt is available for $245.
P.P.S.  I’m already working with more solid silk fabrics.  Lots of burning!

Jacksonville Class: Design Your Own Nature Quilt

I had fun this week teaching Design Your Own Nature Quilt in Jacksonville, FL, with the All Star Quilters.  This class can be a little challenging, so “artistic courage” is included on the supply list.  The ladies did a good job of calling upon that courage and got a lot accomplished in our short time together.

As usual, I was too caught up in the workshop to remember to take pictures until it was almost too late!  Thankfully, I got a few for you to enjoy. 

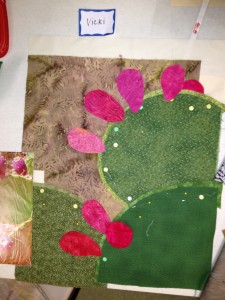
Vicki tackled a prickly pear composition and made great progress with it.

Click any image for a larger view

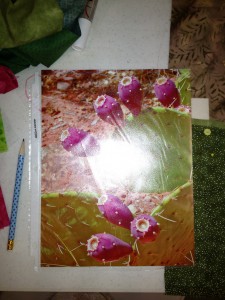
This is her inspiration photo (with a bad reflection.)  She’ll add the round “mouths” of the fruit, which will give them a lot of depth.  Big French knots and other hand embroidery will finish things off.  It will be great!

Mary Anne selected a challenging photo.  Because it has very little variation color, she knew she’d have to play up the value contrasts.

By taking some artistic license (which I always encourage,) she was able to exaggerate the contrasts within the piece.  Notice how much better her “place holder” flower shows up.  (Later, she’ll fuse individual petals.)

Mary Anne’s twisted weed/vines help contribute to an organic feel.

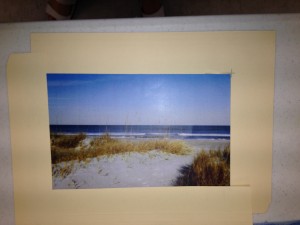
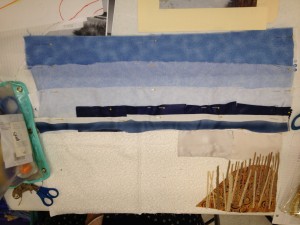
Ruthy selected a serene beach scene for her quilt.  First, she cropped it to improve the composition.

She had a lot of fun considering options and playing with different ways to depict sea grass.  (I’m thinking she might have some fusing in her future!)

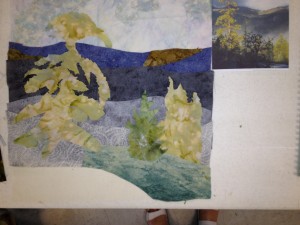
Linda cut loose (quite literally) as she cut the jagged trees needed for her piece.  (Click on this photo, so you can see her inspiration in the corner.)

She’ll add tulle to darken the left side of the sky, which will give better contrast behind the tallest tree.  Tulle will also be used to creat a mist.  The foreground trees will add more contrast and this piece will be very successful.

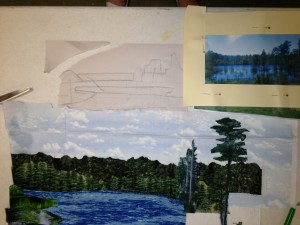
Margaret likes to depict things very accurately and she brought with her the fabrics needed to do the job.  (Click on this photo to see her inspiration photo in the corner.)


Her piece will be very beautiful and serene.

It was a fun and productive day for all of us.  I hope I get to see some finished quilts before too long!

Ellen Lindner
P.S.  I’ll be teaching the online version of this class starting September 21st.  Details here.

Available in My Portfolio: Rhapsody in Blue Berries

One great thing about a blog is that it allows me to easily share large photos.  So, I’ve decided to take advantage of that and to occasionally give you a really great view of some of my pieces.

This time it’s my quilt Rhapsody in Blue Berries. 

Click on any image for a larger view

Rhapsody in Blue Berries, © 2009, 25w” x 20h”

Cotton, silk, and synthetic fabrics. Raw edge collage, soldering (melting,) and machine stitching.

Available for purchase, $495
(Use the Contact link to email me)

Ellen Lindner

Home from Estonia

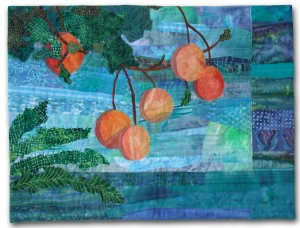
After three years, my quilt, Lakeside Citrus, is home from Estonia.  It was there as part of the Art in Embassies program, hanging in the residence of the U.S. Ambassador.

Click any image for a larger view

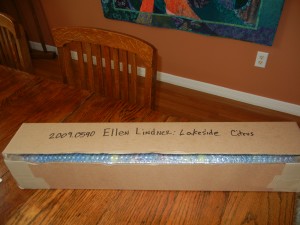
I was surprised at the way it was packed and thought you’d be interested in seeing  it.  Here it is.

See that very intentional gap?  At first I thought the packaging had split open and I commented to the delivery guy.  He said, “That’s a breather.  It must be fabric or something.”

Indeed.  But why was this guy so knowledgeable?  I looked at the delivery truck.  Not UPS.  Not FedEx.  So, I asked “What delivery company are you with?

That’s when he explained that he works for an art shipping company.  Interesting!  Apparently, they have the contract with the Art in Embassies program.

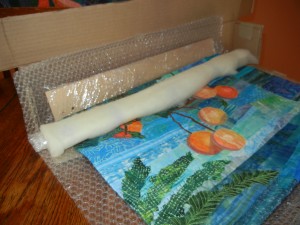
When I opened the package, I saw that the attention to careful detail continued with the interior packaging.

Very nice.  I was delighted to see that my quilt (and even the hanging slat) had received such good care!

Ellen Lindner
P.S.  Not sure where Estonia is?  It’s on the eastern side of the Baltic sea, next to Russia. 
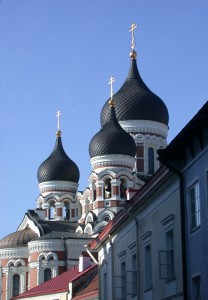
P.P.S.  In 2007, I had the joy of BRIEFLY visiting the capitol city of Tallinn.  Here’s my favorite photo from that day.


Silk Landscape Progressing

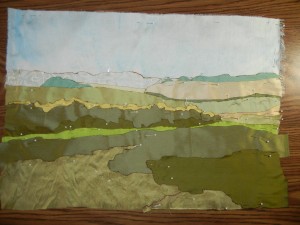
I’m really having fun working on this little silk landscape.  After studying my inspiration photo and my selection of lovely silk fabrics, I got to work.  I had already made a computer sketch, so I was able to jump right in.

At first, I cut the fabrics in my usual fashion.  But, I knew they’d ravel a lot and I was beginning to consider the best way to control that.

Click any image for a larger view

Then, I remembered that burning the edges of silk controls raveling.  I hadn’t used that trick in quite some time!  This, of course required taking apart what I’d already created, burning the edges, and then putting it back together.  But it was worth it.

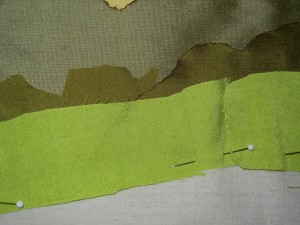
See the photo below of both burned and non-burned edges.  See how badly that silk is already ravelling?  But, the burnt edge stops that.  I also like the little dark edge it adds.

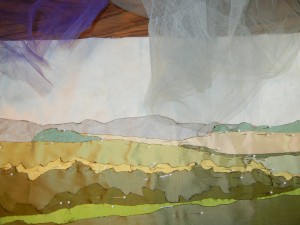
My composition was moving right along when I decided that the farthest trees blended with the sky too much.

So, I did a color correction with two layers of tulle:  one purple and one a dull blue-green.  The result is shown below.  More contrast, right?

Next comes quilting and maybe some hand stitching.

Ellen Lindner
P.S.  See my setup for melting sheers and silks.

Silk Two Ways

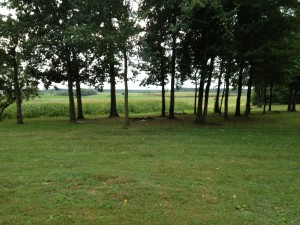
I really enjoyed the lush scenery on a recent trip to rural Virginia.  I took quite a few photos, thinking that they would serve as inspiration for a quilt.

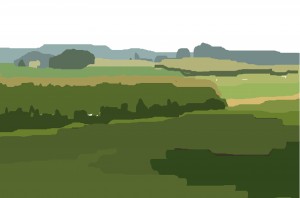
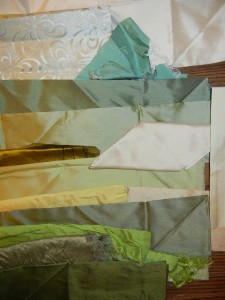
This is one of my favorites, and I had already started sketching it when I discovered some long-lost silk fabrics.  Click on this photo to see the lovely variety of greens and yellows.

If you look closely, perhaps you can see the golden silk tops of the corn plants.

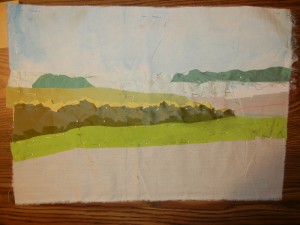
Because my silk fabrics are very muted, I decided to omit the high contrast trees.  Instead, I’ll focus on the softer colors of the crops.  Here’s my fabric audition. 


Although I don’t normally work with muted colors like this, I think they’ll work very well in this case.  I’ll be working quite small, so I might include some hand embroidery. For the corn silk, maybe?

Ellen Lindner

Closets, Clutter, and Color

 When my son was a baby, his room was decorated in royal blue, jade green, and a few hits of purple and fuchsia.  Lively and energetic!

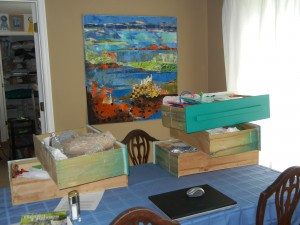
In the years since, his jade green dresser has lived in my studio closet.  But, now things are coming full circle as it will once again be his as he furnishes his college bedroom.  As a a result, I’ve been doing some closet reorganizing.

In the photo above, you can see the drawers filled with a PLETHORA of gift bags.  Just WHY did I think I needed to save so many?!?   But, ignore that and check out the great quilt  by Elizabeth Barton.

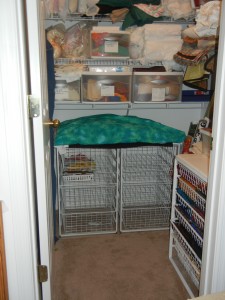
Instead of the green dresser, I’ve got lovely new wire basket drawers.  Smaller quilts are spread out under a green dust cover, as I anticipate organizing the drawers below.  Fun to contemplate!  

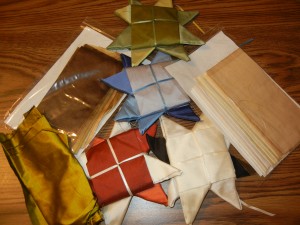
You know how it is when you clean out a closet: 1) It gets worse before it gets better, and you have a big cluttered mess, and 2) you find stuff you forgot you had.  And just look at this lovely collection of silks I found.  I’ve already got an idea about how to use them, inspired by my recent visit to farmland.

Ellen Lindner

P.S.  Ever since we decided to give this dresser to our 19 year old son, I’ve assumed he’d want to paint it a different color.  But, my husband said that he won’t even notice the color and his mom agreed.  To prove her point, she looked at her 21 year old grandson and asked “What colors are the towels in your bathroom?”  He didn’t know.  [Update:  It’s been two days.  I  haven’t mentioned the color to my son and he hasn’t mentioned it to me.  Apparently, jade green is just fine.]

P.P.S. This dresser was used by my husband when he was a teenager, too.