Set Up for Melting Sheers

I thought you might be interested in my set up for melting sheers. 

Set up

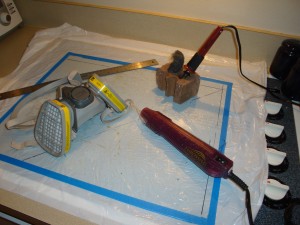
Since melting plastic releases toxic fumes, I always do it under my cook top’s exhaust vent, with the fan on high.  Plus, I always wear a respirator with acid gas filters.

The cook top is glass, so it’s a good working surface.  However, when working with sheers, I want to work on white, so I put down a white kitchen garbage bag as my first layer.  On top of that, I place a large piece of glass, which is my actual working surface.  (I just bought replacement glass for a picture frame, and taped the edges.)

For “cutting” sheers, I use a soldering iron – the kind you can buy in craft stores.  A half brick works extremely well as  a support for this very hot item.  The other hole in the brick holds fine steel wool.  I use this to clean the tip of the soldering tip when it gets too gunky.  If I want to cut approximately straight lines, I use a metal ruler as a guide.

A heat gun is used for melting and distressing the synthetic fabrics.  This is sold in the stamping section of craft stores.

You can purchase a respirator AND the needed filters for $23, shipping included, by following the links above.  This is a very worthwhile investment.

Ellen Lindner
If at First You Don’t Succeed

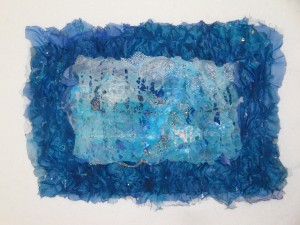
Ta-da!  It worked.  Plan B is better than my first botched attempt!  (Click photo for a larger view.)

Sheer Blue piece with border

I’ll add some hand stitching to the border/background part, attach the two portions, and this piece will be complete.  (Although I think I’ll rotate it 90 degrees to the right.)

I’m making this piece to swap with a friend.  I planned to mount it onto a stretched canvas, but she thinks she’d like to put it into a shadow box frame.   (So, my part is almost done.)

Now for a name.  Hmm.

Oops. Now What?

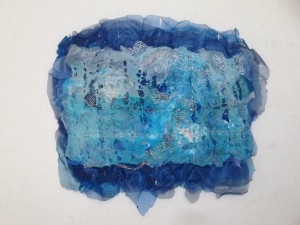
As I mentioned in my previous post, I wanted to make a distorted sheer blue piece to serve as the background/border for the piece in progress.  I did just that, but I forgot to take into consideration how much it would shrink when I melted it.  (Click the photo to see a larger view.)

Blue sheer with small border

Darn it. 

I don’t  have enough of the blue sheer fabric to try again, so I’ll have to go back to the drawing board.  (I keep telling myself that these sorts of issues often yield results that are better than the first attempt.  We’ll see.)

Melted Sheers

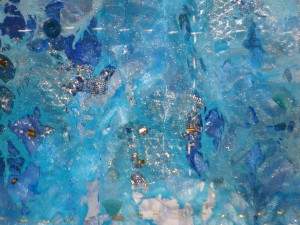
This is a detail shot of my current work in progress.  (Click image for a larger view.)

DSC02547

I started with a dark blue sheer fabric.  On top of it, I scattered bits of interesting sheers:  metallic, patterned, and white.  The top layer is a hand painted sheer fabric.  I used my soldering iron to burn through all layers, which was supposed to fuse them together.  (It didn’t achieve that purpose, but it made interesting wounds.)

Next, I used my heat gun, front and back to distort the fabrics.  This is especially fun to do on the front, since the wounds grow and reveal the middle scattered fabrics in interesting ways.

Finally, I added some hand stitching to hold everything in place, and glued some beads in place.  This portion is finished.  Now, I’m trying to decide how to best mount and display it.  My current thinking is that it needs a dark blue border of melted sheers.

BTW, melting sheers is TONS of fun, but it’s also toxic.  If you try it, wear a respirator!  (Not a paper dust mask.)

Mini Business Cards

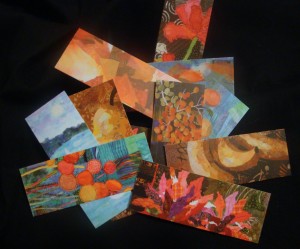
I’ve got a new kind of business card:  little mini ones.  Aren’t they cute?  (Click the image for a larger view.)

okay

These are about half the size of a typical business card, printed on nice card stock.  Each one features a snippet of a quilt image, with my name and website on the back.  These are like little bits of eye candy!  Whenever I show them, people have fun choosing which one they’d like to have.  It’s fun for them, and a great promotional tool for me.

I got mine at www.moo.com.  I understand they’re also available at www.zazzle.com

Prepping for Online Design Class

Although I’ve taught each of my classes multiple times, it’s not unusual for me to make small changes each time I teach.  Maybe I have new work that serves as an example, or a better photo of something already in use.

Right now, I’m prepping for my next online class, Design Your Own Nature Quilt.  This is my favorite class to teach, because the students gain so much knowledge and confidence through the class.  They get excited and so do I!

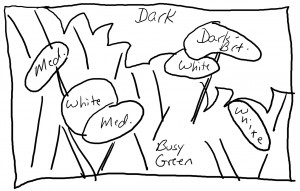
In the latter part of the class, we discuss how to plan a successful design, and I show several of the sketches I’ve used for my quilts.  My students are usually surprised to see how rough they are.  As I tell them, the most important part of skeching is what goes on between your ears, rather than what goes on your paper.  In other words, a sketch is an opportunity to plan, and that’s what’s important.

I thought you might like to see one of the sketches.  The one below was used for one of the pieces on my gallery page.  Can you identify it?  (You can click on the photo for a larger image.)

Cosmo sketch bold copy

This class starts August 7th, if you’re interested.

Sheer Shadows

In my Instant Art Quilt class, the fabric is the star.  High contrast fabrics produce dramatic results, almost without effort.  Low contrast fabrics yield very different results.  They don’t have enough drama to stand alone, but they make lovely backgrounds for further embellishment.

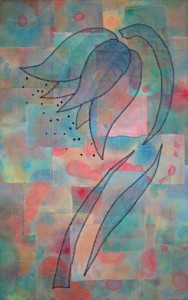
I had the idea of using tulle applique on such a quilt.  Since the sheer fabric would allow the layered background to show through, I thought they’d be a great combo.  So, I stitched up a subtle Instant Art Quilt (IAQ) and gave it a try.

IAQ-flower cropped

What do you think?  I’m  pretty happy with it.  (Click any photo for a larger view.)

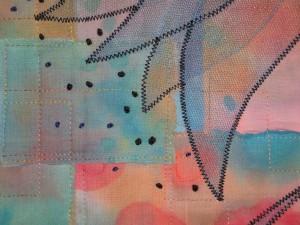
Initially, the dull blue tulle didn’t show up as much as I wanted, so I added a black zigzag.  And some french knots for additional interest.

detail

As expected, the background layers show through, which I like.  And, if you look closely, you might even be able to make out the overlapping tulle petals.

In the Instant Art Quilt classes, we often look for a natural diagonal line that can be emphasized.  I think you can see that such a line existed here, and that I made use of it.

I think the tulle applique idea definitely has merit, and I plan to revisit it.

FYI:  You might be interested in this gallery of my students’ IAQs.  They’re awesome!

Redoing Projects

In between stitched collages, I really enjoy making glued ones.  Because they’re relatively quick to make, they provide a nice creative activity when I don’t have time for something more involved.  

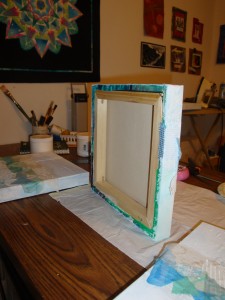
Recently, I made a four-part piece to hang above our new large screen TV.  (You can see a photo in my June newsletter.)  I was pretty happy with it, but after a while, I began to think it was too dark, and also not as cohesive as I would like.  So, I decided to redo it.

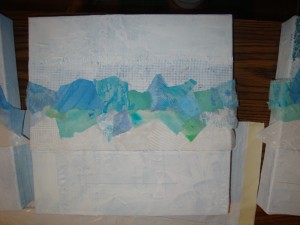
First, I painted over the original canvasses with gesso.

Gesso added

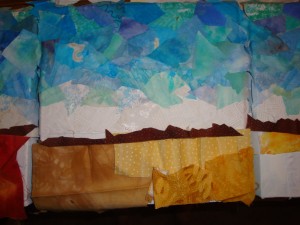
Then, I began to glue new fabric pieces in place.  I decided to create a low horizon line, running across all four canvasses.  First, I added the blue scraps needed for the sky.  As in real life, I wanted the sky near the horizon to be lighter than that higher up.  Therefore, I used tone-on-tone white as the very lowest sky fabrics, knowing that I would paint them later for the desired effect.

Redo IP

Once the four skies were finished, it was time to audition fabrics for the foreground.  Eventually, I decided to paint this area, using Caran D’Ache water soulable wax pastels.  (I love these!)

DSC01576

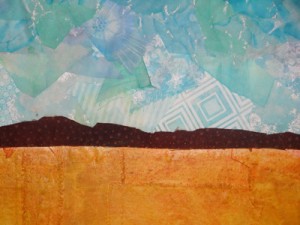
Finally, I painted the white part of the sky, and rubbed on a little white oil pastel to lighten up the rest of the sky.  (Detail shot below.)

Horizon-Line-detailweb

You can see the entire piece, Horizon Line, on my website.

By the way (BTW,) you might enjoy a video which shows me working on another glued collage.  It’s one of the free vidcasts which Bonnie McCaffery offers on her website.  (All of these are very interesting and definitely worth viewing.)  You’ll find the video featuring my collages here.

Ellen Lindner
P.S.  I’m working on a new online class about glued collages, which should be ready in the fall of 2009.  If you’d like to get advance notification of the class details, you can add your name to the the notification list using the subscription link at the bottom of my newsletter.

Board Book Results

Originally posted May 13, 2009 on the Dirty Dozen Fiber Artists’ blog.

I’m having great fun playing with my little board book. (See previous post.) My plan is to use it as a canvas for quick compositions and experiments. 

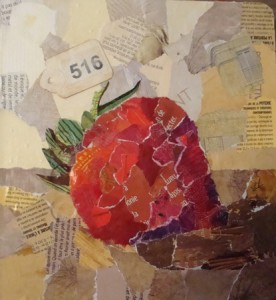
Strawberry1-web

As my first creation, I made this little paper collage of a strawberry.  It was fast and fun!  On the facing page, I taped off squares into which I’m spreading various acrylic mediums, to create a sample board.  That’s fun too, and useful.  I’ve also done a bit of documentation on that page, recording the various products and techniques used.
FYI:  As a collage glue I used diluted gel medium (gloss.)  Just like I do with my glued fabric collages, only with more water.
Interesting link:  I was inspired to do this little collage after seeing the work of Elizabeth St. Hilaire Nelson.  She does fantastic work!
Ellen Lindner

Something Different

Originally posted April 11, 2009 on the Dirty Dozen Fiber Artists’ blog.

Lately, I’ve seen some really interesting art books. These are usually books that have been altered with a variety of mixed media techniques. They look like they’d be a lot of fun to create, so I’ve decided to give it a try.

board-book-web
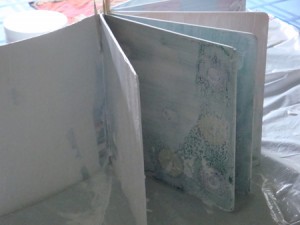
I started with a board book, purchased at my local childrens’ consignment shop. I painted the pages with gesso, and propped it up to dry. Because some of the pages briefly touched, the gesso got “messed up” into a frost-like pattern. No problem: I took detail shots of the cool pattern and then smoothed on another coat.

Now that my book is dry, it’s on to the fun part!

P.S. If you’re not familiar with gesso, it’s the stuff that covers prepared artists’ canvasses. It provides a good base for just about any medium.

Ellen Lindner