Archive | March, 2018

Two Days with Pat Pauly

I was lucky enough to take a two day class with Pat Pauly. Fabric was flying and Adrenalin was flowing as she challenged us to work without a lot of planning.

Two Days with Pat Pauly. Ellen Lindner, AdventureQuilter.com/blog

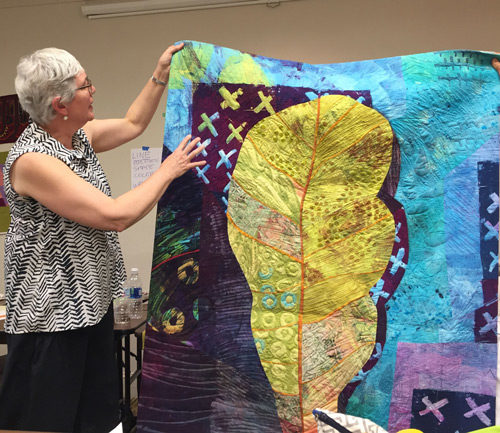
Pat talking about the inspiration for this quilt.

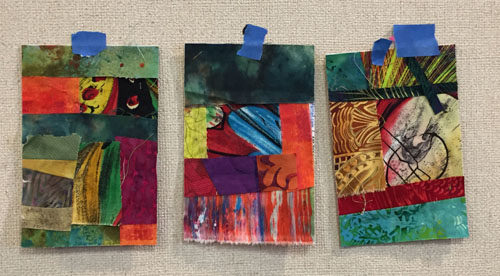
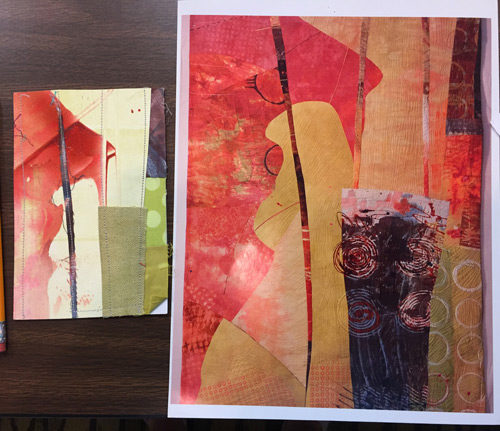
The purpose of the class was to teach us various ways to jump start an abstract design.  One way Pat does that is by making small collaged “postcards.”  These can later serve as quilt sketches.

Like this, with the sketch on the left and the quilt on the right.

Two Days with Pat Pauly. Ellen Lindner, AdventureQuilter.com/blog

And then the students tried it. Anita Krug had especially good results. Wouldn’t these make great quilt designs?

Two Days with Pat Pauly. Ellen Lindner, AdventureQuilter.com/blog

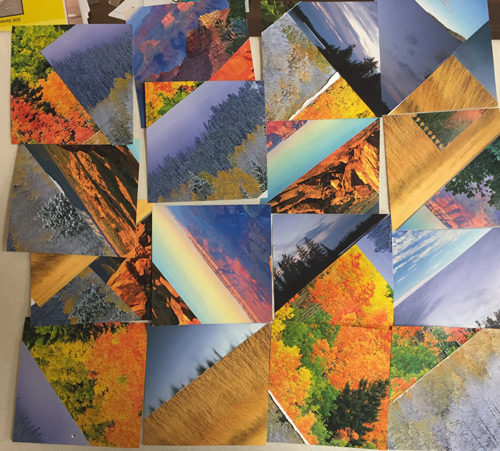
And Karol Kusmaul made a very interesting composition by cutting up and rearranging calendar pages.

Two Days with Pat Pauly. Ellen Lindner, AdventureQuilter.com/blog

Doesn’t this look like fun?

I’d say everyone in the room pushed well beyond their comfort zone.  And we learned a lot!

If you ever get a chance to take a class with Pat Pauly, I highly recommend it.

Ellen Lindner

4

Flower Stall Challenge

My local art quilt group, The Dirty Dozen Fiber Artists, are at it again.  We’re doing a group challenge in which we all use the same inspiration photo.  This time we’re using the photo below, taken on a street in Paris.
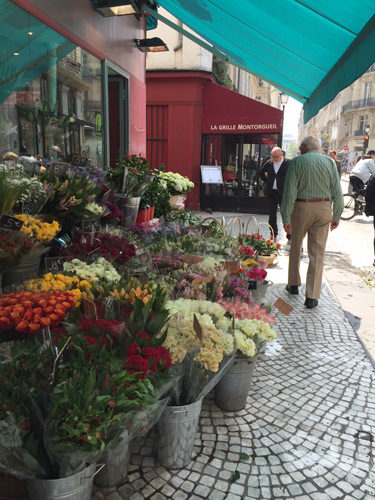
Flower Stall Challenge. Ellen Lindner, AdventureQuilter.com/blog

As usual, we’ve selected a photo with lots going on.  This works well, since different artists will focus on different components, or maybe just the colors, just the shapes, etc. (What intrigues you?)

The thing that got my attention the most was the blue-green awning, followed closely by the burgundy wall. I was pretty sure I wanted to do a somewhat abstract interpretation and I thought these elements had great colors and good shapes.  I was also intrigued by the pattern of the grey stones in the sidewalk. I played around with these things and:
1 – decided against using the stones pattern,
2 – cropped and abstracted the flowers and nearby buildings.

This is what I came up with.  (A computer sketch.) Can you see it?  As you can tell, I outlined each shape with black.  Not quite sure why, but I really liked the effect.  (I’ve never done it before.)
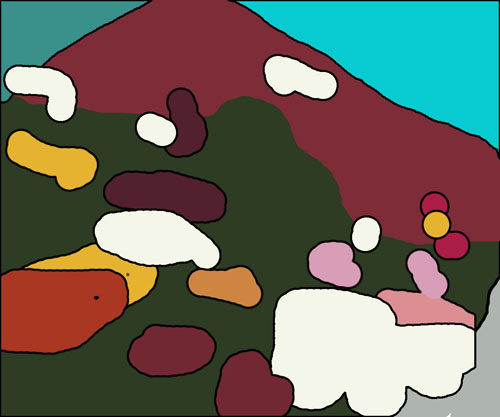
Flower Stall Challenge. Ellen Lindner, AdventureQuilter.com/blog

At the recent retreat, this was my project.  Here I am, just getting started.  As you can see the dimensions have changed to square, as opposed to the original rectangular format.
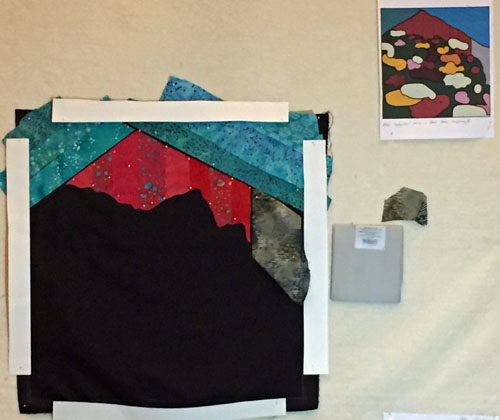
Flower Stall Challenge. Ellen Lindner, AdventureQuilter.com/blog

I used lots of green scraps (left over from my stint on Quilting Arts TV,) to create the green backdrop.  I was LOVING the effect of the skinny black line!
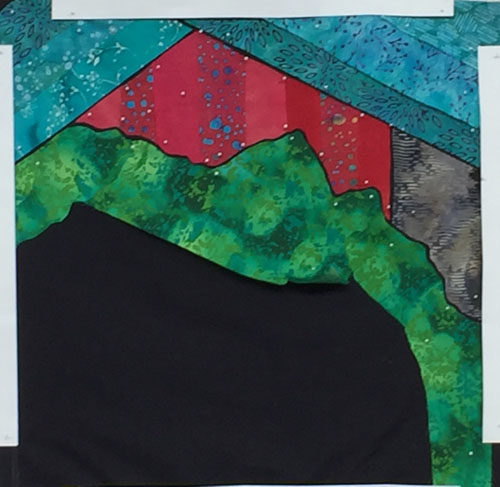
Flower Stall Challenge. Ellen Lindner, AdventureQuilter.com/blog

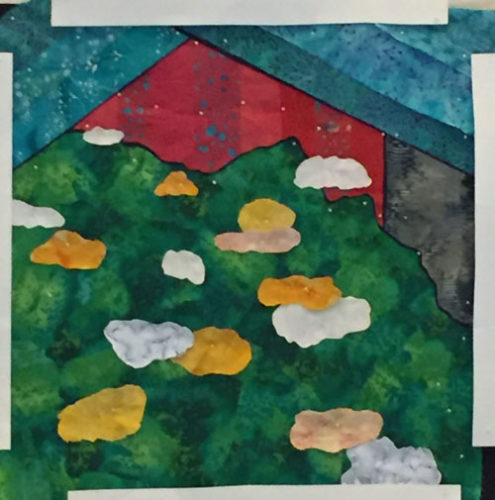
Then, I began to add the flowers.

Flower Stall Challenge. Ellen Lindner, AdventureQuilter.com/blog

Screech.  Wait a second!  There’s something wrong with the composition above.  Can you see what it is?

The problem is there’s not enough depth perspective.  All the flower clusters are similar in size.  In reality the close ones need to be MUCH larger.  More like these first few from my second attempt.
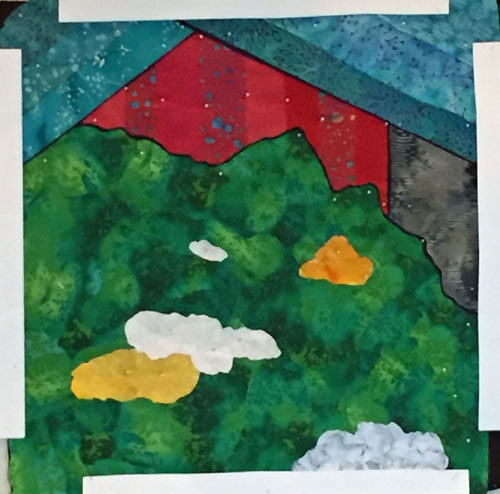
Flower Stall Challenge. Ellen Lindner, AdventureQuilter.com/blog

See what I mean?  Even with just a few blossoms in place, a sense of depth is beginning to develop.  I continued to pay attention to this as I added the remaining floral clusters.
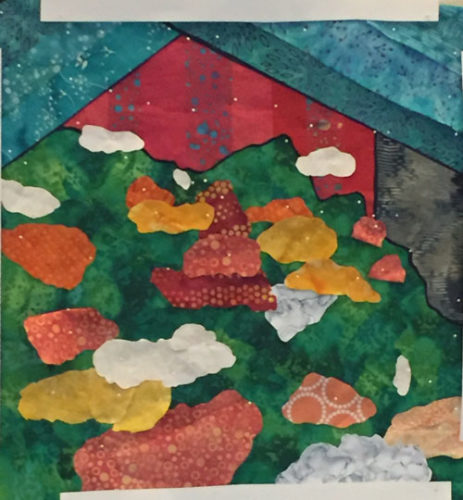
Flower Stall Challenge. Ellen Lindner, AdventureQuilter.com/blog

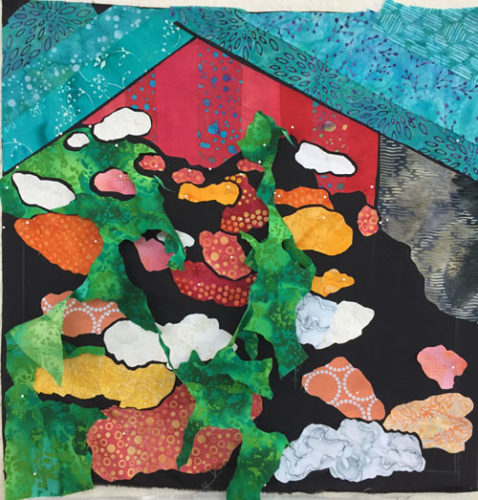
This is the final composition above.  However, I still needed to add the black lines around everything.  This is where I totally LOST MY SENSES and decided on a terribly complex and time consuming technique.  It was so traumatic I’m not sure I’m ready to talk about it.  But these next two photos will tell the sad tale.
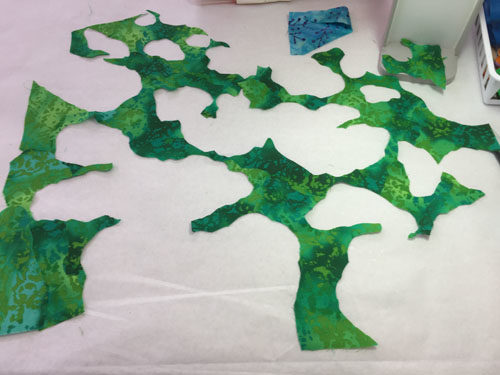
Flower Stall Challenge. Ellen Lindner, AdventureQuilter.com/blog

Flower Stall Challenge. Ellen Lindner, AdventureQuilter.com/blog

WHAT was I thinking?

Thankfully, it all looked good after much fiddling and tweaking.  Here it is, quilted.
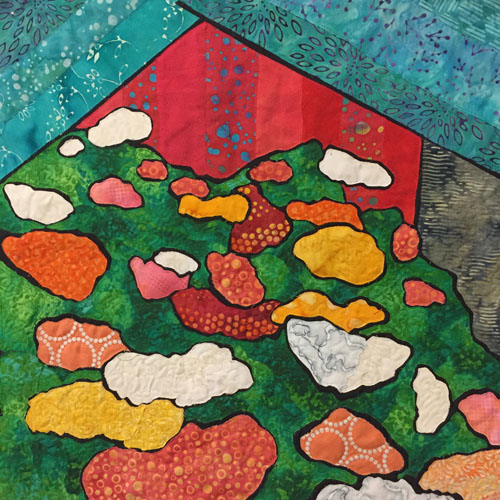
Flower Stall Challenge. Ellen Lindner, AdventureQuilter.com/blog

Finally! Lessons learned/reminded:
– Keep it simple
– Pay attention to perspective
– Persevere when things become difficult.

I need a name for this piece.  Any suggestions?

Ellen Lindner
P.S. I’ll photograph this properly and add it to my website soon.
P.P.S. Check out some of the other Dirty Dozen challenges with the links below.
6

Dying with Sharpies and Alcohol: Part Two

In Part One I showed you how to mark large irregular circle shapes.  Now, let’s learn how to make smaller flowers.

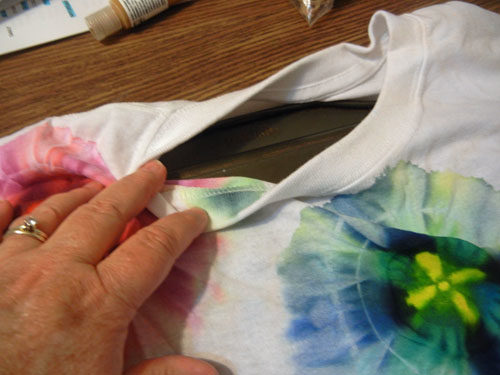
I did this sample on a t-shirt and I wanted the design to be on the front only.  Therefore, I put a baking sheet inside the shirt.

Dying with Sharpies and Alcohol Part One. Ellen Lindner, AdventureQuilter.com/blog

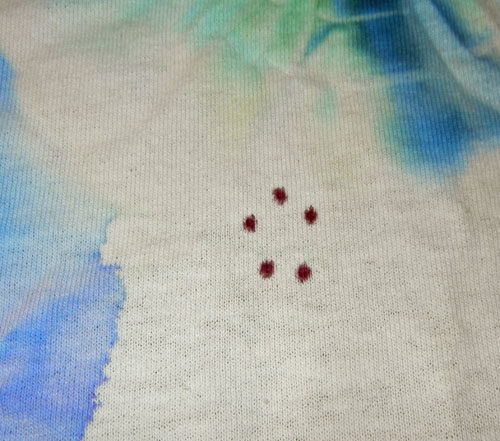
Draw 5 small dots with a Sharpie.

Dying with Sharpies and Alcohol Part One. Ellen Lindner, AdventureQuilter.com/blog

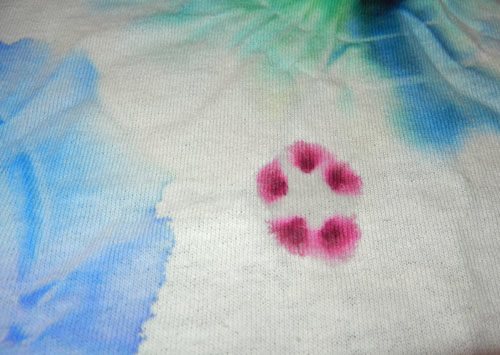
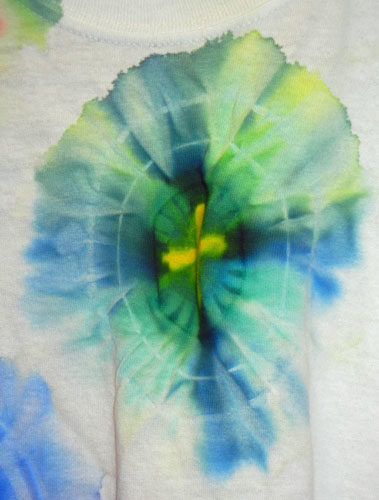
Add a few drops of alcohol in the center of the dots. It will wick outward, taking the pigment with it.

Dying with Sharpies and Alcohol Part One. Ellen Lindner, AdventureQuilter.com/blog

Add more if additional bleeding is desired, but be sure to add it only in the center. Eventually, the color will travel far enough to create a petal effect. Some colors change as they become diluted.

Dying with Sharpies and Alcohol Part One. Ellen Lindner, AdventureQuilter.com/blog

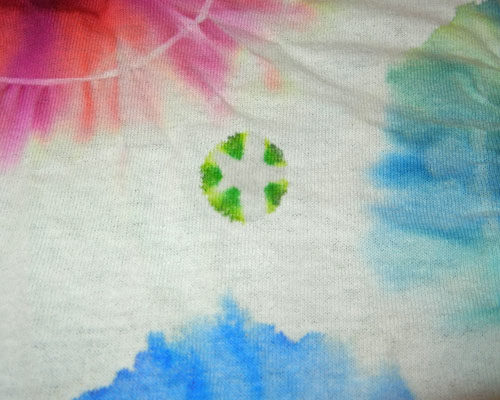
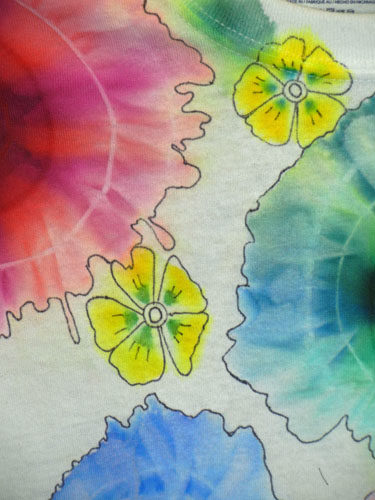
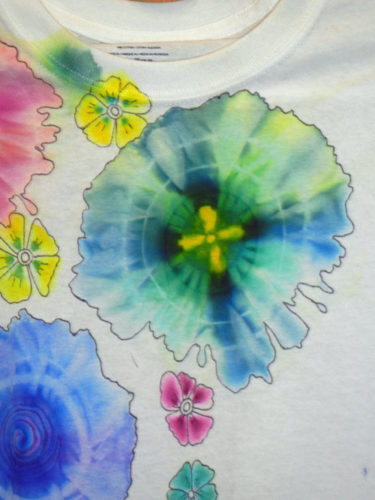
These yellow-green dots turned into the yellow flowers you see below.
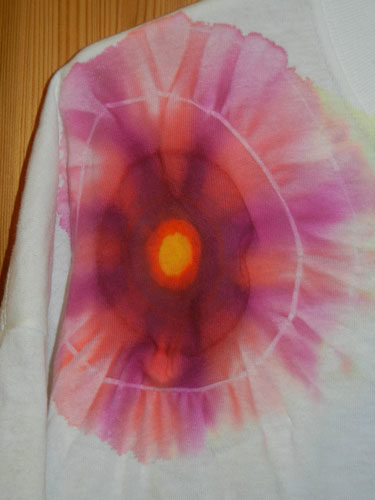
Dying with Sharpies and Alcohol. Ellen Lindner, AdventureQuilter.com

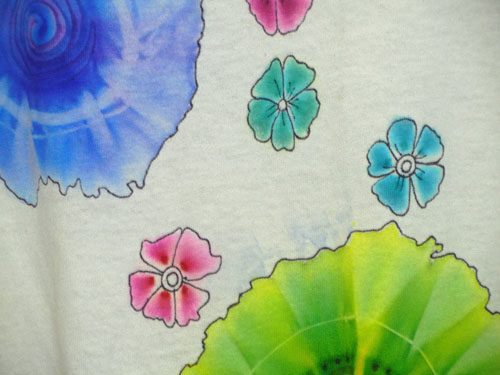
Once dry, details can be added with a thin Sharpie, if desired.

Dying with Sharpies and Alcohol. Ellen Lindner, AdventureQuilter.com

When dry, heat set in the dryer for 20 minutes and you’re done!

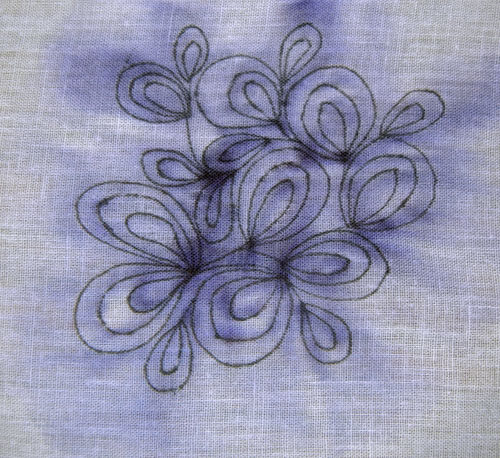
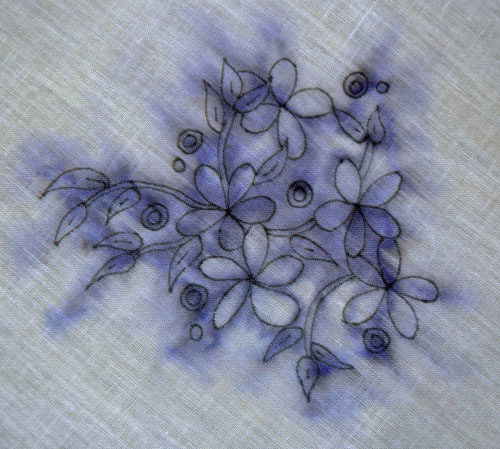
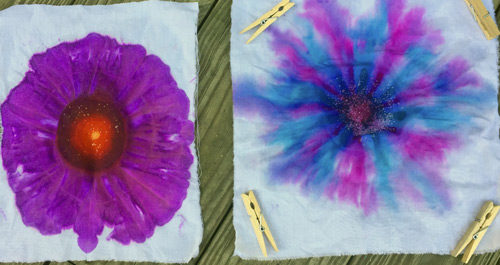
You can also make all-over delicate designs. The examples below were done with a black marker (yes, black) which turned purple and bled when lightly sprayed.  It’s an interesting effect.

Dying with Sharpies and Alcohol Part One. Ellen Lindner, AdventureQuilter.com/blog

Dying with Sharpies and Alcohol Part One. Ellen Lindner, AdventureQuilter.com/blog

I’ve shown you these methods done on cotton fabric.  They can also be used on silk, but the color will bleed MUCH more, giving a lovely water color effect.

I’m sure there are many more things that can be done with this concept.  The basic principle is this: alcohol will wick into dry areas, taking the color with it.  You can use this knowledge to control the movement of color: add alcohol on the left of the pigment if you want the color to move right, and vice versa. Or, of course,  you can spray the entire design for overall bleeding.

Have fun playing!

Ellen Lindner


11

Dying with Sharpies and Alcohol: Part One

While at the retreat, I attended a demo about dying fabric with Sharpies (permanent markers) and rubbing alcohol (isopropyl.) I already knew alcohol would make Sharpies bleed, but I’d never seen this particular application.

This is the sort of result you can expect. Cool, right?

Dying with Sharpies and Alcohol Part One. Ellen Lindner, AdventureQuilter.com/blog

And this is how you do it:
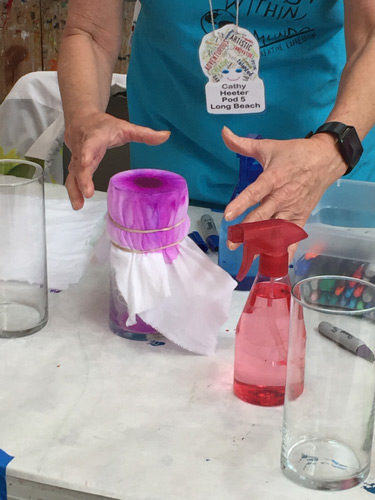
– Stretch fabric over a drinking glass or vase.
– Secure fabric with two rubber bands.
– Color the top of the fabric with Sharpies.  (The colors will bleed so choose ones that will look good together.)
– Spray the top of the fabric, generously, with alcohol.
– You’re done!  The alcohol will quickly wick down the sides, taking the Sharpie color with it.  Because it’s alcohol it will evaporate quickly and you’ll be done in no time.

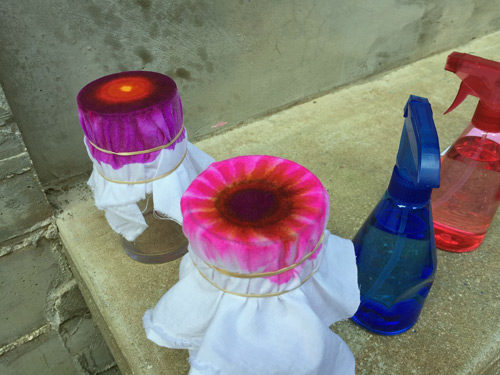
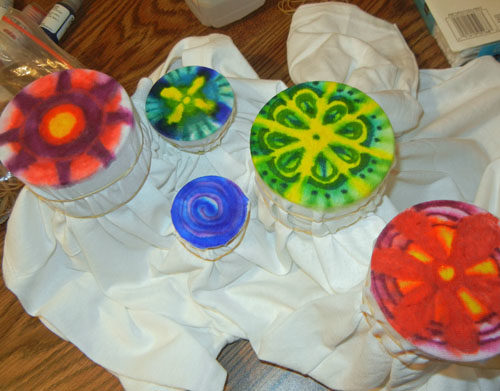
Here are a couple of in-progress examples from our retreat.

Dying with Sharpies and Alcohol Part One. Ellen Lindner, AdventureQuilter.com/blog

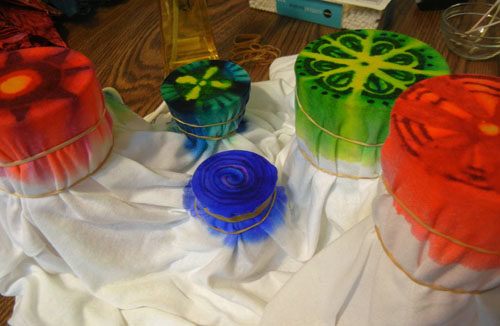
Here they are drying. The left one, below, is the same one shown on the left above.

Dying with Sharpies and Alcohol Part One. Ellen Lindner, AdventureQuilter.com/blog

It’s that easy!

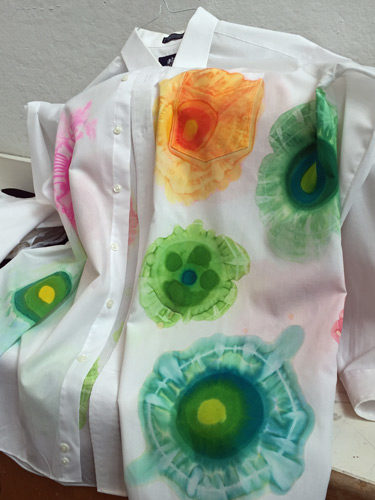
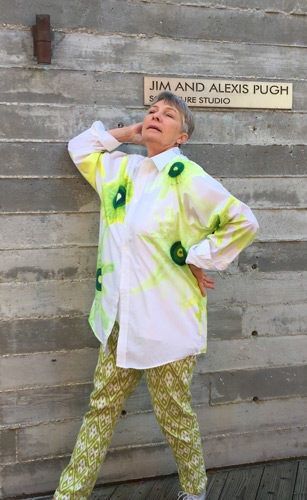
Here’s our teacher, Cathy Heeter, “showing off” a shirt she had made with this technique.  She matched the colors to this pair of pants.

Dying with Sharpies and Alcohol Part One. Ellen Lindner, AdventureQuilter.com/blog

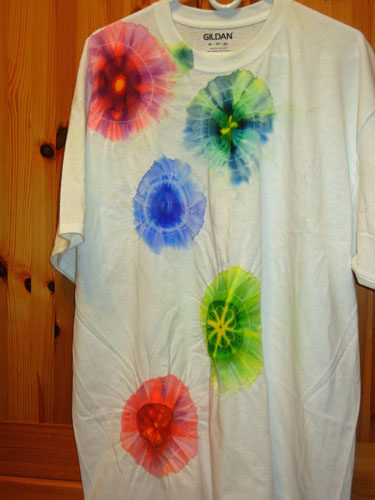
Once home, I decided to play with this on my own, on a t-shirt.

Dying with Sharpies and Alcohol Part One. Ellen Lindner, AdventureQuilter.com/blog

However, they didn’t bleed quite to my liking, so I sprayed them some more.  That did the trick. Can you see the additional bleeding below?

Dying with Sharpies and Alcohol Part One. Ellen Lindner, AdventureQuilter.com/blog

These were my results.

Dying with Sharpies and Alcohol Part One. Ellen Lindner, AdventureQuilter.com/blog

Dying with Sharpies and Alcohol. Ellen Lindner, AdventureQuilter.com

Dying with Sharpies and Alcohol Part One. Ellen Lindner, AdventureQuilter.com/blog

I was very happy with them.  After the shirt dried I threw it in the dryer for 20 minutes of heat setting.

Later, I added some definition by drawing an outline with a thin Sharpie.  (Not diluted this time.)  This is purely optional, but I like the effect.

Dying with Sharpies and Alcohol Part One. Ellen Lindner, AdventureQuilter.com/blog

BTW, I put the glass containers inside the shirt, so I was working with the front only.  I’ll bet you could do it either way.

In Part Two I show you how to make the small flowers and other details.

Ellen Lindner


20

Hand Embroidery

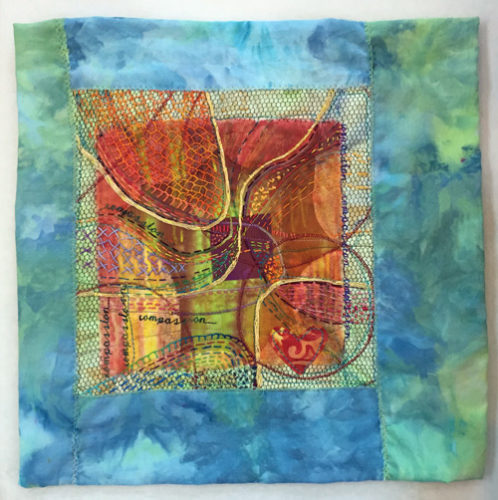
While at the retreat, Annette Boceck did a demonstration about hand embroidery.  I found her use of hand stitch to be very interesting and (to me) unique.  I’ve always used embroidery to add some interest to a quilt or to highlight a particular area.  But, Annette uses it to completely transform the fabric. Like this.

Hand Embroidery. Ellen Lindner, AdventureQuilter.com/blog

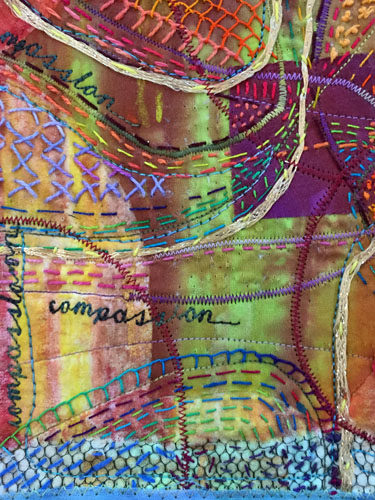
Check out this detail. I already know how to do all of these stitches, but I’ve never used them in such a concentrated way. As you can see, it completely changes the overall appearance.

Hand Embroidery. Ellen Lindner, AdventureQuilter.com/blog

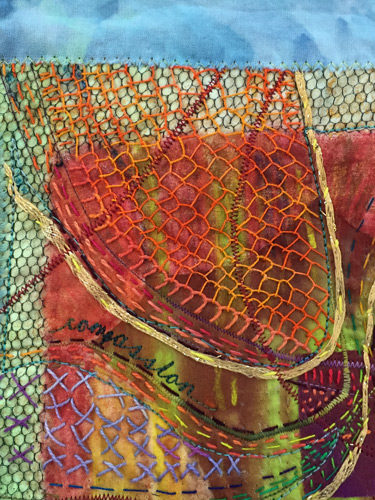
Most of these stitches are quite easy. I was really taken with the netting effect achieved with the orange stitches shown below. Then, I looked more closely.  Rows of blanket stitches create the effect.  Brilliant!
Hand Embroidery. Ellen Lindner, AdventureQuilter.com/blog

I’m itching to give this a try.  If you’d like to join me, you can find lots of stitch tutorials online.  The ones shown here are straight, running, cross, back, and blanket.  You might also want to investigate stem stitch and French knots.

Stitch on!

Ellen Lindner

4

Learn with Me: Complementary Colors

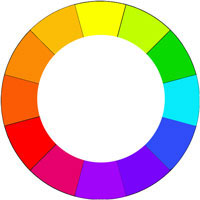
You know about complementary colors, right?  Colors that are in opposite locations on the color wheel?

Color wheel. Ellen Lindner, AdventureQuilter.com/blog

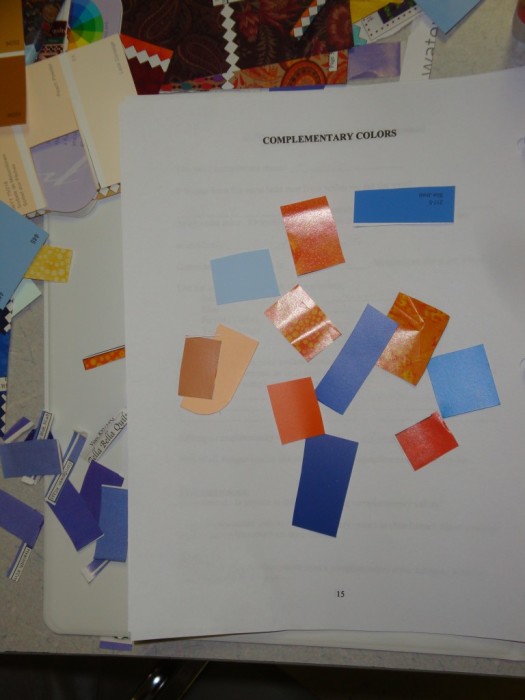
Like blue and orange.

Complementary exercise. Ellen Lindner, Adventurequilter.com/blog

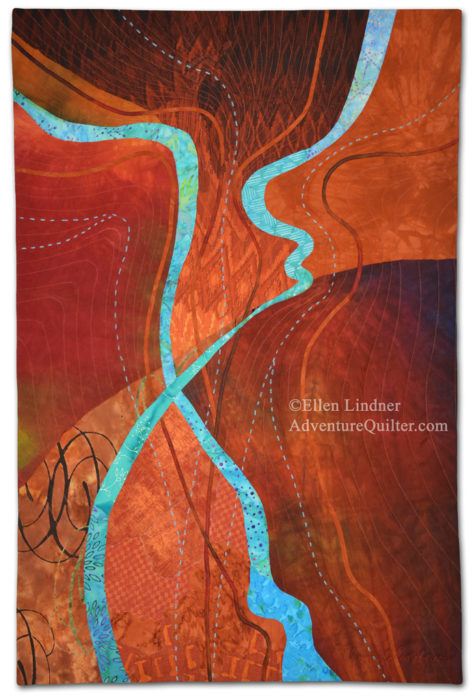
Since rust is a version of orange, this quilt uses complementary colors.
(Or maybe it’s red-orange and blue-green, which are also complementary.)

Deliberation, an art quilt by Ellen Lindner. AdventureQuilter.com

Deliberation

But, maybe you’re not too comfortable with a color wheel, or how to really USE complementary colors together. Here are few key points:
– Each swatch on the color wheel represents an entire color family.  That is, EVERY version of that hue/color. So every blue is complementary to every orange.
– Adding the complementary color always adds drama.
– It’s best to use more of one color than the other.

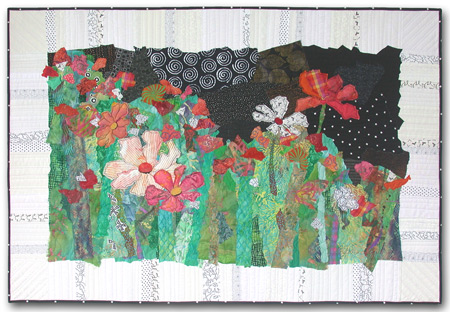
This quilt uses the complementary color scheme of red and green.  But, notice there’s more green than red.  And in the photo above, there’s more rust/orange than blue.

Cosmo Boogie, an art quilt made by Ellen Lindner. AdventureQuilter.com

Cosmo Boogie

Want to learn more?  See these two articles about color, as previously published in Quilting Quarterly:
Color, Part One
Color, Part Two

Or, to master this concept and many more, check out my eBook on color.

Adventures in Color e-book by Ellen Lindner. AdventureQuilter.com

Ellen Lindner
P.S. I have a whole section on my website with helpful articles.  Click on one of the green categories to see what it has to offer.

4

Individual Projects

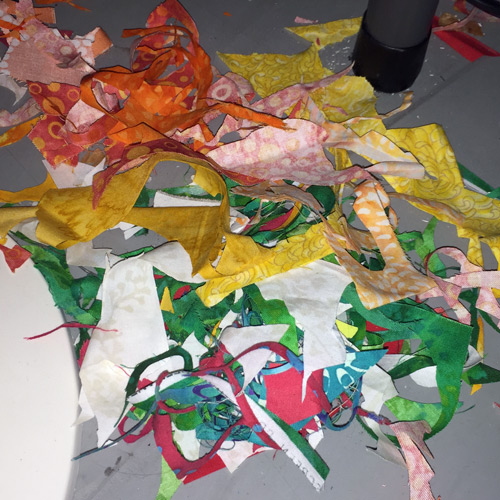
The retreat provided plenty of time for everyone to work on their own projects.  I decided on a very difficult approach to my project and therefore made slow progress.  I made some great scraps, though.

Individual Retreat Projects.  Ellen Lindner, AdventureQuilter.com/blog

(I’ll show you the in-progress craziness when I write a future post about said project.)

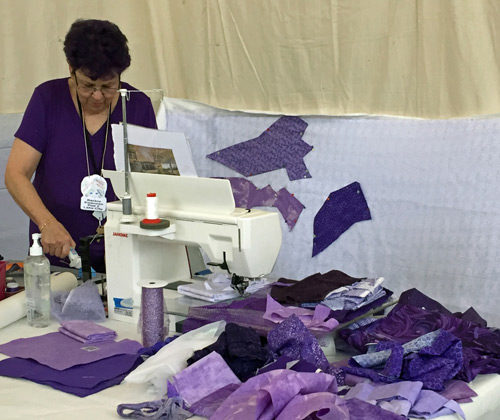
I think Barbie Swanson‘s scraps are all going to be monochromatic. 🙂

Individual Retreat Projects.  Ellen Lindner, AdventureQuilter.com/blog

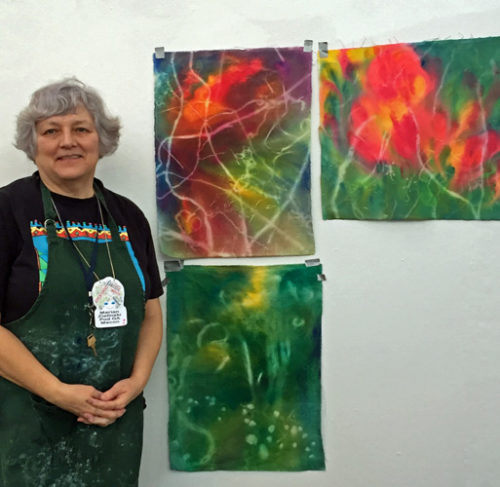
Marian Zielinksi creates wonderful pieces with sun printing.  She gave us an excellent demo! The light areas are created with everything from Easter grass, to rocks.

Individual Retreat Projects.  Ellen Lindner, AdventureQuilter.com/blog

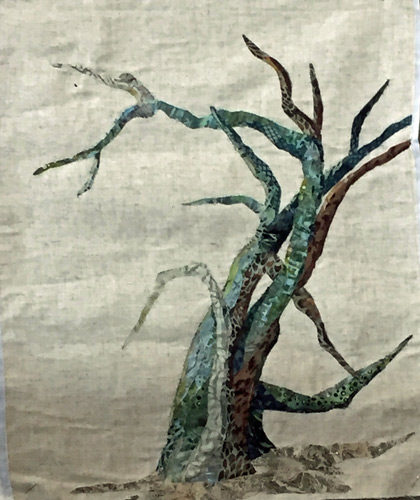
Becky Stack worked on an awesome tree.  She’s working on making it look 3D and I think she’s well on her way.

Individual Retreat Projects.  Ellen Lindner, AdventureQuilter.com/blog

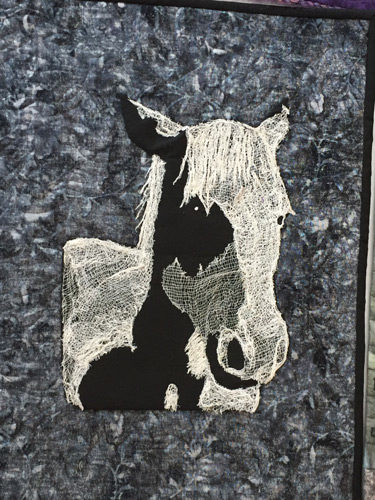
Sheilana Massey brought this finished project to show us.  Isn’t it awesome?  It’s created with a technique devised by Mary Pal.

Individual Retreat Projects.  Ellen Lindner, AdventureQuilter.com/blog

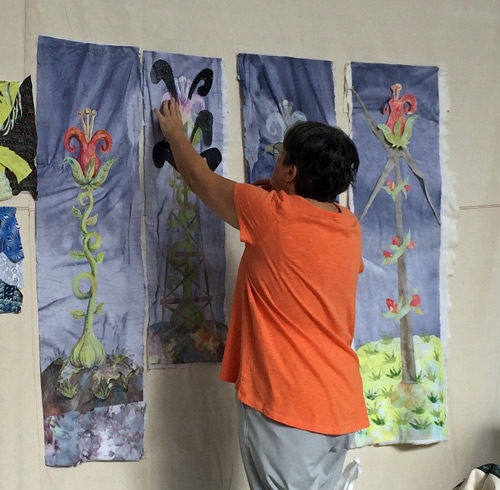
Annette Boncek worked on a 4-panel piece about the environment.

What a Retreat! Ellen Lindner, AdventureQuilter.com/blog

These photos are a SMALL sampling of all the inventive work going on. The atmosphere was electric with creativity, but calm and relaxed in our beautiful surroundings.

Ellen Lindner


0