Archive | August, 2024

Planning as I Go

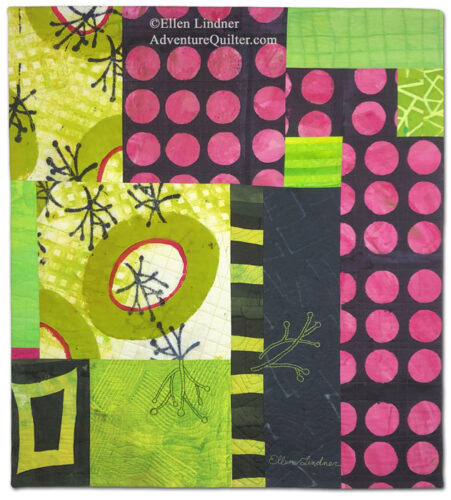
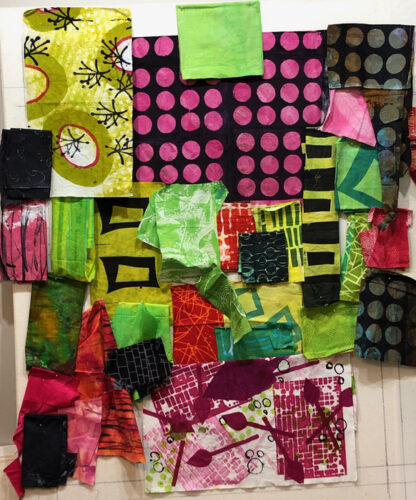
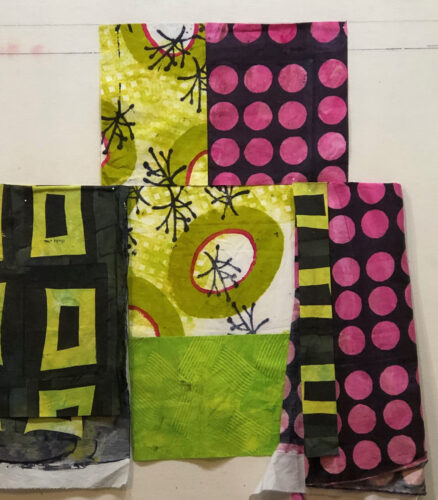
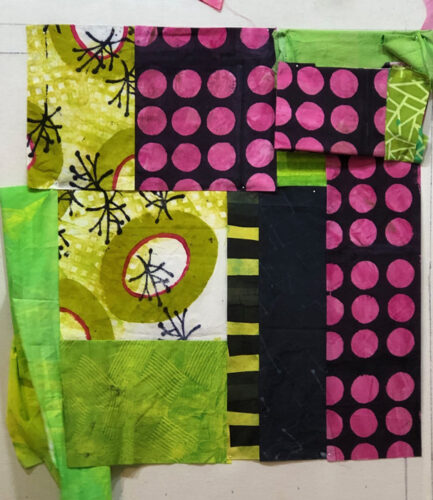
As usual, my current quilt started with a high contrast piece of hand dyed fabric. This is all I had of it.

Planning as I Go. AdventureQuilter.com/blog, Ellen Lindner

What could I do to best show it off?

Planning as I Go. AdventureQuilter.com/blog, Ellen Lindner

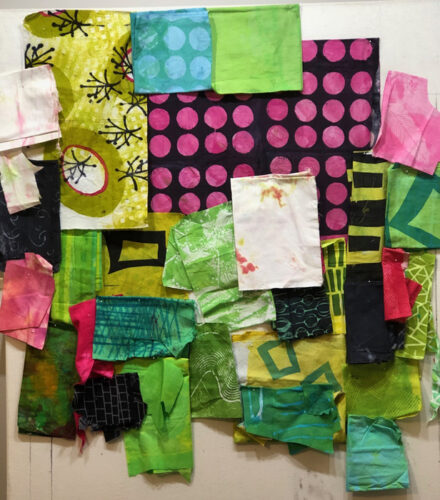
The additional fabrics added above provided interest, but the original fabric swatch still seemed rather straight forward.

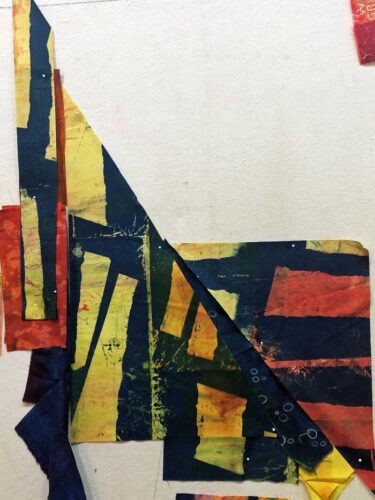
It was kinda hard to judge against white. I knew I wanted a blue background, so I added some to the design wall to help me judge the overall look.

Planning as I Go. AdventureQuilter.com/blog, Ellen Lindner

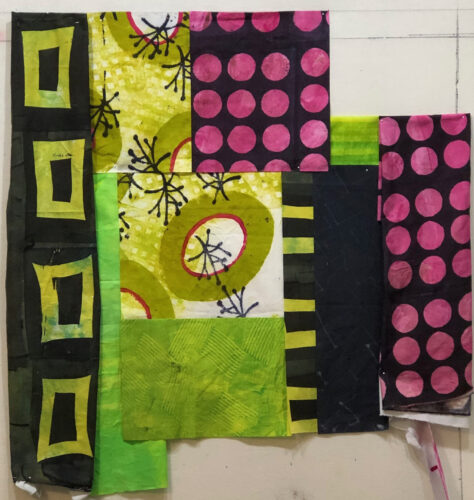
I split the featured print and splayed it apart. I thought this added energy, plus some interesting negative blue space.

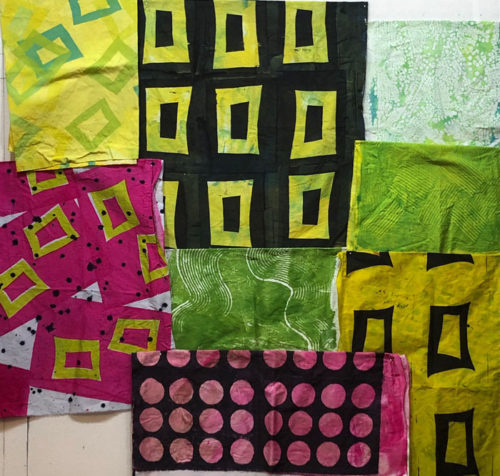
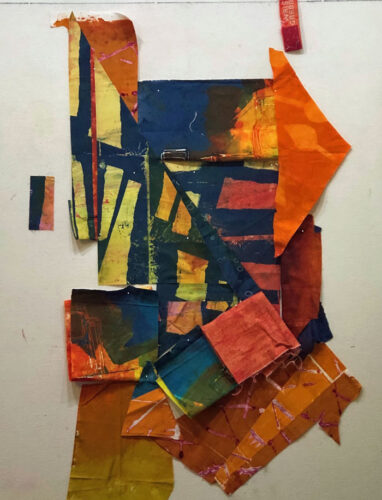
I began to audition additional colors and fabrics. What about a mass of orange on the right and across the bottom? I placed folded fabrics to consider options.

Planning as I Go. AdventureQuilter.com/blog, Ellen Lindner

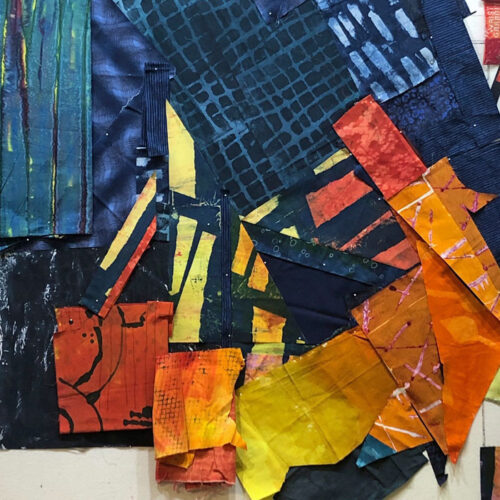
My orange fabric was limited and I knew I’d have to work with the shapes I had: sharp triangles.

Planning as I Go. AdventureQuilter.com/blog, Ellen Lindner

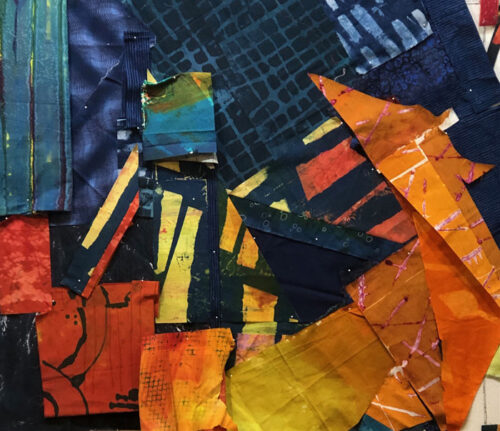
That didn’t seem objectionable. However, I did get rid of the vertical yellow point near the center.

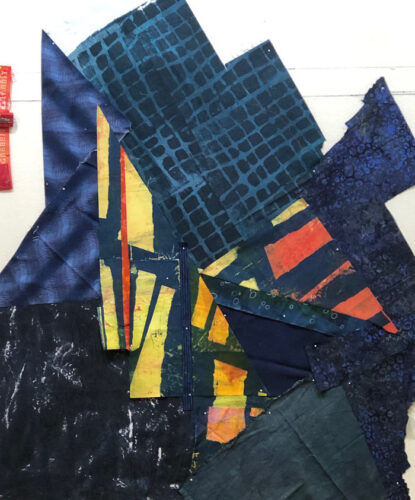
As you might imagine, there was some fiddly stitching on this one. It was actually easier than I expected and I’ll show you some about how I did it in the next post.

My next question: what to do with the lower left.

Ellen Lindner

2

Famous Sights in Florence

I’m still organizing photos from our trip to Italy in March. Here are some noteworthy photos from Florence.

Florence is a very beautiful city and not that big. There’s no public transportation, which is no problem. It’s fun to walk and view!

Florence is known for it’s duomo (cathedral) with it’s amazing domed roof. It was the first of its type and was later copied for St. Peter’s Basillica, in the Vatican. However, it’s really hard to get a good shot since the duomo is surrounded by streets and buildings.

This is my best shot showing the front. However, it’s mostly hidden by a separate church building in the foreground. Both structures are built from white and green marble. The dome is brick.

Famous sights in Florence. Ellen Lindner, AdventureQuilter.com/blog

The smaller building is octagonal and has impressive doors. This is the east facing door during a moment of sunshine. Yes, it’s gold.

Famous sights in Florence. Ellen Lindner, AdventureQuilter.com/blog

This shows some of the ABUNDANT sculptural details all over the duomo.

Famous sights in Florence. Ellen Lindner, AdventureQuilter.com/blog

And here’s the “view” from the back.

Famous sights in Florence. Ellen Lindner, AdventureQuilter.com/blog

As an aside, we found THE BEST gelatto at a gellatoria around the corner. (Recommended in the Rick Steves guide book.) We got pistachio, our first time to try it. It was so good we got right back in line and shared another cone. We recommend it!

Off to see some art. First, we went to Academia, which housed an abundance of amazing statues. Of course, we saw David, by Michelangelo, which did not disappoint.

Famous sights in Florence. Ellen Lindner, AdventureQuilter.com/blog

It’s 12′ tall and is mounted above head height, which made for great viewing. There’s room on all sides, so you can move around it to study it.  Our tour guide said it depicts David before he killed Goliath, which explains his steely gaze. He seems to be sizing up the situation.

Famous sights in Florence. Ellen Lindner, AdventureQuilter.com/blog

And he still has his stones in his right hand.

Famous sights in Florence. Ellen Lindner, AdventureQuilter.com/blog

Nearby were incomplete works, showing Michelangelo’s technique. (Yes, he chiseled them.)

Famous sights in Florence. Ellen Lindner, AdventureQuilter.com/blog

Famous sights in Florence. Ellen Lindner, AdventureQuilter.com/blog

Later, we went to Ufizzi, which housed mostly paintings. The best ones were very crowded with all of us tourists trying to get a photo. Here’s my best attempt at The Birth of Venus, by Boticelli.

Famous sights in Florence. Ellen Lindner, AdventureQuilter.com/blog

Time for pizza. And gelatto, of course!

Ellen Lindner
P.S. Check out our fun pasta making class in Florence.


0

“I’ll Bring the Kiwi” Complete

I’ve finished my latest quilt, I’ll Bring the Kiwi.

I'll Bring the Kiwi, an art quilt by Ellen Lindner. AdventureQuilter.com/blog

I’ll Bring the Kiwi

I especially like the hand embroidery I added.

I'll Bring the Kiwi - detail, an art quilt by Ellen Lindner. AdventureQuilter.com/blog

Another detail shot
I'll Bring the Kiwi - detail, an art quilt by Ellen Lindner. AdventureQuilter.com/blog

The artist statement says:
It’s a gorgeous day for a picnic. You bring the cherries and I’ll bring the kiwi.

This piece is made completely with fabrics I printed and dyed myself.

It’s a little smaller than most of my recent work. This in-situ photo gives you an idea of how it might look in an interior space.

I'll Bring the Kiwi, an art quilt by Ellen Lindner, shown in situ. AdventureQuilter.com

At 31”h x 28”w it’s priced at $395. I hope you like it!

Ellen Lindner

2

Following the Fabric

I’ve been working on a new quilt, using fabrics I dye-printed during my last dying session. As you can see, I made them to go together.

Dyeing with Forethought. Ellen Lindner's fabric dyeing results. AdventureQuilter.com/blog

To get started, I pulled these out, along with every fabric I thought MIGHT go with them. As usual, this stage was a rather ugly mess.   (I was toying with the idea of using some pure red bits along with the pink.)

That seemed like overkill. I removed some busy high-contrast fabrics, most of the red, and tried out a little blue-green.

Following the Fabric. Ellen Lindner, AdventureQuilter.com/blog

Much better. I was ready to move ahead.

There was a fabric combo in this collection that was really exciting me: the pink and black polka dots and the yellow-green print top left, with the little twiggy shapes. I liked the way the sharp little twigs contrasted with the round dots. Unfortunately, the photo above shows ALL the twiggy fabric that I had. I knew I would have to use it very purposefully and that it’s limited size would also dictate the overall size of the quilt.

Here’s the entire piece of twiggy fabric plus what I thought was an appropriate amount of the polka-dot. I quickly committed to the central composition and stitched two primary seams. Everything else is shown in audition stage and is only folded and pinned.

I really liked the vertical strip of black and yellow-green stripe just right of center (above.) I made it by carefully cutting a strip from the fabric with the large yellow-green rectangles. I was very happy with that result

Below, I added more fabric on the right. The black spacer between the stripe and the dots was needed as a calming note.

Following the Fabric. An art quilt in progress. Ellen Lindner, AdventureQuilter.com/blog

I wasn’t sure about the large rectangles on the left, shown above. They seemed to be sorta taking over. I removed them and concentrated on the right side for a bit. This corner combination seemed about right.

Following the Fabric. An art quilt in progress. Ellen Lindner, AdventureQuilter.com/blog

The left side was definitely going to need some attention. At this point it needed some weight (black) and some pink.

In the next post I’ll show you my progress.

Ellen Lindner

2