My local art quilt group, The Dirty Dozen Fiber Artists, are at it again. We’re doing a group challenge in which we all use the same inspiration photo. This time we’re using the photo below, taken on a street in Paris.
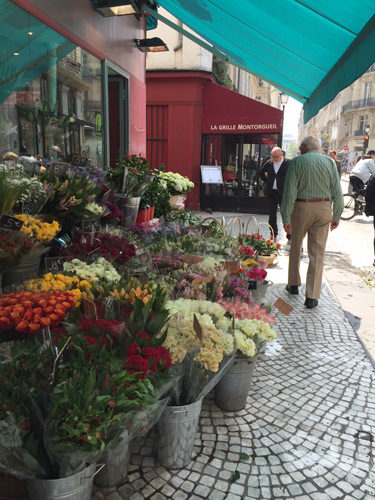
As usual, we’ve selected a photo with lots going on. This works well, since different artists will focus on different components, or maybe just the colors, just the shapes, etc. (What intrigues you?)
The thing that got my attention the most was the blue-green awning, followed closely by the burgundy wall. I was pretty sure I wanted to do a somewhat abstract interpretation and I thought these elements had great colors and good shapes. I was also intrigued by the pattern of the grey stones in the sidewalk. I played around with these things and:
1 – decided against using the stones pattern,
2 – cropped and abstracted the flowers and nearby buildings.
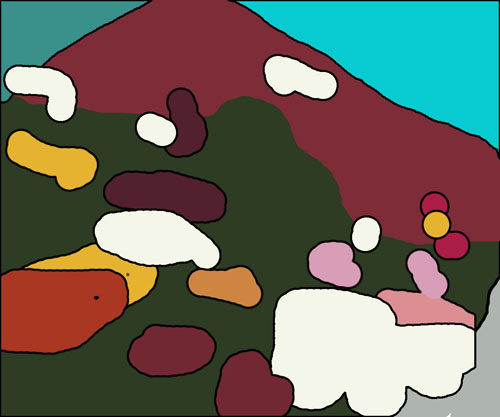
This is what I came up with. (A computer sketch.) Can you see it? As you can tell, I outlined each shape with black. Not quite sure why, but I really liked the effect. (I’ve never done it before.)
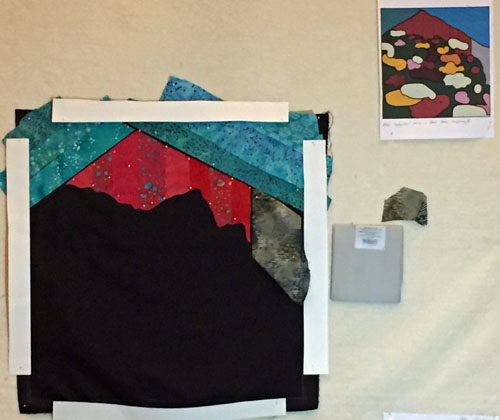
At the recent retreat, this was my project. Here I am, just getting started. As you can see the dimensions have changed to square, as opposed to the original rectangular format.
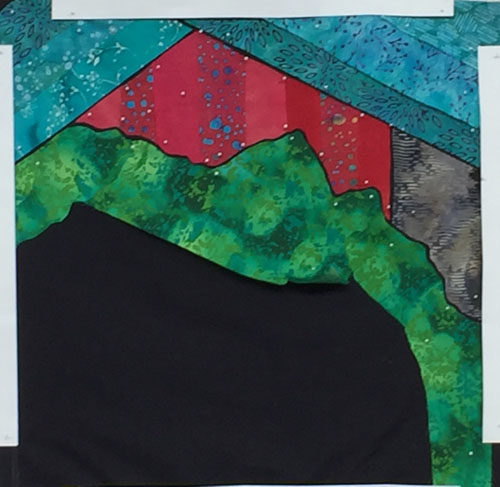
I used lots of green scraps (left over from my stint on Quilting Arts TV,) to create the green backdrop. I was LOVING the effect of the skinny black line!
Then, I began to add the flowers.
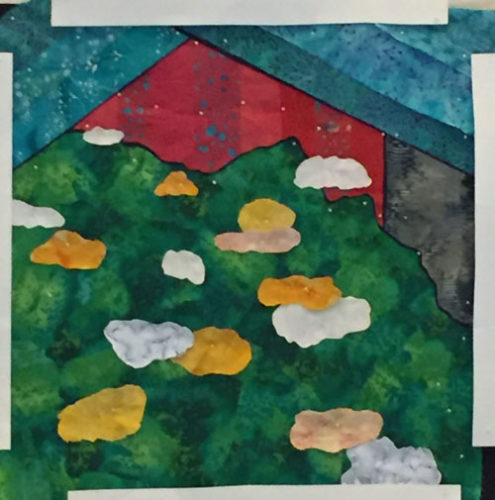
Screech. Wait a second! There’s something wrong with the composition above. Can you see what it is?
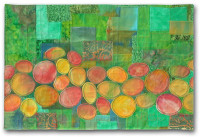
The problem is there’s not enough depth perspective. All the flower clusters are similar in size. In reality the close ones need to be MUCH larger. More like these first few from my second attempt.
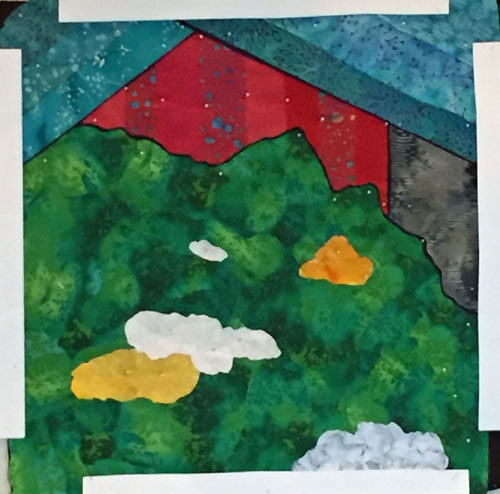
See what I mean? Even with just a few blossoms in place, a sense of depth is beginning to develop. I continued to pay attention to this as I added the remaining floral clusters.
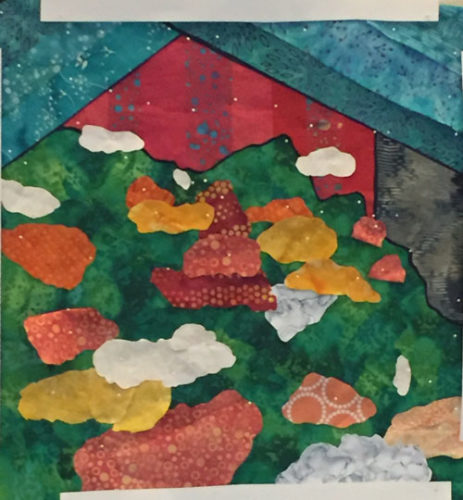
This is the final composition above. However, I still needed to add the black lines around everything. This is where I totally LOST MY SENSES and decided on a terribly complex and time consuming technique. It was so traumatic I’m not sure I’m ready to talk about it. But these next two photos will tell the sad tale.
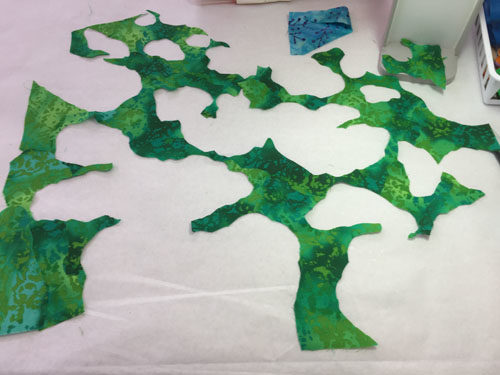
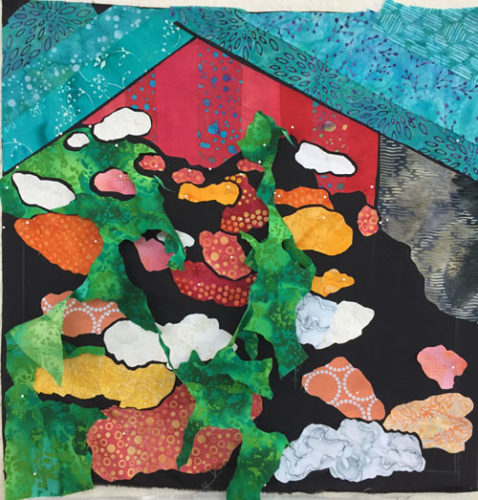
WHAT was I thinking?
Thankfully, it all looked good after much fiddling and tweaking. Here it is, quilted.
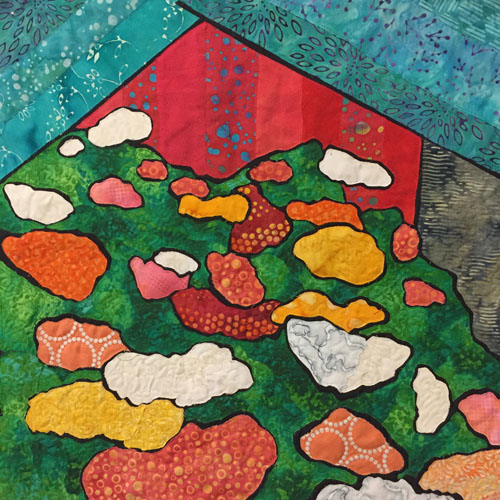
Finally! Lessons learned/reminded:
– Keep it simple
– Pay attention to perspective
– Persevere when things become difficult.
I need a name for this piece. Any suggestions?
Ellen Lindner
P.S. I’ll photograph this properly and add it to my website soon.
P.P.S. Check out some of the other Dirty Dozen challenges with the links below.

Hi, Ellen,
I just want to tell you how much pleasure I get from seeing your experiments and processes on your blog. I love your adventurous and playful but serious approach to art. One of these days, I’m going to have to read all your past blogs to catch up on all you’ve done. Thank you for sharing your excitement with us!
Best wishes, Laura
What a nice comment, Laura! I really appreciate it.
I am truly excited by what I’m doing and I’m glad that shows through. Add in my chatty nature and “voila,” you’ve got a blog post. I’m so glad you enjoy them.
I love your process photos . . . this is so interesting. Thank you for sharing your creative inspirations with us.
Thanks, Maeve. I think I might do something like this again (but with a much more straight forward technique!) 🙂
Love the inspiration photo! So many ways to interpret this. I’ll look forward to seeing all your groups’ pieces.
Yes, Martha, this group is very creative, so it will be a unique and wonderful collection.