After getting started on two big leaf quilts, things went pretty smoothly. (The photos in this post show the left quilt.) Having previously drawn the design on a large piece of muslin, I auditioned which green to use where.
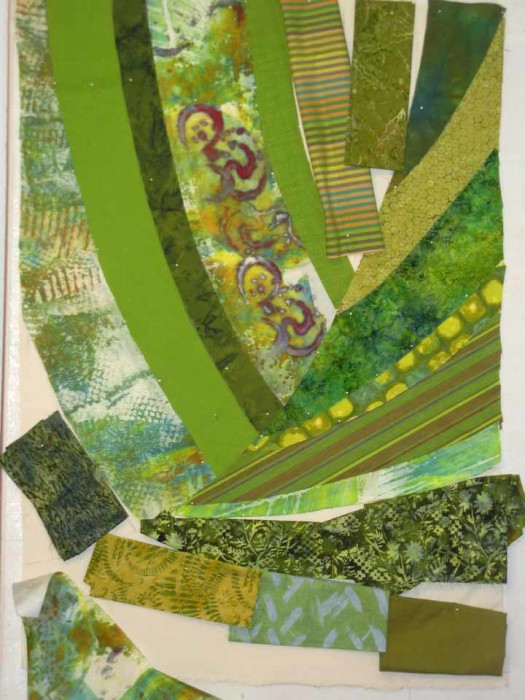
Can you believe I had to buy MORE fabric? Very unexpected.
Here’s the final arrangement of greens. Which ended up being not so final after all.
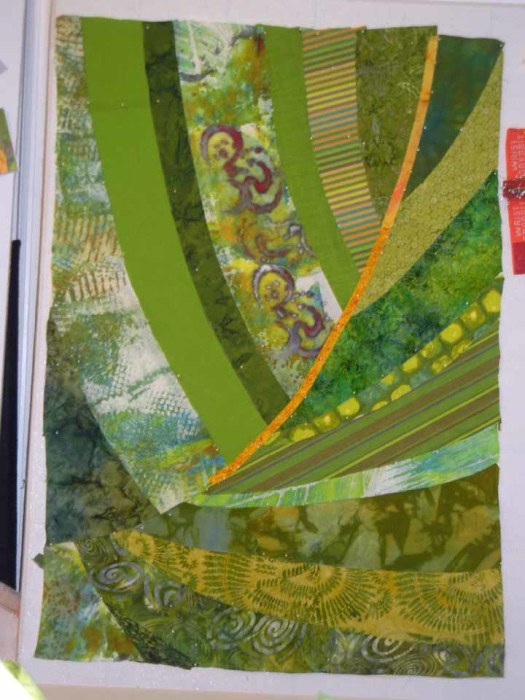
I was beginning to audition vein colors and widths. I loved the color above, but thought it was a little fat. More experimenting was needed.
In the photo below, I’ve changed some of the bottom right fabrics and I was continuing to add veins. I REALLY liked these colors!
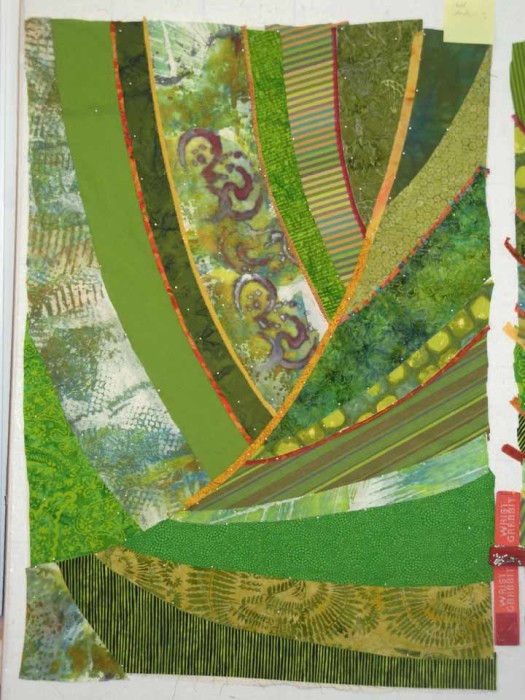
Here’s the final version, with veins complete. I was quite happy with it.
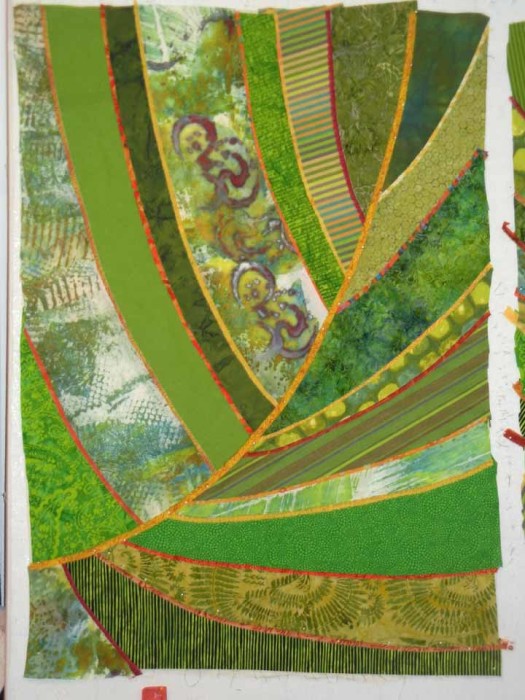
Then, I got to thinking about adding shadows to make the veins looked raised. I did a little experimenting and decided to do this with two layers of black tulle.
I covered the entire quilt with the tulle (2 layers.) Next, I decided on the light source and did some crazy calculating (and guessing) to determine the correct width of the shadow at each location. I drew in the shadow dimensions and stitched them with dark monofilament thread. Finally, I cut away the extra tulle.
In the photo below the entire quilt has tulle on it. I’ve stitched the first few shadow lines, on the right. allowing me to cut away the tulle in those areas. I was pleased to see that it was developing as I had hoped.
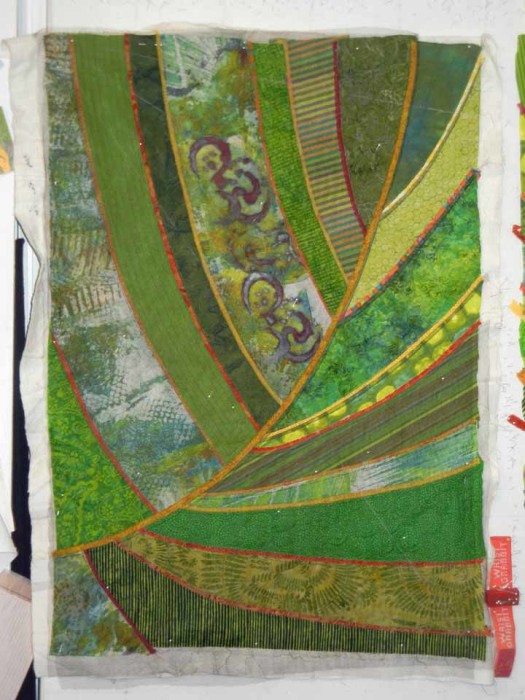
In the next photo, the left side is still covered with tulle and the right has had the shadows completed.
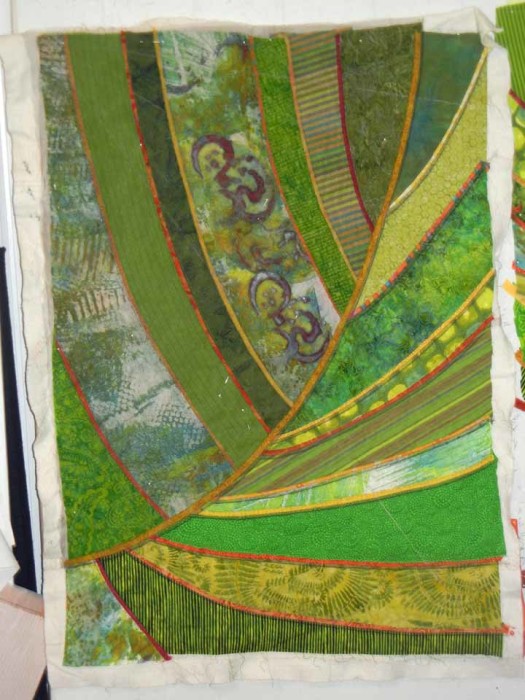
And here it is finished.
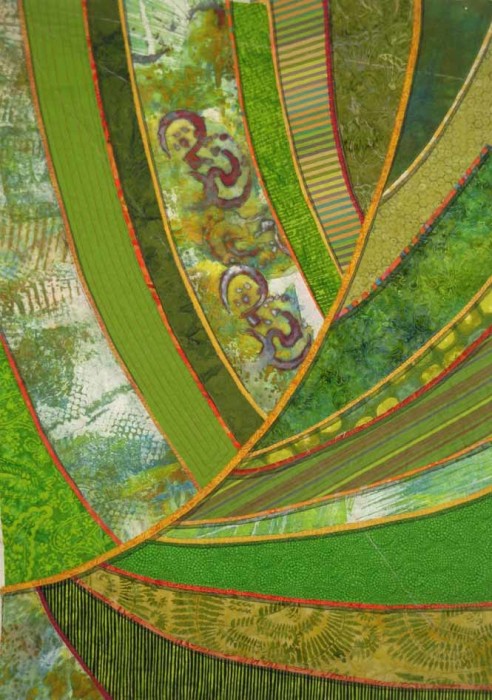
I think the shadow effect worked perfectly. What do you think?
Want to see it up close? I know you do, so here it is.
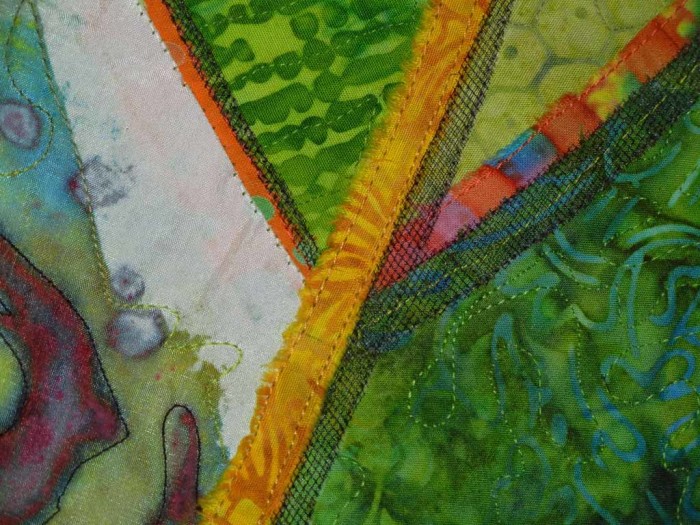
I think I might use clear thread next time.
The left quilt is now almost complete. I’ll wait to trim and face it until the second quilt is finished, so I can make sure they’re the same size.
BTW, I’ve used tulle to add a shadow, or to change a color many other times. See several examples on this page.
– Misty Morn required four layers of black tulle to create the shadows in the foreground.
– Blue tulle was used to created the shadows on the oranges in Lakeside Citrus.
– Black oraganza (more opaque than tulle) was used for the berry shadows in Ripening.
– Two layers of black tulle created the border for Autumn Breeze. Can you see how the interior image continues right into the border?
TIP: Using tulle in this way is very easy.
– Start with a piece significantly larger than needed. Pin well.
– Stitch along desired lines.
– Trim closely.
Because tulle is extruded plastic it will not ravel! (Other woven sheers generally ravel very badly.)
Have you ever used tulle to alter a color?
Ellen Lindner


Leaf it to Ellen to join Mother Nature and Georgia O’Keefe in glorifying a simple form. Did this come out of Pat Pauly’s class? The shadows are what make it! Thanks for referring to the use of tulle in other quilts. Inspirational!
Hi Eleanor,
This whole thing started as a way to use a funky green fabric. It was meant to be a spiky palm, but I decide to let it be a leaf instead.
I’m glad you like the shadows. They were a late decision and I think they work very well.
Thanks for commenting!
Your process is fascinating to me. A simple leaf becomes a work of art with fabrics! Gorgeous color and shading! I like your explanations and photos when you are demonstrating your process. Thanks so much for sharing your talent with us!
I’m anxious to try your technique, Ellen. Leave it to you to give this ole gal some inspiration when she needed it most!
Hi Kathy,
Yes, you should definitely try it. It was easy and, I think, effective.
Thanks for the details and close shots about the shadowing with black tulle. Very cleverly done.
Thanks, Martha. I use tulle to shade or alter colors every so often. You can trim it very closely, since it won’t ravel.
LOVE your work! I’m a new quilter and want to do exactly what you’re doing. Glad I “found” your site 🙂
Thanks, Pat!
I only stumbled across your blog today, thanks to Pinterest… I see the last comment was posted on 17 March (at least on my version…) Do you have photos of the final product? I think the WIP pics are FABULOUS. I want to make that! But I am not even close to that skill level. Yet.
Great work! Brava!
Hi Renate,
Sorry for my very slow response. (I wasn’t properly notified about your comment.) Anyway, yes, I have finished this quilt. You can see it at http://adventurequilter.com/quilt-gallery/around-the-neighborhood-gallery-partial/florida-native-2/ and the sister one at http://adventurequilter.com/quilt-gallery/around-the-neighborhood-gallery-partial/florida-native-1/.
I’m so delighted to have stumbled across you! I like to make crazy quilts…..minus all of the fancy embroidery for which I have no patience……and was contemplating doing a crazy quilt with a leaf design of some sort or a tree design. How fortuitous that I find your blog on Pinterest!
Hi Kim,
I think a crazy quilt leaf quilt would be awesome! And, I’d love to see it when you finish it, too.
Truly inspiring! How big is the piece?
Hi Kim,
I’m glad you like seeing these pieces in progress. They’re both about 36h x 24.5w. You can see the finished version of this quilt at http://adventurequilter.com/quilt-gallery/around-the-neighborhood-gallery-partial/florida-native-2/ and the other one at http://adventurequilter.com/quilt-gallery/around-the-neighborhood-gallery-partial/florida-native-1/.