Tag Archives | Abstract

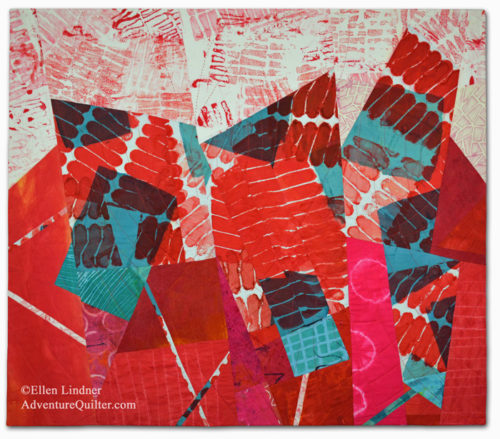
Making Progress in Red

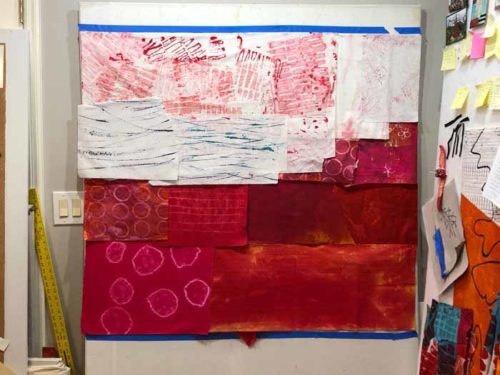
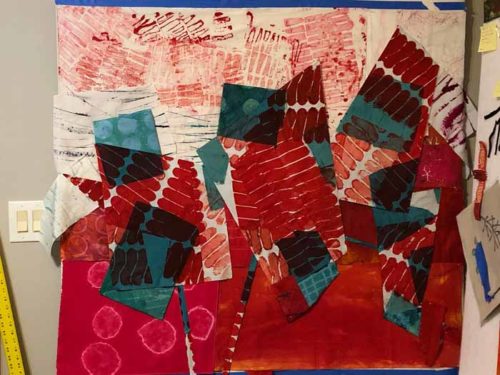
After trying several temporary background colors, I decided to make one side white and one side red.

Ta.ckling That Red Fabric. Ellen Lindner, AdventureQuilter.com/blog

I started with a new temporary background. The purpose of this is so I don’t have to compose against my pure white design wall. It helps me visualize.

This was first stab at a new composition. I could see that I’d be able to create lots of energy, thanks to the sharp angles and high value contrasts.

But again, it seemed like the green squares against the white were, once again, taking over.

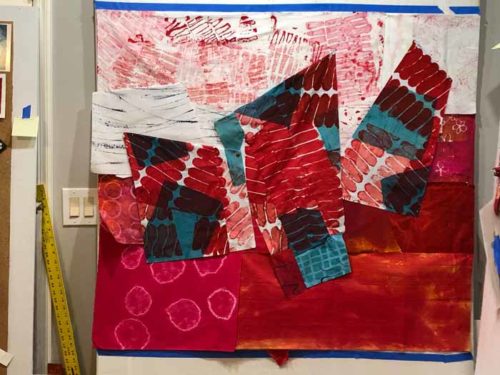
I removed them and liked them better. (Note: most of the green shapes are just folded and pinned in place. This works well for auditioning ideas. I’ll delay cutting fabrics until I’m convinced about what needs to happen.)

I removed all the squares. That helped immensely in the top half, but I thought the bottom portion looked a little naked.

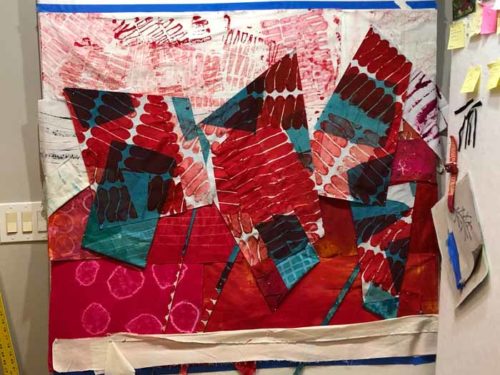
I added some squares against the red and I liked the effect.

Art quiz: why did I previously decide to remove green squares from a red background, but here I’ve just added them back? Answer in P.S.

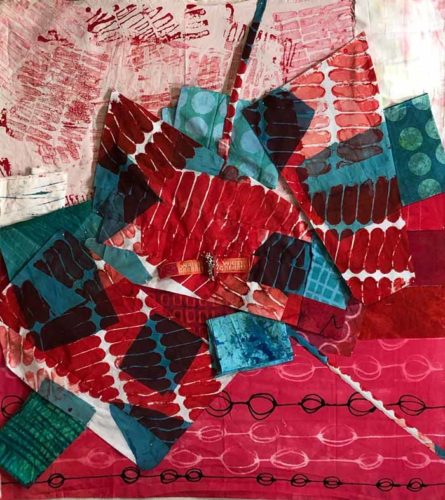
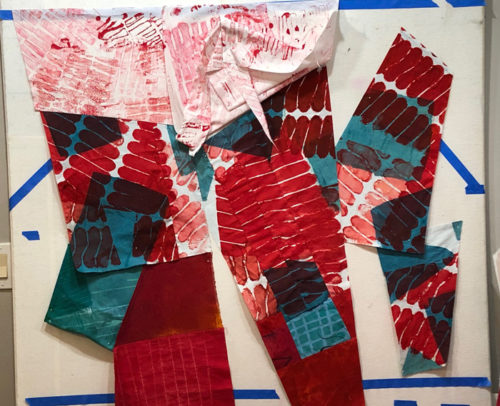
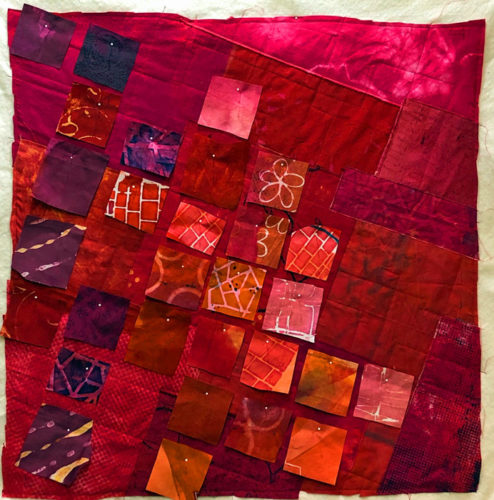
Next it was time for actual construction. It was time to remove those temporary background fabrics and switch in the ones that I’d need. In this photo I had just finished the first few red seams in the lower section.

I’ll need to go slowly, select the right fabrics, and figure out how to “tetris” this whole thing together. I imagine it will be a little challenging, but I think it will be fun too!

Ellen Lindner
P.S. Answer to art quiz: It goes back to the fact that contrasts in value always attract attention. In my last post I showed  you how the green squares were taking over against the red. That’s because of the value contrast between them. But, in this post I added those greens squares right back to the red bottom. That’s because everything affects everything else. When I change the background to white I created VERY strong value contrasts between the sharp red shapes and the white background. Therefore, they attract attention. The contrast between red and green is now secondary and not as noticeable. Remember, when you make one change you often need to make another.

0

Composing with an Eye Toward Value

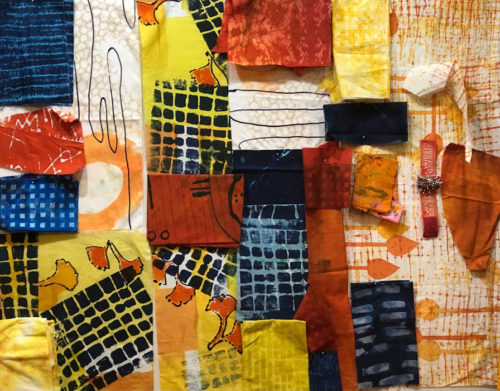
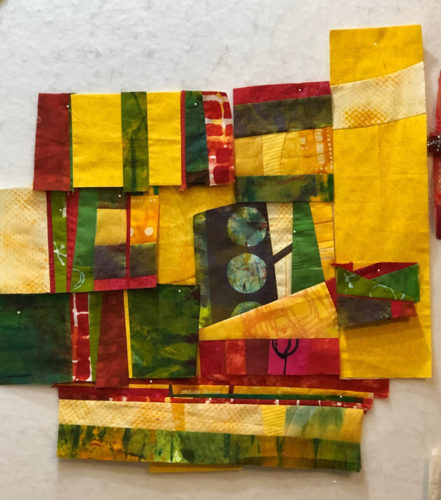
These were the fabrics I selected as I started on an abstract quilt with NO plan.
Working with Dwindling Fabrics, Ellen Lindner, AdventureQuilter.com/blog

Although I didn’t have a plan, I did have a goal. I wanted to use the last of my favorite fabric, the navy and yellow grid, and to let it be the star of the show.

BTW, can you see how the scale of that one print greatly affects the scale of the overall piece? I wouldn’t want to cut it into tiny pieces, for instance.

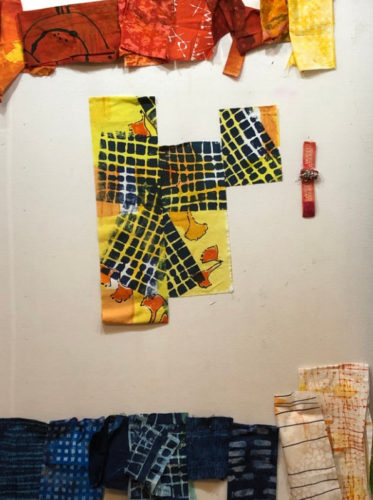
I had two lengths of the favorite fabric and I wanted to cut it as little as possible. I cut one piece into about a 1/3 – 2/3 split, so I had 3 pieces.. Since this fabric has the highest value contrast (light vs. dark) of all the other fabrics, I knew it would attract a lot of attention. Which was good.

Therefore, I moved everything else out of the way and created the first part of the composition with just these 3 pieces of fabric.
Composing with Value. Ellen Lindner, AdventureQuilter.com/blog

Because this fabric had a diagonal aspect to its design, it created a lot of energy. Plus, as you can see, I made sure to offset the pieces. I really liked this starting point! I knew I’d have to pay attention to the value contrasts that developed throughout the rest of the design, making sure that none of them drew attention away from it.

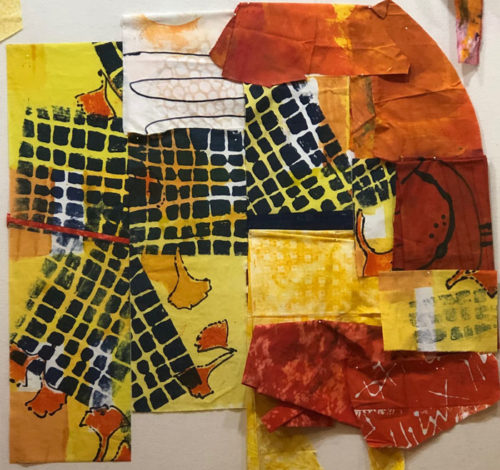
In the photo above you can probably tell that the left fabric is folded under at the bottom. I cut that off and added it to my starting composition, (see below.) I wanted to break up the large expanse of grid on the left piece and inserted a skinny orange strip (shown in the next photo.) I liked it a lot.

I let the fabric lead my next few decisions: adding more yellow and orange in their respective areas.
Composing with Value. Ellen Lindner, AdventureQuilter.com/blog

As you can see in the photo above, I didn’t have large pieces of orange, so I knew I’d have to piece those together. I thought I’d probably repeat the orange in the lower right, as well. Adding navy would be tricky. It would automatically create a very high value contrast, attracting attention. I’d have to consider it very carefully.

And what about that white in the top center of the photo above? Although I liked the fabric in the mix, it was right next to the navy grid, creating exactly the problem I was hoping to avoid. I did add some navy just right of center and I thought it worked there.

Next round. Navy top left: too strong!
Navy at the bottom: maybe.
White at the bottom right: maybe
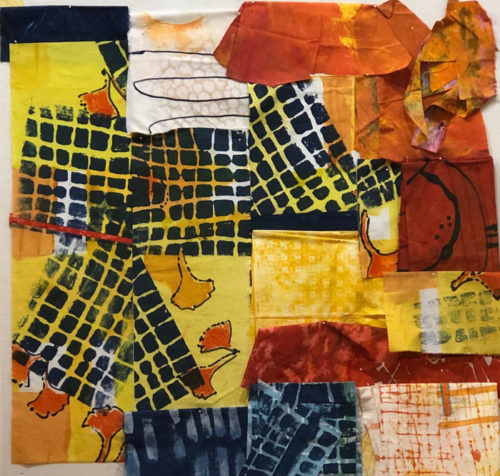
Composing with Value. Ellen Lindner, AdventureQuilter.com/blog

Next round. Replaced top left navy with yellow-orange: MUCH better! (Low contrast, right?)
More navy at the bottom: probably. The navy is visually weighty which gives the piece some stability.
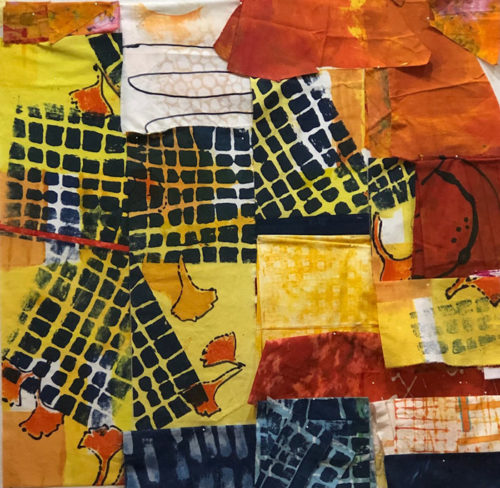
Composing with Value. Ellen Lindner, AdventureQuilter.com/blog

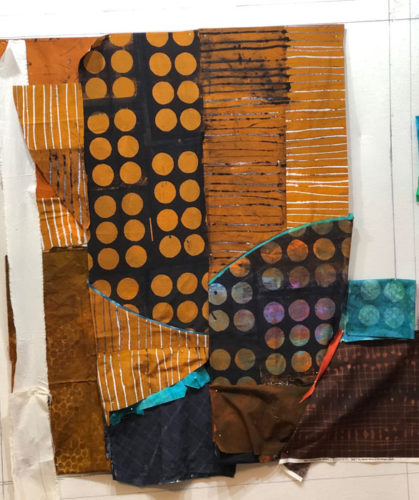
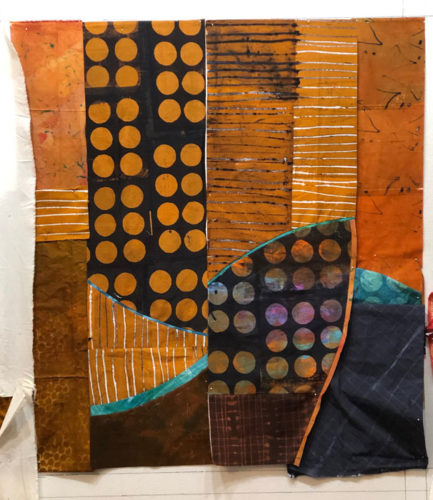
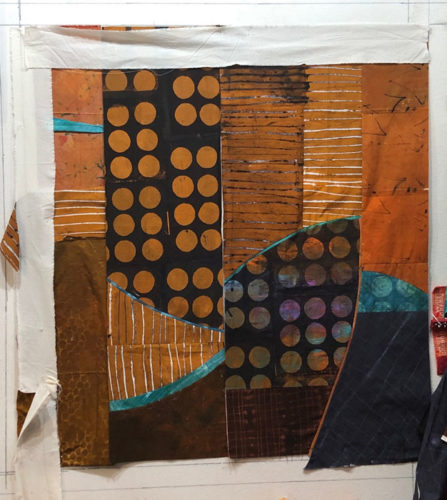
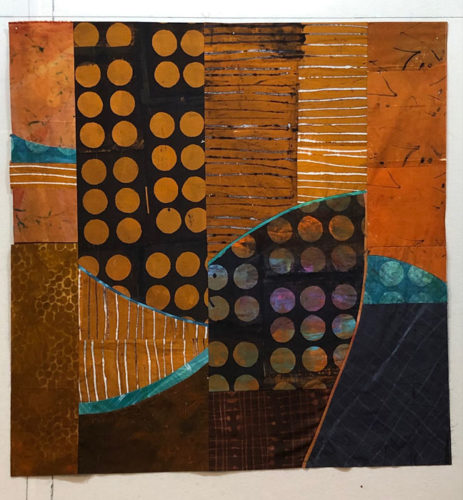
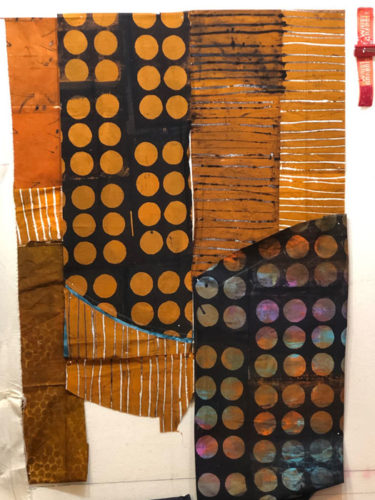
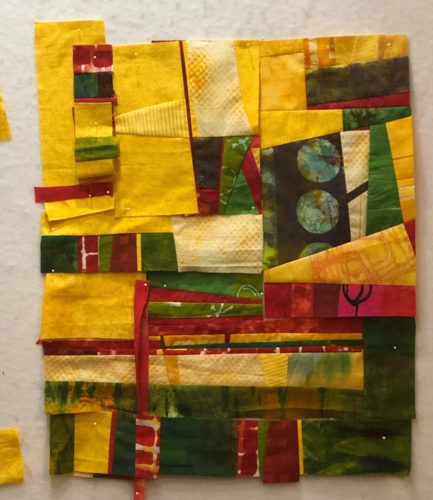
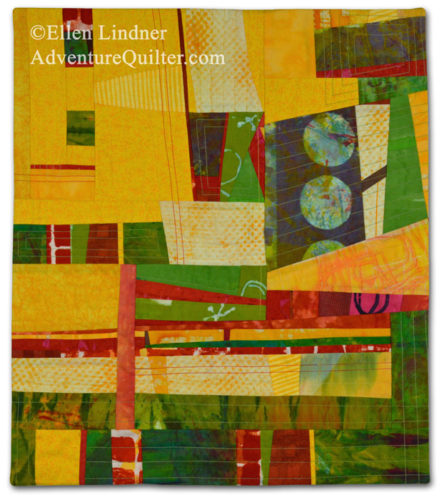
This hodge podge of scraps pinned to the design wall evolved only slightly as I began to figure out how to piece all of this. See the finished quilt in my next post.

Do you think about value this much? I find it very helpful, although sometimes I get seduced by a color or some such and forget to pay attention to the contrast.

Ellen Lindner


0

Working with Dwindling Fabrics

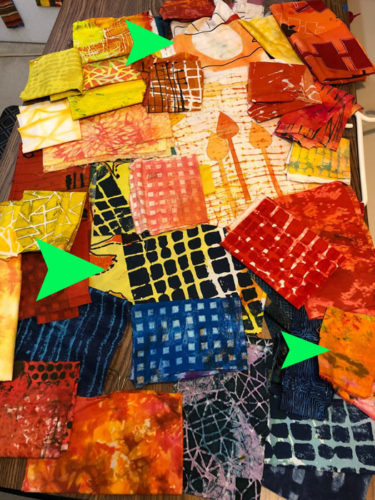
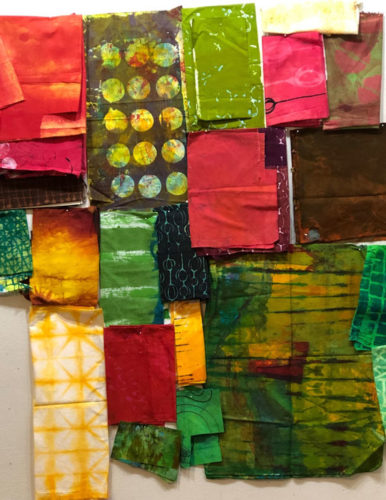
I was running low on a favorite hand dyed fabric when I decided to make a quilt with it. It’s the navy and yellow grid shown below, indicated by the largest arrow.

Working with Dwindling Fabrics, Ellen Lindner, AdventureQuilter.com/blog

I pulled every other hand dyed fabric that would go with it and this is the selection, shown above. Smaller arrows indicated two more fabrics that were down to fairly small pieces. I was loving the energy of these bright fabrics and excited to get started.

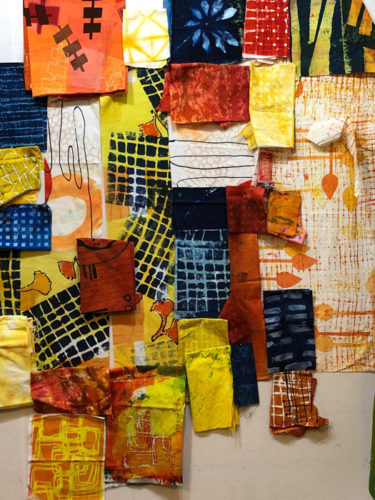
I pinned everything up on the design wall and began to edit. Now you get a better idea about the sizes of the pieces. Some of the fabrics had too much pattern and would draw attention away from my feature fabric.

Working with Dwindling Fabrics, Ellen Lindner, AdventureQuilter.com/blog

Some fabrics removed, I continued to study the combination. Still some competing fabrics.

Working with Dwindling Fabrics, Ellen Lindner, AdventureQuilter.com/blog

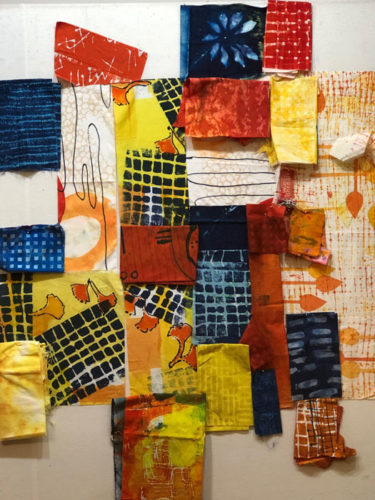
After deleting the “show stoppers” I thought this combination would be workable.

Working with Dwindling Fabrics, Ellen Lindner, AdventureQuilter.com/blog

I’d still need to edit and carefully consider as I proceeded. What about that near-solid navy? Will it be too strong? And the brighter blue grid on the left: too bright?

This was my starting point. These fabrics went on my work table, and all the others were moved out of sight. I didn’t have a design plan. My only plan was to feature that navy/yellow gridded fabric. All my decisions would be in support of it. I knew this would be challenging, but also invigorating.

In my next post, I’ll show you how I began to compose the design. It was fun!

Ellen Lindner
P.S. Do you ever work without a plan?

2

“Toast and Jam”

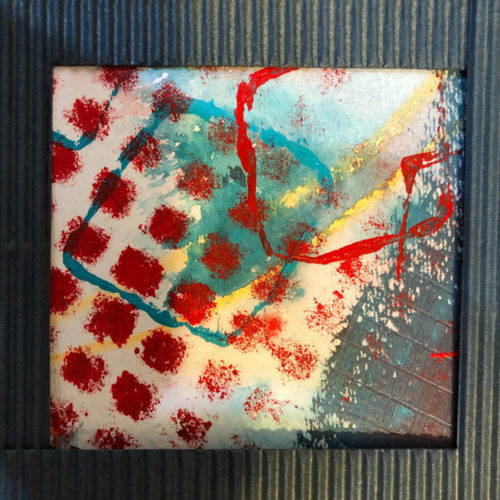
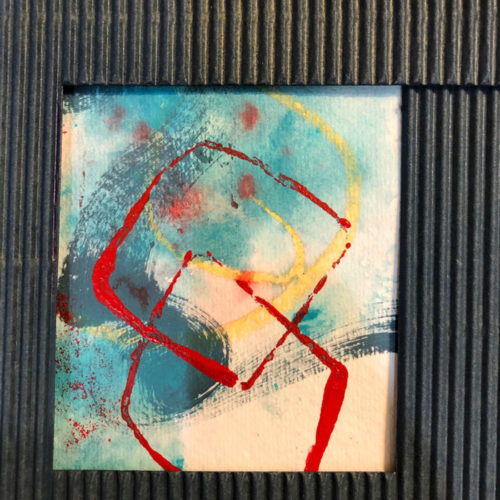
Remember that ugly exercise that I’ve been considering? This is the portion of my ugly painted which I selected as my inspiration for a small quilt.

Super Cool UGLY Exercise. Ellen Lindner, AdventureQuilter.com/blog

I played around with the individual elements in the computer and, at one point, accidentally colored the background red. Which I liked!

"Toast and Jam," and art quilt by Ellen Lindner. AdventureQuilter.com/blog

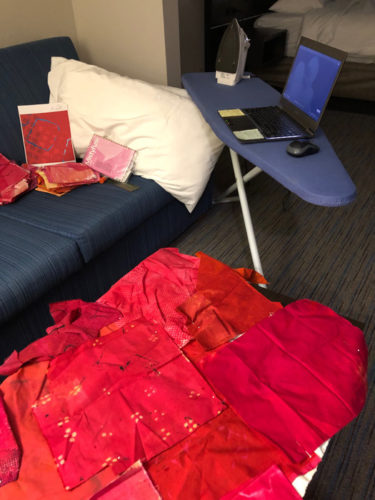
So, I started pulling fabrics and got to work. Actually, I got to work in a hotel room. This was my set up. Construction on the coffee table and Netflix on my laptop. With the iron at the perfect height, of course.

"Toast and Jam," and art quilt by Ellen Lindner. AdventureQuilter.com/blog

Once home, I stitched the background and fused up a bunch of fabrics for the background squares. (I fuse very seldom.)

"Toast and Jam," and art quilt by Ellen Lindner. AdventureQuilter.com/blog

I noticed that some of my lovely squares were attracting a lot of attention. I knew that wouldn’t work in the end, so I had to swap them out.

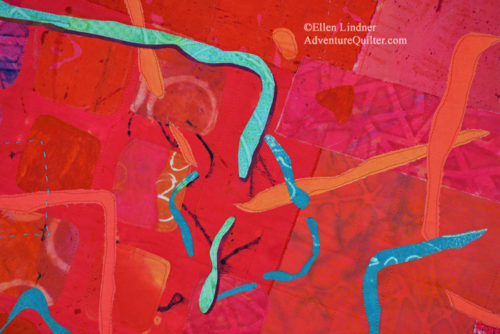
Eventually, I was happy with the background and started with the part I DID want to attract attention: the wonky open squares. This is a detail shot.

"Toast and Jam," and art quilt by Ellen Lindner. AdventureQuilter.com/blog

I added a little hand stitching, but that was difficult through the fused fabrics.

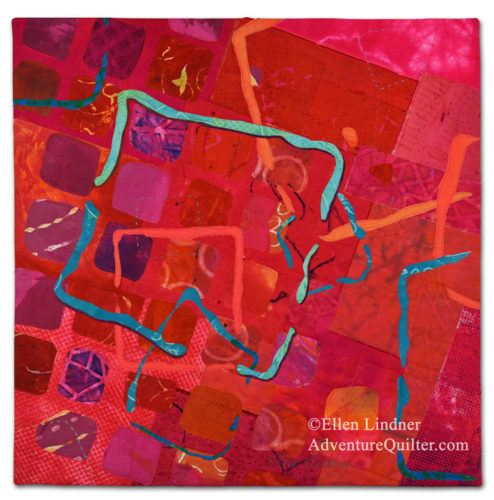
Here’s the full quilt, Toast and Jam, 24″ x 24″.

"Toast and Jam," and art quilt by Ellen Lindner. AdventureQuilter.com/blog

This was fun to work on, but I think I’m ready for something other than red!

This piece is available for $195 US. Contact me if you’re interested.

Ellen Lindner
2

Turning Leftovers Into a Meal

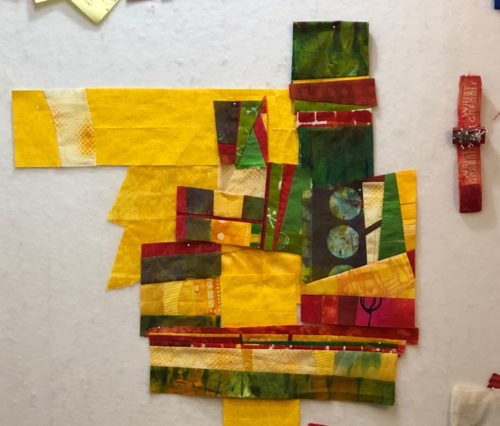
After making Potager Garden, I had quite a few scraps left over, so I decided to use them to make a small quilt. This is what I had to work with.

Turning Leftovers Into a Meal. AdventureQuilter.com/blog

I began to move them around to see how they might fit together. I didn’t like this first version, though. I thought it needed more yellow, if I could find some in my stash.

Turning Leftovers Into a Meal. AdventureQuilter.com/blog

Plus, the colors in the first version (above) were pretty evenly scattered about. That works for wallpaper, but not always for art. I remembered what I had recently learned about massing a color and switched things to this.

Turning Leftovers Into a Meal. AdventureQuilter.com/blog

Much better! And I didn’t change it much after that.

This is the finished quilt, I Hope You Like Peppers.

I Hope You Like Peppers, an art quilt by Ellen Lindner. AdventureQuilter.com

Here’s a detail shot.

I Hope You Like Peppers - detail, an art quilt by Ellen Lindner. AdventureQuilter.com

See larger images and purchase information.

Ellen Lindner
 

2

Upcoming Exhibit: Ormond, FL

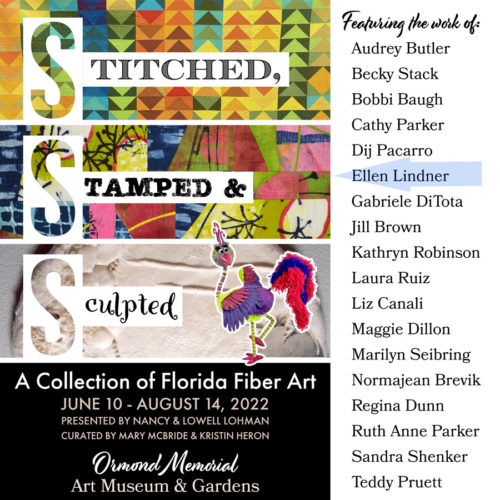
There’s a textile exhibit coming up in which I’ll have SIX pieces. I’m super excited!

Ellen Lindner exhibits in Ormond, FL. AdventureQuilter.com/blog
The exhibit is called “Stitched, Stamped, & Sculpted,” and it will be at the Ormond Memorial Art Museum and Gardens, in Ormond, FL, starting this Friday, June 10th. The exhibit will run through August 22nd. And, if you’re in the area, the opening reception will be this coming Friday, June 10th, at 6 PM. This is also the first reception/exhibit to be held in the newly renovated gallery! I think it’s going to be wonderful.

What will I be showing, you ask? Check out these six abstract(ed) pieces.

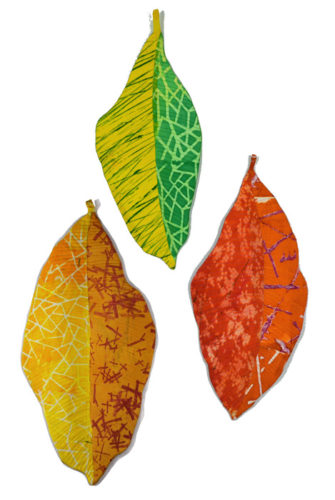
Croton Trio. 3D art quilt by Ellen Lindner. AdventureQuilter.com

Croton Trio. Although this triptych has three components it’s considered one piece of art.


I’m looking forward to seeing these pieces hanging together!

I’ll also have my piece She Looked for Blessings and Found Them, as part of a group display called “Measure of a Woman.” You can read more about that and see all ten pieces here.

I hope you get to see this exhibit sometime this summer. If you make it to the reception on Friday, please introduce yourself!

Ellen Lindner
0

Super Cool UGLY Exercise

Yep, that’s right: ugly.

I recently did this cool exercise with my local fiber art buddies, the Dirty Dozen Fiber Artists. We used a book called “Paint Mojo” for prompts about making an UGLY painting.

The prompts included things like using a dark neutral in certain ways, painting words, using crayons as a resist, dripping paint, adding stamps, and more. Just let me say, we all achieved ugly! Just as desired.

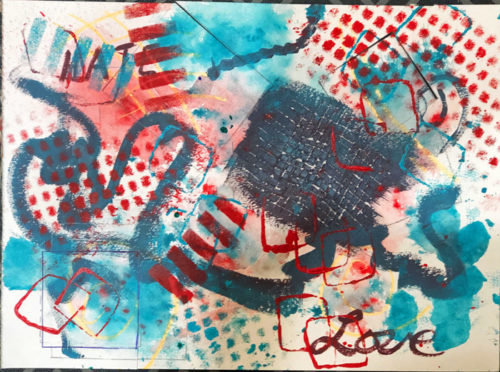
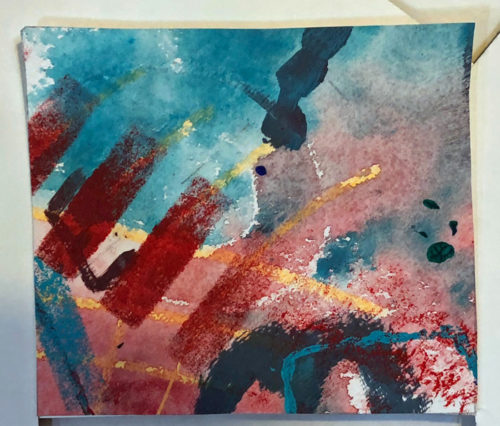
This was mine.

Super Cool UGLY Exercise. Ellen Lindner, AdventureQuilter.com/blog

See what I mean? UG. LEE!

But then, you pull out your little L-shaped pieces of cardboard and start to search for pleasing compositions.

Super Cool UGLY Exercise. Ellen Lindner, AdventureQuilter.com/blog

Low and behold, when you zoom in tightly like this you actually find them!

And they’re kinda amazing.

Super Cool UGLY Exercise. Ellen Lindner, AdventureQuilter.com/blog

Our plan is for each of us to choose a little cropped view as inspiration for a square art quilt. (I’m not sure the other artists were as enamored with this process as I was, so we’ll see how many still want to do it.)

Isn’t this wacky? It was great fun and the results are totally usable.

Ellen Lindner
P.S. For more fun, follow the three links below to see how this worked it out when I first tried it, six years ago.


0

Color Inspiration

Slowly, over the course of a couple of months, I began to notice the same group of colors.

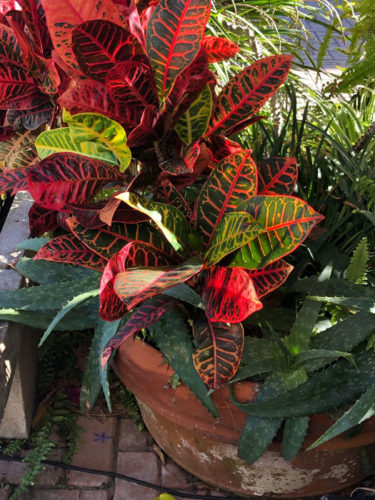
First, was a Croton plant.

Color Inspiration. Ellen Lindner, AdventureQuilter.com/blog

What pretty oranges and greens!

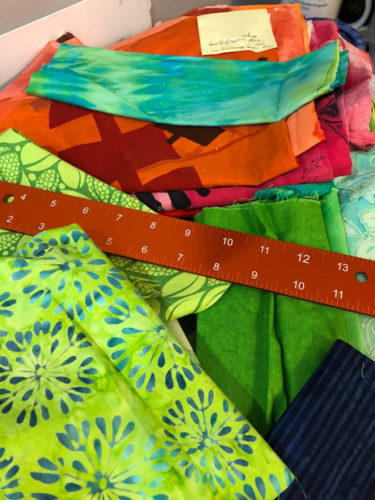
Then, I noticed the mess on my table, which had the same colors.

Color Inspiration. Ellen Lindner, AdventureQuilter.com/blog

I decided to work with green, yellow-green, and orange. I pulled out all the hand dyes I had in those colors and noticed that one dark green fabric had yellow circles. What about adding yellow-orange?

Color Inspiration. Ellen Lindner, AdventureQuilter.com/blog

Yes! I dug a little more and selected the fabrics you see above. This was getting exciting!

Ellen Lindner
P.S. Where do you find your color inspiration?

0

Going Back and Making Changes

Last summer, I made a quilt called Beet Salad. I put a lot of work into it, including dyeing all the fabrics especially with this quilt in mind. This was the final result.

Beet Salad, an art quilt by Ellen Lindner. AdventureQuilter.com

Beet Salad

Although I liked it, somehow it didn’t quite meet my vision. I wasn’t sure what it needed. Recently, (when I finally put it away,) I studied it again and decided the color contrast was just too harsh. Especially with those yellow circles.

So, I removed them, and this is the new rendition.

Beet Salad, an art quilt by Ellen Lindner. AdventureQuilter.com

Beet Salad

I like it SO much better! It was a little bit of a technical challenge to remove the yellow circles, but I think it was worth it.

What do you think? Do you like it better?

Ellen Lindner
P.S. Have you ever changed something after it’s completely finished?

0

If You Never Fail You’re Not Experimenting Enough

I’m not sure where I heard that quote, but I agree with it. And, I’ve been doing plenty of experimenting lately. Yes, you guessed it: I created a big failure rough draft.

I’ve been doing quite a few abstract quilts in a style I call “Slice and Dice.” As the name implies, I slice into fabrics and rearrange them back together in different – and hopefully more interesting – arrangements.

Like this:
A Little Bit Tart, an art quilt by Ellen Lindner, AdventureQuilter.com

A Little Bit Tart

And this:

On the Road to Home, an art quilt by Ellen Lindner. Adventurequilter.com

On the Road to Home

The fabrics I’ve used have been hand dyed, which definitely add to the design of these busy quilts. So, when friends suggested that I teach the technique I thought I wouldn’t be able to do it because of the unique nature of my fabric selections.

Still, I decided to give it a shot. I bought an ombre fabric with several colors in it and fabrics in all the colors. This was my starting point.

Can commercial fabrics be used for a "Slice and Dice" quilt? Ellen Lindner, AdventureQuilter.com/blog

I cut each fabric in predetermined sizes and joined them in pairs. I took meticulous notes so I’d be able to teach exactly what to do.

Can commercial fabrics be used for a "Slice and Dice" quilt? Ellen Lindner, AdventureQuilter.com/blog

Each pair was then altered, either by adding a skinny pieced line, or by cutting and rearranging the pieces.

Can commercial fabrics be used for a "Slice and Dice" quilt? Ellen Lindner, AdventureQuilter.com/blog

Can commercial fabrics be used for a "Slice and Dice" quilt? Ellen Lindner, AdventureQuilter.com/blog

I did that OVER and OVER. And OVER and OVER. After a while I realized that no student would want to spend this long altering the blocks. I didn’t enjoy it either. So much for teaching it.

But, I thought I could at least make it into a good sample in case I figured out the teaching angle down the road. I worked and worked, but the white fabric and the dark colors just stood out too much. I sliced into them repeatedly, trying to whittle them down to what I considered the correct proportion. But, eventually, I had such an abundance of bulky seam allowances that the whole thing was barely sewable.

I decided to cut my losses.

Can commercial fabrics be used for a "Slice and Dice" quilt? Ellen Lindner, AdventureQuilter.com/blog

This is where I ended up. It was taking a lot of time and it wasn’t getting better. I just stopped.

Do I have angst or regret about tackling this project? No, just the opposite, actually. I had a question and I needed to work it through to find the answer. Now I know the answer. Plus, I recognize the time I spent problem solving and trying new things will make me more creative in the future. I didn’t waste my time and I didn’t waste my fabric. The fabric served a useful purpose, even though it wasn’t the one I imagined.

I feel strongly about the importance of experimentation, which is why I call myself the Adventure Quilter.

Have you “failed” at anything lately? (Actually, I don’t call them failures. They’re “rough drafts,” or “experiments.”) Any recent rough drafts?

Ellen Lindner
P.S. Click the title of this blog to see it without the rest of the blog posts. This will reveal several links  below which will take you to several other posts showing high levels of experimentation on my part. Beware: rabbit holes ahead!
4