Tag Archives | Hand Stitching

“She Looked for Blessings and Found Them” Complete

She Looked for Blessings and Found Them is the tile of my just completed self-portrait. Here’s a photo of the full quilt. It’s height matches my own, at 60″. And it’s 12″ wide.

"She Looked for Blessings and Found Them." A self-portrait art quilt by Ellen Lindner, AdventureQuilter.com

She Looked for Blessings and Found Them
(A self-portrait)

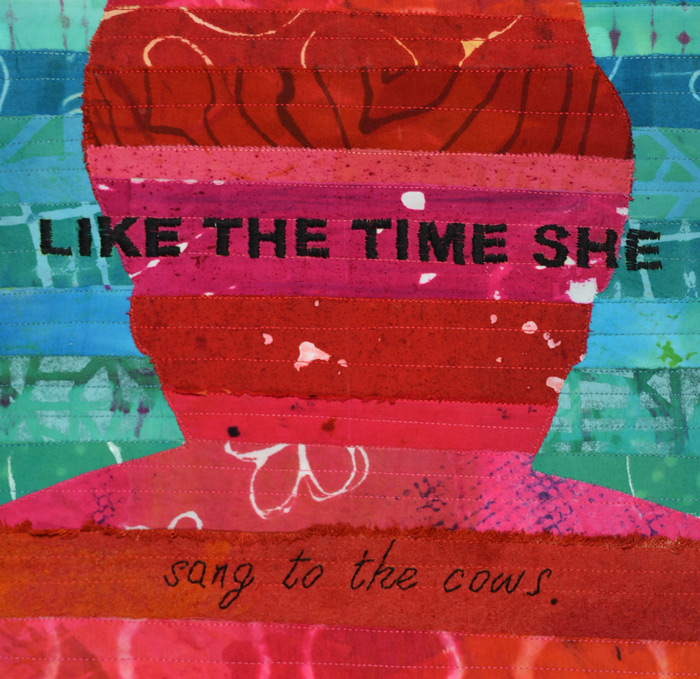
What makes this piece special are the statements I’ve stitched in telling things I’ve done over the years. Some are cute and others are not so complimentary, but the combination gives a good insight into who I am.

"She Looked for Blessings and Found Them," detail. A self-portrait art quilt by Ellen Lindner, AdventureQuilter.com

I hope you’ll check out all the detail shots which show these statements and really tell the story.

Ellen Lindner
P.S. See this quilt in-progress.


0

A Self-Portrait in Red

My art quilt group, the Dirty Dozen Fiber Artists, have a really interesting challenge going on. We’re all making self-portraits, each the height of the maker. Isn’t that a cool idea? They also have to be skinny: no more than 12″ wide.

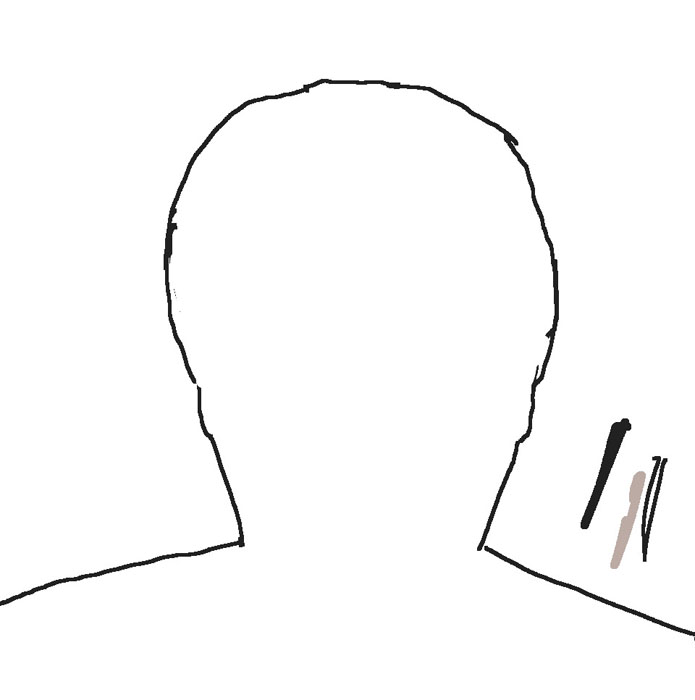
I wanted to include a lot of text in mine, stating my characteristics or attributes.  I decided  a composition with horizontal lines would lend itself to this. But, I also wanted to add my own head. That was surprisingly difficult, but I finally got it.


A Self-Portrait in Red. Ellen Lindner, AdventureQuilter.com/blog

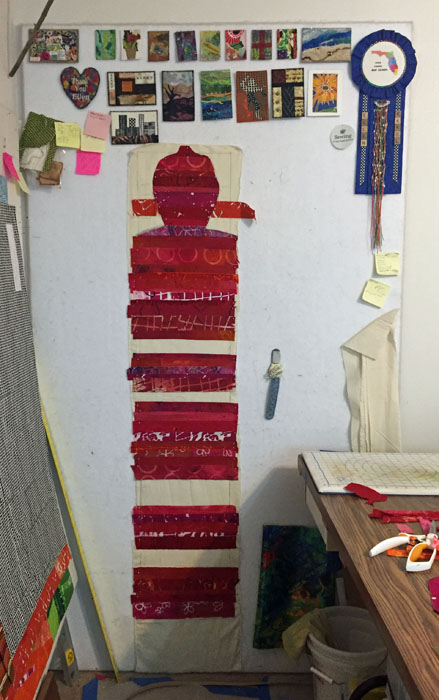
Working on my design wall, the horizontal RED stripes became my body. I used my hand dyed fabrics, paying attention to scattering in a variety of patterns and scales. But, I also aimed for a lot of quiet (near solid) areas that would show off text.

A Self-Portrait in Red. Ellen Lindner, AdventureQuilter.com/blog

My primary design wall is only 4′ tall, so I had to work on my alternate one, above. It’s 7′ tall and I’m only 5′ so it provided plenty of room. (BTW, the bump on the top of my head will be lost in the trimming and seam allowance. I always want the design to extend into the seam allowance, so the bump acheives that.)

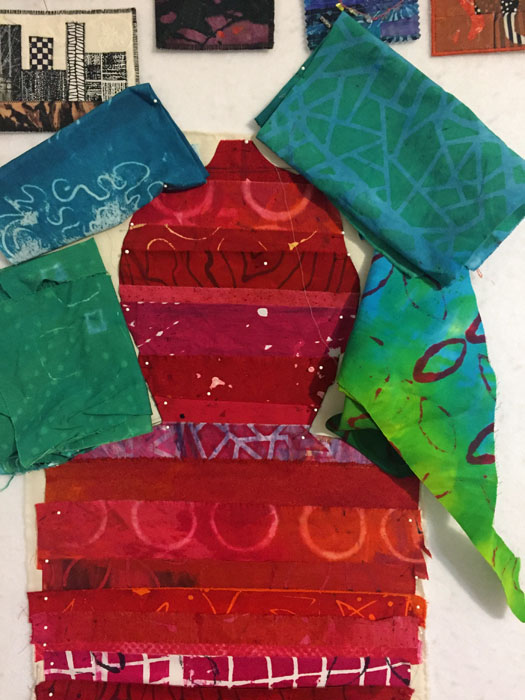
I initially planned to use orange in the background around my head. But, I worried that it didn’t provide enough contrast. A quick audition confirmed the problem.

A Self-Portrait in Red. Ellen Lindner, AdventureQuilter.com/blog

I tried again with blue-green. Much better.

A Self-Portrait in Red. Ellen Lindner, AdventureQuilter.com/blog

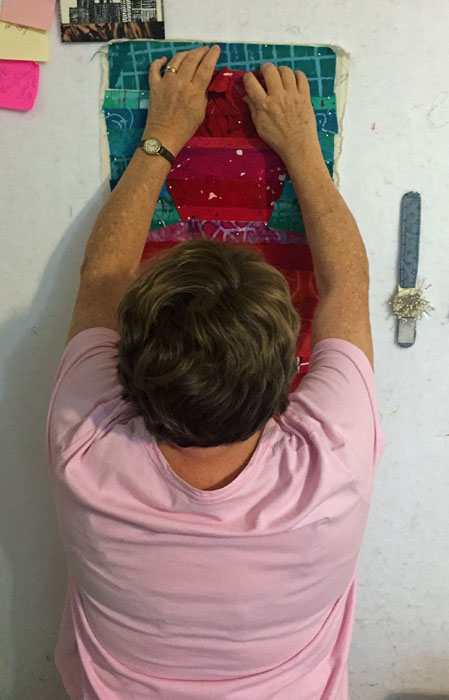
The height of this piece meant that I was frequently working above my head. S-T-R-E-T-C-H.

A Self-Portrait in Red. Ellen Lindner, AdventureQuilter.com/blog

This is what it looked like with the composition complete. No stitching or text yet. I was very happy with it!

A Self-Portrait in Red. Ellen Lindner, AdventureQuilter.com/blog

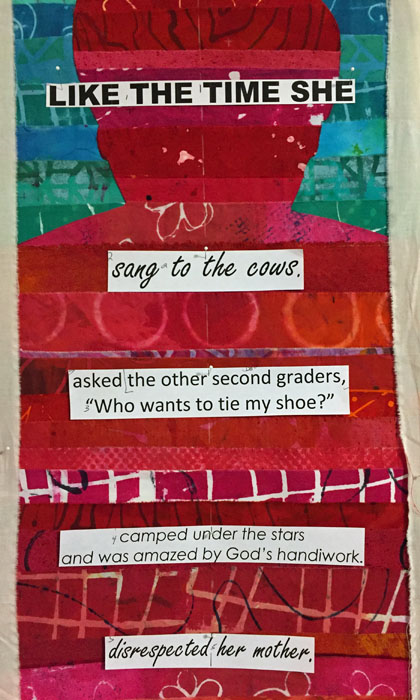
When selecting the text for my self-portrait I switched from attributes to actions. I selected some cute and complimentary things, but also some not-so-flattering confessions. I printed out everything in a variety of fonts and began to audition placement.

A Self-Portrait in Red. Ellen Lindner, AdventureQuilter.com/blog

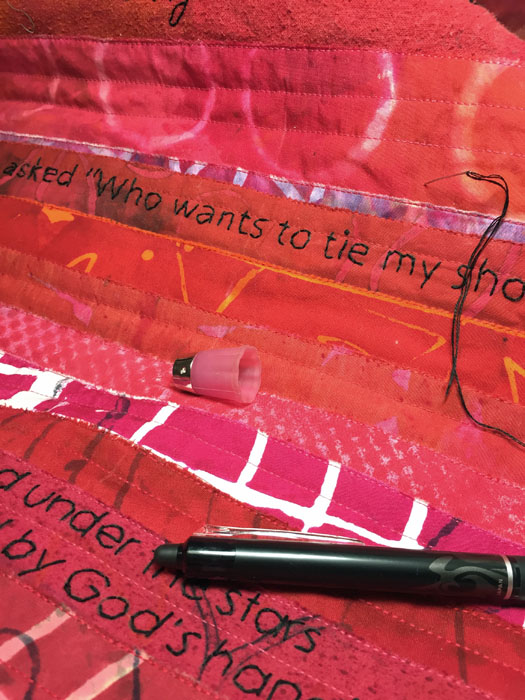
I transferred the text to the unquilted quilt. Then, I quilted it with horizontal lines. And finally, I started hand stitching the text.

A Self-Portrait in Red. Ellen Lindner, AdventureQuilter.com/blog

Oh my, that took a LONG time!!! (I think I’ll use marker next time.)

Now it’s almost complete and you’ll find it on my website soon.

Ellen Lindner

8

A Fabric Book

My friend, Marilyn, taught our fiber art group how to make fabric books. Hers were lovely, with pale pages, lots of embellishments, and amazing contents.

I had just whacked off a good bit of an already quilted quilt and thought that piece would make a good start for the cover. This is what it looked like when freshly trimmed. (From the bottom of this quilt.)


The start of a fabric book. Ellen Lindner. AdventureQuilter.com/blog

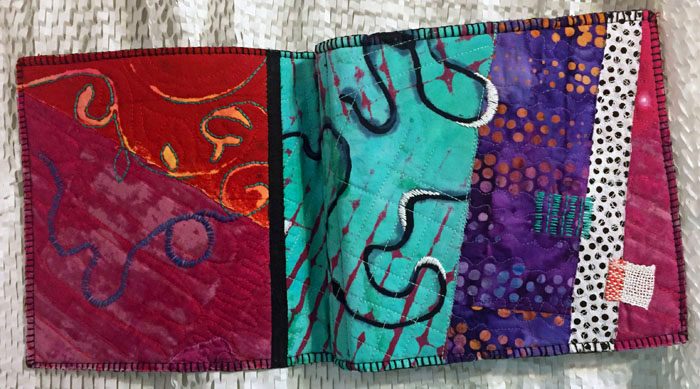
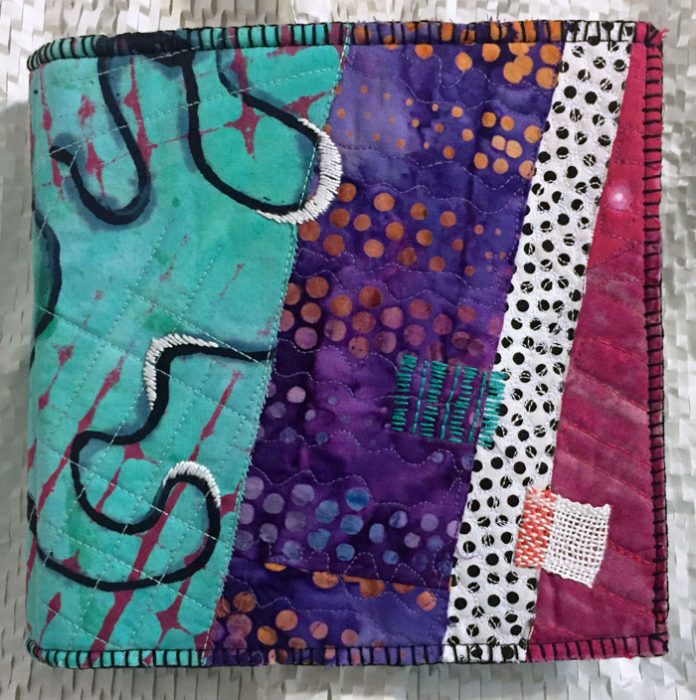
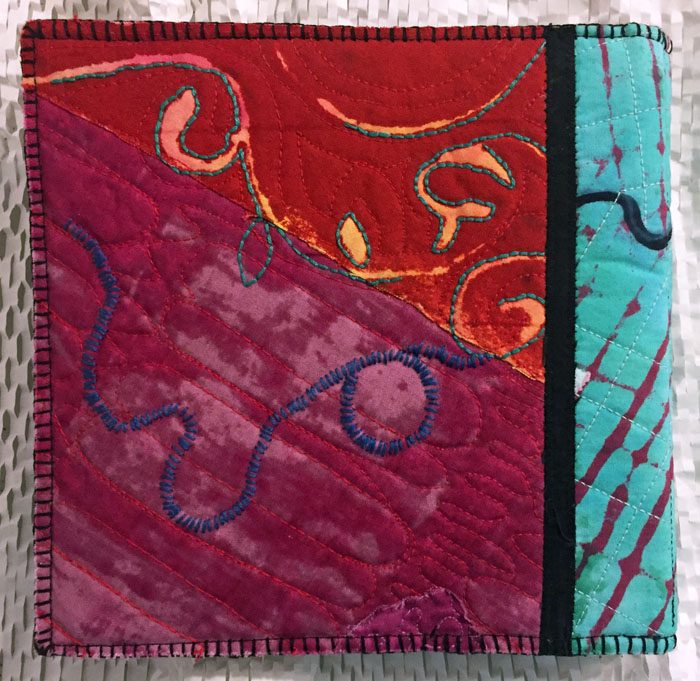
And here it is as the book cover, front (right) and back (left.)

A fabric book by Ellen Lindner. AdventureQuilter.com/blog

I added hand embroidery to both covers.

A fabric book by Ellen Lindner. AdventureQuilter.com/blog

I initially planned to leave the edges unfinished, but later added hand buttonhole stitching, which I really like.

A fabric book by Ellen Lindner. AdventureQuilter.com/blog

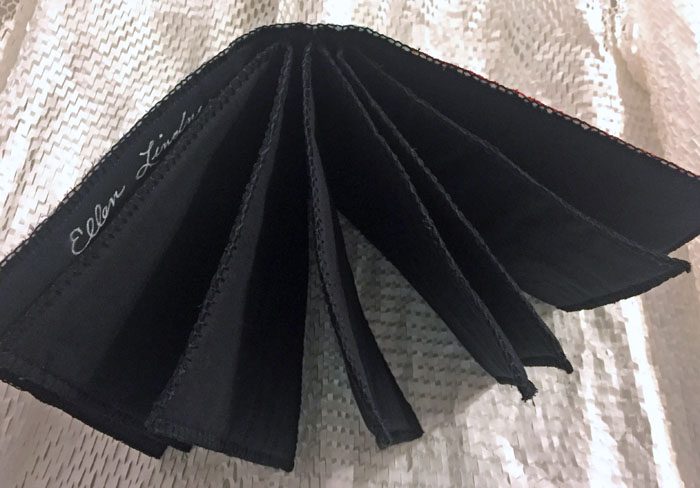
Knowing that I would probably add colorful items to my book, I chose black for the pages.

A fabric book by Ellen Lindner. AdventureQuilter.com/blog

The pages are about 6″ square with one layer of batting between two pieces of fabric. The batting gives it some body. But, maybe the coolest thing about the structure of the book is that it’s made with signatures. These are groups of pages that are sewn as one into the spine of a book. In this case there are 3 signatures, creating 6 pages. The signatures are attached with a space between them, (1/2″ here,) which creates a flat spine. A very nice shape.

For my content I plan to add little samples and things I’ve done over the years, as well as ones I’ll do in the future.

A fabric book by Ellen Lindner. AdventureQuilter.com/blog

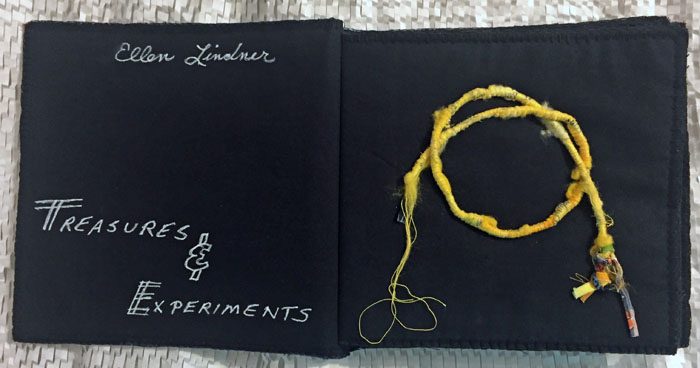
This first page shows a sample I did of cording made on the machine.

Isn’t the knot cool?

A fabric book - detail, by Ellen Lindner. AdventureQuilter.com/blog

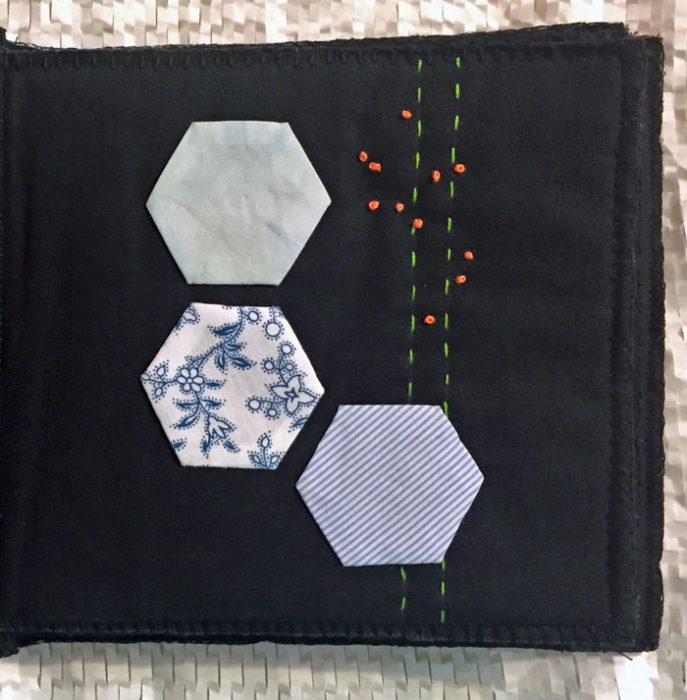
The only other page I’ve done is one I did after the book was constructed. The batting layer makes it easy to slip a needle around without having stitches and knots showing on the back. A nice feature.

A fabric book by Ellen Lindner. AdventureQuilter.com/blog

This little book was quick to make and I look forward to adding little things to it.

Other bookish things I’ve tried:
Mixed media book
A book using tea bags
A video about how to make an accordion book

Ellen Lindner

14

“Rhythm of the City” Complete

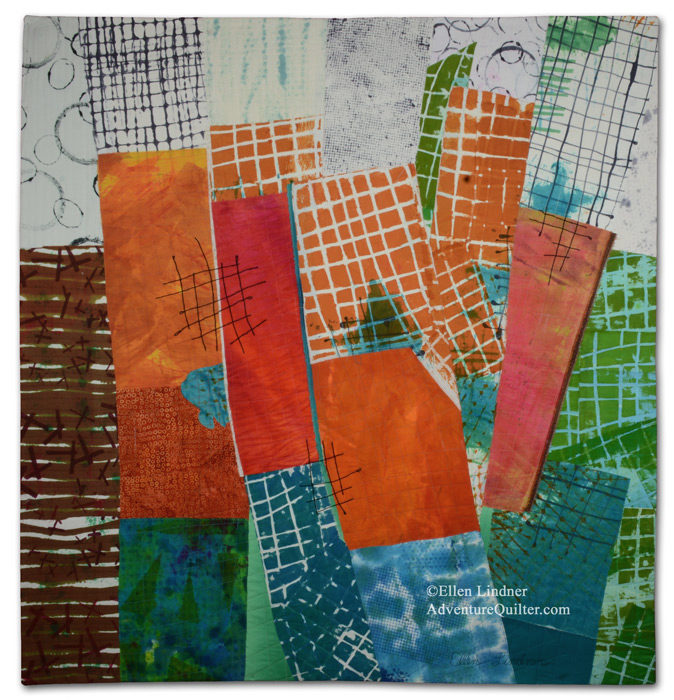
Rhythm of the City, an art quilt by Ellen Lindner. AdventureQuilter.com

My latest quilt, Rhythm of the City, is now complete.  It’s made almost entirely with fabrics I dyed myself.  I’m very happy with both the fabrics and the composition.

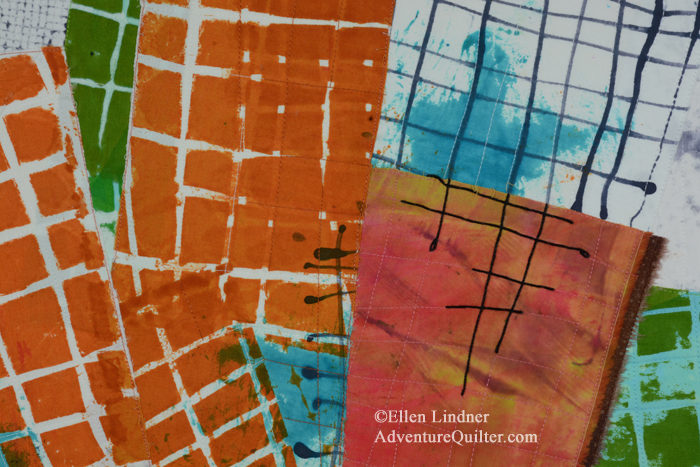
I added additional pattern and interest with couched heavy black thread. I think it adds a lot.

Rhythm of the City - detail, an art quilt by Ellen Lindner. AdventureQuilter.com

Completing the Composition. Ellen Lindner, AdventureQuilter.com/blog

More information about this quilt

Audition this quilt in your home

I’m looking forward to working with these fabrics again, and I have something totally different in mind.

Ellen Lindner
P.S. My Facebook followers were a big help with naming this quilt. Thanks for the suggestions, everyone!

2

“Ahead of the Storm” Completed

In the fall of 2017, hurricane Irma set its sights on Florida. Although Floridians don’t get too excited about most hurricanes, this one was a category 5, the strongest possible.  It’s path was hard to predict, so ALL of the Florida peninsula was in the strike zone.  As a result, widespread evacuations were ordered and everyone took the storm very seriously. The outcome was over 6.5 million people evacuating, over one-quarter of the state’s population!

As you might imagine, this mass exodus created a new set of problems: huge traffic jams, gas shortages, and a lack of available hotel rooms.  All of this factored in as I (a Floridian) designed this piece.

Ahead of the StormAhead of the Storm, an art quilt by Ellen Lindner. AdventureQuilter.com/blog
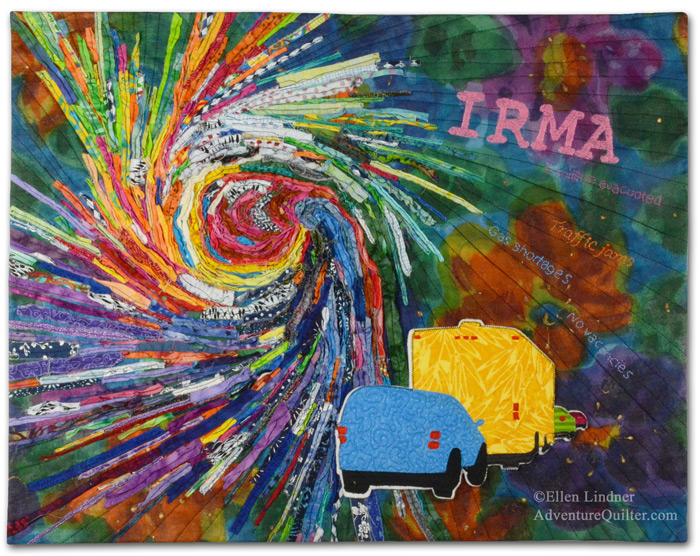
The swirl of fabric strips was a bit of play that I had done a couple of years before. It served as the perfect starting point for the composition.

I hand stitched the name of the hurricane, as well as some text about the evacuation issues.
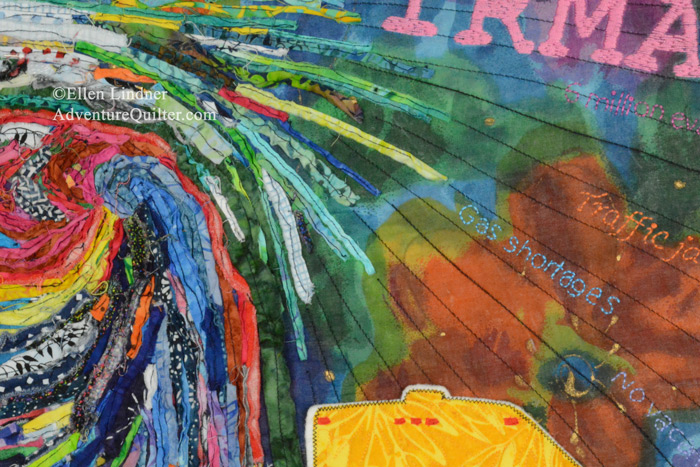
Ahead of the Storm - detail, an art quilt by Ellen Lindner. AdventureQuilter.com/blog

I made this quilt for a call for art named “Forced to Flee.” However, I sold it right away, so I won’t be entering it after all.

My best patron, my mom, was the buyer. Shortly after purchasing it, she meekly asked, “How much trouble would it be to remove the word ‘Irma’?” What? That’s the main point, right?  But, I got it: she had no relationship to that particular hurricane and preferred something generic.  Now, I wouldn’t do this for anyone else, but for my mother, what could I say?  Of course, I removed it.

Afterwards, I thought it looked a little empty in that corner, so I added “Category 5,” much smaller. I forgot to take a picture of the revised version, but this computer edited photo will give you a pretty good idea.
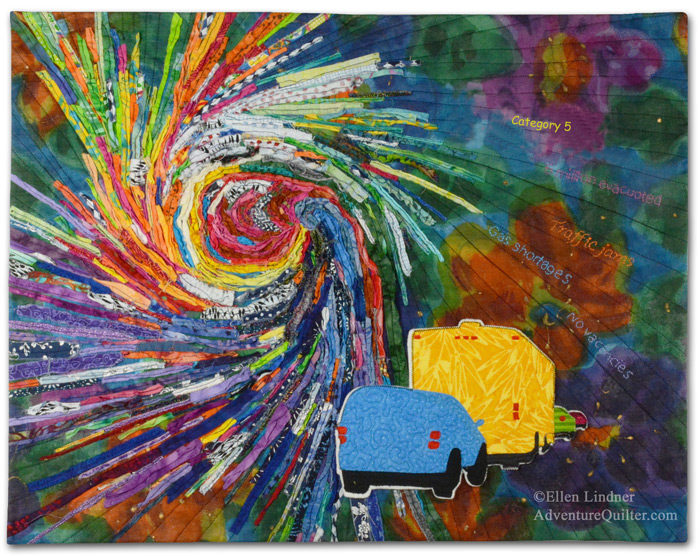
Ahead of the Storm, an art quilt by Ellen Lindner. AdventureQuilter.com/blog

I have to admit I think it looks better and my mom loves it.

Have you ever altered a piece of art after finishing it?  Or after SELLING it?

Ellen Lindner
P.S. We didn’t evacuate for Irma only because there’s a shelter just down the road.  We knew we could get there quickly if needed. Fortunately for us, it only side swiped us as a much weaker storm. We tend to measure the strength of storms in the number of days the power was out.  This one was only a few hours!

0

Indigo Blanket Complete

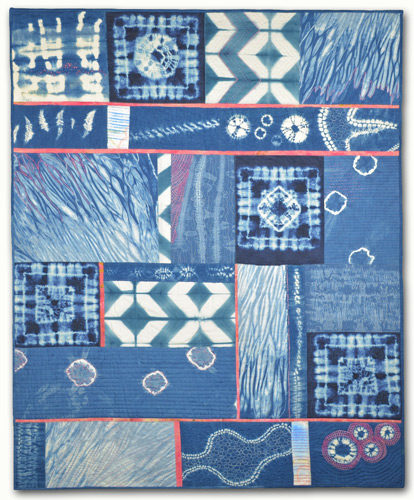
I still can’t believe I made a blanket, but here it is.

Indigo blanket complete. Ellen Lindner, AdventureQuilter.com/blog

It’s about 53″ x 42″ and will serve as a nice lap quilt for my son. Although blankets don’t normally get names, I decided this one needed one.  So, I’m calling it Indigo Hug.  Appropriate, don’t you think?

Of course, I love the indigo, but my favorite aspect of making it was adding the hand stitching.  Here, I used rows of buttonhole stitch to accentuate the shibori design.

Indigo blanket complete. Ellen Lindner, AdventureQuilter.com/blog

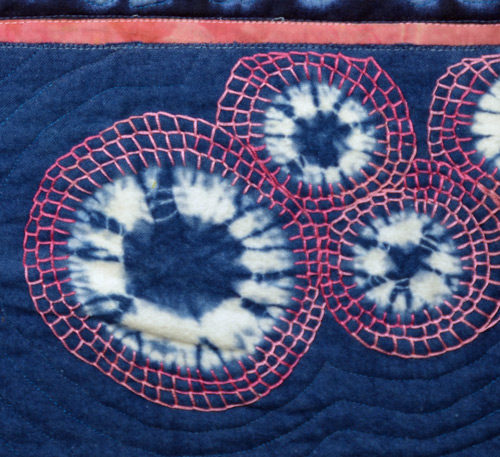
And, I recently learned to use the same stitch in an undulating pattern that looks almost like netting.  It’s my favorite.

Indigo blanket complete. Ellen Lindner, AdventureQuilter.com/blog

Plus, an abundance of French knots!
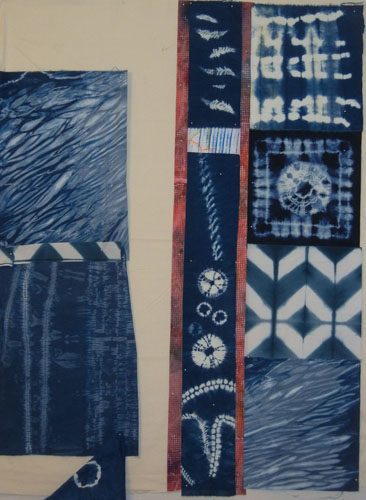
Indigo blanket complete. Ellen Lindner, AdventureQuilter.com/blog

Although this quilt is designed to be functional, I think it would also look really nice on a wall.  In that case, Andrew said he’d like it to be oriented horizontally.  Like this.

Indigo blanket complete. Ellen Lindner, AdventureQuilter.com/blog

So, I’ll add a sleeve at the top and he’ll be all set.  PLUS a label with some really specific washing instructions!
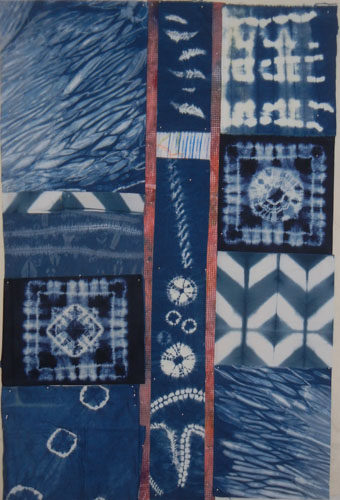
Ellen Lindner


10

Pink Stitching on Blue Indigo

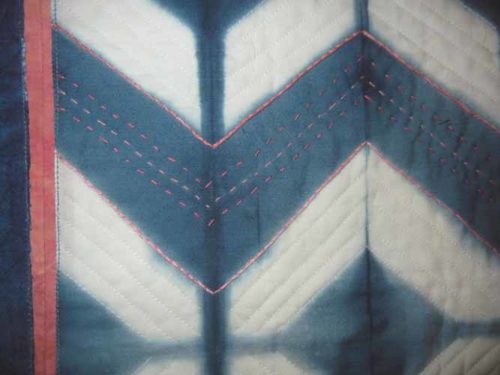
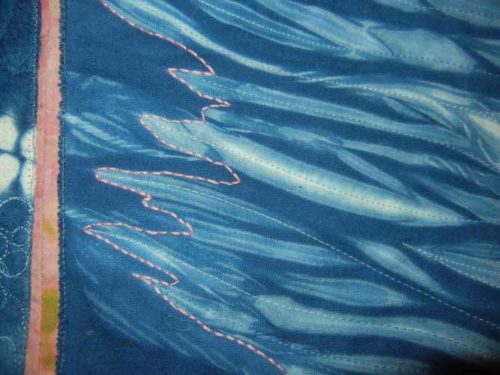
I’ve really enjoyed adding hand stitching to my indigo piece.  I selected three colors of embroidery floss and used them alternately.  I started with a simple running stitch in the chevron area, later backed up with a stem stitch. Machine quilting was later added to play up the chevron pattern.

Pink Stitching on Blue Indigo. Ellen Lindner, AdventureQuilter.com/blog

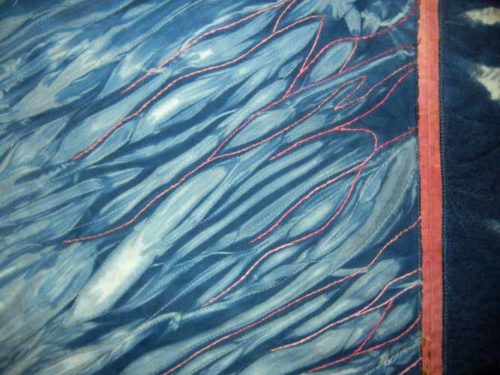
I also used stem stitching to play up the undulating ripples in one of the shibori areas.

Pink Stitching on Blue Indigo. Ellen Lindner, AdventureQuilter.com/blog

The other shibori area got stitching in the “base” area only.  Back stitch this time.

Pink Stitching on Blue Indigo. Ellen Lindner, AdventureQuilter.com/blog

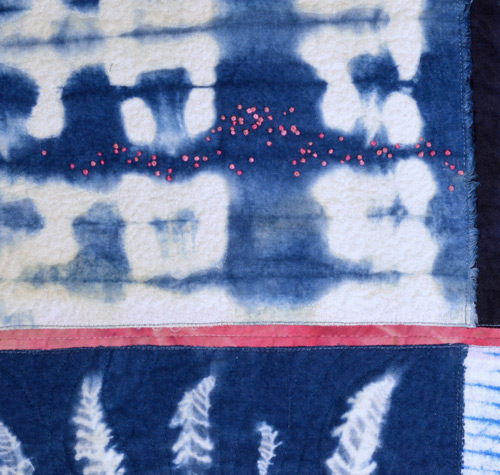
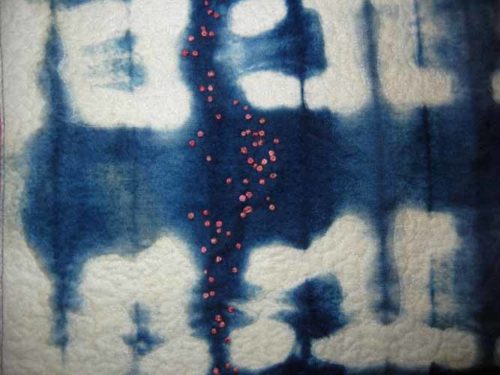
Then it was time for French knots sprinkled in a random area.  I love these!

Pink Stitching on Blue Indigo. Ellen Lindner, AdventureQuilter.com/blog

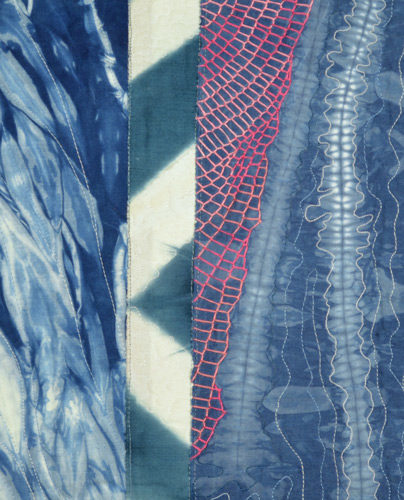
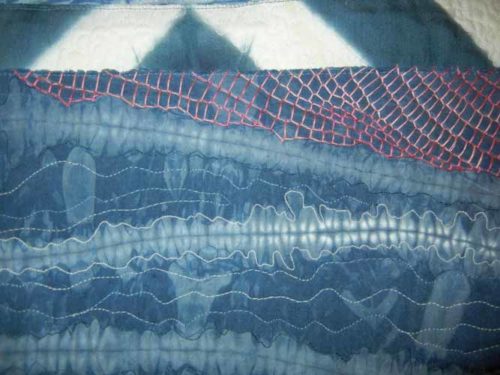
And my favorite: rows of blanket stitching.  This creates a look similar to netting, which I think is very effective.

Pink Stitching on Blue Indigo. Ellen Lindner, AdventureQuilter.com/blog

Don’t you like the way it undulates?  I wish I had done more of that. Combining rows like this was new to me.  Have you seen it before?

All this slow stitching gave me plenty of time to think about what should come next, and I ended up taking a fairly radical turn which I’ll show you soon.

Ellen Lindner


2

Composing with Indigo

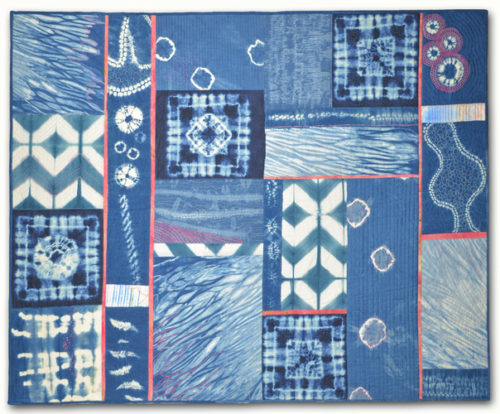
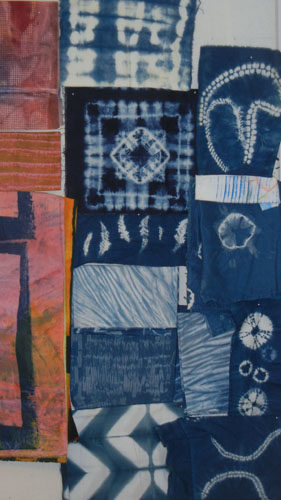
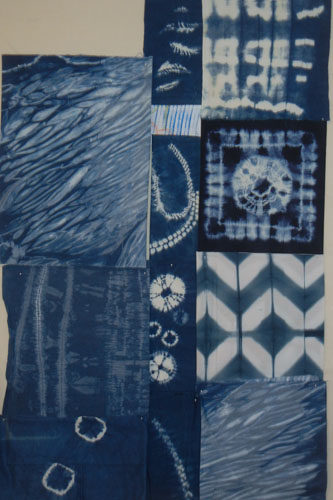
Being blessed with a bunch of indigo fabrics, I was ready to make an art piece with them.  I knew I’d like to add an accent color, but which one?  After some auditioning, I decided on the pink/orange family.

Composing with Indigo. Ellen Lindner, AdventureQuilter.com/blog

But, how to best use these wonderful designs?  I didn’t really want to cut into them, and several were in squarish proportions.  I decided on a gridded composition with three vertical columns. This shows an early arrangement, incomplete.

Composing with Indigo. Ellen Lindner, AdventureQuilter.com/blog

I added in some dull pink.  (Dull, because I didn’t want it to shine more than the indigo fabrics.)

Composing with Indigo. Ellen Lindner, AdventureQuilter.com/blog

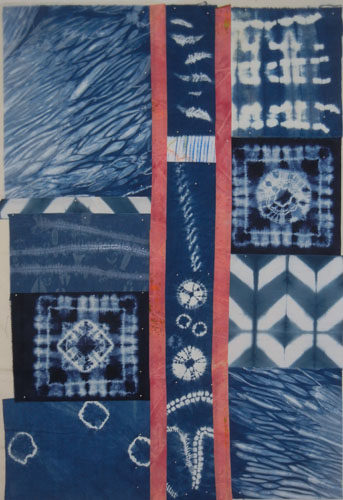
And the almost-finished composition, pinned.  I was happy with it. But, maybe the pink had too many dull spots?

Composing with Indigo. Ellen Lindner, AdventureQuilter.com/blog

I auditioned a brighter pink.

Composing with Indigo. Ellen Lindner, AdventureQuilter.com/blog

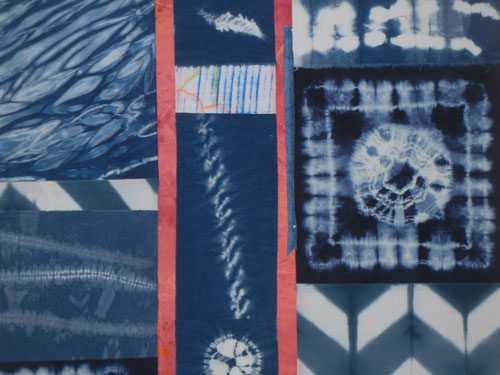
I liked it much better EXCEPT I thought it probably needed to be thinner. I auditioned the idea.

Composing with Indigo. Ellen Lindner, AdventureQuilter.com/blog

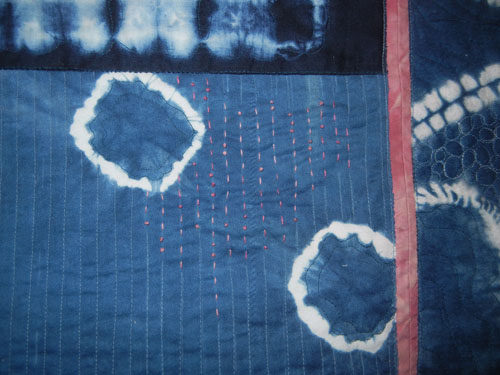
Yep.  Much better. But, I had a problem.  Most of this was already glued, so I couldn’t easily rearrange things.  How could I make the pink stripes thinner? I decided to sew a tuck in the back of each, through the muslin support and all. Can you see the seam below?

Composing with Indigo. Ellen Lindner, AdventureQuilter.com/blog

That worked.  As you can see, I also added some hand embroidery.  I’ll have more detail shots of that in the next post.

Ellen Lindner

8

Hand Embroidery

While at the retreat, Annette Boceck did a demonstration about hand embroidery.  I found her use of hand stitch to be very interesting and (to me) unique.  I’ve always used embroidery to add some interest to a quilt or to highlight a particular area.  But, Annette uses it to completely transform the fabric. Like this.

Hand Embroidery. Ellen Lindner, AdventureQuilter.com/blog

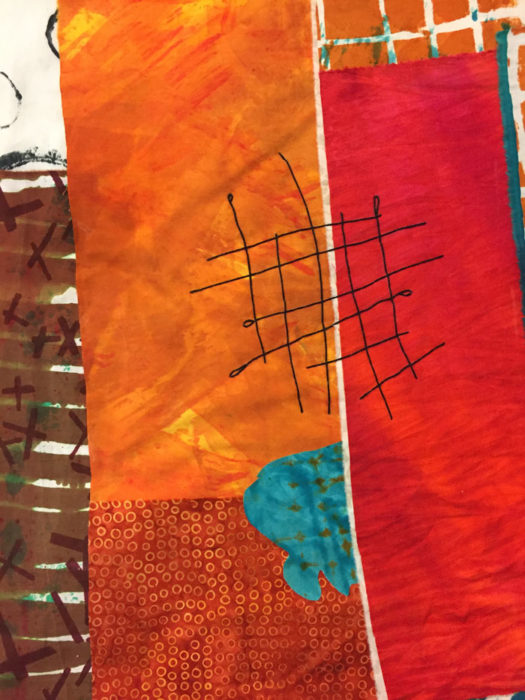
Check out this detail. I already know how to do all of these stitches, but I’ve never used them in such a concentrated way. As you can see, it completely changes the overall appearance.

Hand Embroidery. Ellen Lindner, AdventureQuilter.com/blog

Most of these stitches are quite easy. I was really taken with the netting effect achieved with the orange stitches shown below. Then, I looked more closely.  Rows of blanket stitches create the effect.  Brilliant!

Hand Embroidery. Ellen Lindner, AdventureQuilter.com/blog

I’m itching to give this a try.  If you’d like to join me, you can find lots of stitch tutorials online.  The ones shown here are straight, running, cross, back, and blanket.  You might also want to investigate stem stitch and French knots.

Stitch on!

Ellen Lindner

4

“Initial Response” Complete

My latest quilt, Initial Response, is now complete.

Initial Response, an art quilt by Ellen Lindner. AdventureQuilter.com

Initial Response

Initial Response - detail, an art quilt by Ellen Lindner. AdventureQuilter.com

Initial Response - detail, an art quilt by Ellen Lindner. AdventureQuilter.com

Find more information here.

I’m REALLY happy with this quilt!  Especially the color scheme, which was new to me.  And, it went together easily, since I let the initial hand dyed fabric (center) give me lots of cues.  I selected the name, Initial Response, mostly because I liked the sound of it and the idea of it.  Then, I realized that it eluded to my process, as well.  I like that.

I’ve written lots about my process in making this quilt. If you scroll back to January 14th, 2018 you’ll see the first post and you can read forward for the full story.

I’m looking forward to using the rest of that special fabric.  Hmm, what shall I do with it?

Ellen Lindner

Audition this art in your home

6