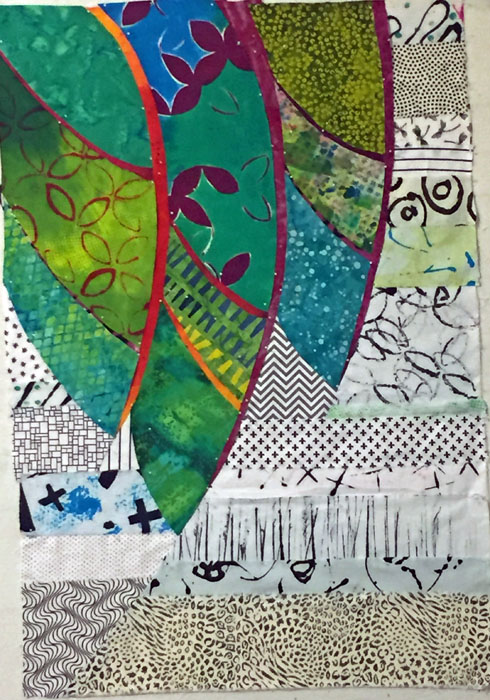
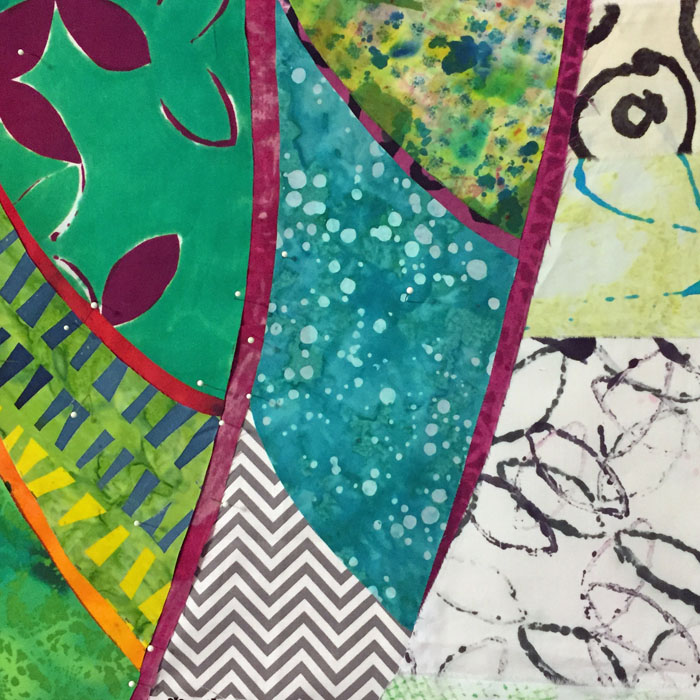
Archive | October, 2018

Making Stencils

In preparation for my next dyeing session, I’ve been making stencils.  Of course, I did some of the typical sort in which you cut through stiff plastic.  Then, I learned about interfacing stencils.  These are used with screen printing, which is something I’m trying to learn more about.

The basic idea is to paint onto interfacing the area you do not want to print.  These were my first two, hand painted with household paint.
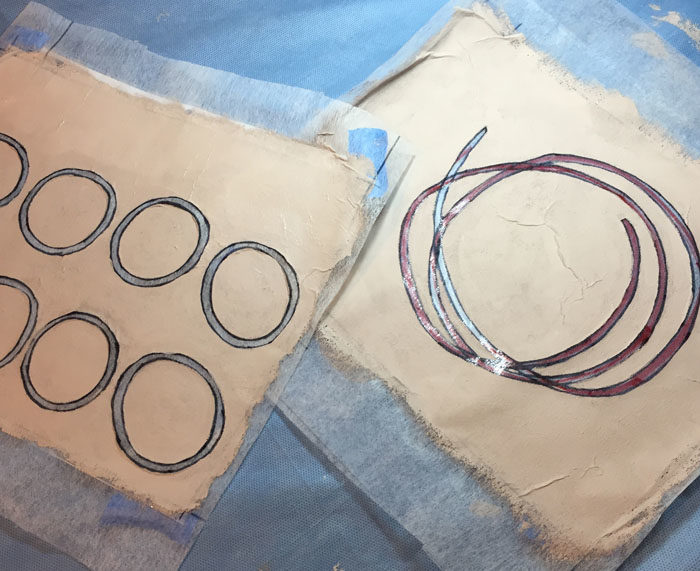
Interfacing stencils. Ellen Lindner, AdventureQuilter.com/blog

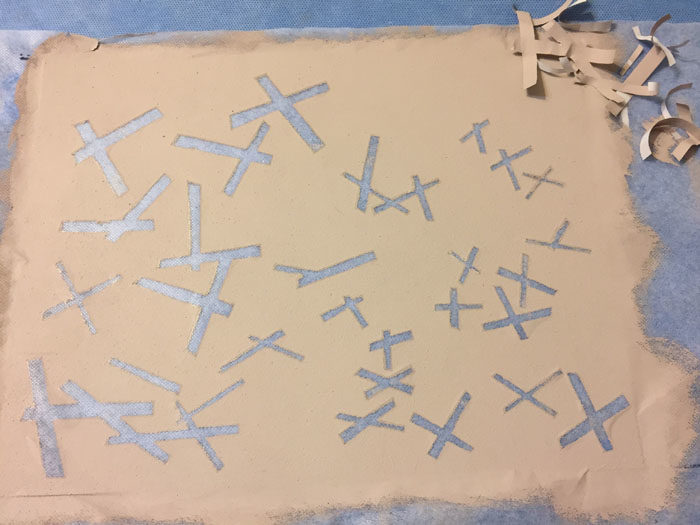
Next, I tried painting over freezer paper shapes that had been ironed onto the interfacing.  This worked well.
Making Stencils. Ellen Lindner, AdventureQulter.com/blog

Making Stencils. Ellen Lindner, AdventureQulter.com/blog

Making Stencils. Ellen Lindner, AdventureQulter.com/blog

It takes about 3 layers of acrylic paint, dried between applications.

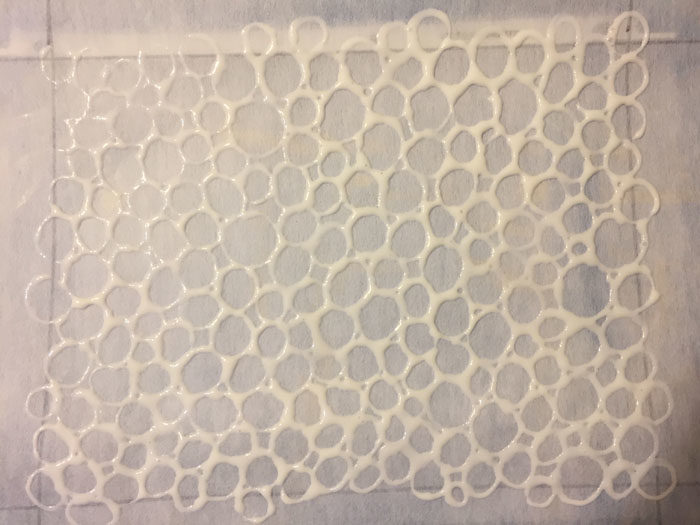
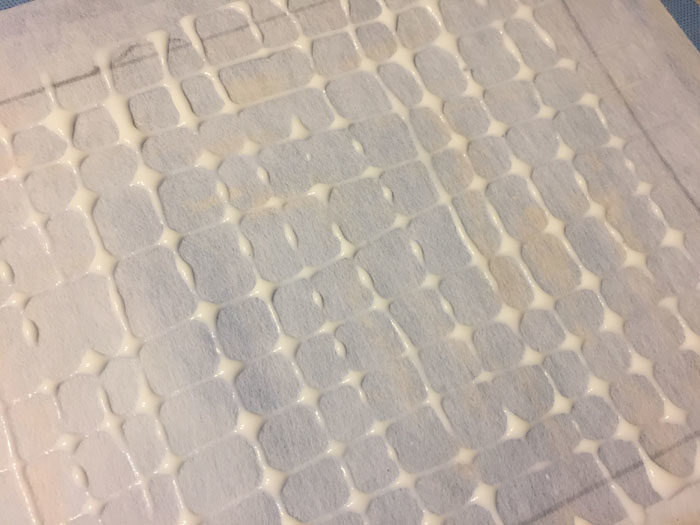
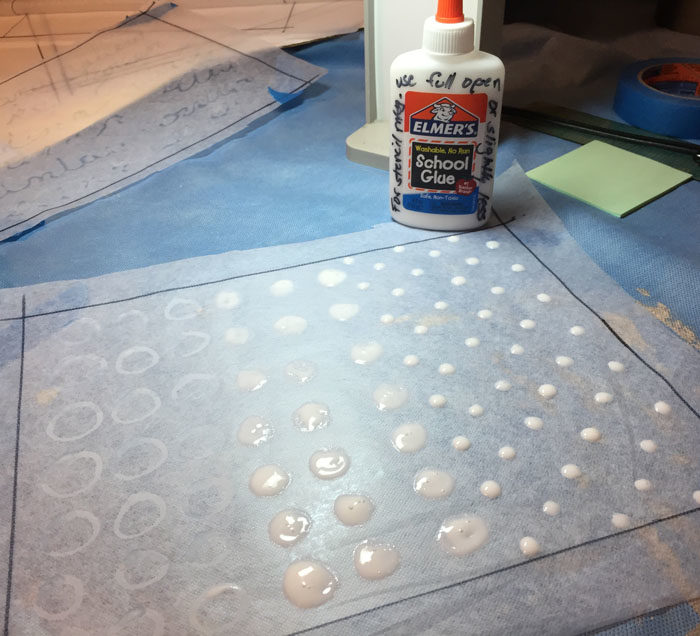
Next, I tried painting over a glue resist.  I used basic Elmer’s white school glue.
Making Stencils. Ellen Lindner, AdventureQulter.com/blog

Making Stencils. Ellen Lindner, AdventureQulter.com/blog

Making Stencils. Ellen Lindner, AdventureQulter.com/blog

They’re all shown wet above.  After drying and over painting, the glue has to washed out which takes a little while. I’ve now tried the resulting stencils and they’ve all worked well.

There was an issue, though, with the last two.  When I drew on the glue I extended it beyond my drawn line indicating the frame size.  That meant that the stencil print would end sharply and abruptly at the edge of the tape that would hold it in place. Realizing this, I altered the final stencils by filling in the outer design lines, resulting in a more undulating perimeter to these motifs.

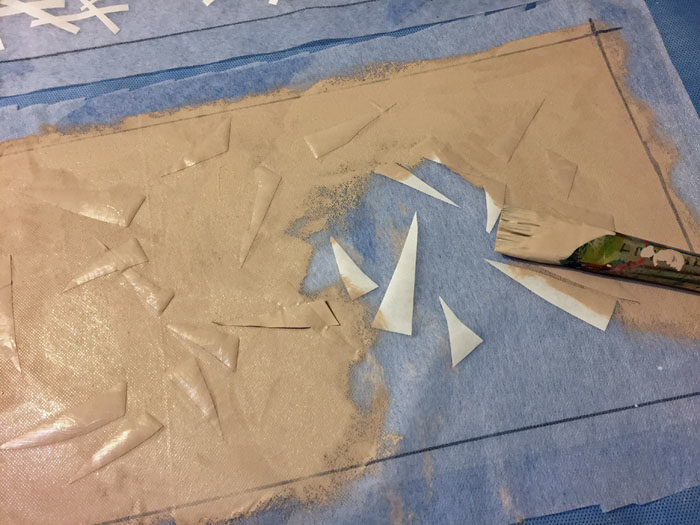
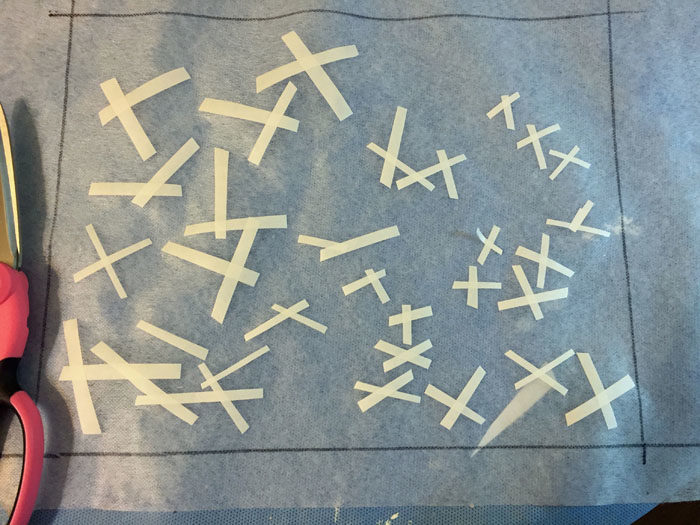
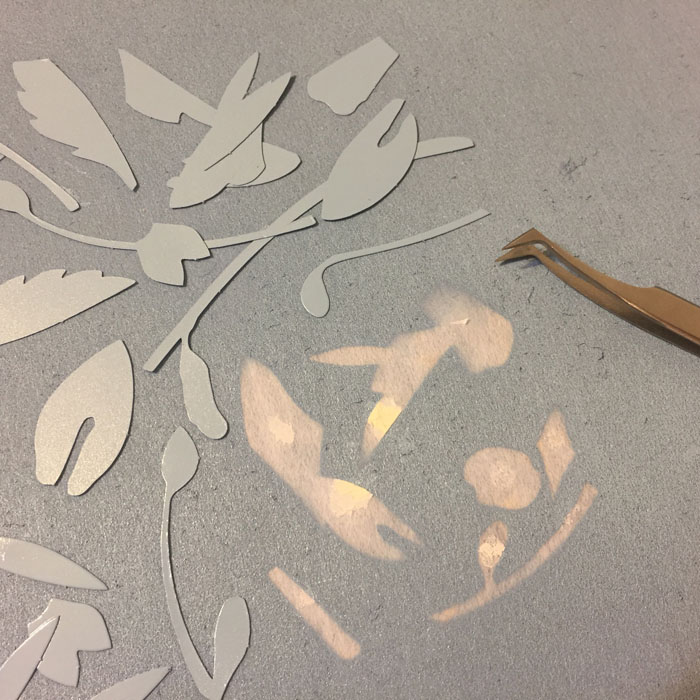
Finally, I tried putting shapes onto the interfacing and covering it all with spray paint. You’re supposed to use semi-heavy shapes for this so the interfacing won’t blow away when you hit it with the spray of the paint.  I didn’t have those at hand so I tried other things.  One was these little cardboard shapes, which I lightly glued in place, and later washed out.
Making Stencils. Ellen Lindner, AdventureQulter.com/blog

Although these spray paint efforts looked successful, I didn’t get good prints from them.

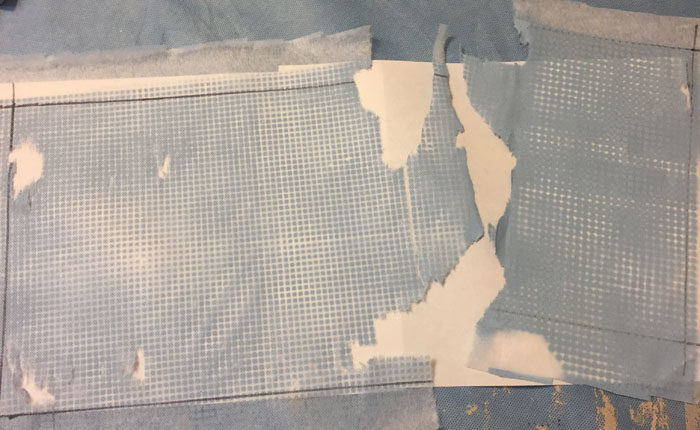
But that wasn’t my biggest issue.  The big problem was that some of my early stencils completely shredded when I tried to remove them from the painted areas. Like this.
Making Stencils. Ellen Lindner, AdventureQulter.com/blog

I realized pretty quickly that the interfacing was too lightweight.  I did some shopping and switched to Pellon 110, which worked beautifully.  (BTW, when selecting interfacings don’t go by the description.  Feel them, instead.)

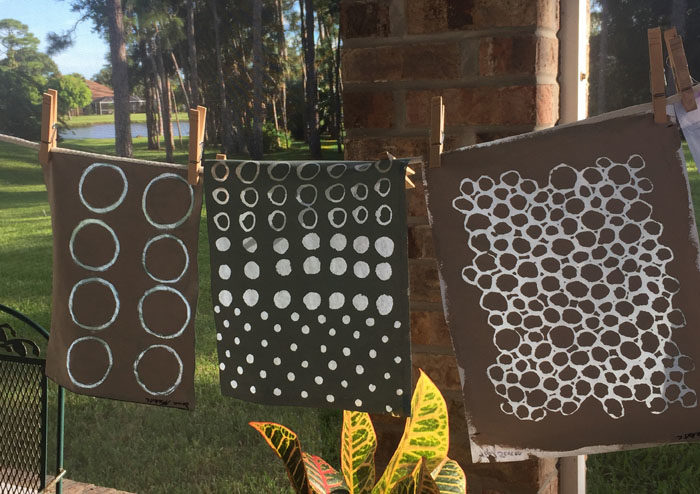
I’m now armed with quite a collection of stencils. Here are a few drying out after use.
Making Stencils. Ellen Lindner, AdventureQulter.com/blog

As I begin to use them in earnest, I’ll be posting my results. Stay tuned!

Ellen Lindner
P.S. Check out the right stencil above.  Can you see how I altered the edge to avoid a straight line?
P.P.S. I generally post isolated photos on Facebook and Instagram more quickly than I write full posts, If you want to follow me there, click on the Facebook icon below, or find me on Instagram by clicking here.
P.P.P.S. I learned about interfacing stencils from an excellent book called “Screen Printing: Layering Textiles with Color,” by Claire Benn and Leslie Morgan.  At $43 this book seems pricey, but it includes and 45 minute DVD and it’s WELL worth it.

4

“Ahead of the Storm” Completed

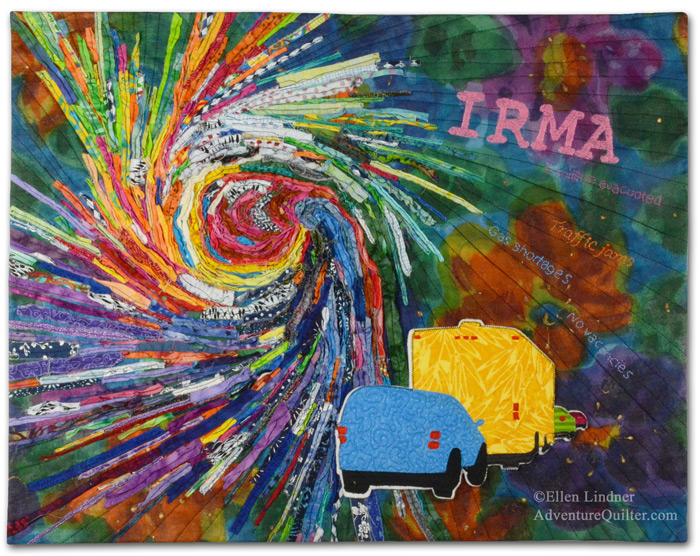
In the fall of 2017, hurricane Irma set its sights on Florida. Although Floridians don’t get too excited about most hurricanes, this one was a category 5, the strongest possible.  It’s path was hard to predict, so ALL of the Florida peninsula was in the strike zone.  As a result, widespread evacuations were ordered and everyone took the storm very seriously. The outcome was over 6.5 million people evacuating, over one-quarter of the state’s population!

As you might imagine, this mass exodus created a new set of problems: huge traffic jams, gas shortages, and a lack of available hotel rooms.  All of this factored in as I (a Floridian) designed this piece.

Ahead of the StormAhead of the Storm, an art quilt by Ellen Lindner. AdventureQuilter.com/blog

The swirl of fabric strips was a bit of play that I had done a couple of years before. It served as the perfect starting point for the composition.

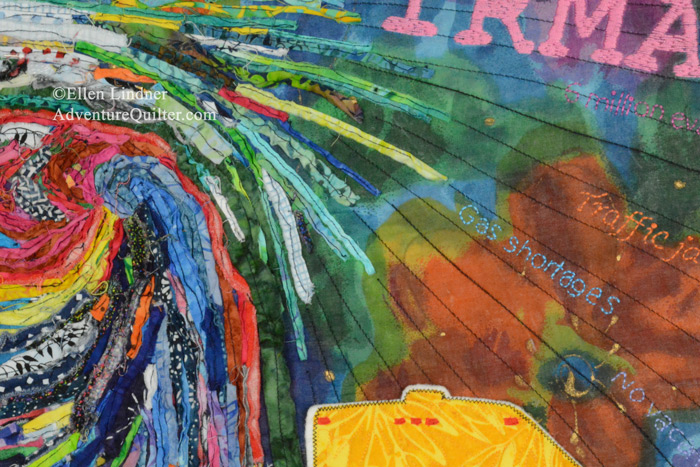
I hand stitched the name of the hurricane, as well as some text about the evacuation issues.

Ahead of the Storm - detail, an art quilt by Ellen Lindner. AdventureQuilter.com/blog

I made this quilt for a call for art named “Forced to Flee.” However, I sold it right away, so I won’t be entering it after all.

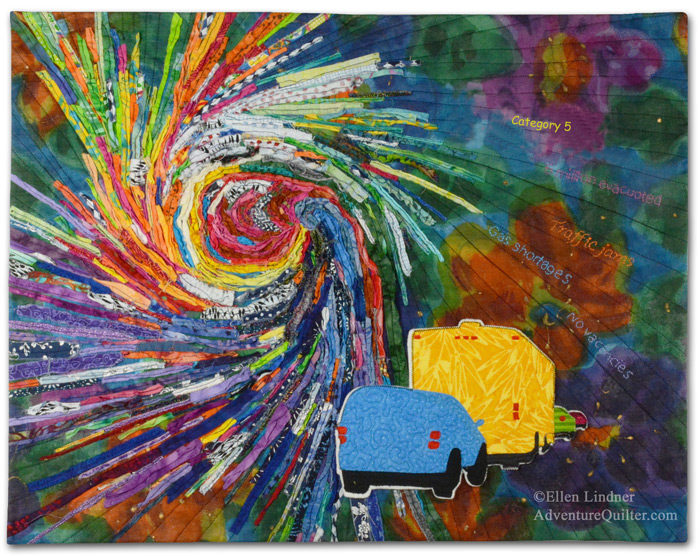
My best patron, my mom, was the buyer. Shortly after purchasing it, she meekly asked, “How much trouble would it be to remove the word ‘Irma’?” What? That’s the main point, right?  But, I got it: she had no relationship to that particular hurricane and preferred something generic.  Now, I wouldn’t do this for anyone else, but for my mother, what could I say?  Of course, I removed it.

Afterwards, I thought it looked a little empty in that corner, so I added “Category 5,” much smaller. I forgot to take a picture of the revised version, but this computer edited photo will give you a pretty good idea.

Ahead of the Storm, an art quilt by Ellen Lindner. AdventureQuilter.com/blog

I have to admit I think it looks better and my mom loves it.

Have you ever altered a piece of art after finishing it?  Or after SELLING it?

Ellen Lindner
P.S. We didn’t evacuate for Irma only because there’s a shelter just down the road.  We knew we could get there quickly if needed. Fortunately for us, it only side swiped us as a much weaker storm. We tend to measure the strength of storms in the number of days the power was out.  This one was only a few hours!

0

Leaves, Flowers, and the Best Tip of the Day

Flowers and foliage are always popular subjects in my class, “Design Your Own Nature Quilt,” and this time was no different.

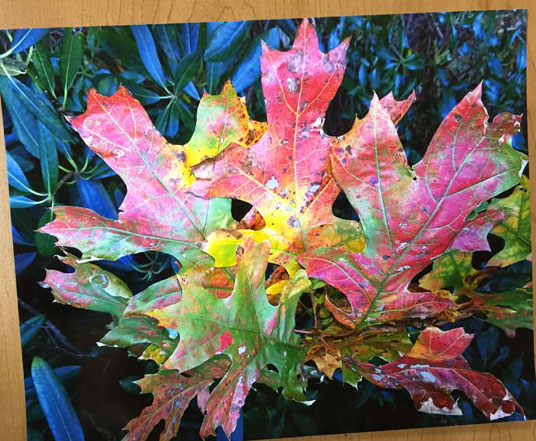
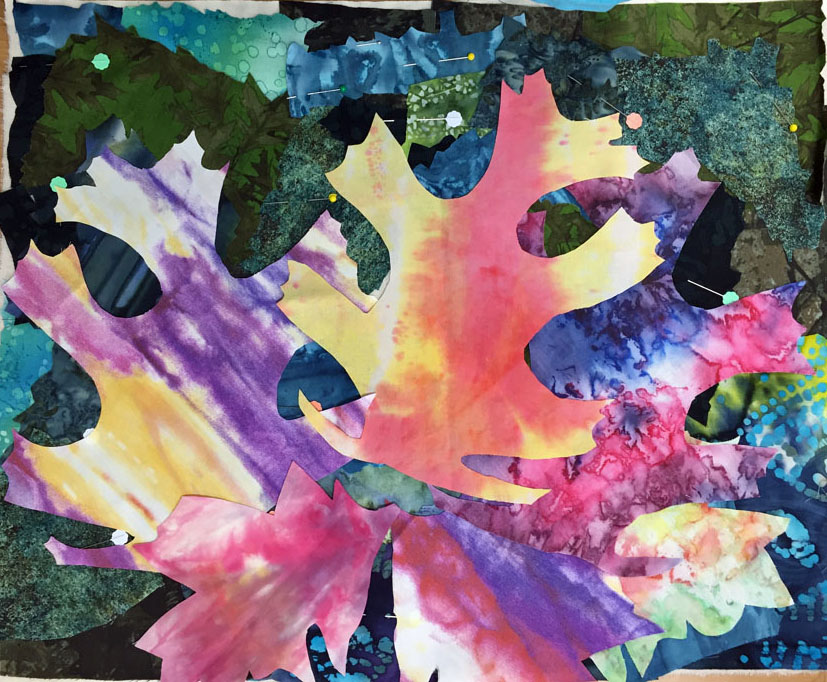
Jodi had a FABULOUS photo, that she had taken, of some colorful leaves.

Design Your Own Nature Quilt with Ellen Lindner. AdventureQuilter.com/blog

She wisely created an interesting dark background to set off the brighter leaves.  Then she bravely cut into some hand dyed fabrics for her leaves. Later, she’ll add some veins with stitching. Won’t it be great?

Design Your Own Nature Quilt with Ellen Lindner. AdventureQuilter.com/blog

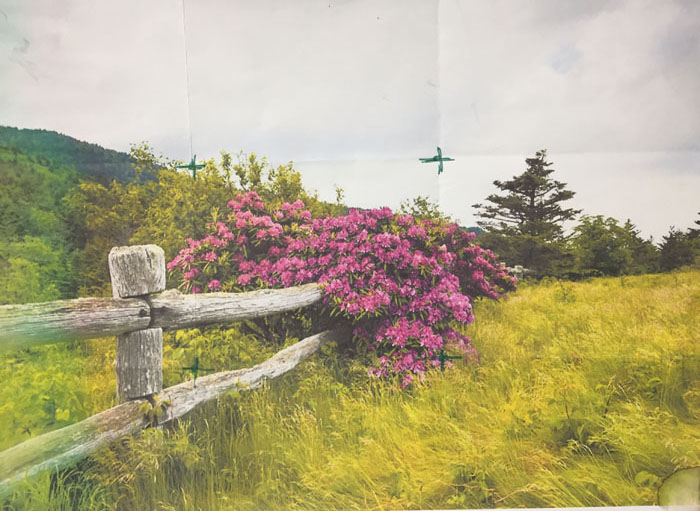
Gail also used one of her own photos. (Note the registration marks which she referenced when composing her quilt.)

Design Your Own Nature Quilt with Ellen Lindner. AdventureQuilter.com/blog

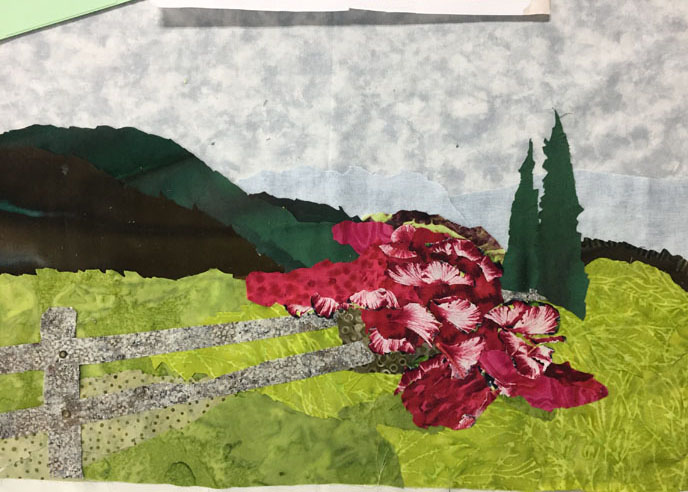
As you might imagine the pink bush of flowers was rather challenging.  Especially trying to make it look like the photo! But, after trying a few things, Gail embraced the value of looseness and created a really effective pink bush. She’ll do a little shadowing on the fence and be ready to quilt it.

Design Your Own Nature Quilt with Ellen Lindner. AdventureQuilter.com/blog

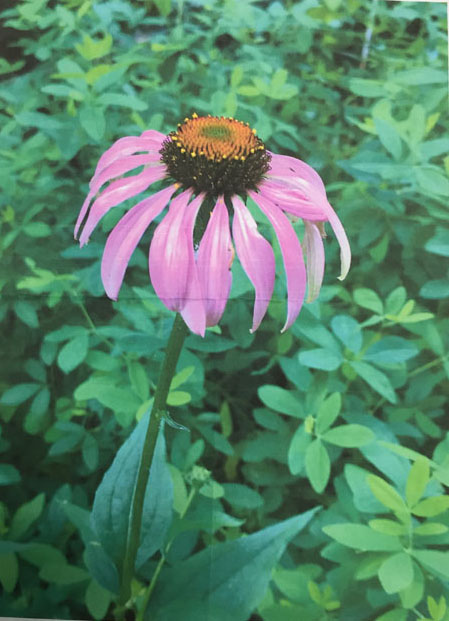
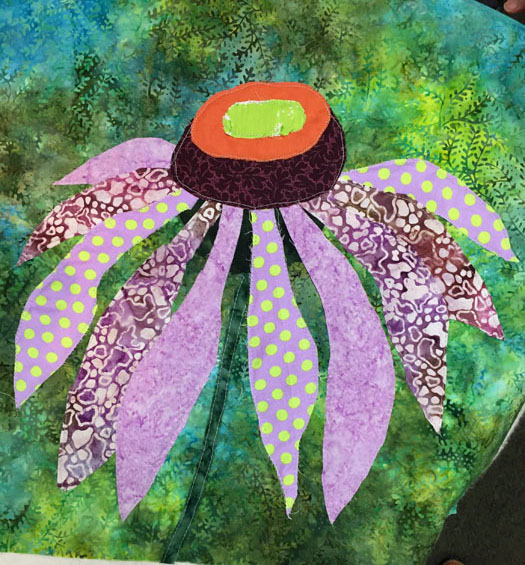
Martha started with this photo of a lone cone flower.

Design Your Own Nature Quilt with Ellen Lindner. AdventureQuilter.com/blog

She wanted to really showcase this solitary blossom, so cropped it almost into a square.  Her use of different lavenders added interest to the petals.  She’ll add plenty of French knots to the top.  That will give it a lot of texture and finish it off nicely.

Design Your Own Nature Quilt with Ellen Lindner. AdventureQuilter.com/blog

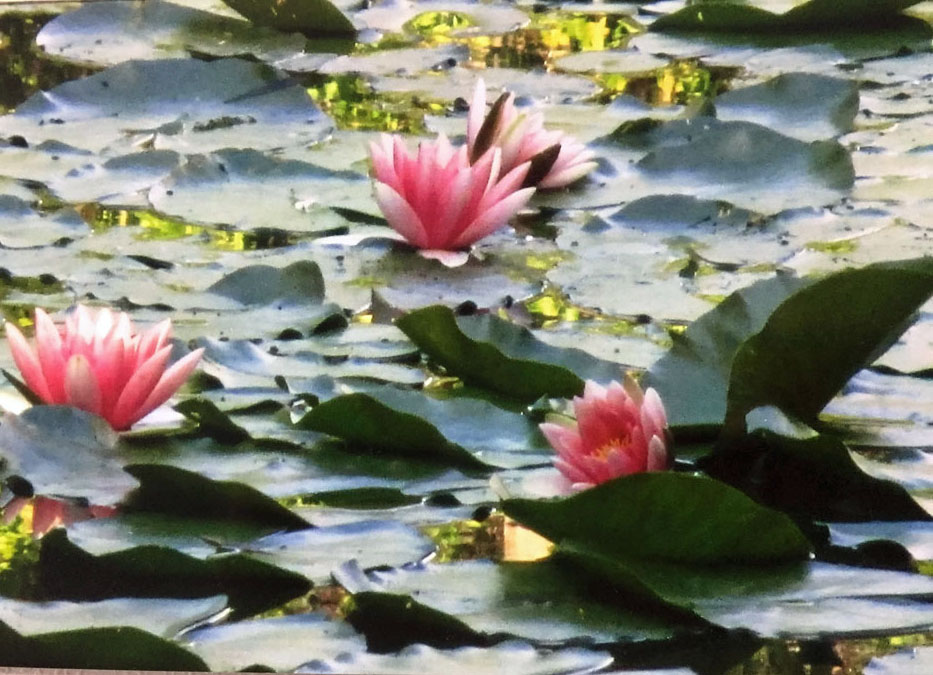
Pat had a great starting photo, but with a lot going on.  She knew she’d need to simplify things some.

Design Your Own Nature Quilt with Ellen Lindner. AdventureQuilter.com/blog

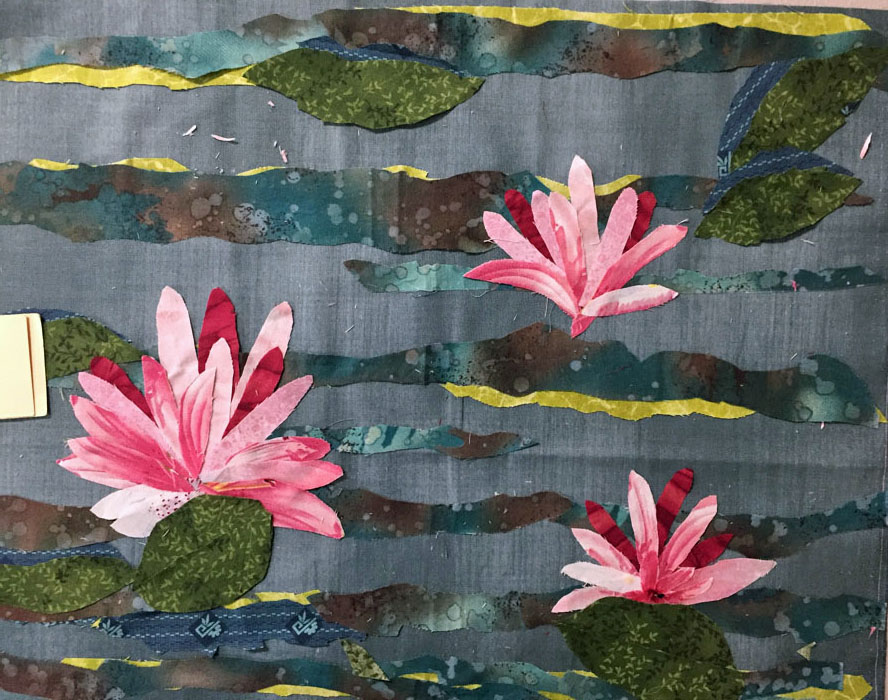
The perfect background/water fabric went a long way toward depicting the water, so she was able to focus on the flowers. (By the way, did you notice how much better her dark water sets off the flowers than the lighter photo background did?) A nice bonus. This is really going to be great.

Design Your Own Nature Quilt with Ellen Lindner. AdventureQuilter.com/blog

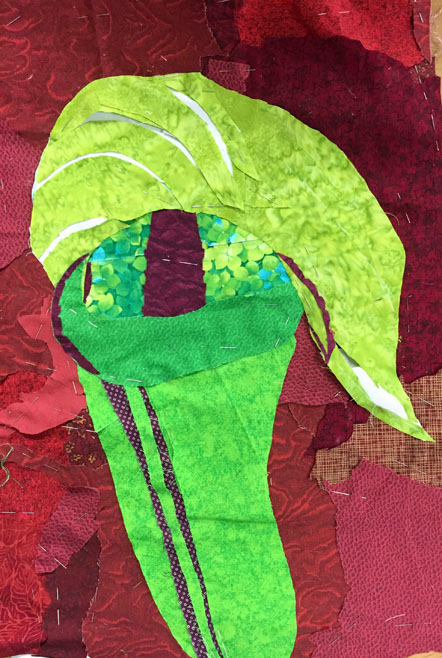
Carol composed this Jack-in-the-pulpit pretty quickly.

Design Your Own Nature Quilt with Ellen Lindner. AdventureQuilter.com/blog

As you can see, she has several little tiny lines of fabric in it.  These can be problematic, but I have a trick for dealing with them. Rather than cutting little tiny fiddly pieces of fabric, I have the students cut them bigger than needed.  Then, they cut the adjacent piece to size and slip the larger-than-needed fabric underneath.  The edge of that adjacent piece properly defines the edge/shape of the tiny little piece. Can you see what I mean, above? Look at the top green curvy section that has 4 white lines showing.  Those 4 lines are actually one larger piece of white fabric. The green fabric on top has been cut to reveal just enough of the white.

Carol pronounced this trick “The best tip of the day.” It really came in handy on her wonderful little quilt. (By the way, Carol was so speedy that she made good progress on a second quilt! I didn’t get any good photos of it, however.)

This group of women was very talented and very fun to work with.  (And they fed me home-cooked desserts!) I hope I get to visit Brevard Art Quilters again one of these days.

Ellen Lindner
P.S. Find out more about bringing this class to your group.


0

Testing with Eye Candy

I’m having a little glitch with my blog posts.  As I try to sort that out I’ll be posting some tests. To compensate you for putting up with them I’ll include some eye candy with each one.

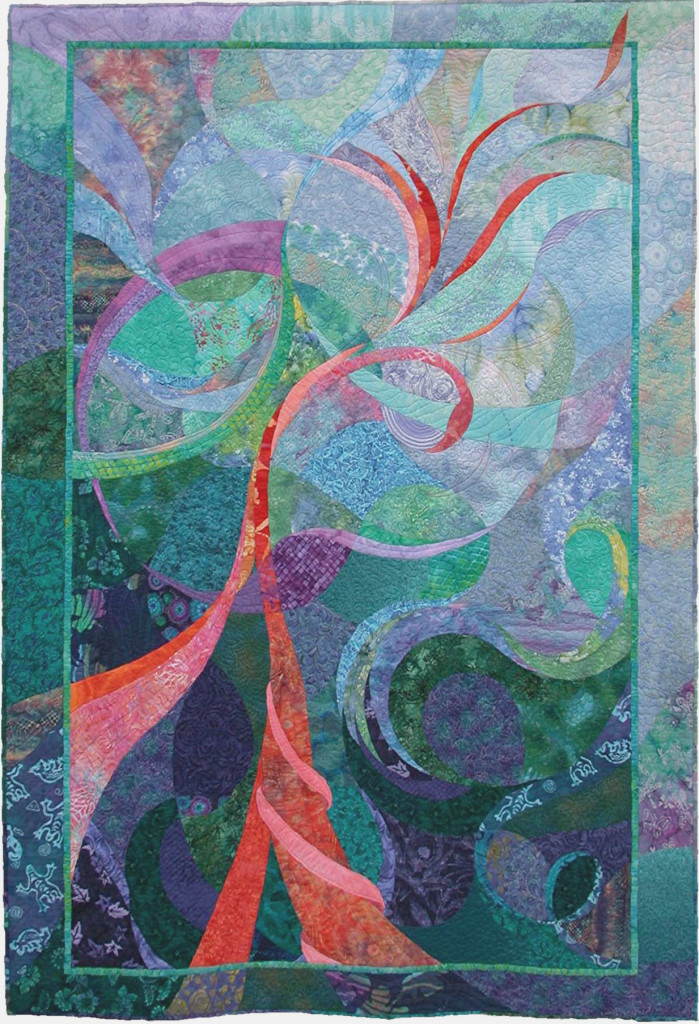
Here’s an early art quilt from 2001, called Hopes and Daydreams.

Hopes and Daydreams, an art quilt by Ellen Lindner. AdventureQuilter.com/blog

Hopes and Daydreams, 2001

Although it looks like I did complicated curved piecing, I didn’t.  Instead, all the stitching is done from the top with a technique similar to machine applique.  I learned it from a Caryl Bryer Fallert-Gentry lecture.

Ellen Lindner

4

“Palm Fronds” Complete

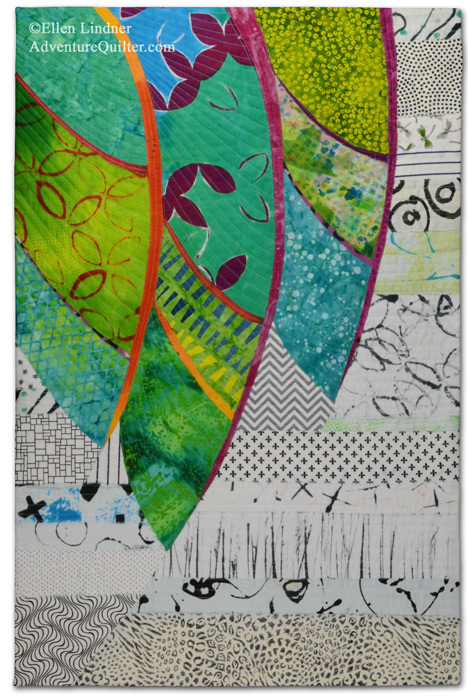
I had SO MUCH FUN using my hand dyed fabrics in this recent quilt!  I’m calling it Palm Fronds, and I really like it. It’s 36″ x 24″.

Palm Fronds, an art quilt by Ellen Lindner. AdventureQuilter.com

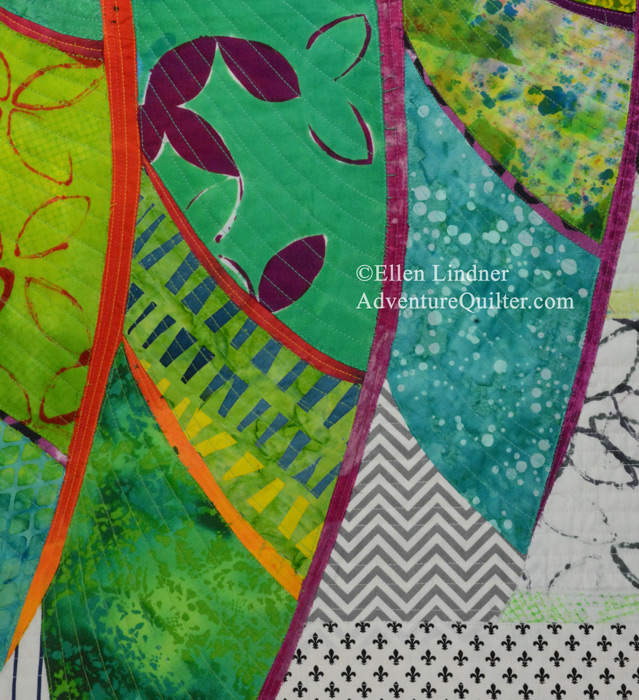
About one third of the fabrics used are ones I dyed.  So exciting!

Palm Fronds - detail, an art quilt by Ellen Lindner. AdventureQuilter.com

I like this quilt so much I think I might do another couple to make a series. And I’m busy planning my next round of dyeing.

Ellen Lindner

2

Be Inspired by Your Photo, Not Controlled by It

“Be inspired by your photo, not controlled by it.” This is our class motto in Design Your Own Nature Quilt. The quilts in this post are good examples of that.

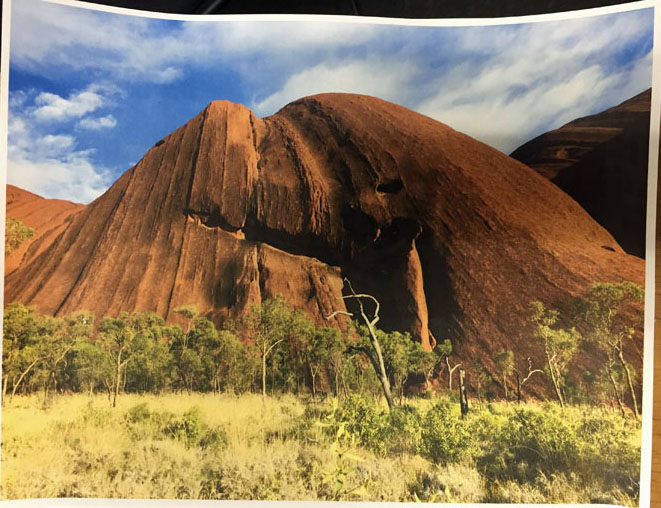
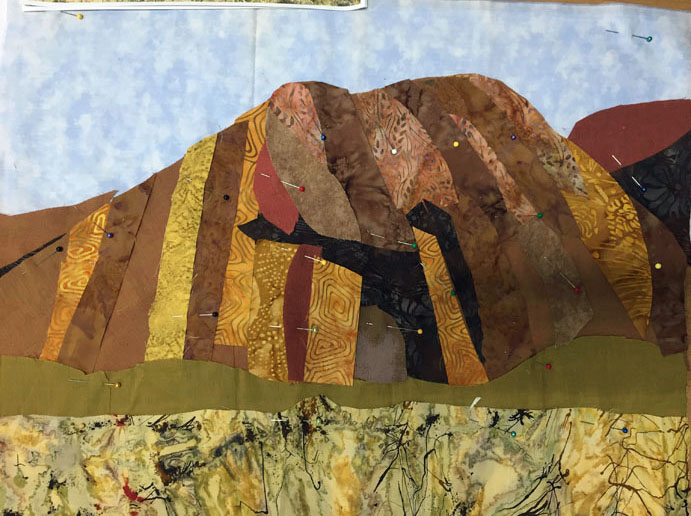
Barbara had this great starting photo.  She noticed the vertical striations and decided to abstract them a little and to exaggerate them.

Design Your Own Nature Quilt with Ellen Lindner. AdventureQuilter.com/blog

Isn’t that more interesting?  I think so.

Design Your Own Nature Quilt with Ellen Lindner. AdventureQuilter.com/blog

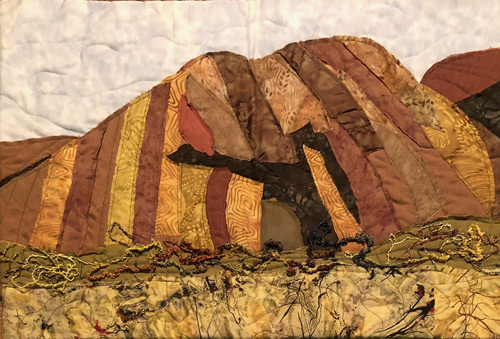
Barbara was kind enough to later send me a photo of her finished quilt.  Here it is, “Uluru, Austraila.” I think it’s fantastic!

Design Your Own Nature Quilt with Ellen Lindner. AdventureQuilter.com/blog

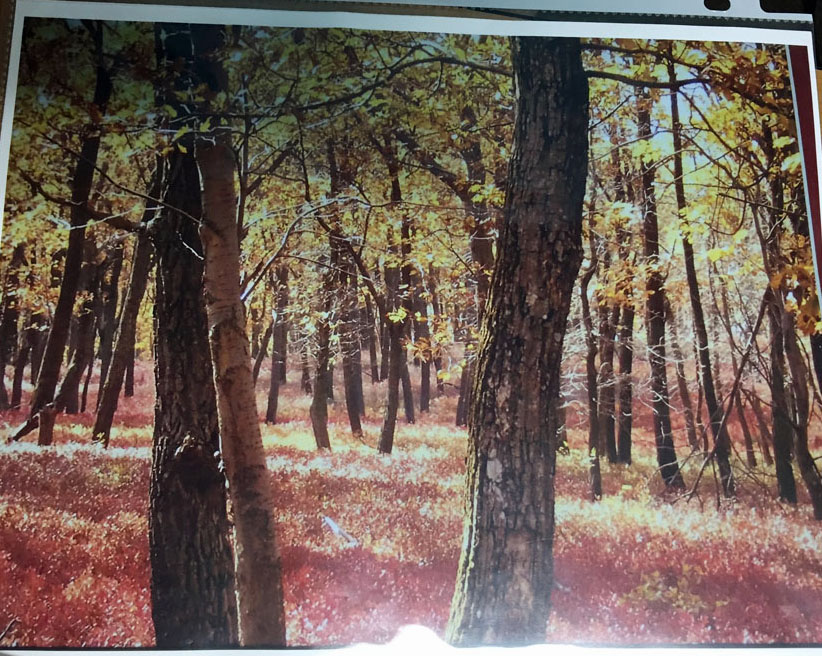
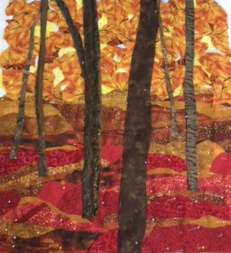
Joan started with this great photo. Although she planned to eliminate quite a few trees, she wanted to reproduce it pretty closely.

Design Your Own Nature Quilt with Ellen Lindner. AdventureQuilter.com/blog

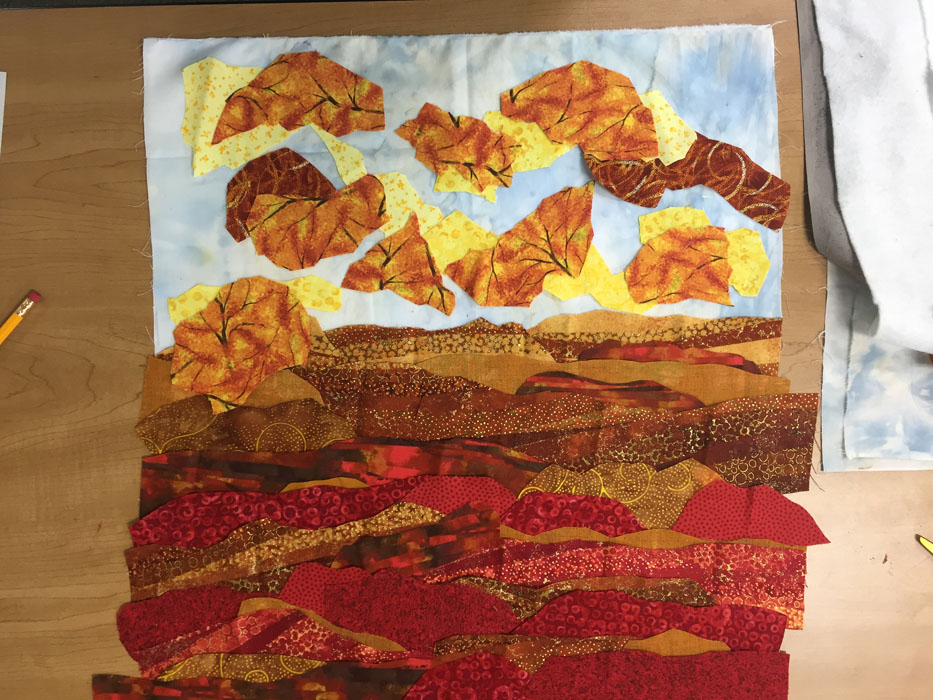
However, as she began to exactly match some of the red colors in the foreground, she decided they weren’t bright enough for her.  She kicked up the colors and was much happier with it.
Then, it was time to tackle the mass of yellow leaves in the background.  Fortunately, Joan had a wonderful tree-like fabric that could be cut and used over and over to get the desired effect.

Design Your Own Nature Quilt with Ellen Lindner. AdventureQuilter.com/blog

This is what it looked like at the end of class.  Very dramatic, right?

Design Your Own Nature Quilt with Ellen Lindner. AdventureQuilter.com/blog

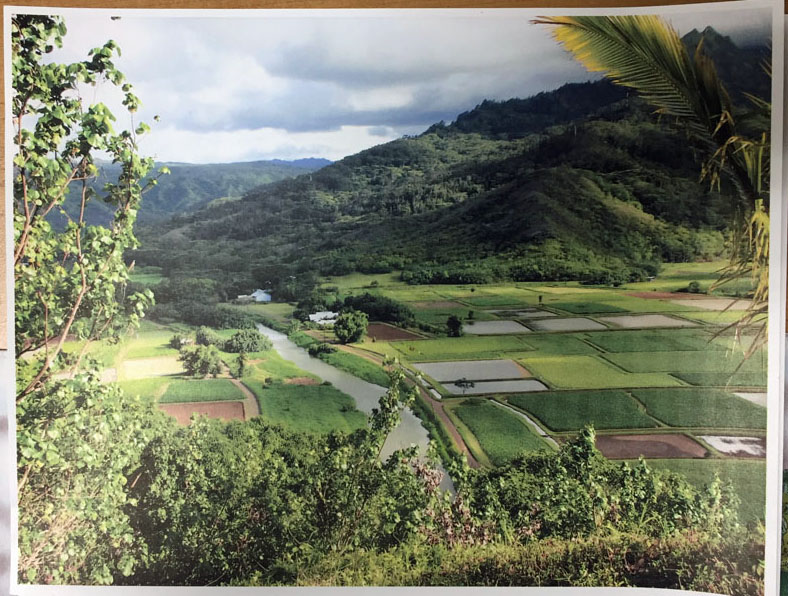
For her second quilt, Barbara started with a great photo taken in Hawaii.

Design Your Own Nature Quilt with Ellen Lindner. AdventureQuilter.com/blog

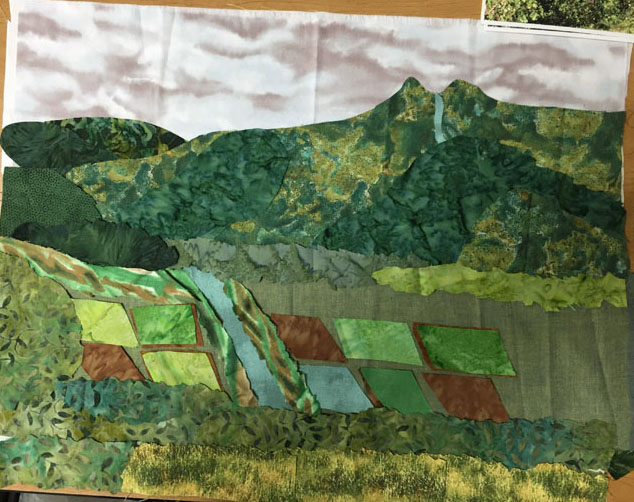
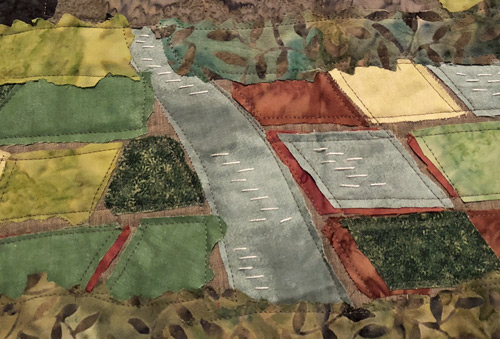
Again, she simplified the shapes of the fields, and played up only the best parts of her photo. See the in-progress photo below.

Design Your Own Nature Quilt with Ellen Lindner. AdventureQuilter.com/blog

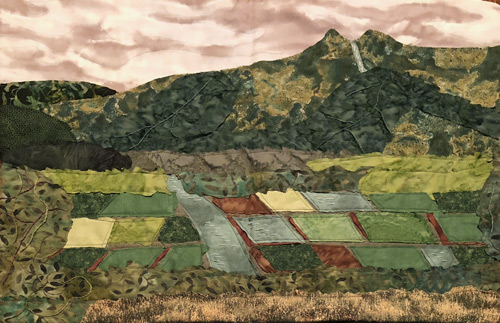
Here’s her finished quilt, “Taro Ponds, Hanalei, Kauai.”

Design Your Own Nature Quilt with Ellen Lindner. AdventureQuilter.com/blog

And a detail shot of the flooded fields.

Design Your Own Nature Quilt with Ellen Lindner. AdventureQuilter.com/blog

These ladies did great work!

Ellen Lindner

0

Sunflowers as Inspiration

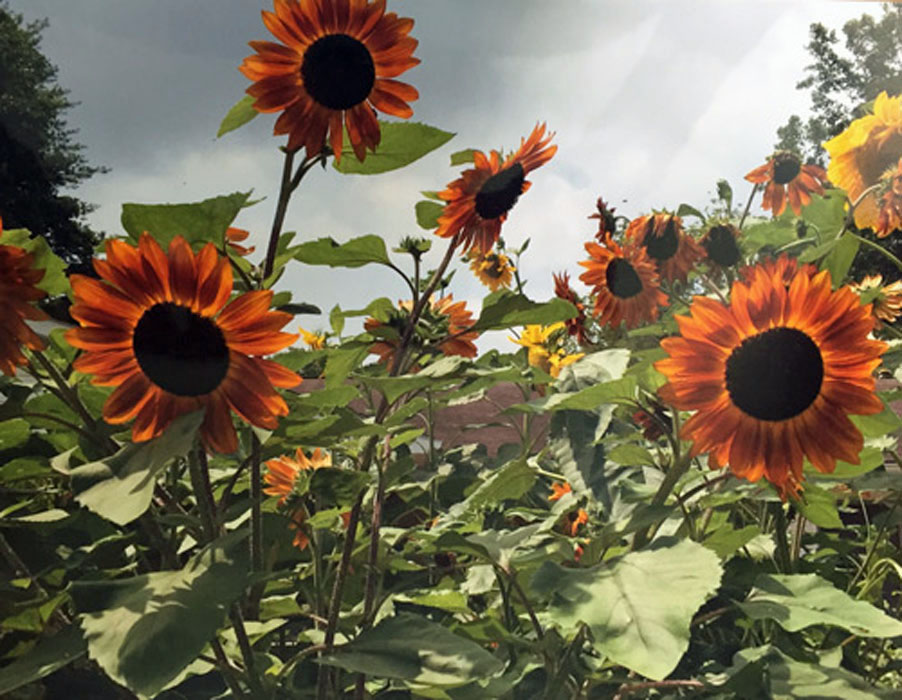
Two students brought photos of sunflowers as their inspirations.  This was Jo-Ann’s.

Design Your Own Nature Quilt with Ellen Lindner. AdventureQuilter.com/blog

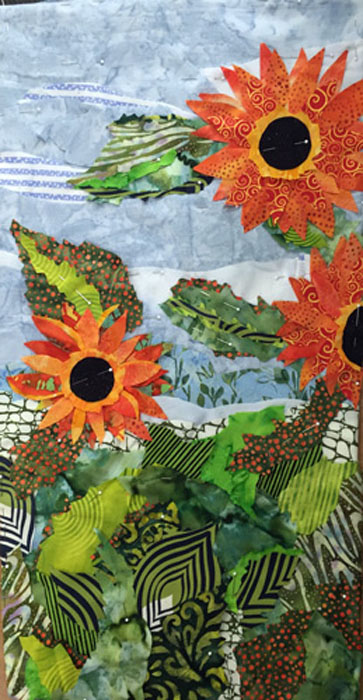
She needed to make a long skinny piece to fit a particular backing so she was NOT controlled by her photo.  She edited it very successfully.  Here it is before stems are added. Isn’t it vibrant and lively?

Design Your Own Nature Quilt with Ellen Lindner. AdventureQuilter.com/blog

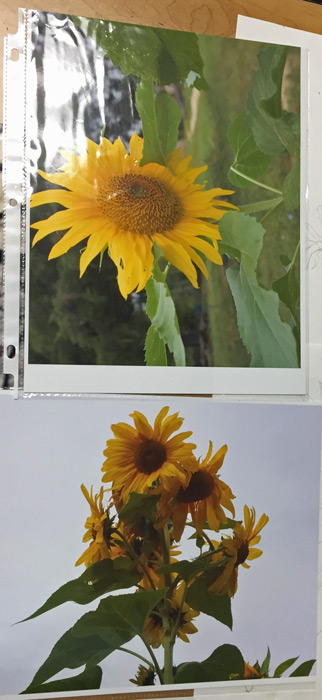
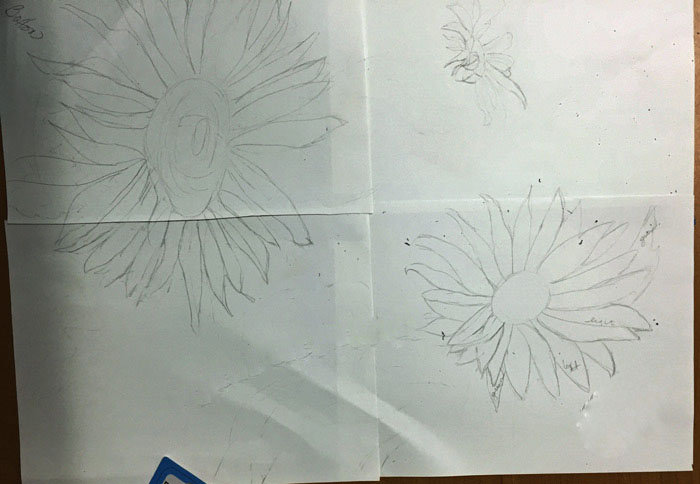
After her first wonderful piece, Gloria started designing a second piece.  These were her inspiration photos.

Design Your Own Nature Quilt with Ellen Lindner. AdventureQuilter.com/blog

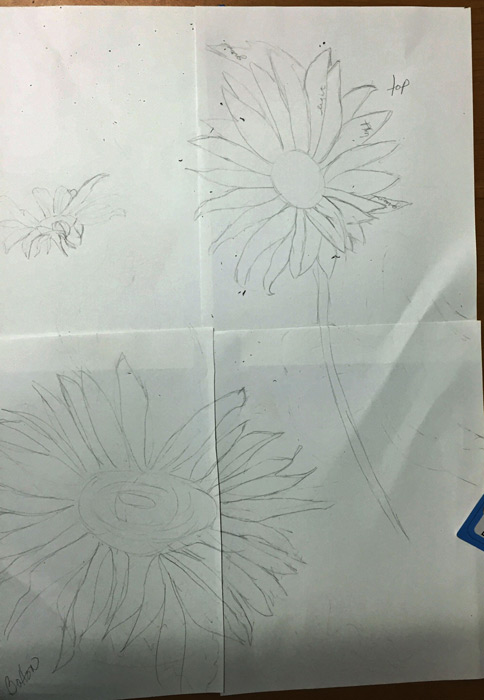
She started sketching, but could tell that it wasn’t quite right.

Design Your Own Nature Quilt with Ellen Lindner. AdventureQuilter.com/blog

I suggested that it looked rather top heavy and asked, “What would happen if you rotated it?” She did, and got this.  Much better.

Design Your Own Nature Quilt with Ellen Lindner. AdventureQuilter.com/blog

I’m sure both of these quilts will be happy and upbeat.

Ellen Lindner

0

Design Your Own Nature Quilt: Texture Real and Implied

There are two types of texture in art: real, and visual.  Visual texture is achieved with value and pattern changes and is one of the things I teach in class.

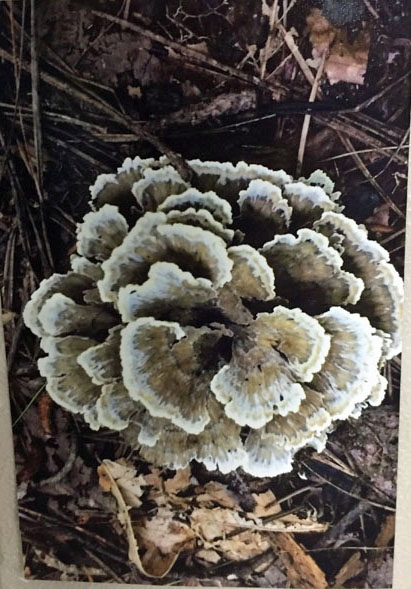
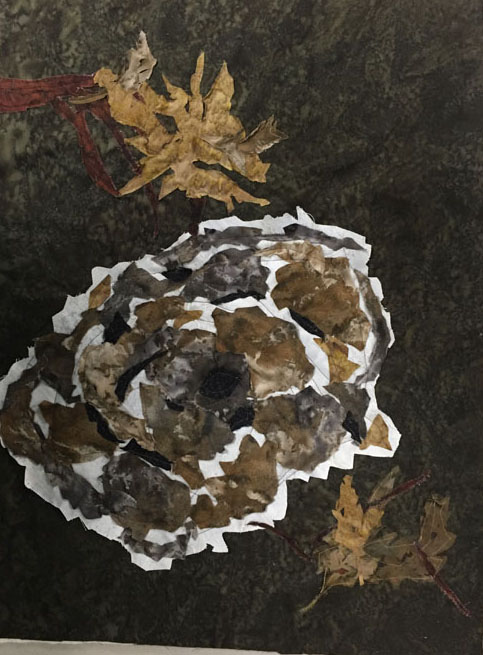
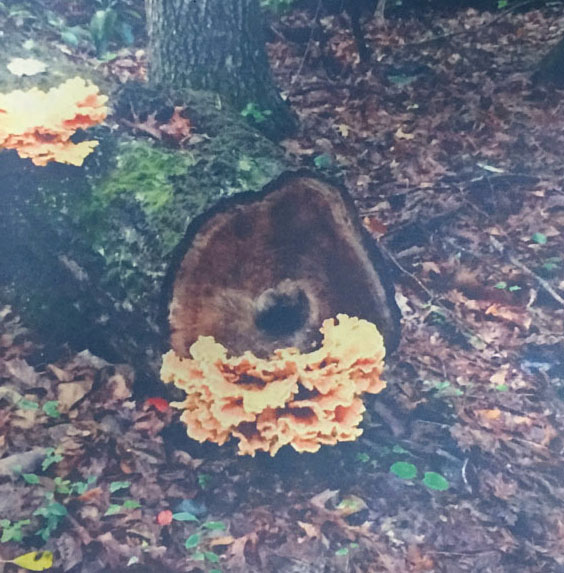
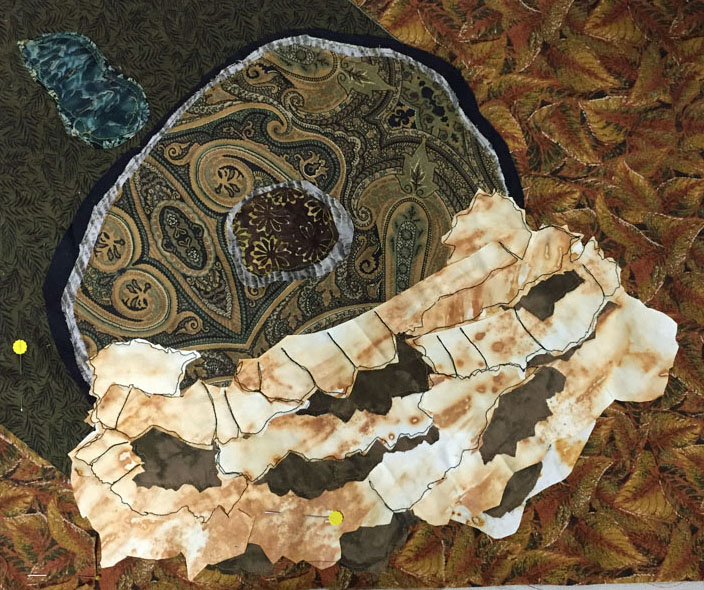
Two students brought in mushroom photos to use as their inspirations.  Their photos had a lot of visual texture and these two worked hard at creating it in their pieces.

Here’s Kate’s photo. What wonderful pattern and texture!  Can you see that she’ll REALLY need to rely on value to depict this shape?

Design Your Own Nature Quilt with Ellen Lindner. AdventureQuilter.com/blog

Well, she did just that and this was her quilt, ready for stitching.  Nice!

Design Your Own Nature Quilt with Ellen Lindner. AdventureQuilter.com/blog

Peggy’s photo included the same challenges.

Design Your Own Nature Quilt with Ellen Lindner. AdventureQuilter.com/blog

Again, she used value  and raggedy (“jagged”) edges to complete the task.  Dark stitching has added some definition and she’ll add more.

Design Your Own Nature Quilt with Ellen Lindner. AdventureQuilter.com/blog

As an aside, these two were seated at the same table and referred to themselves as “the fun guys.” Get it?  They cracked me up.

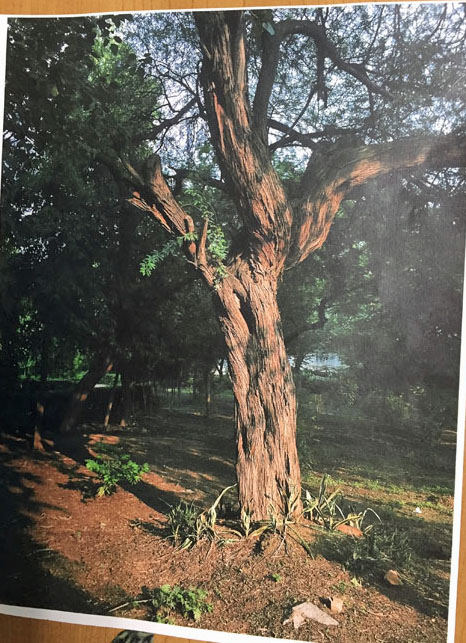
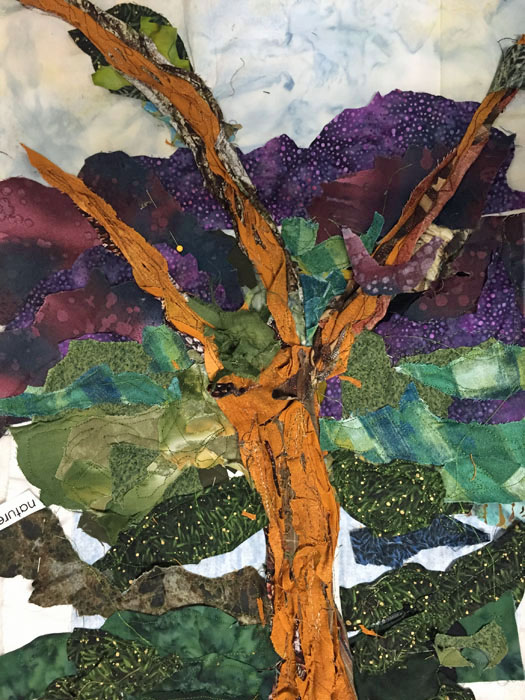
One of the students, Barbara, LOVES to use actual texture in her work.  The gnarled and twisted tree of her inspiration photo was perfect for some experimentation.

Design Your Own Nature Quilt with Ellen Lindner. AdventureQuilter.com/blog

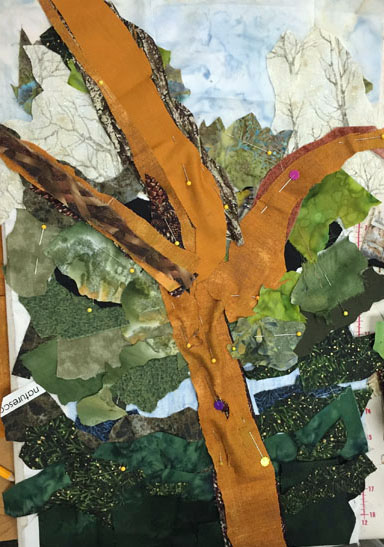
She started out composing her tree much like the other students.  However, she added contrasting fabrics on both the top of her tree and underneath it.
Design Your Own Nature Quilt with Ellen Lindner. AdventureQuilter.com/blog

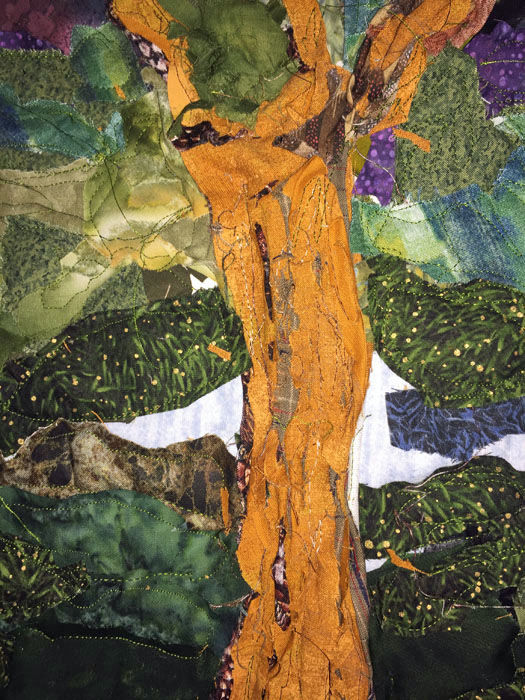
Later, she cut into the tree, revealing those contrasting fabrics below. She also stitched tucks into place, and did quite a bit of machine stitching.

Design Your Own Nature Quilt with Ellen Lindner. AdventureQuilter.com/blog

The effect was very rugged looking: perfect for a tree trunk!

Design Your Own Nature Quilt with Ellen Lindner. AdventureQuilter.com/blog

Isn’t that interesting?

It was VERY fun to see these pieces come together!

Ellen Lindner


0

Design Your Own Nature Quilt in Western North Carolina

I had a fabulous time teaching “Design Your Own Nature Quilt” in western North Carolina recently.  The students were talented, excited to learn, and willing to experiment.  As a result, they produced some amazing quilts in our two days together.
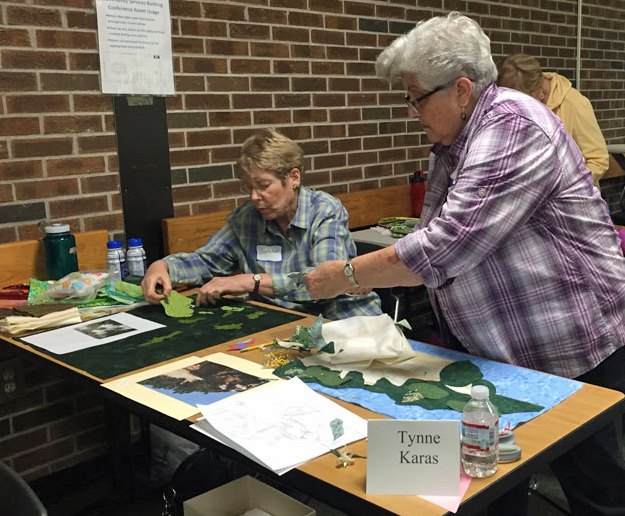
After learning some design concepts in the morning, the fabric was flying in the afternoon of day one.

Design Your Own Nature Quilt with Ellen Lindner. AdventureQuilter.com/blog

Gretchen and Tynne auditioning fabric choices.

Our class motto was “Be inspired by your photo, not controlled by it.” But, Gloria’s photo was so great that it needed very little editing.

Design Your Own Nature Quilt with Ellen Lindner. AdventureQuilter.com/blog

She wisely brought the perfect background fabric.  Note that it doesn’t need to have tiny branches, just something that shows the general sky color with some variation/”imperfections.”

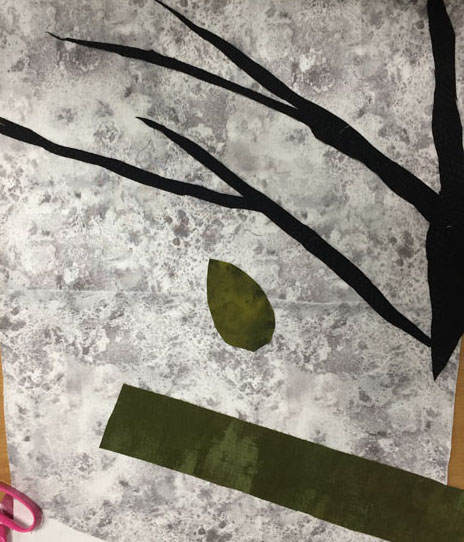
When placing the branches, Gloria deviated from the photo, which I applauded.  However, a little trial and error was called for (as is generally the case.) In the first rendition, her branches were too parallel to one another and they lacked the proper taper and lovely curving of actual branches.

Design Your Own Nature Quilt with Ellen Lindner. AdventureQuilter.com/blog

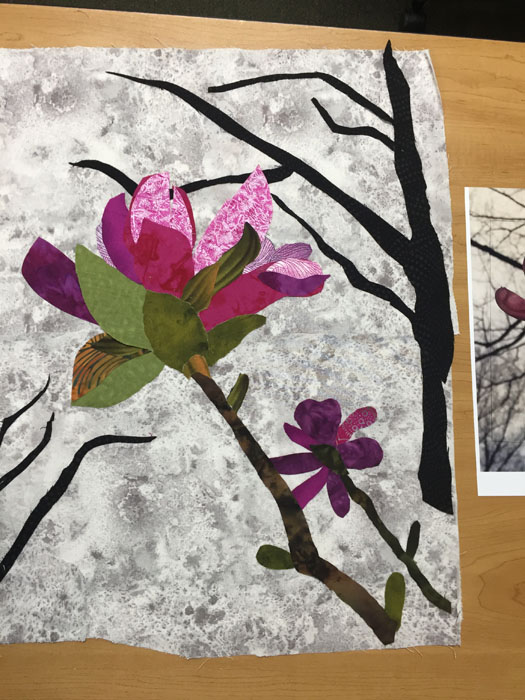
She did a little tweaking and soon arrived at this, glued and ready to be stitched.  Isn’t it lovely?

Design Your Own Nature Quilt with Ellen Lindner. AdventureQuilter.com/blog

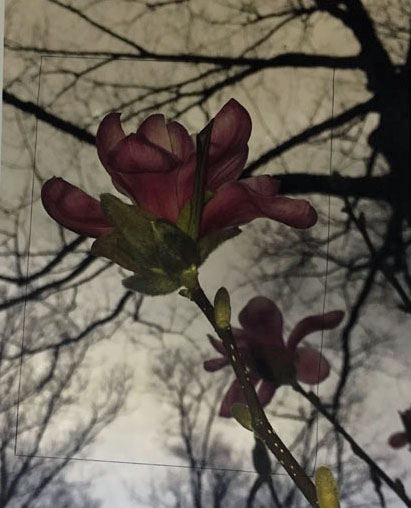
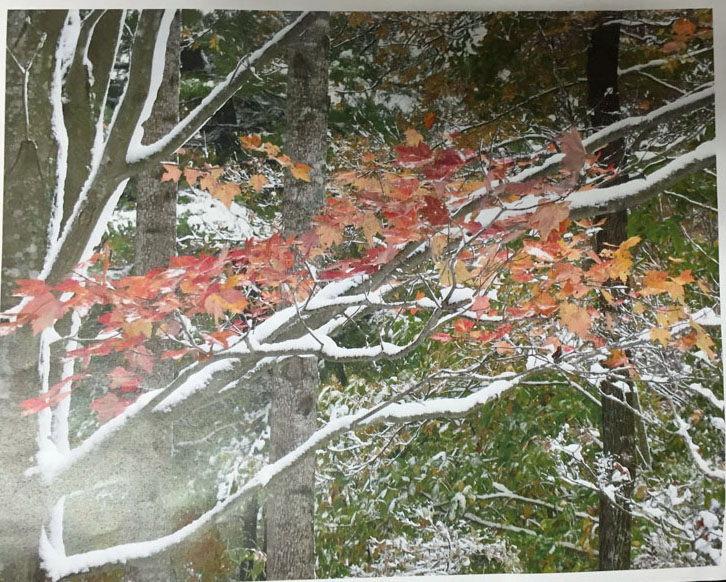
Becky was also inspired by branches, in particular these covered with an early snow.

Design Your Own Nature Quilt with Ellen Lindner. AdventureQuilter.com/blog

Here first few branches were not bad, but also needed a little better tapering and such.

Design Your Own Nature Quilt with Ellen Lindner. AdventureQuilter.com/blog

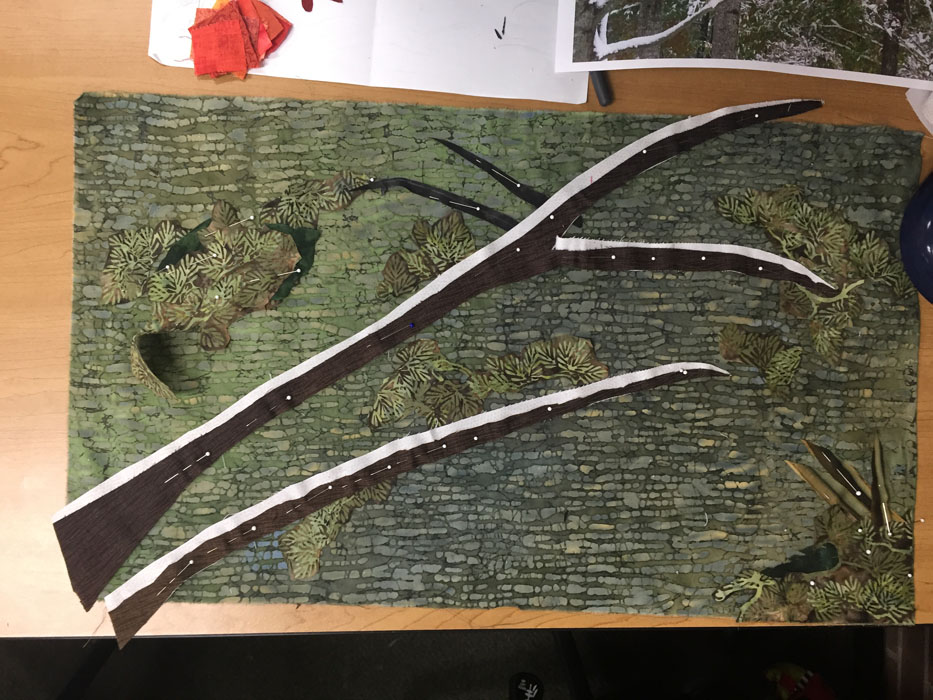
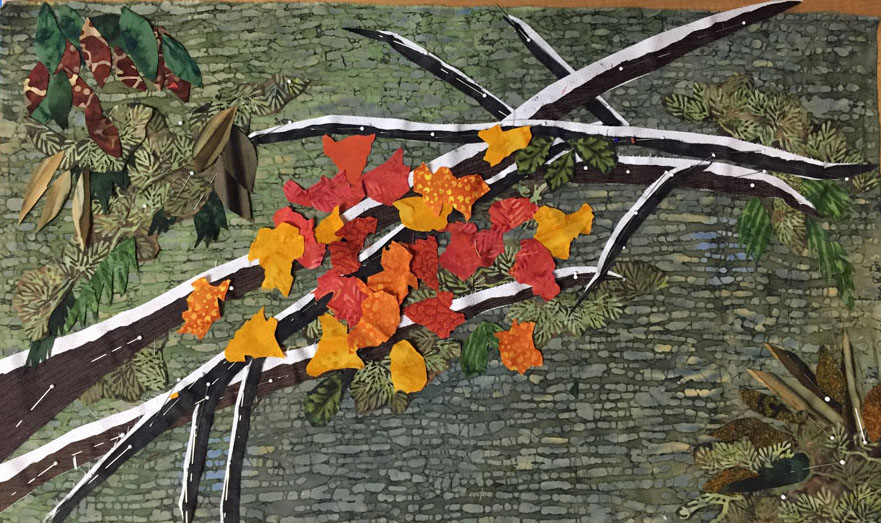
After a bit more experimenting she added in a bunch more branches with snow and the piece really came to life. Don’t you love the strong white diagonal lines of the snow? She created it by tucking white fabric under dark brown.

Design Your Own Nature Quilt with Ellen Lindner. AdventureQuilter.com/blog

After initially cutting perfect leaves, Becky realized they didn’t actually look perfect in her photo and something more irregular would do the trick.  Aren’t these great?  This is progressing very nicely and, after a few more leaves are added, she’ll be ready to stitch.

Can you feel the Adrenalin that was building in class?!

I have many more photos to show you so watch for them in future blogs.

Ellen Lindner


0

Palm Frond Quilt Coming Together

Gee, this quilt has been fun to make!

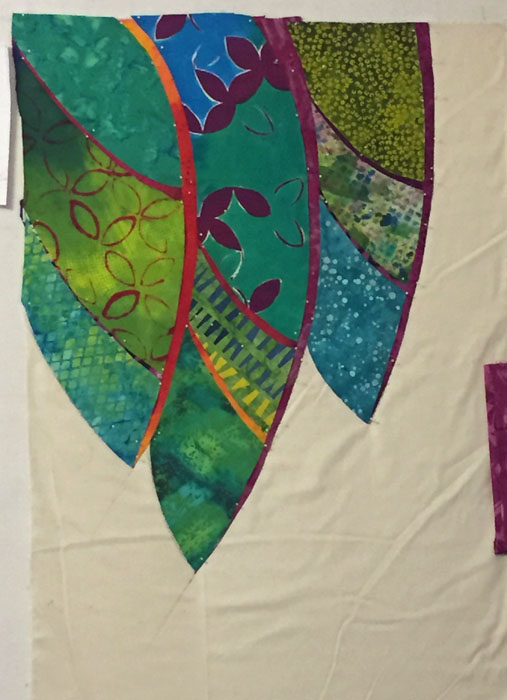
Using My Hand Dyed Fabrics. Ellen Lindner, AdventureQuilter.com/blog

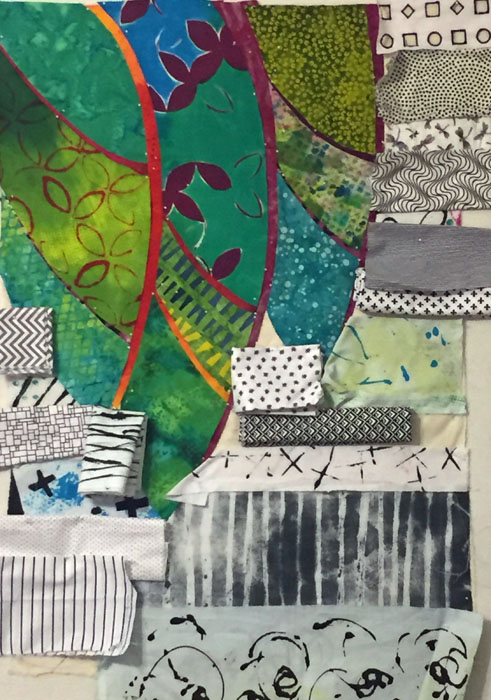
After completing the foreground, it was time to address the background – again, with many hand dyed fabrics. First, I auditioned possible fabrics.  I really wanted to use the darkest one, but I was worried that it would created too much contrast.

Palm Frond Quilt Coming Together. Ellen Lindner, AdventureQuilter.com/blog

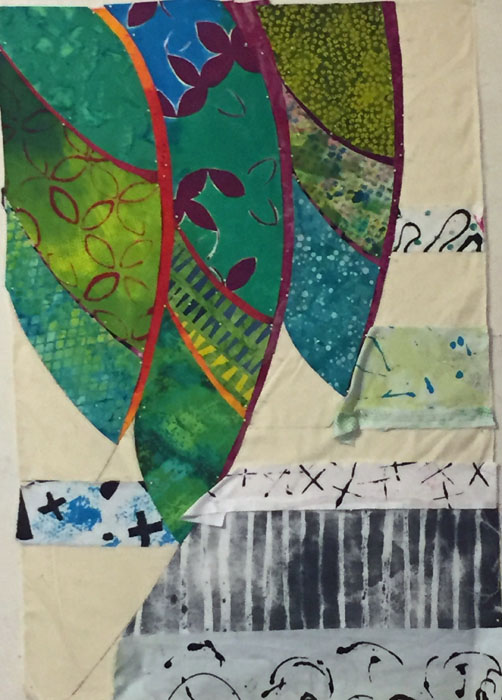
Still, I kept it in initially. As you can see, I’m tearing fabrics and laying them in horizontally.

Palm Frond Quilt Coming Together. Ellen Lindner, AdventureQuilter.com/blog

This is what it looked like when the background was complete.  I did eventually move the darkest piece.  Also, I made the blue with crosses pieces (on the left) smaller after taking this picture.  Like the dark fabric, it provided just a little too much contrast.

Palm Frond Quilt Coming Together. Ellen Lindner, AdventureQuilter.com/blog

After composing and pinning the design, I glue it fairly thoroughly before taking it to the machine.  That’s in progress below.

Palm Frond Quilt Coming Together. Ellen Lindner, AdventureQuilter.com/blog

Next comes quilting and I’ll get to use my new sewing machine!

Ellen Lindner

2