Archive | September, 2023

Red and Yellow Abstract

Historically, I haven’t been a fan of red and yellow combinations, but for some reason, I now find myself drawn to them. I still think they’re a little jarring, but it seems that I now like that. As evidence, I recently dyed fabrics with these colors.

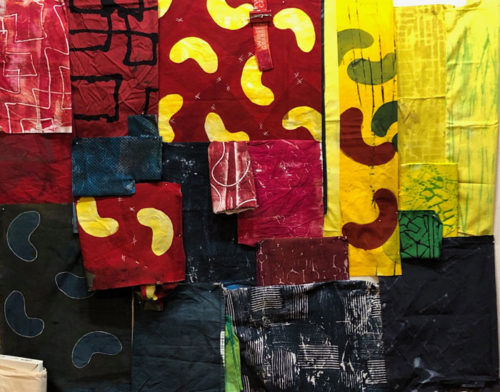
I created a variety, hoping I could use them together. As you an see, I repeated a bean shape in several colors. I was happy with how they worked together and was anxious to get started.
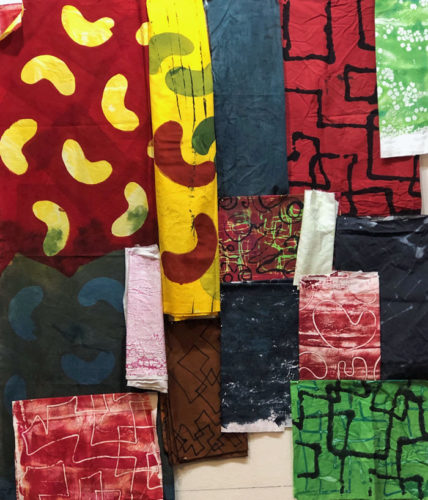
Red and Yellow Abstract. Ellen Lindner, AdventureQuilter.com/blog

I realized some of the lightest fabrics wouldn’t fit well into the mix. But, I had some other fabrics I thought I could use. I pinned everything together on the design wall. And I loosely arranged them: a good starting point.
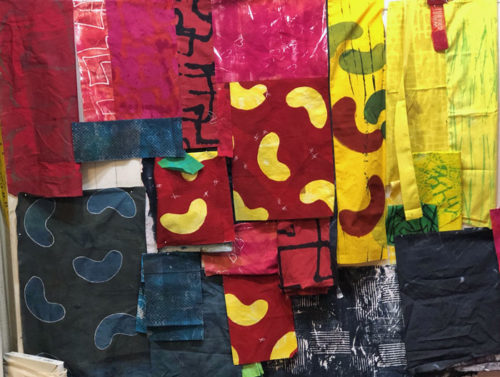
Knowing the contrast of red and yellow, as well as the contrast of different values, would attract attention, I placed them (above) in approximately “sweet spots.” These are considered ideal locations for focal points. They’re easy to identify: picture a tic-tac-toe game overlaying the overall shape. Where the lines cross are sweet spots.

I immediately thought the red fabric with yellow beans was a little too “regular.” (See above) That is, the beans were spaced too evenly. I thought the composition would be stronger if they were “messed up” a little bit. So, in the photo below, you can see that I sliced right through the red bean fabric, and scooted things out of alignment.  Better, I thought.
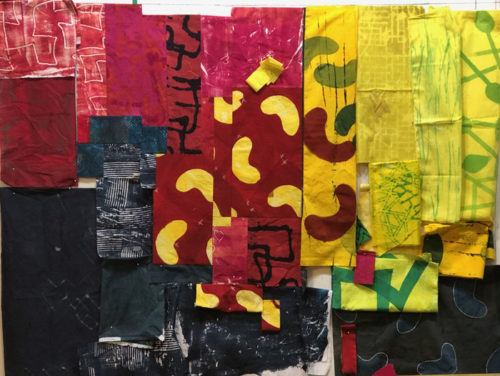
Next, came A LOT of auditioning as I folded, rearranged, cut (only once I was sure,) and pieced.
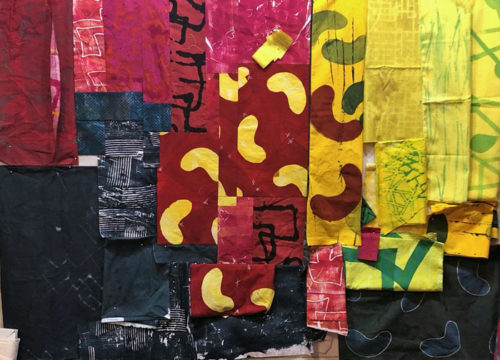
Red and Yellow Abstract. Ellen Lindner, AdventureQuilter.com/blog

It was like a giant game of Tetris. Eventually, I had the left portion pieced and began to work on the yellow fabrics on the right.
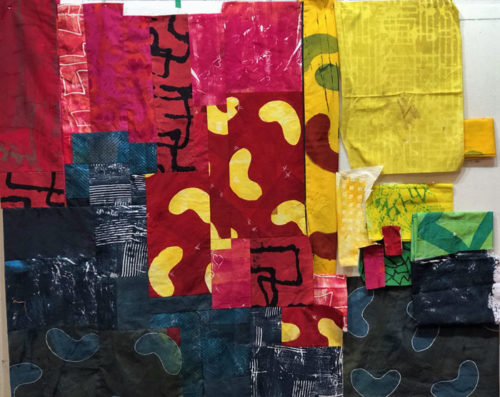
Red and Yellow Abstract. Ellen Lindner, AdventureQuilter.com/blog

It all went more slowly that I would have liked, but I was definitely having fun!

More next time.

Ellen Lindner


2

New studio Flooring

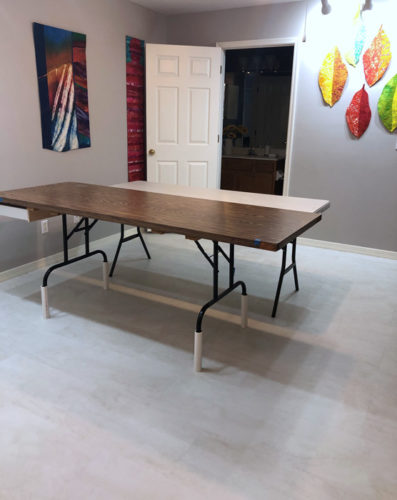
Check out my new studio flooring!

New studio flooring. Ellen Lindner, AdventureQuilter.com/blog

I just love it!

This photo was taken right after installation, before I moved ALL MY STUFF back in. I had it all piled in the dining room. Moving it in and out was QUITE the job!

I wanted new flooring to accomodate fabric dying and this is going to work great. I can just easily wipe  up dye, even after it dries. (Before, I was covering my carpeted floors with plastic for each dye session.)

Now, I can set up very quickly. I’m thinking I’ll be doing more dying. Can’t wait!

Ellen Lindner
P.S. I may have picked something a little too light. It’s definitely showing threads and such more easily, but so far I’m managing with a little increased  house keeping.

0

Dying and Mono Printing

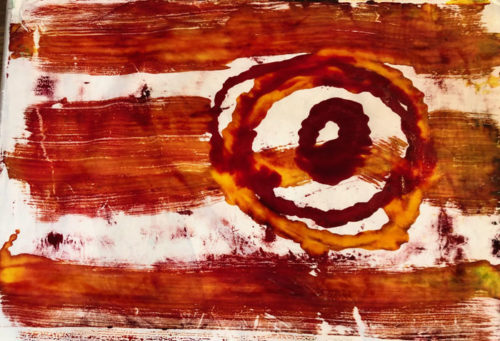
In my recent dye session. I played around with mono printing, which is great fun. This was my first piece. The colors were brushed horizontally, but I left the squirted “eyeball” in tact.

Learning to Monoprint. Ellen Lindner, AdventureQuilter.com

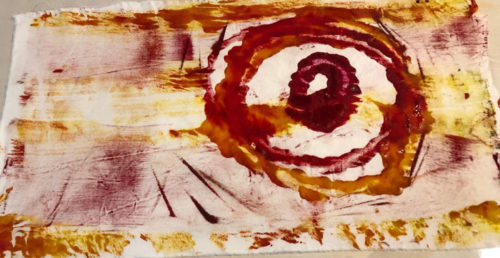
There was a lot of dye left on the plastic, so I printed a “ghost.” As you can see, the brushed on dye was already used up, but the more gloppy eyeball printed fairly nicely.

Learning to Monoprint. Ellen Lindner, AdventureQuilter.com

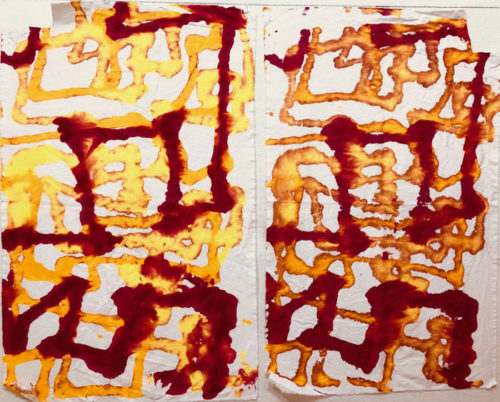
So, I learned something: if I squirt on generous amounts, I can get a second print. And it will be somewhat different from the first. I tried it again, with these two. Not very ghostly, but the colors have moved and merged. Very interesting.

Learning to Monoprint. Ellen Lindner, AdventureQuilter.com

You can also mono print in a “finger paint” sort of way. These had dye brushed on pretty smoothly. Then, I drew or scraped through them. I’ll definitely be doing more of this!

Learning to Monoprint. Ellen Lindner, AdventureQuilter.com

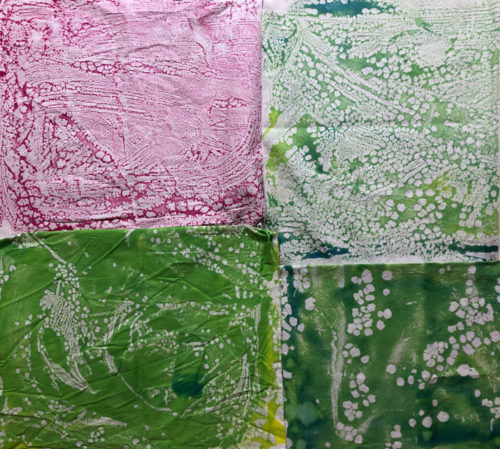
When I switched to shiny plastic as my surface the dye beaded up. Which actually gave me a wonderful texture. I’ll be doing more of this, too!

Learning to Monoprint. Ellen Lindner, AdventureQuilter.com

I learned a lot. Some of these are  not too usable – yet. But, hey, I know how to over dye, so I’m not worried.

I’ve written a short tutorial about mono printing. The underlined text at left is a direct link, or you can find it in the Articles section of Learn with Ellen. If you give it a try, I’d love to see your results!

Ellen Lindner

0

Dying Again

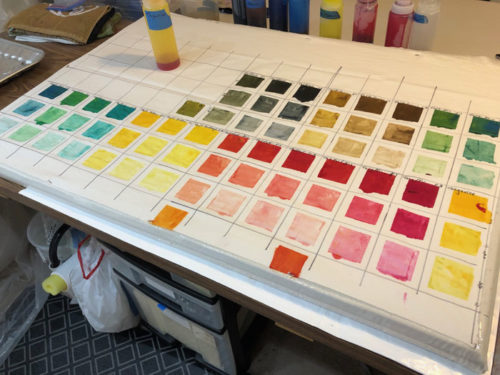
As usual, I really enjoyed my recent dying session. I was trying out a new color, Tangerine, so I did a lot of swatching to get to know how it worked.

Dying Again. Getting to Know Tangerine. Ellen Lindner, AdventureQuilter.com/blog

The swatches above show what happened when I mixed tangerine with each of my other 7 colors, in 3 ratios, and 3 values. Yes, it takes a while, but the results are worth it. I’ve done this with each color and have them all sorted, and LABELED, in a book.

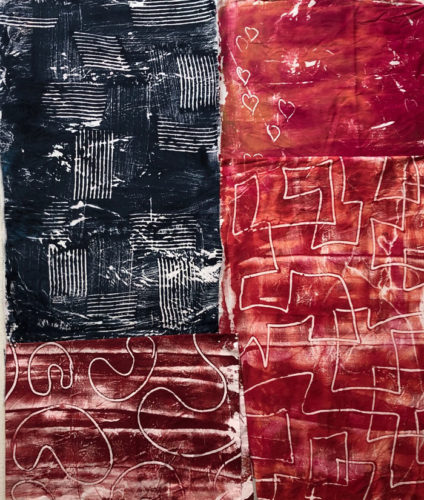
When dying fabrics, I often repeat colors and motifs, so the pieces will work together well. This time, I did quite a few pieces with large, squarish meandering. Some of them were in high contrast colors and others were more subtle.

Dying Again. Ellen Lindner, AdventureQuilter.com/blog

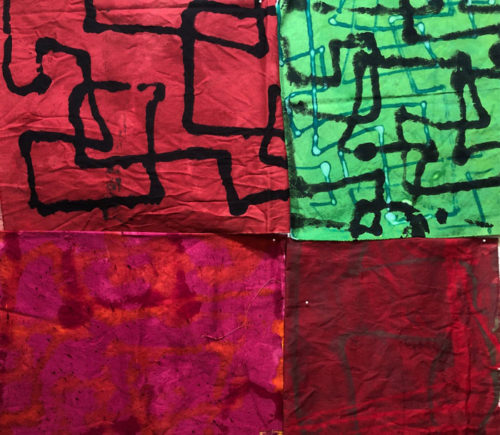
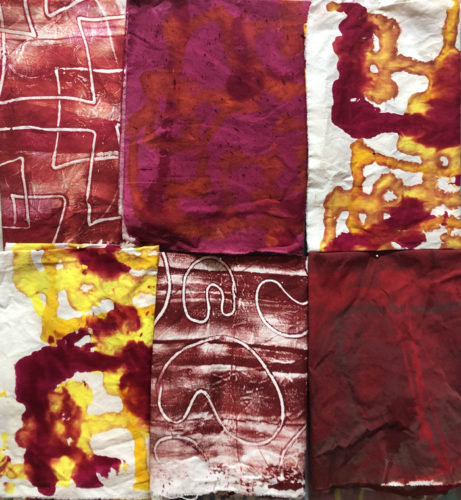
A few more examples, (with one exception.) Several of these were mono printed, and I’ve written an article about that process.

Learning to Monoprint. Ellen Lindner, AdventureQuilter.com

These are fabrics I dyed that will probably go together in the same quilt. As you can see, I also played around with a “bean” shape. I think these will work well together.

Dying Again. Ellen Lindner, AdventureQuilter.com/blog

More dyed fabrics in the next post!

Ellen Lindner
P.S. See the earlier swatching I did with my other colors.

0

Grow with the Flow in Maine

The ladies in my Grow with the Flow class learned a lot and got such excellent results!

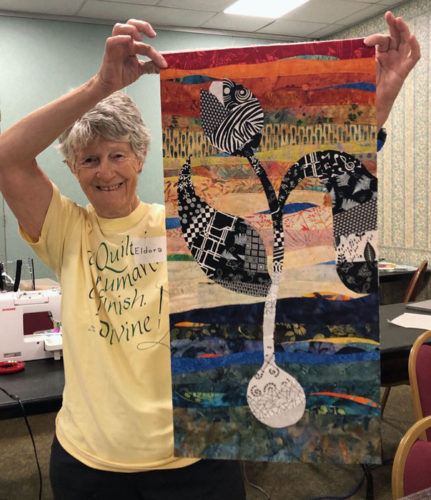
Here’s Eldora with her quilt. Didn’t she do a great job?

Grow with the Flow in Maine. A class with Ellen Lindner, AdventureQuilter.com/blog

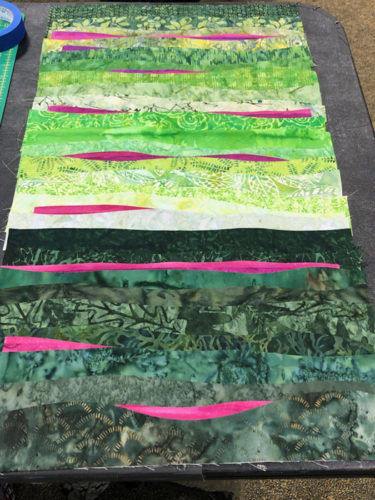
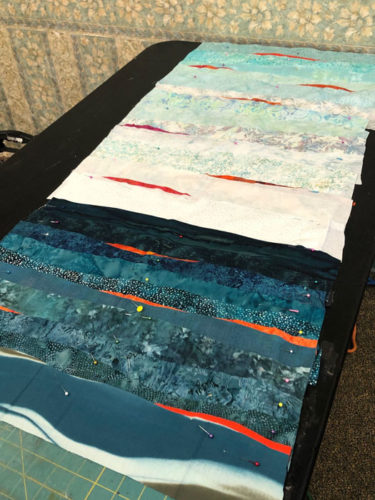
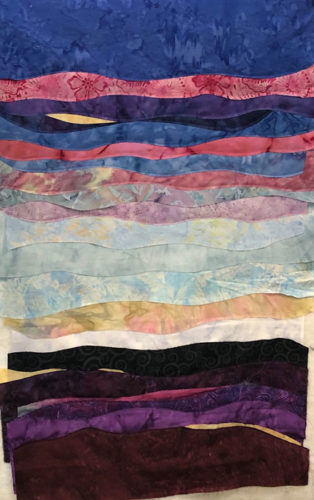
First, they learned how to create an ombre background, with a horizon line. These were pretty to start with, but then the students added skinny accent pieces and everything really came to life! This is Kim’s background, below.

Grow with the Flow in Maine. A class with Ellen Lindner, AdventureQuilter.com/blog

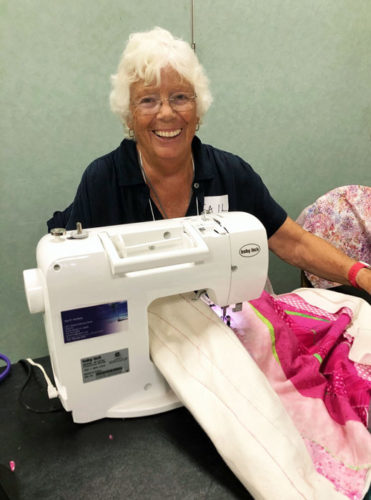
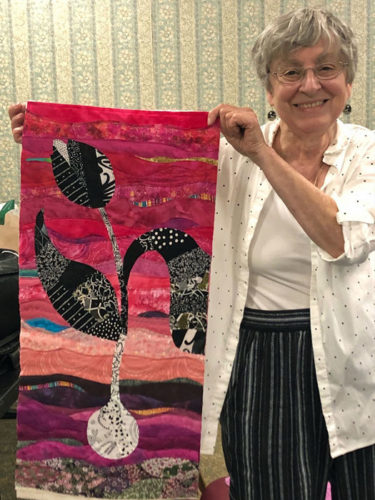
This class – for the only time ever – offered two different sizes. The students who worked in the larger size spent most of the day on their backgrounds. Gail was in a puddle of pink as she worked on hers.

Grow with the Flow in Maine. A class with Ellen Lindner, AdventureQuilter.com/blog

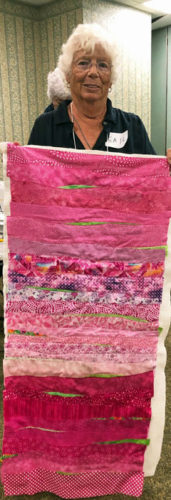
She finished it beautifully.

Grow with the Flow in Maine. A class with Ellen Lindner, AdventureQuilter.com/blog

Charlene also worked in the larger size. She used one of my favorite color combinations.

Grow with the Flow in Maine. A class with Ellen Lindner, AdventureQuilter.com/blog

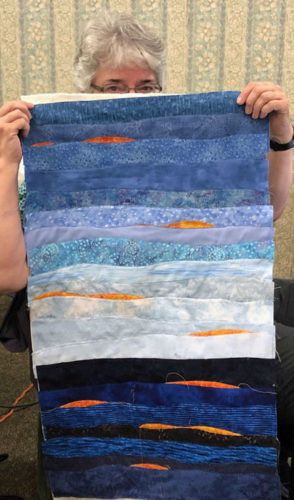
Complementary (opposite) colors often work well for the accents. Sue is sheepishly showing off one such example. Don’t those accents make everything pop?

Grow with the Flow in Maine. A class with Ellen Lindner, AdventureQuilter.com/blog

Carla went for a sunset feel with hers. I think it works!

Grow with the Flow in Maine. A class with Ellen Lindner, AdventureQuilter.com/blog

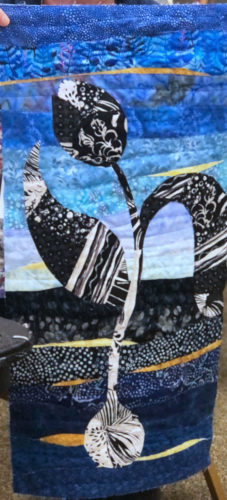
After completing their backgrounds, students were ready to add their black and white sprout. I taught them how to “fussy fuse” and they fully embraced it. This is Carol’s result.

Grow with the Flow in Maine. A class with Ellen Lindner, AdventureQuilter.com/blog

And Kate’s. She had fun adding some printed accents. They have lots of zip!

Grow with the Flow in Maine. A class with Ellen Lindner, AdventureQuilter.com/blog

Can you see how everyone paid attention to the light and dark areas of the sprout? They made sure the lightest parts were against the darkest background and vice versa. This was critical to make the sprout show up properly.

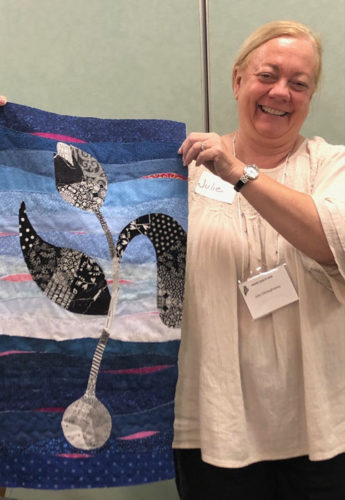
Here’s Julie with her quilt. Another dramatic piece!

Grow with the Flow in Maine. A class with Ellen Lindner, AdventureQuilter.com/blog

I really enjoyed teaching these women. They were fun and easy going and not afraid to try something new. (Like raw edges.) They had great results and those who didn’t finish theirs went home knowing how to do so.

You can see earlier student work in the Grow with the Flow gallery.

Ellen Lindner
P.S. The Grow with the Flow class is available by zoom or in person. Here’s more info.

1