Tag Archives | Dirty Dozen

A Self-Portrait in Red

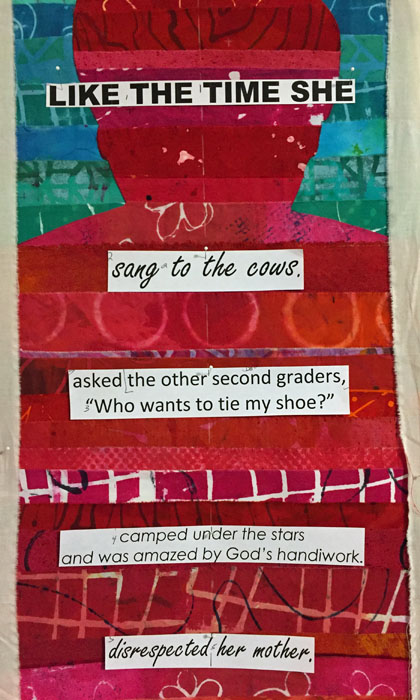
My art quilt group, the Dirty Dozen Fiber Artists, have a really interesting challenge going on. We’re all making self-portraits, each the height of the maker. Isn’t that a cool idea? They also have to be skinny: no more than 12″ wide.

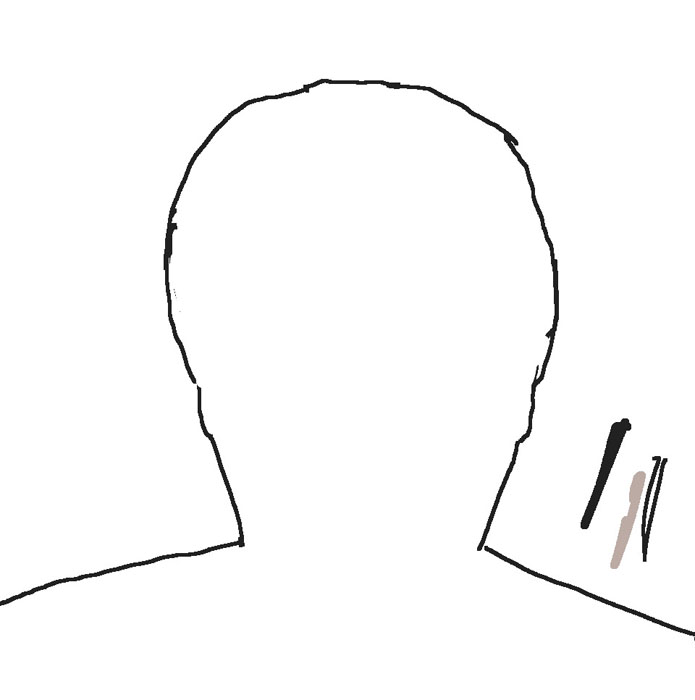
I wanted to include a lot of text in mine, stating my characteristics or attributes.  I decided  a composition with horizontal lines would lend itself to this. But, I also wanted to add my own head. That was surprisingly difficult, but I finally got it.


A Self-Portrait in Red. Ellen Lindner, AdventureQuilter.com/blog

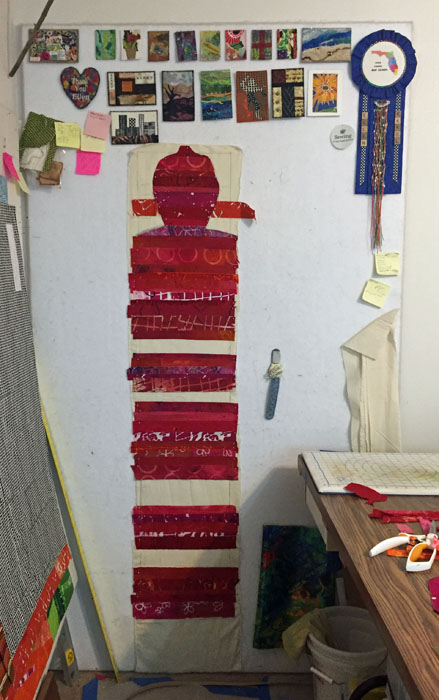
Working on my design wall, the horizontal RED stripes became my body. I used my hand dyed fabrics, paying attention to scattering in a variety of patterns and scales. But, I also aimed for a lot of quiet (near solid) areas that would show off text.

A Self-Portrait in Red. Ellen Lindner, AdventureQuilter.com/blog

My primary design wall is only 4′ tall, so I had to work on my alternate one, above. It’s 7′ tall and I’m only 5′ so it provided plenty of room. (BTW, the bump on the top of my head will be lost in the trimming and seam allowance. I always want the design to extend into the seam allowance, so the bump acheives that.)

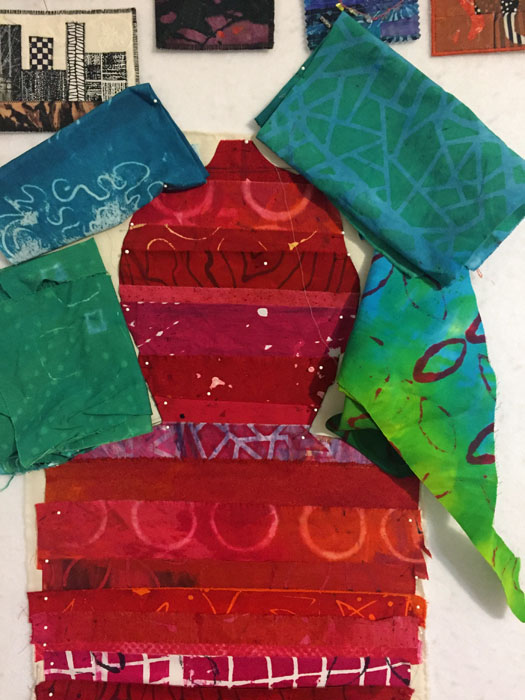
I initially planned to use orange in the background around my head. But, I worried that it didn’t provide enough contrast. A quick audition confirmed the problem.

A Self-Portrait in Red. Ellen Lindner, AdventureQuilter.com/blog

I tried again with blue-green. Much better.

A Self-Portrait in Red. Ellen Lindner, AdventureQuilter.com/blog

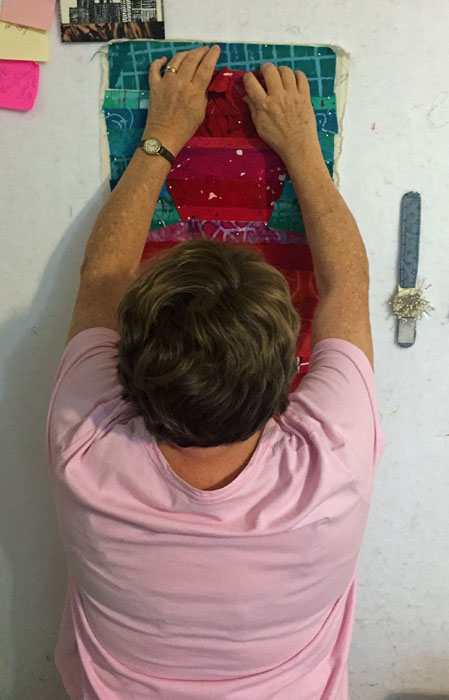
The height of this piece meant that I was frequently working above my head. S-T-R-E-T-C-H.

A Self-Portrait in Red. Ellen Lindner, AdventureQuilter.com/blog

This is what it looked like with the composition complete. No stitching or text yet. I was very happy with it!

A Self-Portrait in Red. Ellen Lindner, AdventureQuilter.com/blog

When selecting the text for my self-portrait I switched from attributes to actions. I selected some cute and complimentary things, but also some not-so-flattering confessions. I printed out everything in a variety of fonts and began to audition placement.

A Self-Portrait in Red. Ellen Lindner, AdventureQuilter.com/blog

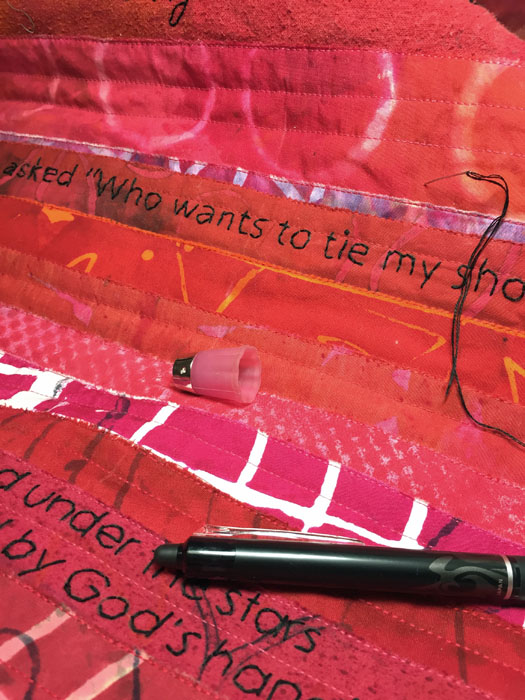
I transferred the text to the unquilted quilt. Then, I quilted it with horizontal lines. And finally, I started hand stitching the text.

A Self-Portrait in Red. Ellen Lindner, AdventureQuilter.com/blog

Oh my, that took a LONG time!!! (I think I’ll use marker next time.)

Now it’s almost complete and you’ll find it on my website soon.

Ellen Lindner

8

A Fabric Book

My friend, Marilyn, taught our fiber art group how to make fabric books. Hers were lovely, with pale pages, lots of embellishments, and amazing contents.

I had just whacked off a good bit of an already quilted quilt and thought that piece would make a good start for the cover. This is what it looked like when freshly trimmed. (From the bottom of this quilt.)


The start of a fabric book. Ellen Lindner. AdventureQuilter.com/blog

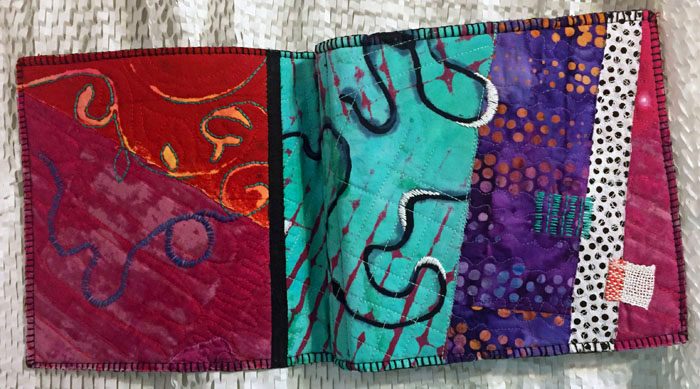
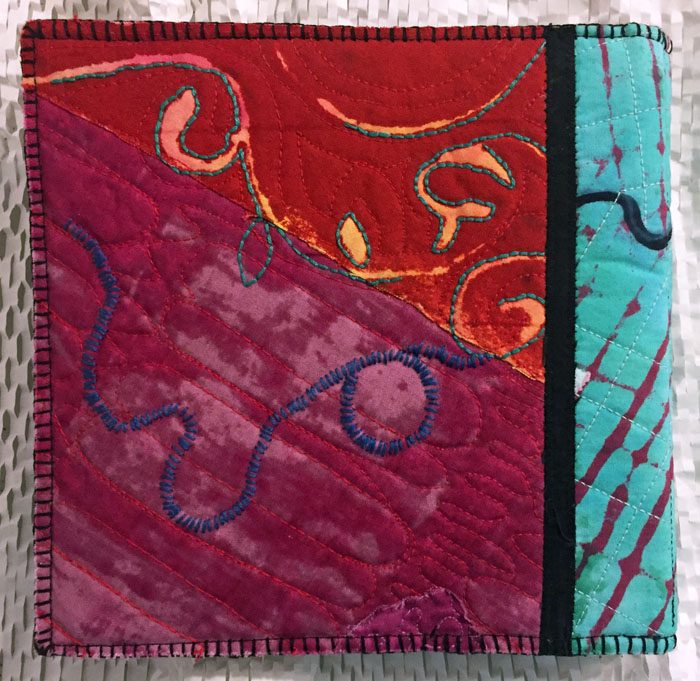
And here it is as the book cover, front (right) and back (left.)

A fabric book by Ellen Lindner. AdventureQuilter.com/blog

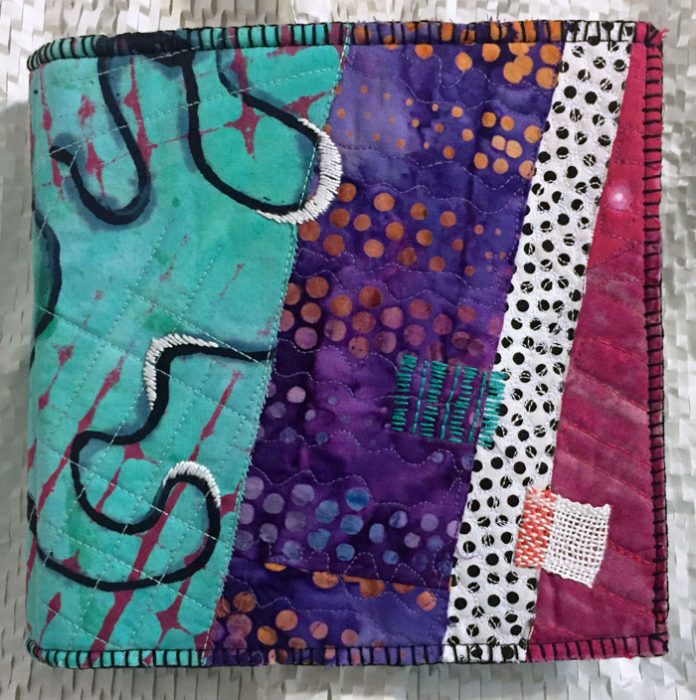
I added hand embroidery to both covers.

A fabric book by Ellen Lindner. AdventureQuilter.com/blog

I initially planned to leave the edges unfinished, but later added hand buttonhole stitching, which I really like.

A fabric book by Ellen Lindner. AdventureQuilter.com/blog

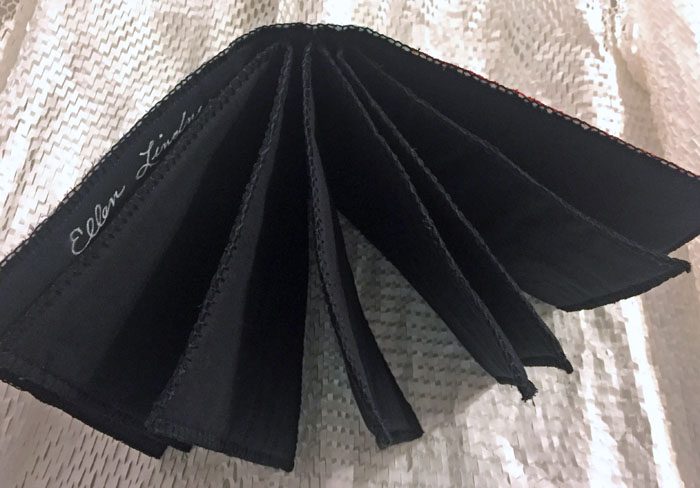
Knowing that I would probably add colorful items to my book, I chose black for the pages.

A fabric book by Ellen Lindner. AdventureQuilter.com/blog

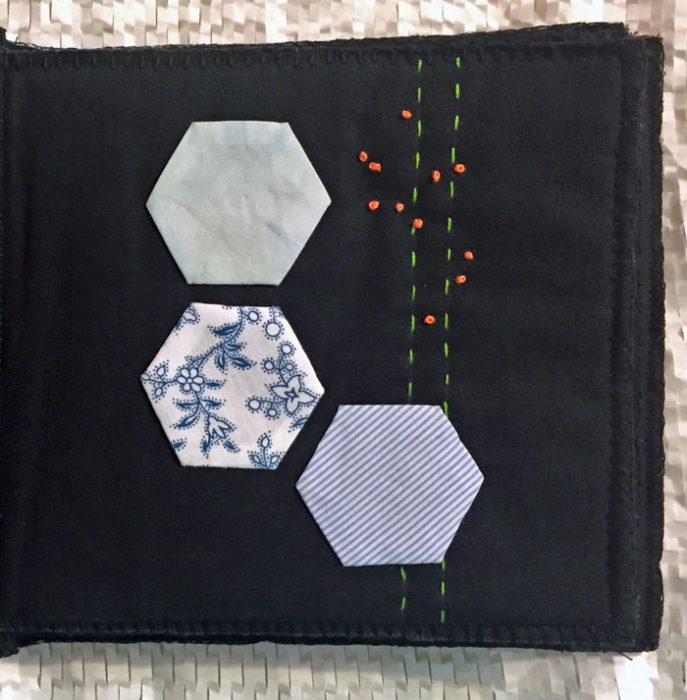
The pages are about 6″ square with one layer of batting between two pieces of fabric. The batting gives it some body. But, maybe the coolest thing about the structure of the book is that it’s made with signatures. These are groups of pages that are sewn as one into the spine of a book. In this case there are 3 signatures, creating 6 pages. The signatures are attached with a space between them, (1/2″ here,) which creates a flat spine. A very nice shape.

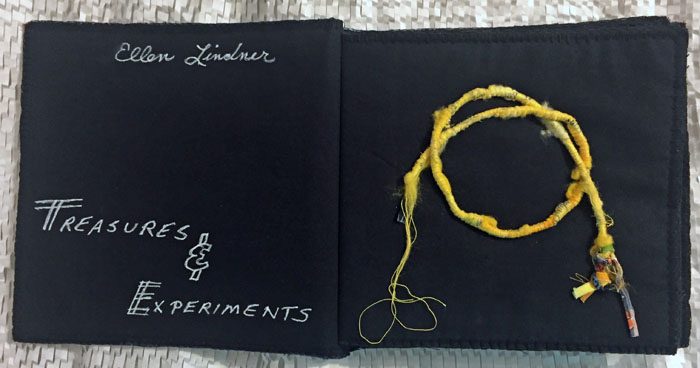
For my content I plan to add little samples and things I’ve done over the years, as well as ones I’ll do in the future.

A fabric book by Ellen Lindner. AdventureQuilter.com/blog

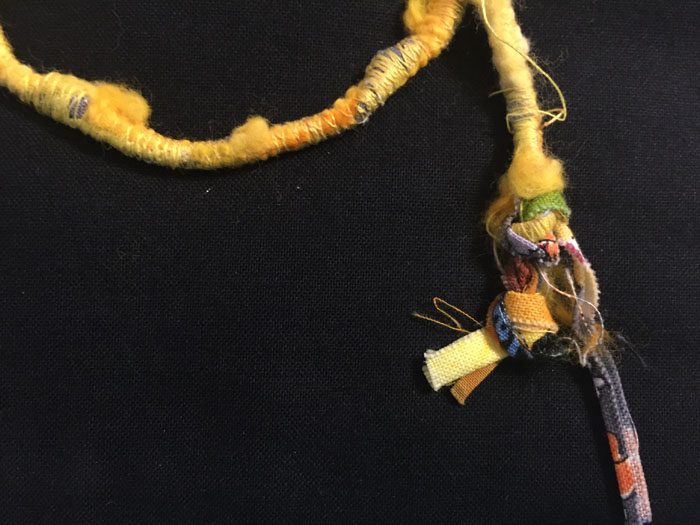
This first page shows a sample I did of cording made on the machine.

Isn’t the knot cool?

A fabric book - detail, by Ellen Lindner. AdventureQuilter.com/blog

The only other page I’ve done is one I did after the book was constructed. The batting layer makes it easy to slip a needle around without having stitches and knots showing on the back. A nice feature.

A fabric book by Ellen Lindner. AdventureQuilter.com/blog

This little book was quick to make and I look forward to adding little things to it.

Other bookish things I’ve tried:
Mixed media book
A book using tea bags
A video about how to make an accordion book

Ellen Lindner

14

Ice Dyeing

Have you tried ice dyeing? Oh my! It produces BEAUTIFUL brilliant colors and complex patterns.

At a recent group dyeing day, Dij taught us how to do it. First, she showed us various ways to bunch, scrunch, and secure the fabric. Like tie dye, the folds in the fabric affect the way the dye penetrates and they help create the patterns.

Ice Dyeing. Ellen Lindner, AdventureQuilter.com/blog

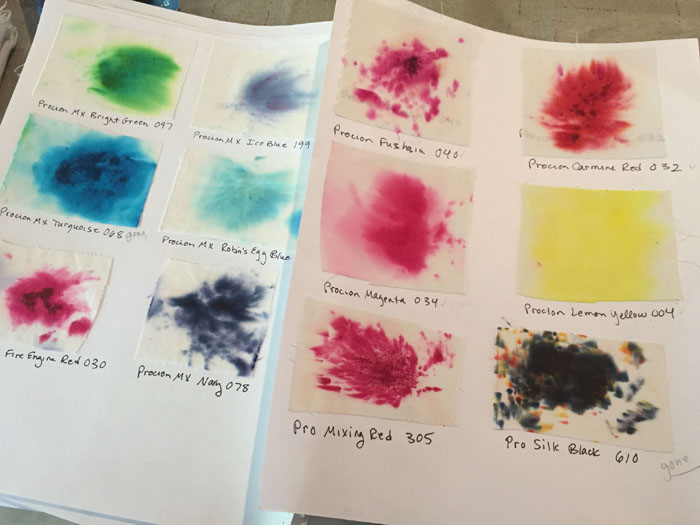
Before reaching for the dyes, Dij talked to us about color selection. She has made charts showing how each dye separates into other colors, and she keeps this in mind. (Check out the black swatch, bottom right.)

Ice Dyeing. Ellen Lindner, AdventureQuilter.com/blog

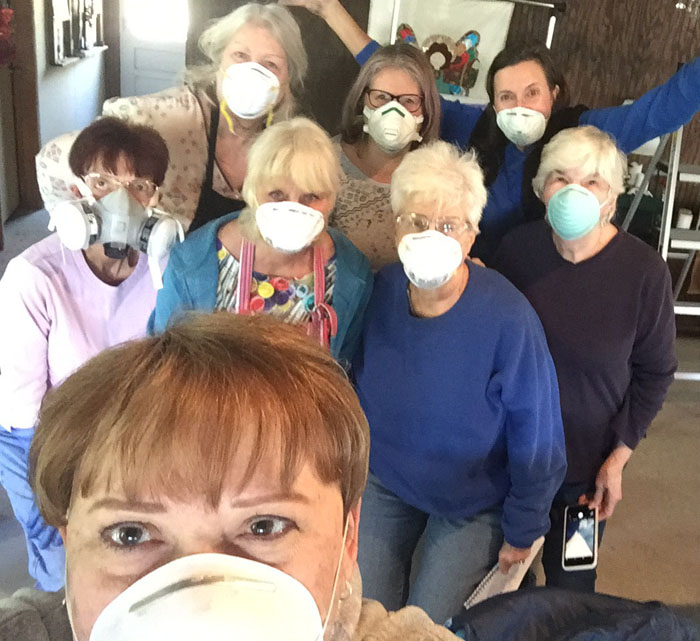
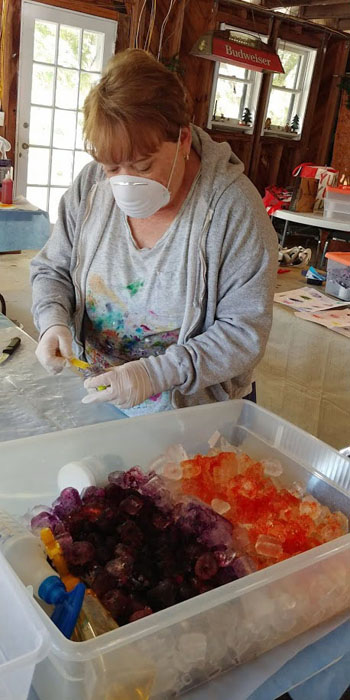
After manipulating our fabric, we placed it on elevated grids in plastic boxes and dumped a bunch of ice on top. Then, before grabbing the dyes we put on our dust masks.  VERY IMPORTANT

Ice Dyeing. Ellen Lindner, AdventureQuilter.com/blog

Next we sprinkled 3 colors of dry dye powder onto each fabric.

Ice Dyeing. Ellen Lindner, AdventureQuilter.com/blog

It didn’t look too great at this point.

Ice Dyeing. Ellen Lindner, AdventureQuilter.com/blog

We toted our containers home and waited for the ice to melt. (This is why the fabric was elevated: so it wouldn’t sit in the resulting puddle of mixed colors.) Then, it was time to thoroughly rinse and dry, and voila!

Ice Dyeing. Ellen Lindner, AdventureQuilter.com/blog

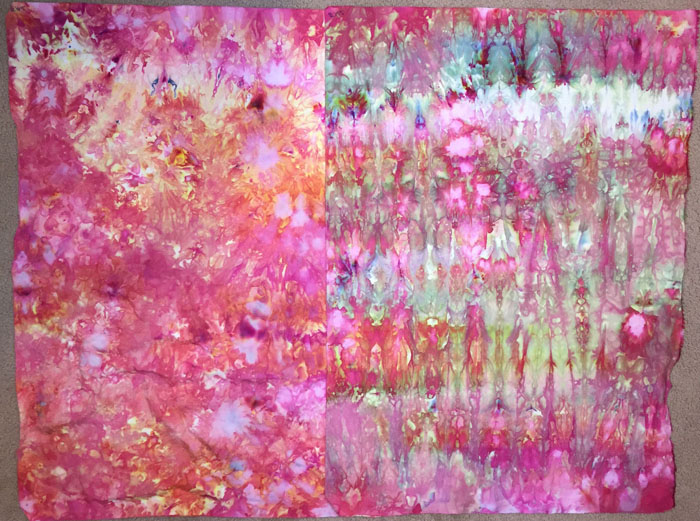
Can you believe how gorgeous these 2 fabrics are?!? The one on the left was loosely scrunched. The one of the right was folded into soft accordion folds and secured with rubber bands. I love these!

To say that all this dyeing was fun would be a huge under statement. It was joyful and exhilarating!

Ellen Lindner


9

Dirty Dozen Dyeing Day

My local art quilt group, the Dirty Dozen Fiber Artists,  had a dyeing day recently, at Ruth Anne’s “barn.”

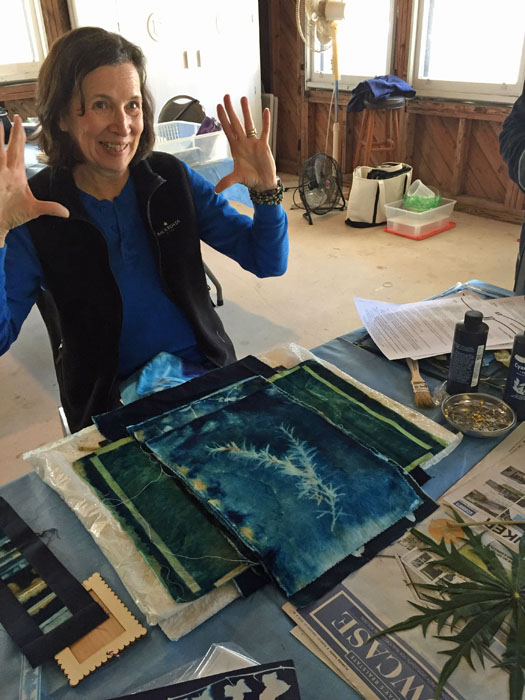
We started with Gabriele explaining wet cyanotype to us.

Dirty Dozen Dye Day. Ellen Lindner, AdventureQuilter.com/blog

It’s similar to sun printing, but with chemically treated fabric that turns dark blue. That is, until you add water to the process. After that the results are much less predictable, but always interesting.

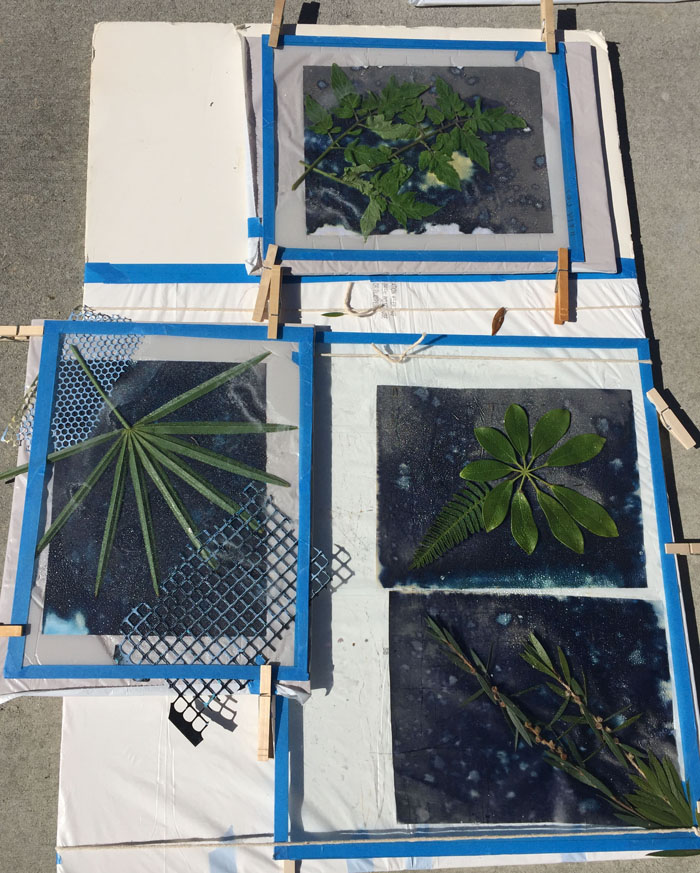
The treated fabric is sprayed with water and greenery or other resist items are placed on it. Glass is secured tightly on top to hold it all in place, and it’s put in the sun.

Dirty Dozen Dye Day. Ellen Lindner, AdventureQuilter.com/blog

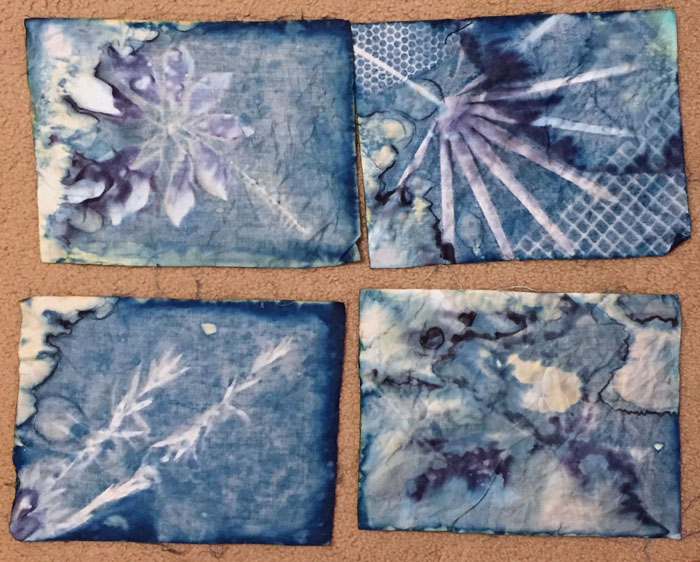
After a few hours it’s ready to come inside for curing, rinsing and drying. This involves leaving it in a dark environment for a while and a few other techniques. Finally, it’s ready.

Dirty Dozen Dye Day. Ellen Lindner, AdventureQuilter.com/blog

And the backs are pretty, too. I think I’ll use them as yardage and actually cut them up as needed.

Dirty Dozen Dye Day. Ellen Lindner, AdventureQuilter.com/blog

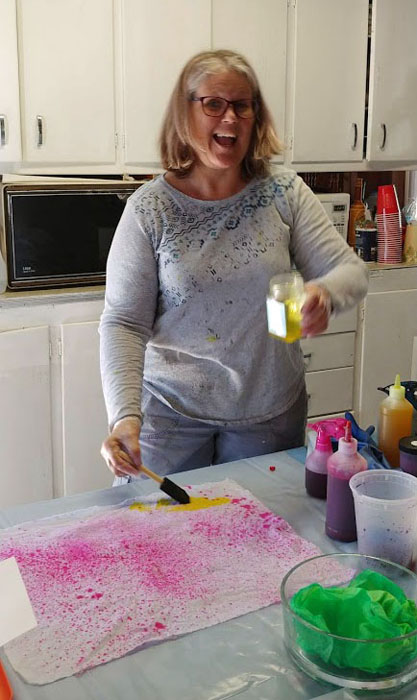
Sandy taught us about low immersion dyeing. She’s very subdued. NOT!

Dirty Dozen Dye Day. Ellen Lindner, AdventureQuilter.com/blog

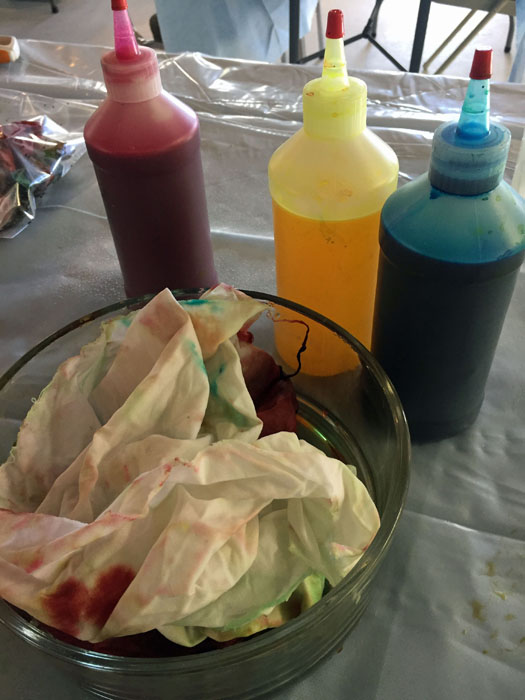
A common technique with low immersion dyeing is to manipulate the fabric in some fashion and to put it into a small space with the dye, so it stays in that shape. This prevents the dye from spreading evenly and interesting mottled colors can be achieved.

Dirty Dozen Dye Day. Ellen Lindner, AdventureQuilter.com/blog

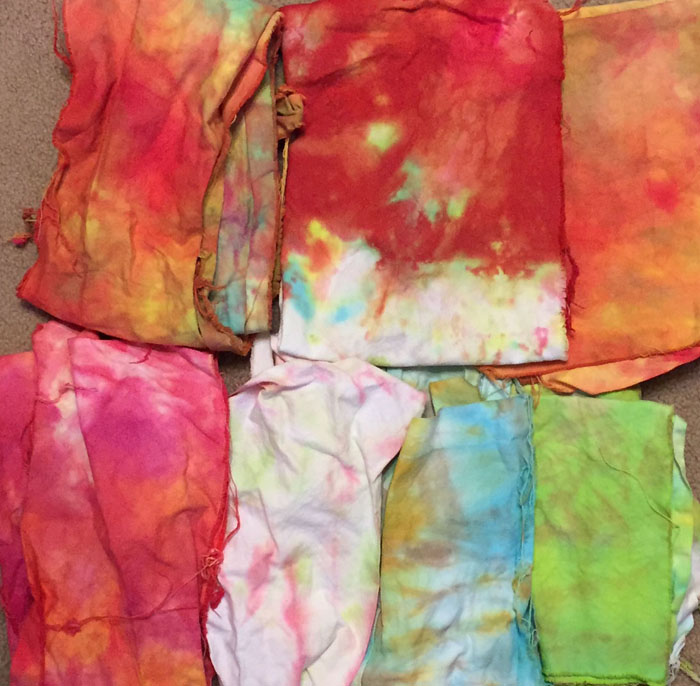
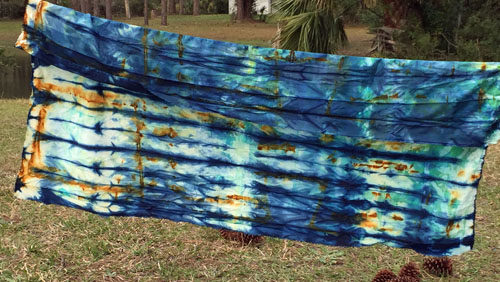
These are some of my resulting fabrics. Very useful, right?

Dirty Dozen Dye Day. Ellen Lindner, AdventureQuilter.com/blog

We also did ice dyeing that day and I’ll show you that in my next post.

I’m SO lucky to have this intrepid group of fiber artists to hang out with!

Ellen Lindner


1

Dirty Dozen Fiber Artists “Paris to Provence” Exhibit

My small art quilt group was thrilled to have our work exhibited collectively at the World Quilt Show Florida, recently held in Tampa, FL.

There was LOTS of prep work before the exhibit was ready to hang: photos, proposals, layout planning, technical figuring, signs to make, attaching quilts onto felt panels, and finally, installing everything. Some of us went over a day early to accomplish that, including Jared, the husband of one of our members. He designed the signs for us and helped hoist the high stuff.

Dirty Dozen Fiber Artists Exhibit in Tampa. Ellen Lindner, AdventureQuilter.com/blog

Nine of our members (and former members) had work in the show.  They were Jill Brown, Gabriele DiTota, Terri Drake, Elizabeth King, Ellen Lindner, RuthAnne Parker, Dij Pacarro, Kathryn Robinson, Laura Ruiz, and Becky Stack.

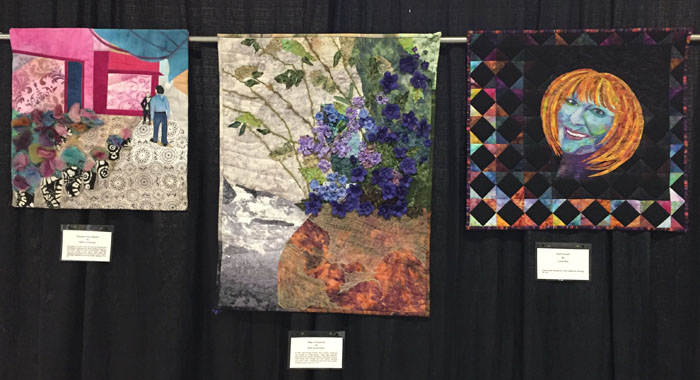
The exhibit featured the results of three group challenges and was called “Paris to Provence.” It filled six panels, plus a title panel. This is where the sign was and it featured one quilt from each of the three challenges.

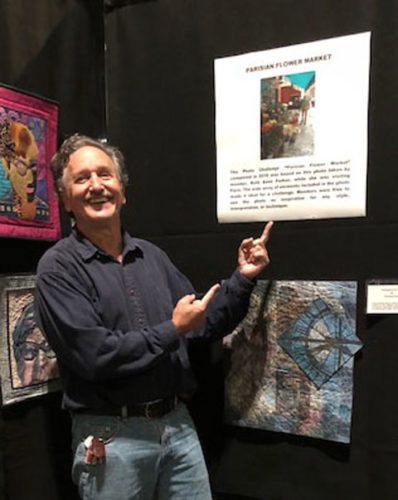
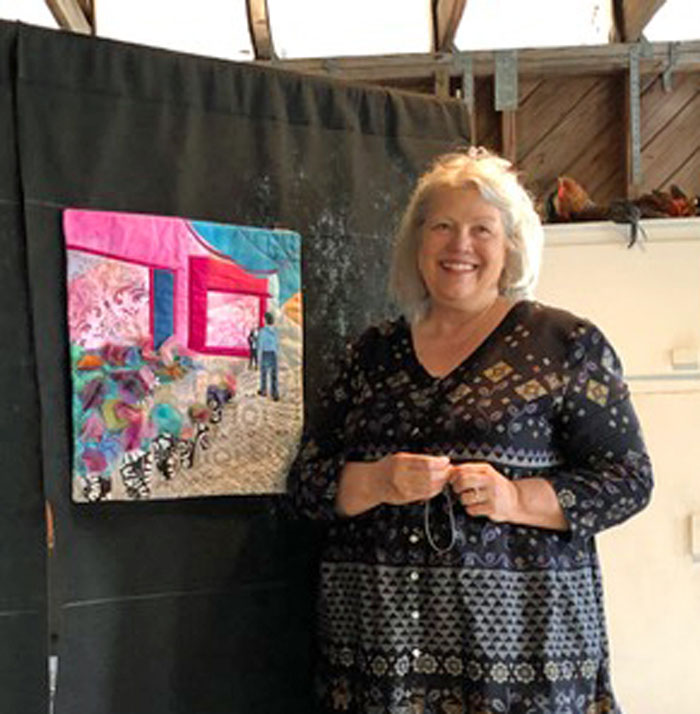
Shown below are Kathryn’s “Parisian Flower Market” piece, Ruth Anne’s “Welcome to Provence,” and Laura’s self-portrait.

Dirty Dozen Fiber Artists Exhibit in Tampa. Ellen Lindner, AdventureQuilter.com/blog

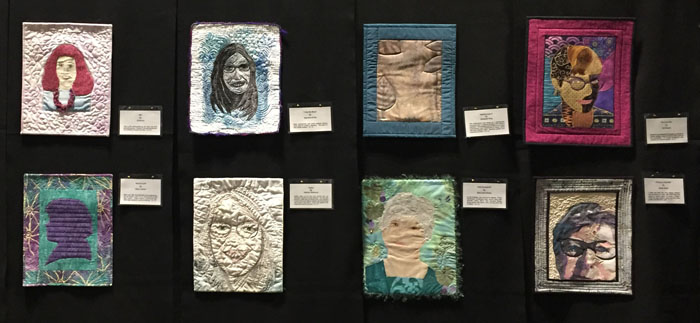
The first panel featured our self-portraits.  These are important because they’re a requirement to join the group. They’ve worked very well as a “litmus test” of sorts. Those who are comfortable making a self-portrait are generally good candidates for the group, and vice versa.

Dirty Dozen Fiber Artists Exhibit in Tampa. Ellen Lindner, AdventureQuilter.com/blog

Top row: Jill, Gabriele, Elizabeth, and Dij.  Bottom row: me, Kathryn, Ruth Anne, and Becky. The harsh lighting made these look a little odd.

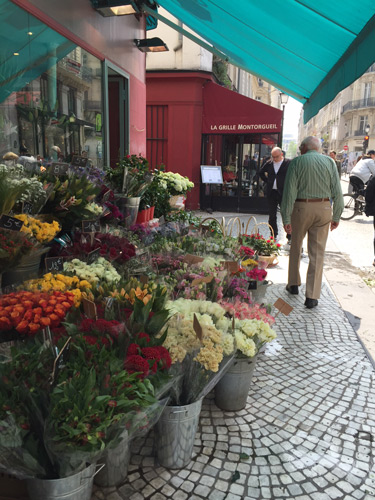
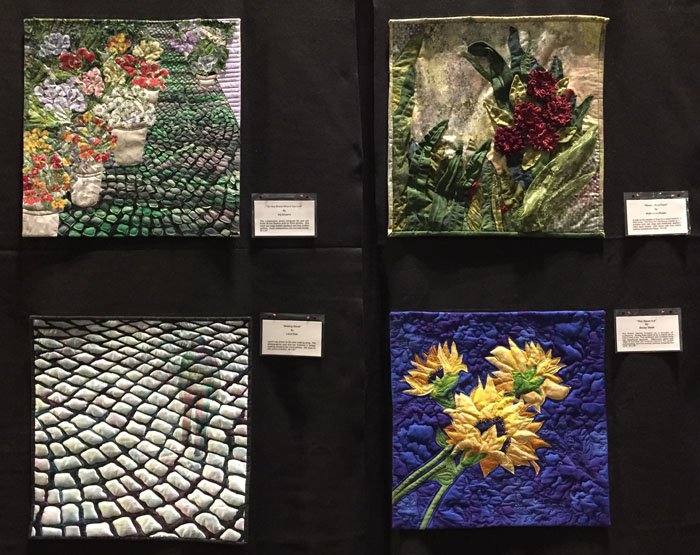
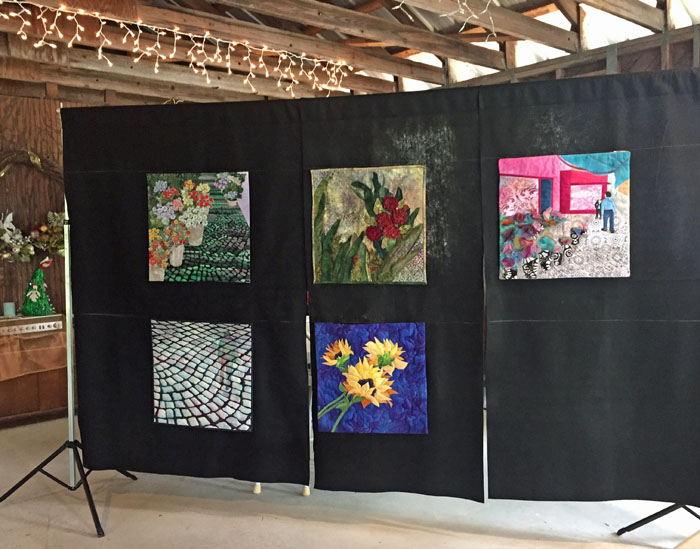
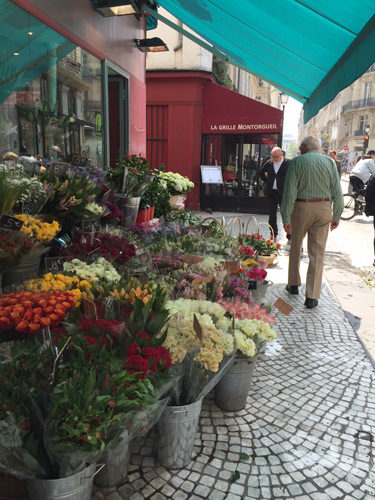
The next two panels showed off our “Parisian Flower Market” pieces. With these, we were all inspired by this photo.

Flower Stall Challenge. Ellen Lindner, AdventureQuilter.com/blog

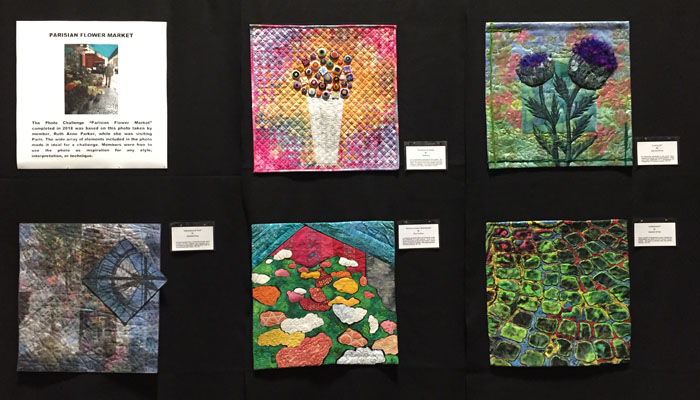
Here’s panel one. Cool, right?

Dirty Dozen Fiber Artists Exhibit in Tampa. Ellen Lindner, AdventureQuilter.com/blog

Above, top row: Jill & Gabriele, Bottom row: Elizabeth, me, & Gabriele

Panel Two shown below. Top row: Dij, & Ruth Anne. Bottom row: Laura and Becky

Dirty Dozen Fiber Artists Exhibit in Tampa. Ellen Lindner, AdventureQuilter.com/blog

Isn’t it amazing how different they all are? That’s what we love about these challenges.

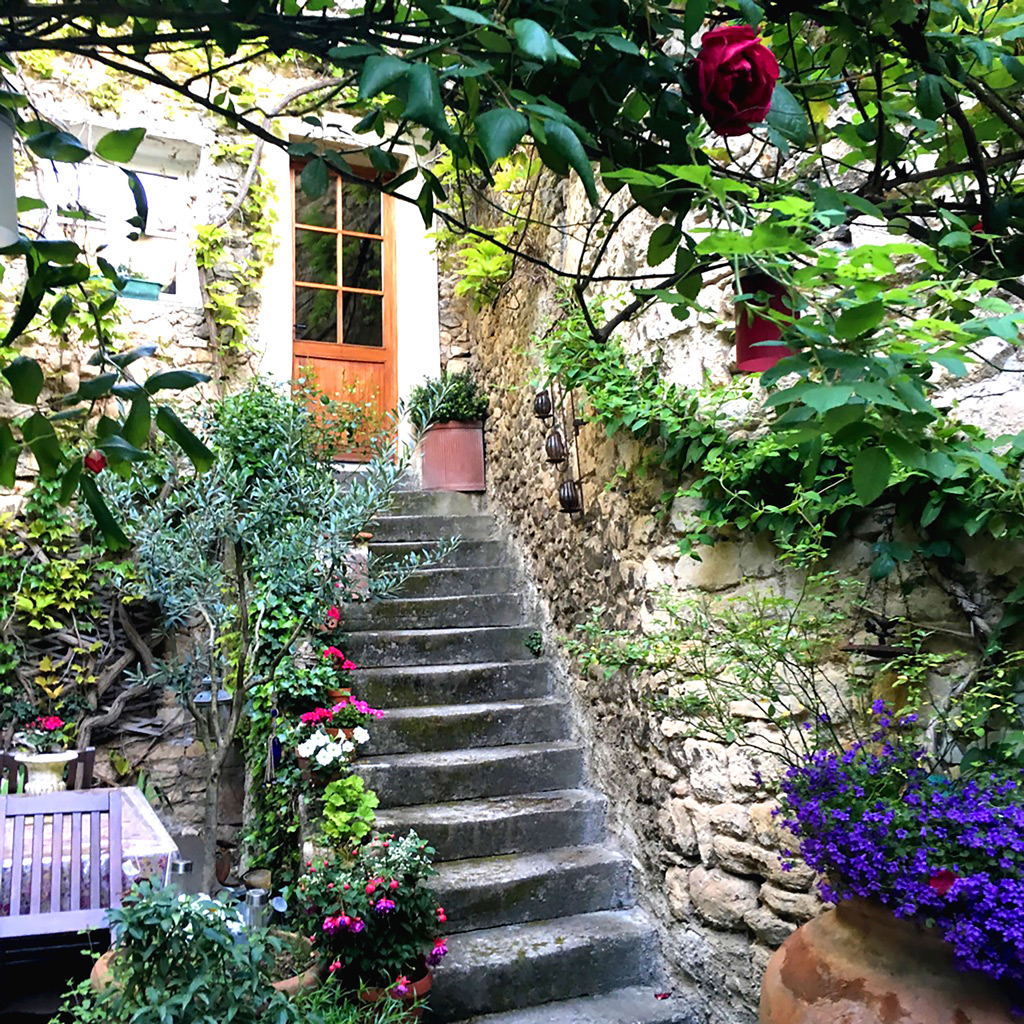
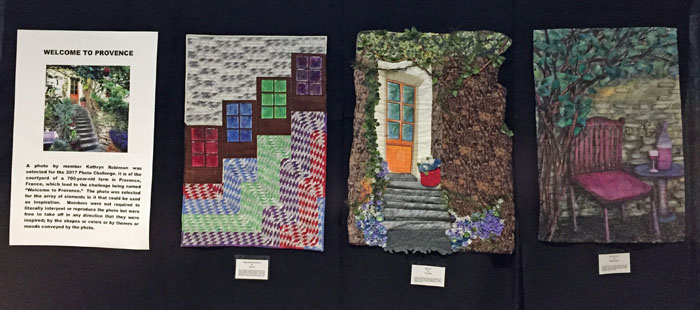
For our “Welcome to Provence” challenge, we used this photo as our inspiration source. We always choose an image with a lot going on, knowing that this will produce more diverse results.

Welcome to Provence inspiration photo. Ellen Lindner, AdventureQuilter.com/blog

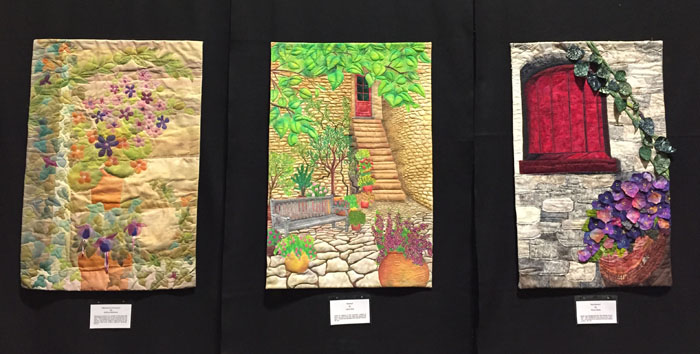
Panel One below. Work made by Jill, Terri, and Gabriele.

Dirty Dozen Fiber Artists Exhibit in Tampa. Ellen Lindner, AdventureQuilter.com/blog

Panel Two below. These pieces were created by Elizabeth, me, and Dij.

Dirty Dozen Fiber Artists Exhibit in Tampa. Ellen Lindner, AdventureQuilter.com/blog

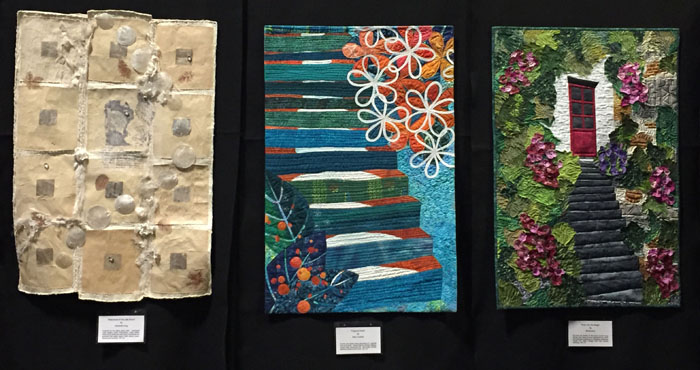
And the final panel, with pieces made by Kathryn, Laura, and Becky.

Dirty Dozen Fiber Artists Exhibit in Tampa. Ellen Lindner, AdventureQuilter.com/blog

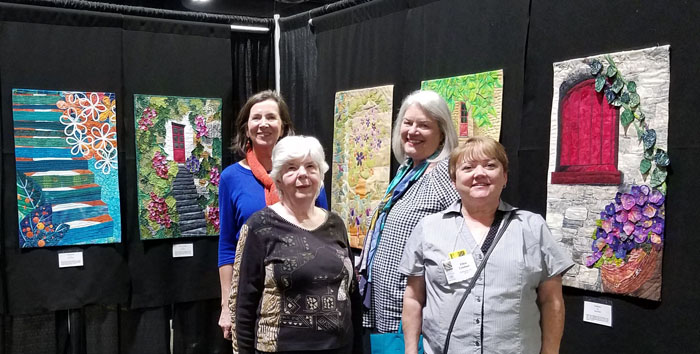
We weren’t all able to be at the show at the same time, but we did manage to get a photo with four of us. L-R: Gabriele, Ruth Anne, Kathrn, and me.

Dirty Dozen Fiber Artists Exhibit in Tampa. Ellen Lindner, AdventureQuilter.com/blog

It was great to have our work shown to a new audience! These same pieces will be in three AQS shows later this fall: Grand Rapids, Paducah, and Charleston. I hope you get to see them!

Ellen Lindner

0

Hangin’ Day

My local art quilt group, Dirty Dozen Fiber Artists, is preparing an exhibit for an upcoming regional show. It has been A LOT of work, but it’s finally coming together. The culmination of our planning and creating was Hangin’ Day, the day we pinned everything to black felt panels to create a cohesive exhibition.

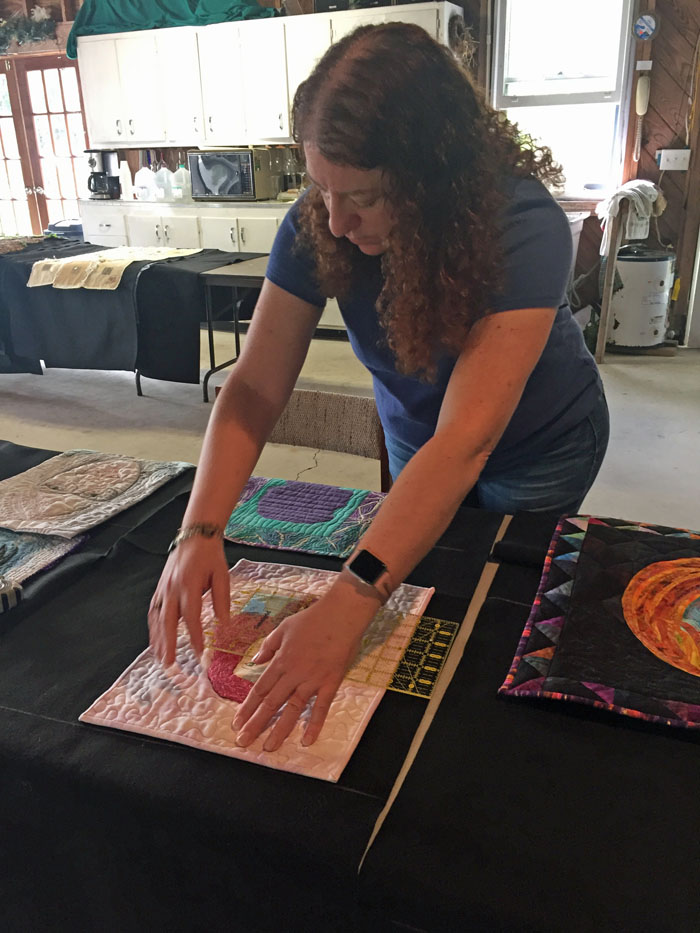
There was a complex master plan and everything had to be measured and pinned.

Quilt Hangin' Day. Ellen Lindner, AdventureQuilter.com/blog
Jill at work on self-portraits
Quilt Hangin' Day. Ellen Lindner, AdventureQuilter.com/blog
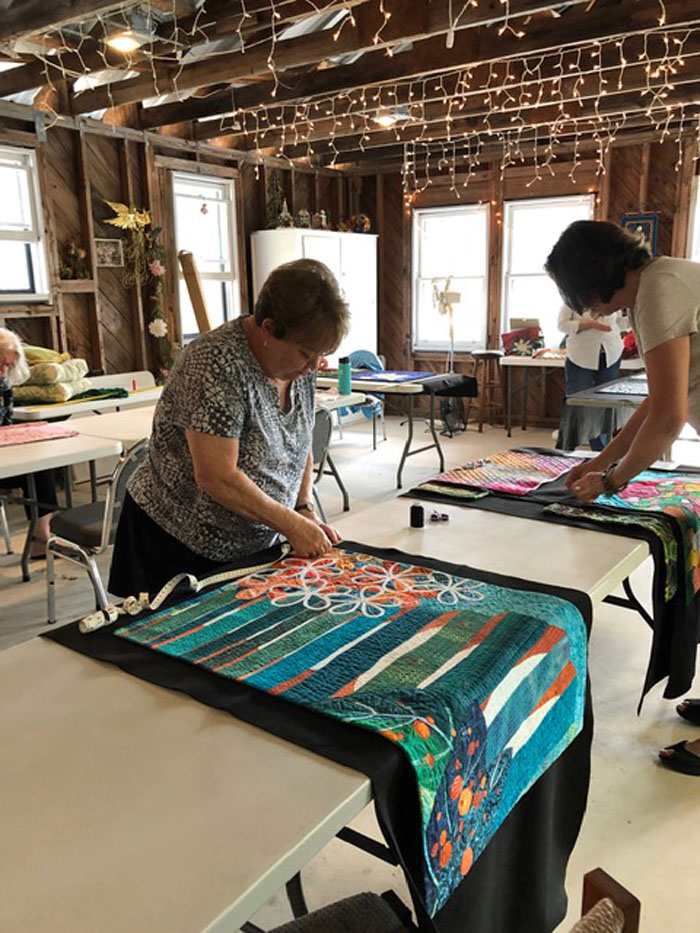
Gabtriele and me working on some of the largest pieces.

Don’t we have an awesome space to work? One of our members, Ruth Anne Parker, is VERY generous with her “barn.” It’s a fabulous space for projects during the cooler months.

After pinning, we could peel back each quilt to access the hanging sleeves and tack though those with one of those tacking gizmos. It worked beautifully and we finally got to see the rewards of our work. This is one of the sections in the Parisian Flower Market challenge. It looks pretty awesome, right?

Quilt Hangin' Day. Ellen Lindner, AdventureQuilter.com/blog
One of the Flower Market Sections

Of course, it will hang much higher when on display. We just kept it low to preview with easy access.

Quilt Hangin' Day. Ellen Lindner, AdventureQuilter.com/blog
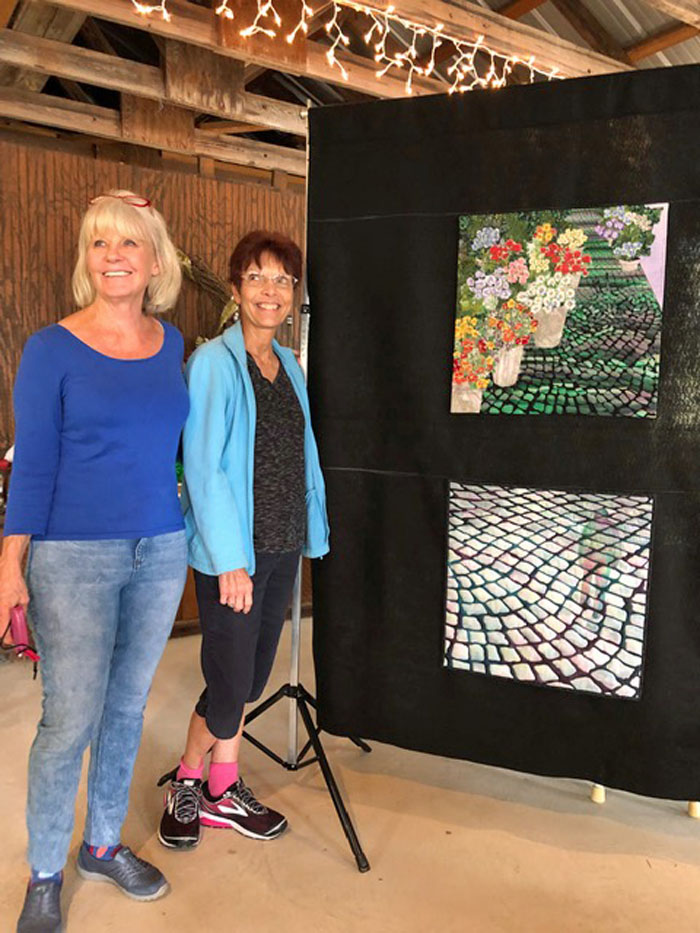
Laura (L) and Dij (R) standing next to their Flower Market pieces, bottom and top, respectively.
Quilt Hangin' Day. Ellen Lindner, AdventureQuilter.com/blog
Kathryn with her Flower Market piece

I’m so proud of us! I think this is going to be an extraordinary display. It will include 29 quilts which make up our Self-Portraits, the Parisian Flower Market Challenge, and our Welcome to Provence Challenge. The self-portraits are a requirement to be in the group. The other two are challenges we did in which we were all inspired by the same photo. The different interpretations are really interesting!

Where can you see all this creativity? Glad you asked. All six sections of quilts will be at the World Quilt Show Florida, at the Tampa Convention Center, January 31 – February 2. I can’t wait!

Ellen Lindner

0

Flower Stall Challenge

My local art quilt group, The Dirty Dozen Fiber Artists, are at it again.  We’re doing a group challenge in which we all use the same inspiration photo.  This time we’re using the photo below, taken on a street in Paris.

Flower Stall Challenge. Ellen Lindner, AdventureQuilter.com/blog

As usual, we’ve selected a photo with lots going on.  This works well, since different artists will focus on different components, or maybe just the colors, just the shapes, etc. (What intrigues you?)

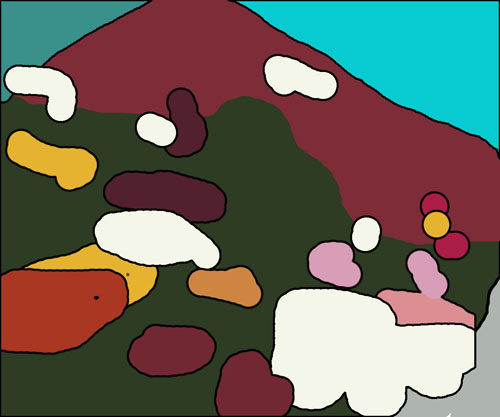
The thing that got my attention the most was the blue-green awning, followed closely by the burgundy wall. I was pretty sure I wanted to do a somewhat abstract interpretation and I thought these elements had great colors and good shapes.  I was also intrigued by the pattern of the grey stones in the sidewalk. I played around with these things and:
1 – decided against using the stones pattern,
2 – cropped and abstracted the flowers and nearby buildings.

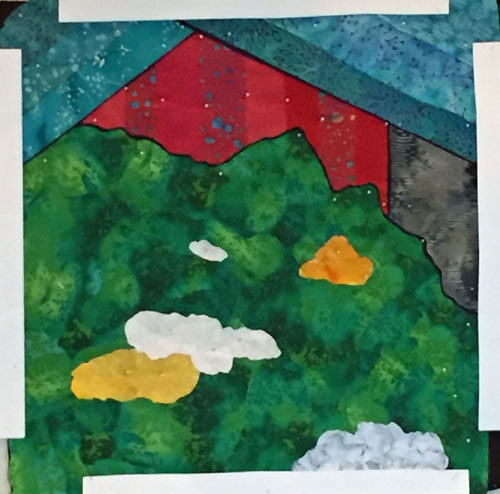
This is what I came up with.  (A computer sketch.) Can you see it?  As you can tell, I outlined each shape with black.  Not quite sure why, but I really liked the effect.  (I’ve never done it before.)

Flower Stall Challenge. Ellen Lindner, AdventureQuilter.com/blog

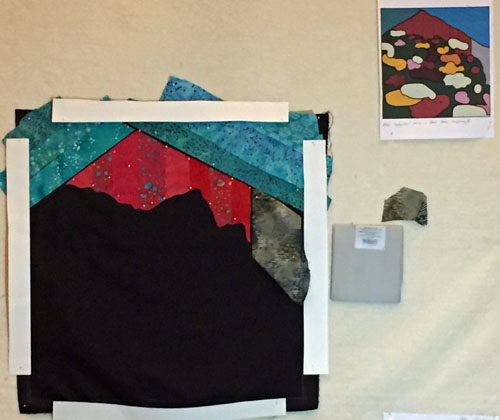
At the recent retreat, this was my project.  Here I am, just getting started.  As you can see the dimensions have changed to square, as opposed to the original rectangular format.

Flower Stall Challenge. Ellen Lindner, AdventureQuilter.com/blog

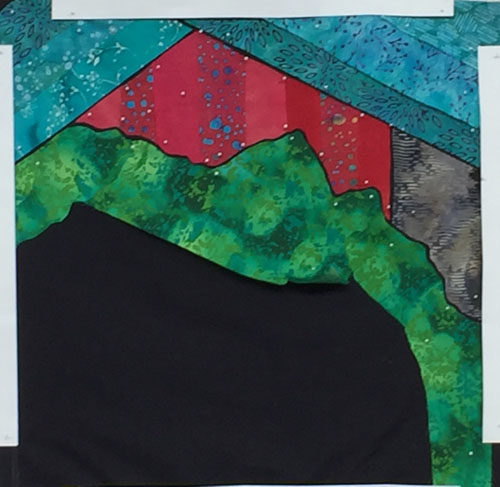
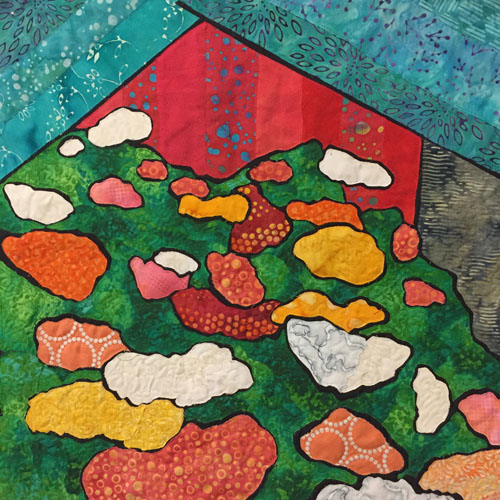
I used lots of green scraps (left over from my stint on Quilting Arts TV,) to create the green backdrop.  I was LOVING the effect of the skinny black line!

Flower Stall Challenge. Ellen Lindner, AdventureQuilter.com/blog

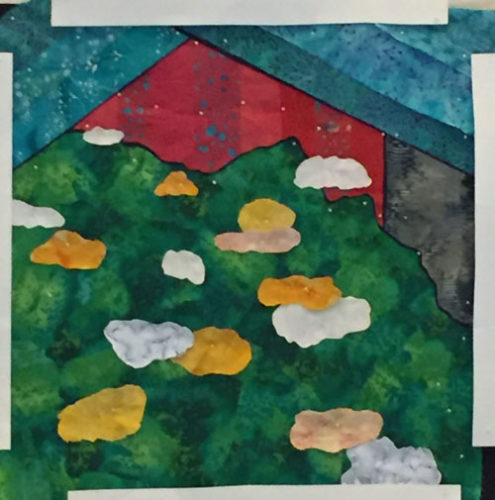
Then, I began to add the flowers.

Flower Stall Challenge. Ellen Lindner, AdventureQuilter.com/blog

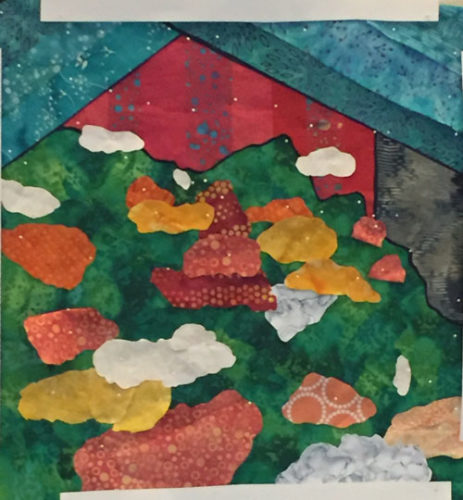
Screech.  Wait a second!  There’s something wrong with the composition above.  Can you see what it is?

The problem is there’s not enough depth perspective.  All the flower clusters are similar in size.  In reality the close ones need to be MUCH larger.  More like these first few from my second attempt.

Flower Stall Challenge. Ellen Lindner, AdventureQuilter.com/blog

See what I mean?  Even with just a few blossoms in place, a sense of depth is beginning to develop.  I continued to pay attention to this as I added the remaining floral clusters.

Flower Stall Challenge. Ellen Lindner, AdventureQuilter.com/blog

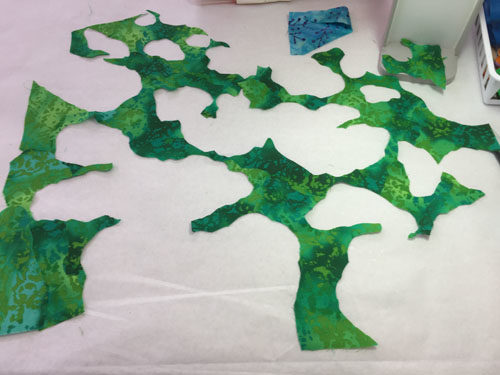
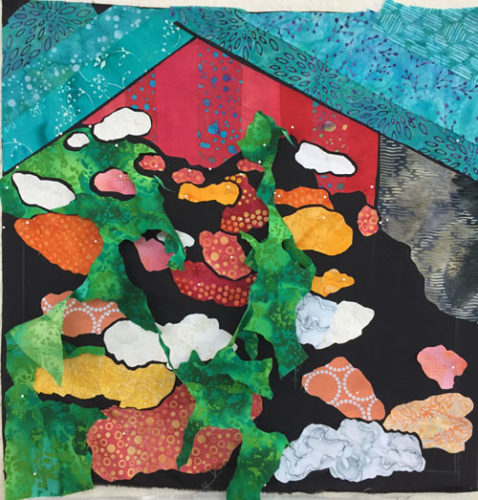
This is the final composition above.  However, I still needed to add the black lines around everything.  This is where I totally LOST MY SENSES and decided on a terribly complex and time consuming technique.  It was so traumatic I’m not sure I’m ready to talk about it.  But these next two photos will tell the sad tale.

Flower Stall Challenge. Ellen Lindner, AdventureQuilter.com/blog

Flower Stall Challenge. Ellen Lindner, AdventureQuilter.com/blog

WHAT was I thinking?

Thankfully, it all looked good after much fiddling and tweaking.  Here it is, quilted.

Flower Stall Challenge. Ellen Lindner, AdventureQuilter.com/blog

Finally! Lessons learned/reminded:
– Keep it simple
– Pay attention to perspective
– Persevere when things become difficult.

I need a name for this piece.  Any suggestions?

Ellen Lindner
P.S. I’ll photograph this properly and add it to my website soon.
P.P.S. Check out some of the other Dirty Dozen challenges with the links below.

6

Indigo Results!

Wow!  Wait till you see these fabulous results from our dying day.

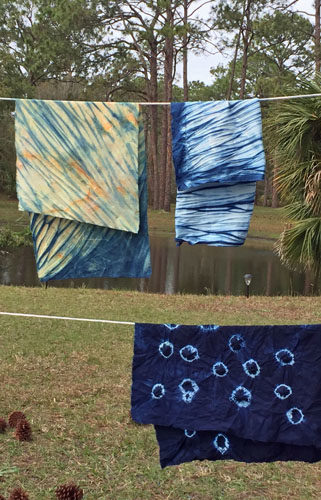
We began to get an idea of what lay ahead as Gabriele unfolded her pieces and hung them up.  Aren’t these awesome?

Indigo Results! Ellen Lindner, AdventureQuilter.com/blog

Gabriele used colored fabric for some of her dying, like the yellow and blue one below.

Indigo Results! Ellen Lindner, AdventureQuilter.com/blog

And check this one out! Me likey! Gabriele is very skilled with surface design and she put a lot of thought (and stitching) into her pieces.

Indigo Results! Ellen Lindner, AdventureQuilter.com/blog

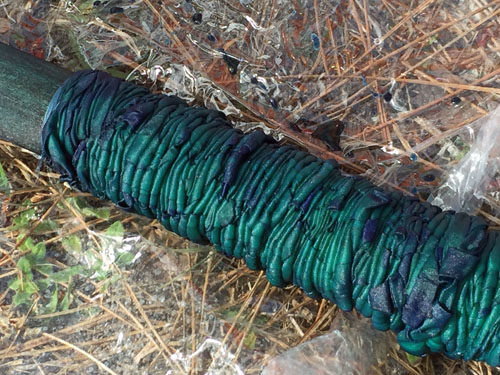
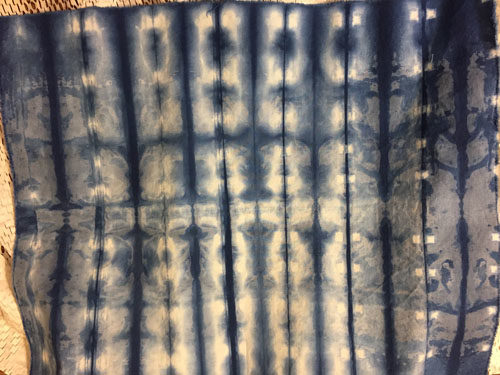
These pieces with the striped effect were pole wrapped and scrunched tightly.  These tight folds created a barrier to the dye.

Indigo Results! Ellen Lindner, AdventureQuilter.com/blog

Pole wrapped

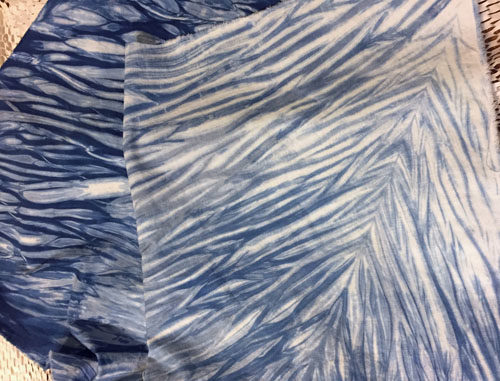
And here are some of my own wrapped and scrunched pieces. The subtle chevron pattern on the right occurred (accidentally) when I folded the corner of the fabric before wrapping it.

Indigo results! Ellen Lindner, AdventureQuilter.com/blog

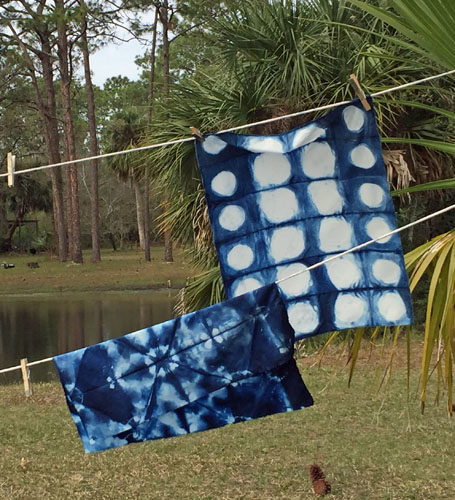
This was one folded and then held in place with clothes pins.  Didn’t they make a neat pattern?

Indigo results! Ellen Lindner, AdventureQuilter.com/blog

And that’s not all.  I’ve got more fabrics in various colors to show you in the next post.  Loving it all!

Ellen Lindner

1

It Was a Good Day to Dye

Are you a Star Trek fan?  Do you know about Klingons?

It was a good day to dye. Ellen Lindner, AdventureQuilter.com/blog

They’re a very fierce fighting clan who’s motto is “It is a good day to die.” So, when I headed out the door to a recent dye session my husband pronounced it as “a good day to dye.”

And indeed, it was. The weather was perfect as the Dirty Dozen Fiber Artists gathered at Ruth Anne’s “barn.”  Kathryn kept us busy mixing, and timing, and mixing procion dyes inside.

It was a good day to dye. Ellen Lindner, AdventureQuilter.com/blog

Kathryn

We had each previously stitched, folded, bound, and prepped our fabrics for dying.  It was time to mix the dye and throw them in!  At one point four of us were lined up stirring bundles of colorful fabric and watching the clock.

It was a good day to dye. Ellen Lindner, AdventureQuilter.com/blog

L-R: Jill, Becky, Dij

I was out of sight on the right. Someone said we looked like witches stirring our brew and Ruth Anne got a witch’s hat and plopped it on my head!

It was a good day to dye. Ellen Lindner, AdventureQuilter.com/blog

Outside, we did something almost magical: dying with indigo!  Oh my!  Becky was the mistress of the pots.

It was a good day to dye. Ellen Lindner, AdventureQuilter.com/blog

Have you ever dyed with indigo?  I hadn’t and I found it to be totally amazing!  The fabric comes out of the vat almost yellow.  But, it very quickly turns yellow-green.  Within a minute or so it’s green and eventually, after absorbing enough oxygen, it turns dark blue.  The transformation was mesmerizing.

This is one of my fabrics, shortly after coming out of the vat.  Can you see that some of the most exposed areas are starting to turn blue?

It was a good day to dye. Ellen Lindner, AdventureQuilter.com/blog

And here it is a few minutes later.

It was a good day to dye. Ellen Lindner, AdventureQuilter.com/blog

Kathryn bound the heck out of this piece of fabric.  Here it is shortly after coming out of the pot.

It was a good day to dye. Ellen Lindner, AdventureQuilter.com/blog

And a few minutes later.

It was a good day to dye. Ellen Lindner, AdventureQuilter.com/blog

All those little rubber bands will create white rings and the pleating will create some variation as well.

Gabriele was smart enough to string up a clothes line. This was great because hanging our fabrics allowed oxygen to penetrate from all directions.  It all looked like an abstract art installation.

It was a good day to dye. Ellen Lindner, AdventureQuilter.com/blog

It was a good day to dye. Ellen Lindner, AdventureQuilter.com/blog

Ruth Anne’s “barn”

The photo above shows the barn.  Aren’t we LUCKY to get to play in such a fabulous place?  Ruth Anne is a very gracious hostess.

Fabrics are being washed an ironed as we speak, so I’ll have some photos of finished fabrics in the next post.  Can’t wait!

Ellen Lindner
P.S. My apologies to Ruth Anne and Gabriele, whose photos I didn’t get.

4

“Fragrant Climb” Complete

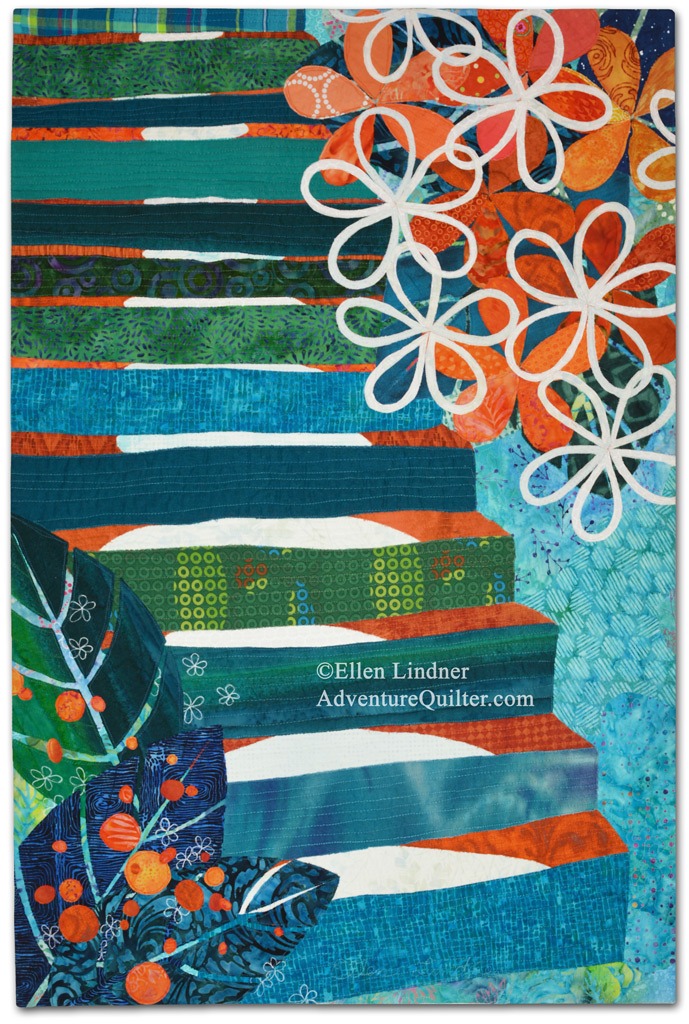
Here’s my challenge piece, complete.  I call it Fragrant Climb.

Fragrant Climb, an art quilt by Ellen Lindner. AdventureQuilter.com

Fragrant Climb

Detail:

Fragrant Climb - detail, an art quilt by Ellen Lindner. AdventureQuilter.com

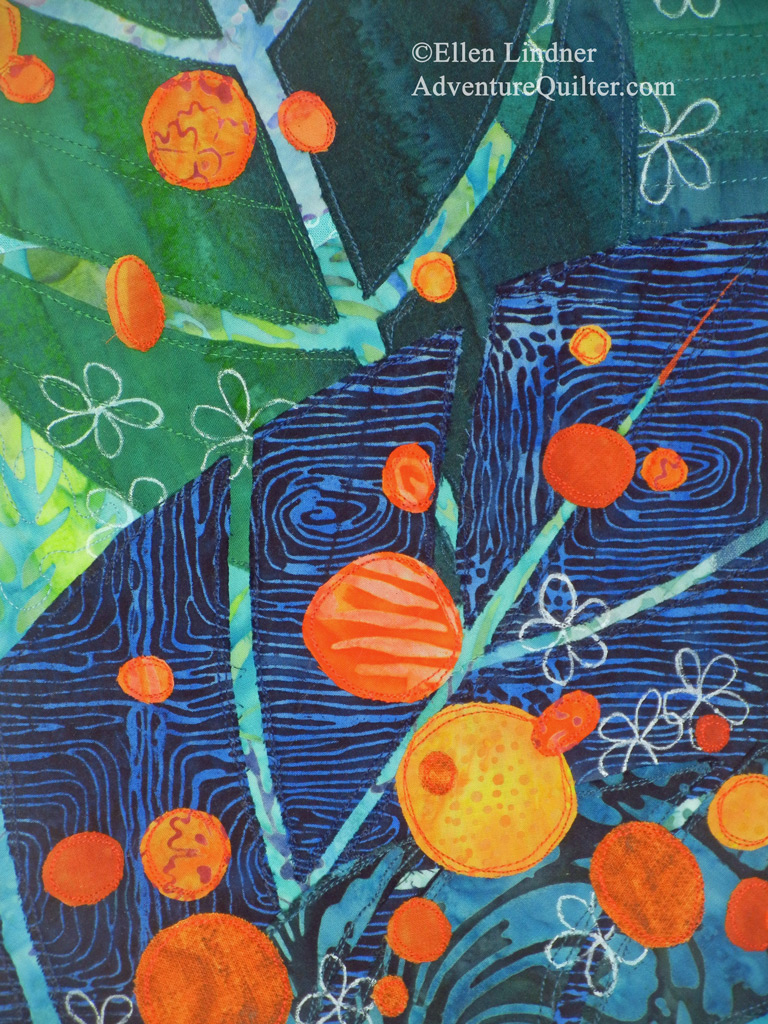
In a nod to the small flowers near the stairs in the inspiration photo, I drew on additional open-petal ones (above.)  I liked the effect and will use it again.

I’m pretty happy with this piece.  Especially since I wasn’t that crazy about the inspiration photo.  But, then, that’s why it’s called a challenge, right?

I encourage you to view a slide show showing all ten pieces made for this challenge.

Ellen Lindner
7