Tag Archives | Hanging

When it Comes to Hanging Artwork Size Matters

I have a new favorite app: ArtStage (available for iphone only.) The app allows me to digitally hang my artwork in various spaces. What fun!

When it Comes to Hanging Artwork Size Matters. Ellen Lindner, AdventureQuilter.com/blog

Don’t you love this little setting, above? What makes it perfect for my purposes is that it’s a good size for the size of Happy Family, the quilt. Can you see how it comes close to filling the space, but without being crowded? That’s exactly what you want.

Or, this one works, too. (And all our houses look this great, right?)

When it Comes to Hanging Artwork Size Matters. Ellen Lindner, AdventureQuilter.com/blog

And here’s a third scenario.

When it Comes to Hanging Artwork Size Matters. Ellen Lindner, AdventureQuilter.com/blog

I love the opportunity to preview my artwork in these various spaces. (With the app you can even upload images of your own space, but that version is not free.)

Need some new art for your space?

Ellen Lindner
P.S. Happy Family is available for purchase, at $1100. Use the link at the bottom of the page to email me if you’re interested.

0

Giving Away Quilts – and the Prep that Goes with It

My inventory of quilts has gotten just WAY too big! I estimate that I have 250 in the house. Granted, some of them are only 5 x 7, but most are poster sized or larger. Of course, they’re not all master pieces, but they’re still nice enough to hang as art. So, I decided to give away some of them, starting with my nieces and nephews. I let each of them pick one and started prepping the hanging gear.

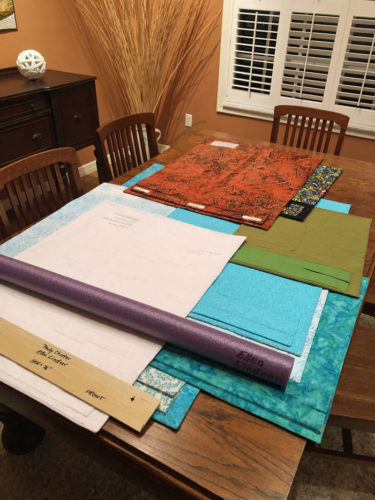
This is my dining room table now, (at the end of several days of work.)

Prepping quilts for shipping. Ellen Lindner, AdventureQuilter.com/blog

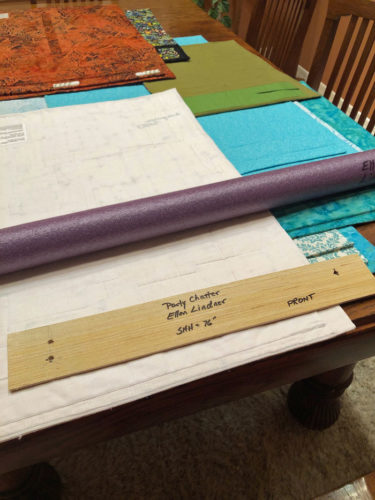
Each quilt has a hanging sleeve on the back and I cut a wooden slat to fit into it. Typically the quilts are hung with 2 nails. The slat and the sleeve have corresponding holes. The slat shown below fits into the white quilt that’s face down. (Oops, I drilled an extra nail hole.)

A hanging slat, and prepping quilts for shipping. Ellen Lindner, AdventureQuilter.com/blog

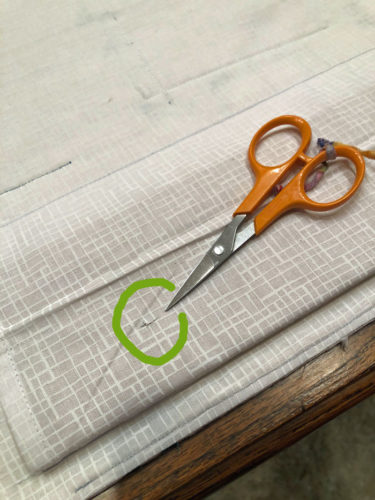
Once inserted, I feel around for the hanging holes and cut corresponding “wounds” in the sleeve.

A quilt hanging sleeve with a wound for the nail. Ellen Lindner, AdventureQuilter.com/blog

It all hangs very nice and flat on the wall.

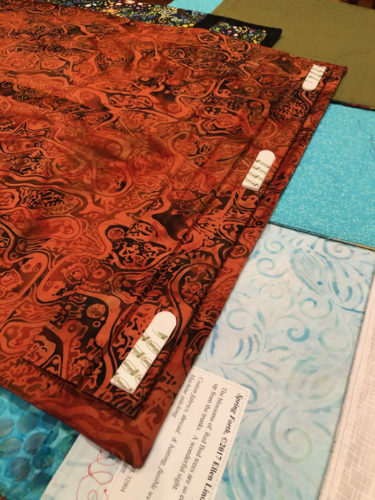
But, sometimes a different method is called for. For instance, some of these are going to apartment dwellers, who can’t use nails in their walls. In that case, I still use a sleeve and slat. But, this time, I staple half of a Command Strip through the sleeve and slat. The staples go through far enough to make it all secure, but not so far as the protrude out the front. The corresponding half of the Command strip is velcroed in place and it’s ready to go.

A quilt with Command strips. Ellen Lindner, AdventureQuilter.com/blog

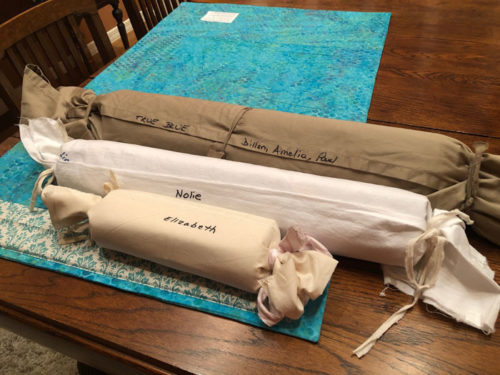
Once the hardware is handled, the quilts are rolled onto pool noodles, right sides facing out. I wrap them in fabric and they’re ready for shipping. (Although in this case I’ll be hand delivering five quilts. Three are wrapped together in the brown roll. Those recipients live near one another.)

It’s very satisfying to see them all prepped and ready to go. I’ll see my nieces and nephews at an upcoming family reunion and I’m looking forward to handing them off.

Quilts rolled and ready for shipping. Ellen Lindner, AdventureQuilter.com/blog

I’m feeling good about this.

Is your inventory growing? What do you do the not-quite-show-worthy ones?

Ellen Lindner

14

Use a Slat to Hang Your Quilt

After making a hanging sleeve for your quilt it’s time to make the slat that will go in it.

The slat should be made from lightweight but sturdy wood. My husband cuts strips of luan  door skin for me. I can then cut them to length with a utility knife. You can also look for wood trim and have the hardware store cut it to length of you.

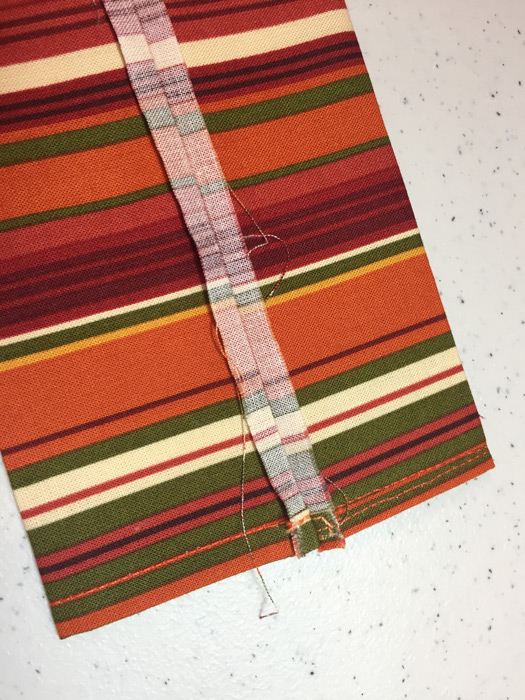
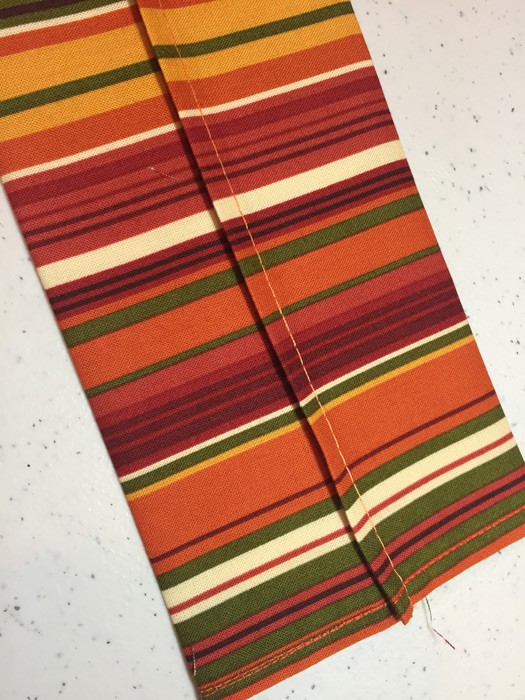
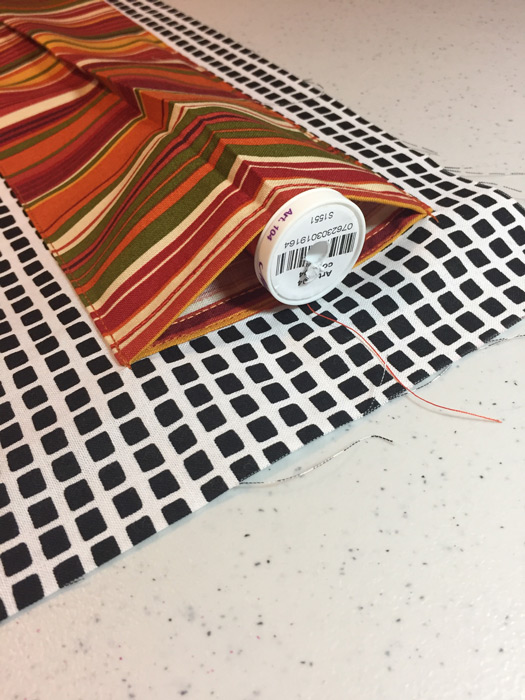
What length, you ask? It should match the length of the sleeve. (In the following photos, the striped fabric is the hanging sleeve and the black and white fabric is the faced backing.)
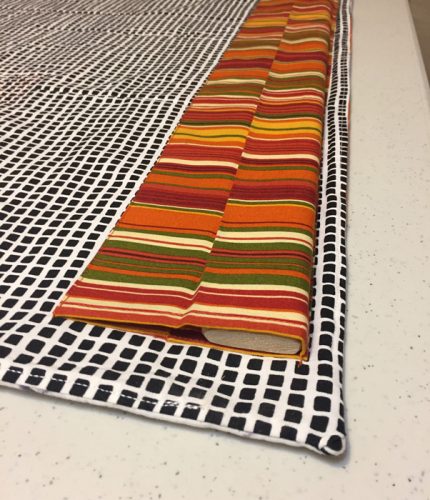
Use a slat to hang your quilt. Ellen Lindner, AdventureQuilter.com/blog

This slat is much heftier than I usually use – just because it’s what I had on hand.

Drill hanging holes, about 1/4″ wide about 2″ from each end. The holes should be in the top half of the slat. In the photo below, the slat has been pulled out temporarily to show the holes.
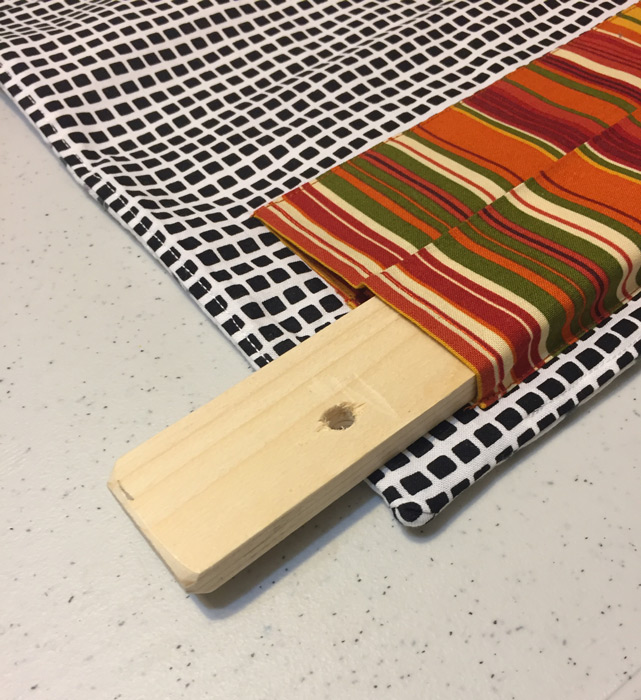
Use a slat to hang your quilt. Ellen Lindner, AdventureQuilter.com/blog

This slat is much heftier than I usually use – just because it’s what I had on hand.

Insert the slat into the sleeve and center it, left to right. Then, scoot it up as high as it can go toward the top of the sleeve. (Gravity will cause this shift when hanging.) Feel around, through the sleeve, to find the drilled holes. Using sharp embroidery scissors,  cut a small X in each location. These allow the hanging nails to reach from the front of the slat, through the sleeve, to the wall. Use nails with a head to them, to allow them to catch the slat more easily.

This photo shows how it will all work. The head of the protruding nail is inside the sleeve, reaching through the slat hole, and the sleeve hole.
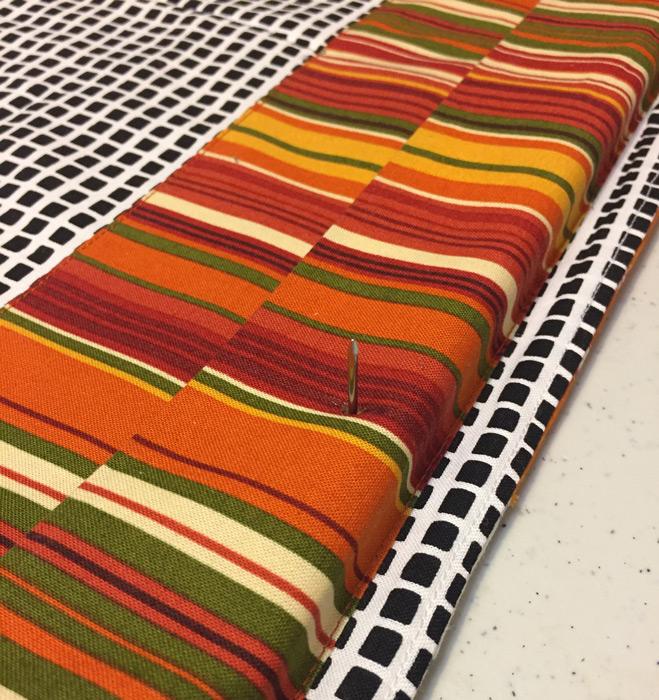
Use a slat to hang your quilt. Ellen Lindner, AdventureQuilter.com/blog

Now you’re ready to hammer two nails into the wall to support the quilt and the slat.
– Insert the slat in the sleeve. Determine the desired location and mark this on the wall.
– Remove the quilt and work with just the slat. Position it in the desired location, check that it’s level, and mark the  nail holes on the wall.
– Hammer nails into these two positions, leaving the nails protruding about ¼”.
– Reinsert the slat into the sleeve.
– You’ll probably need a helper for the actual hanging part. The idea is to lift the quilt onto the two nails, but you won’t be able to see them as you’re doing it. I find the hole and put my thumb over it in the front, while I hold the slat and quilt aligned with my other fingers on the back. IF the nails stay in place, you can just lift and set the slat/quilt combo on to the nails.
– However, the nails frequently slide into the wall. In that case, pull them out of the wall and put them into the slat in the correct orientation, now holding quilt, slat, and nail as you hunt for the hole in the wall. It’s generally not difficult but slightly awkward and definitely a 2 person job.  Voila!

These quilts were hung using slats like those described.

Using a Hanging Slat. Ellen Linder, AdventureQuilter.com/blog

“Crotons,” displayed in my home


Using a Hanging Slat. Ellen Linder, AdventureQuilter.com/blog

“Maybe a Maple,” displayed in my home

See how flat they are? Just like hanging a stiff piece of art.

And, if you do use a dowel, the excess sleeve fullness still allows it to hang pretty flat, like the one below.

Ellen Lindner with her art quilt Vine Ripened. AdventureQuilter.com/blog

I’d love to see installation photos after you get your quilt up!

Ellen Lindner
P.S. There’s a much easier version which works well for small quilts.
– Make the sleeve a couple of inches shorter, so the slat will protrude out both ends. This allows you to fold the quilt back and SEE the slat holes when hanging.
– The only down side is that the far left and right edges of the quilt are not supported by a slat. For heavier/larger quilts some sagging may be visible, especially over time.

0

First, Make a Hanging Sleeve

After seeing the post about my bedroom redo, Sandy asked how I hang my quilts. Here’s the photo that piqued her interest.

Ellen Lindner's Bedroom Redo. AdventureQuilter.com/blog

And here’s the scoop.
(If you purchase a quilt from me it will come ready to hang and you don’t need to read any of this.)

Making and attaching a hanging sleeve

First, I make a 4″ hanging sleeve. There are quite a few variations out there and this is my version.
– Cut a piece of fabric with the following dimensions:
– Length = the width of the trimmed quilt minus 1 1/2″ inches.
– Width 9″.

Stitch the sleeve together as follows:
– Hem each short end by pressing up 1/4″, then folding and pressing up an additional 1/4″, and stitching.

– Fold the fabric in half, WRONG SIDES TOGETHER, matching up the long cut edges.
– Press the long folded edge on the opposite side.
– Using a 1/4″ seam allowance, stitch along the long raw edges, creating a tube.

First, make a hanging sleeve. Ellen Lindner, AdventuerQuilter.com/blog

– Create a tuck by stitching with a long basting stitch along the opposing  folded crease, again with 1/4″ seam allowance.
– Repress, so the seam allowance is pressed open and is at the center of the back. The tuck will be on the center of the other side.

First, make a hanging sleeve. Ellen Lindner, AdventuerQuilter.com/blog

Next, the sleeve needs to be attached to the back of the quilt. Leave the tuck in place and position the seam side down.

If you’re facing your quilt you can attach the sleeve to the facing before attaching it to the quilt. To do so pin the sleeve to the right side of the cut facing, seam side down, positioning it 1″ below the top. Then top stitch close to each long edge. See this article on how to face a quilt.

If binding your quilt, stitch the top edge of the sleeve into the binding as you go. Hand stitch the bottom edge in place.

– Pick out the basting stitches. The fullness from the tuck will provide room for the depth of a hanging rod or slat.

First, make a hanging sleeve. Ellen Lindner, AdventuerQuilter.com/blog

The completed sleeve will be 4″ wide, from creased edged to creased edge.

Learn how to make a slat and use it to hang your quilt.

Ellen Lindner


0