Tag Archives | Non-Fabric Projects

Collaging with Magazine Pages

Do you ever hit a creative stumbling block? Or just don’t have the mental stamina to take on something major? How about a quick little collage with magazine pages.

I especially like doing this with calendar images. Since the images already relate to one another, it makes for easier going.

Here’s one I did with winter birds.

Collaging with Magazine Pages. Ellen Lindner, AdventureQuilter.com/blog

And with Western/Native American motifs.

Collaging with Magazine Pages. Ellen Lindner, AdventureQuilter.com/blog

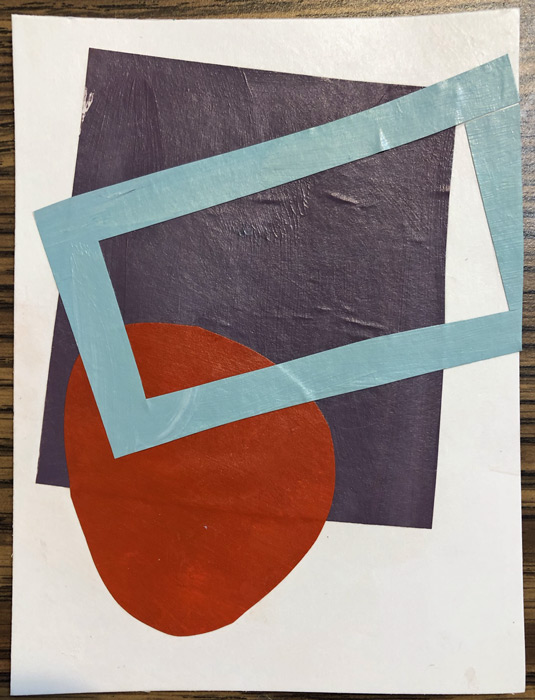
These are NOT meant to be works of art. Or even inspiration for something else. They’re purely a playful exercise in arranging colors, shapes, and values. Just a moment of creativity. I love making them.

Of course, magazine pages are also great if you’re trying to make an abstracted version of something realistic. In that case, I tear the pages, knowing that everything will be somewhat imperfect: just what I need for abstracting.

Loosen Up with Torn Paper Collage. Ellen Lindner, AdventureQuilter.com

I’ve written several blog posts about this technique. See the links below.

Ellen Lindner
Links: Loosen Up with Torn Paper Collage
Torn Paper
Overcoming my Left Brained Tendencies
Three Cherries Complete


0

Playing with Colored Pieces of Paper

You can’t work with a bunch of pieces of colored paper without seeing some design possibilities!

As part of my online class with Jane Davies, I was arranging, and rearranging, and rearranging again a wide array of colors and shapes.

Playing with Colored Pieces of Paper. Ellen Lindner, AdventureQuilter.com

Our first assignment was to make a largish collage with multiple pieces. Mine missed the mark (although I had fun doing it.)

Playing with Colored Pieces of Paper. Ellen Lindner, AdventureQuilter.com

Along the way, I was seduced by all the colors and I just HAD to play with them outside the scope of the class exercises. I played with monochromatic greys. Look how nicely they set off soft colors. Could I use enough restraint to create with these colors in fabric? I’m not sure.

Playing with Colored Pieces of Paper. Ellen Lindner, AdventureQuilter.com

Then, I saw a photo of a red beet and a gold beet. So, I had to play with those colors a little. A little sharp, perhaps, but still something I may want to explore in the future.

Playing with Colored Pieces of Paper. Ellen Lindner, AdventureQuilter.com

Eventually, we got to make collages with just three pieces and I was swimming back in more comfortable waters. Quite a few of these were successful, but I know Jane will have us alter them in the next step. I’m very interested to see what we’ll do with them.

Playing with Colored Pieces of Paper. Ellen Lindner, AdventureQuilter.com

When was the last time you took a class that didn’t involve fabric? I think it’s a really good way to explore new ideas and I feel confident some of these will find their way into my fabric  collages.

Ellen Lindner

0

INDEPENDENCE Day!

My son is moving out! On July 4th. His Independence Day! I’m so excited for him.

And I also admit to a little joy at the prospect of reclaiming his bedroom for my own purposes! Yahoo!

I got to use his room a few years ago and it was so great. Once again, I have big plans for it. I’ll use it for photo and video shooting. Which will be MUCH better than my current set up, which takes place in the dining room or cramped studio.

The old photo set up. Ellen Lindner, AdventureQuilter.com/blog

Maybe I’ll even be able to keep the light stands up most of the time! I also plan to have a packing station. I can’t wait!

But, I WILL miss having my son around! Thankfully, he’ll be close.

Ellen Lindner

0

Working with Magazine Pages

Inspired by the work of Derek Gores, I decided to make a glued collage with magazine pages. I’ve done this before on a small scale. This time I moved up to a whopping 16 x 20.

This was my inspiration photo. It’s a combination of 3 photos which I manipulated and merged on my computer. Can you guess why I chose blue-green as the background (fabric) color? (Think near-complementary colors.)

Working with Magazine Pages. Ellen Lindner, AdventureQuilter.com/blog

I drew my design directly onto a wrapped canvas and got to work.

Working with Magazine Pages. Ellen Lindner, AdventureQuilter.com/blog

I was working with friends and we used undiluted matte medium just the way you would with decoupage. You remember that from the seventies right? Glue underneath and more glue on top.

As you might imagine, the largish pieces and the lack of accuracy needed made the background go pretty quickly.

Working with Magazine Pages. Ellen Lindner, AdventureQuilter.com/blog

But, hmm, I had a problem. The shadows seemed to almost disappear. Clearly, I’d need to make them darker. More paper and more glue!

Working with Magazine Pages. Ellen Lindner, AdventureQuilter.com/blog

That’s better.

I began working on the cherries in earnest and, as you can imagine, I soon had little bits of colored paper going in all directions. Finding papers was pretty fun, though.

Working with Magazine Pages. Ellen Lindner, AdventureQuilter.com/blog

The right cherry completed.

Working with Magazine Pages. Ellen Lindner, AdventureQuilter.com/blog

LOTS more tiny bits of paper as I worked on the other two.

Working with Magazine Pages. Ellen Lindner, AdventureQuilter.com/blog

I was getting there, but I was also getting rather tired of dealing with little fiddly pieces of paper. I decided that perfection was not needed and started to work more loosely. What a relief! (I should have done this from the get-go.)

Soon, I’ll show you the finished collage and also give you a rundown of the pros and cons, as I see them, of fabric collage versus paper collage.

Ellen Lindner
P.S. See some of my earlier magazine page collages: ONE, 

6

Making a Mobile

A few months ago I was playing around with paint quite a bit and using a lot of palette paper.  You’re probably familiar with it.  It’s sorta waxy, so it can handle a lot of moisture.

Often, the paint dried in interesting ways, so I decided to save the papers.  (Yep, I did it again: saved something I had no idea how I’d ever use.)

This week I had some down time, so I cut out the paint blobs.

Making a mobile with paint blobs. Ellen Lindner, AdventureQuilter.com/blog

See what I mean about them being interesting?

Making a mobile with paint blobs. Ellen Lindner, AdventureQuilter.com/blog

I thought maybe I could make them into a mobile.  All white or with color?  I decided on a mixture.

At some point I had heard that you should build a mobile from the bottom up and that was good advice. I used button twist (heavy thread) and started knotting and threading shapes on. I let the bottom shapes dangle, but I wanted the others to hang semi parallel to the floor.  With that in mind I tried to puncture each piece at the center of gravity.  (One of my aviation terms, simply meaning balance point.)  This sometimes took more than one try.

Making a mobile with paint blobs. Ellen Lindner, AdventureQuilter.com/blog

After adding a piece, I’d make a small knot a little ways down the thread an add the next shape.  I kept the colorful side facing down, since I knew it would be viewed from below.  ( I did a lot of lifting to look up at my progress.)

I used short pieces of plastic straws as my cross structures, again finding the center of gravity for each one before adding it to item above.

Making a mobile with paint blobs. Ellen Lindner, AdventureQuilter.com/blog

I think it turned out pretty cool.

Making a mobile with paint blobs. Ellen Lindner, AdventureQuilter.com/blog

One thing I didn’t anticipate was the mobile moving.  And that’s the best part!  It’s sorta like visual wind chimes.  (Only better.)

What experimenting have you tried lately?

Ellen Lindner


8

Suzanne Sanger’s Work

Back in October, I wrote about creating torn paper collages in order to loosen up and to work more abstractly.  Like this:

Original photo
Ti Plants inspiration photo. Ellen Lindner, AdventureQuilter.com/blog

Torn paper collage
Because the paper is torn, you can’t be too accurate, so you
HAVE to focus on the largest shapes.
Ti plants torn paper collage. Ellen Lindner, AdventureQuilter.com/blog

The fabric interpretation, Ti Party.
Ti Party, an art quilt by Ellen Lindner. AdventureQuilter.comOne of my readers, Suzanne Sanger, decided to give it a try and was kind enough to share her results with me (and with you.)

Her original photo, taken in Bermuda
Suzanne Sanger's Work. Ellen Lindner, AdventureQuilter.com/blog
The paper collage, with part of the original photo overlapping.
Suzanne Sanger's Work. Ellen Lindner, AdventureQuilter.com/blog
And, her final quilt, called Dozing in Bermuda.

Suzanne Sanger's Work. Ellen Lindner, AdventureQuilter.com/blog

I think it’s great.  And don’t you love the way she’s matted and framed it?

Suzanne says, “I want to thank you for inspiring me! Like you, I’ve been challenging myself to work more abstractly, and have dabbled with a range from just barely to totally non representational. Your blog post from last October about torn paper collage sent me right into the studio to tear up the only magazine I had in order to recreate a photo I took in Bermuda a few years ago. Then I did my semi-annual house switch, life intervened, I took a great abstraction class from Lisa Call, all the while leaving my torn paper start hanging on my design wall. Now I’ve switched back to my summer house, and needed a project to get myself back into the studio. Ah hah! It was time to return to my dozing man. He’s a bit more realistic than I would like, but still a move in the right direction. I LOVE this process! Hmmm. I guess I’ll have to subscribe to an image heavy magazine again, pain though that is what with changing mailing addresses twice a year. LOL. Anyway, thanks for a great idea! You always give me new things to think about.”

I love this!  So much so that it makes me want to reach for my magazines again, too. It’s a FUN way to work!

Ellen Lindner


3

Revamping Artificial Flowers

I have a white “silk” orchid that was very realistic looking when I purchased it several years ago.  Over time, however, it has yellowed badly.

Revamping Artificial Flowers. Ellen Lindner, AdventureQuilter.com/blog

Revamping Artificial Flowers. Ellen Lindner, AdventureQuilter.com/blog

I considered several ideas about how to best revamp these pretty petals.  Eventually, I decided just to paint them, with ordinary acrylic paint.

Revamping Artificial Flowers. Ellen Lindner, AdventureQuilter.com/blog

This worked well.  I left the fiddly centers yellow and was happy with the results.

Revamping Artificial Flowers. Ellen Lindner, AdventureQuilter.com/blog

Revamping Artificial Flowers. Ellen Lindner, AdventureQuilter.com/blog

Not bad, right?  No one’s going to think they’re real, but they’re definitely pretty.

What have you painted lately?

Ellen Lindner
P.S.  What I really wanted to do was to decoupage black and white fabrics onto the petals.  It only took a little experimenting to realize that would be too difficult.  But if I ever create some from scratch?  Who knows.

11

Some Eye Candy

Here are some interesting links for your enjoyment.

First, a gallery of wonderful quilts made by  the Front Range Contemporary Quilters.  You’ll love them!

AdventureQuilter.com/blog

Ova Nova, an art quilt by Louisa Smith

Next, check out the beautiful and subtle work of Cas Holmes.

AdventureQuilter.com/blog

Textile installation by Cas Holmes

Finally, something a little different:  painted pebbles.  I was intrigued by these because some of them looked almost like they were embroidered.  They reminded me of fabric cookies.   Wouldn’t they be fun to reproduce with some felt scraps?

AdventureQuilter.com/blog

And there you go: just some of the sites I’ve enjoyed recently.

Ellen Lindner

0

Making Angel Ornaments

After seeing some angel ornaments for sale I got the idea of making something similar as gifts.  But my idea was to add the faces of the recipients to their respective angels. Doesn’t that sound like fun?

I painted the bodies red and added a little shading on the sides.  As you can see, these primitive figures have no shoulders or arms.  Which I kinda love.  It will make the angels almost cartoon-like, giving me lots of artistic latitude.

Making angel ornaments. Ellen Lindner, AdventureQuilter.com/blog

The halos got a gold leaf treatment.  Don’t you love the way the black underneath shows through?  I think that sort of imperfection adds a LOT of character and interest.

Making angel ornaments. Ellen Lindner, AdventureQuilter.com/blog

The wings got a rather “fancy” country-style treatment:  cream paint, stained edges, and lace.  Perfect, I think!

Making angel ornaments. Ellen Lindner, AdventureQuilter.com/blog

Before assembling the angels, I spent some time on Photoshop tweaking photographs in order to get heads to the right size, etc.  Here’s my first prototype, with me as the subject.

Making angel ornaments. Ellen Lindner, AdventureQuilter.com/blog

Isn’t it a hoot?

I’ve now given away the other three, and I can’t believe I forgot to photograph them first!  But, my friend, Lynn, photographed hers.  As you can see, I tried to match the text to the expression on the face.

Making angel ornaments. Ellen Lindner, AdventureQuilter.com/blog

(This is what she gets for striking such a goofy pose in the original photo!)

These were a lot of fun to make and I’ll be making several more.

What craft/art projects are you doing for Christmas?

Ellen Lindner
P.S.  I ordered the angel kits from retrocafeart.com

2