Paper Lace
I just recently learned about paper lace and decided to give it a try. If you’ve made thread lace on water soluble stabilizer, the technique is very similar.
Start by layering several layers of paper together. Select papers that are a little bit fragile, like newspaper or tissue paper. Next, stitch a grid or other pattern onto the paper. Go over each line of stitching twice.
After stitching, soak the paper until it becomes fairly fragile. Then, begin rubbing the paper off, using your finger. Don’t rub all of it off, though. Leave little bits hear and there.
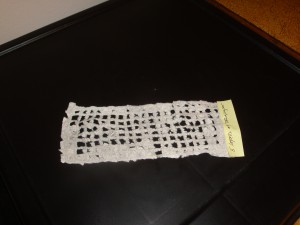
Here’s my first attempt, with five layers of newspaper and white thread.
Click on any image for a much larger view.
As you can see, the little bits of paper remaining create a very interesting affect.
My impressions:
– The newspaper was much more sturdy than I imagined, and it took a good bit of rubbing to get it to come apart. I’d definitely use fewer layers next time.
– Soaking the paper gave it all a slightly gray color, rather than the crisp black and white of the original paper.
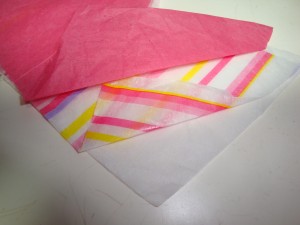
Next, I tried the technique with three layers of tissue paper. I wanted to experiment with revealing just one or two layers, so I chose three different colors/patterns.

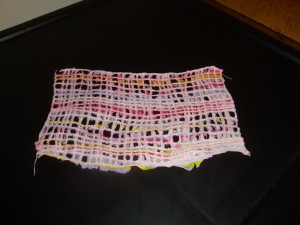
I stitched a grid, and found the wet tissue paper very easy to rub off.

Pretty cool, huh? This shows what it looks like from the white
tissue paper side. As you can see, the pattern of the central sheet shows
through the white quite a bit. I’m not sure I like that.

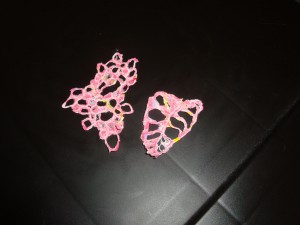
The two pieces above are seen from the pink side, so the white thread
gives a bit of contrast. I’m liking this pretty well.
More impressions:
– The stitching takes a little while, but the results are worthwhile. I think these will make great additions to mixed media work, such as journal books and collages.
Ellen Lindner

I love this idea of stitching into paper and rubbing it out. I am currently making free motion machine lace to represent foam on waves. Working well with silver and white in the needle and white in the bobbin – but I bet if I add a couple of layers of white or turquoise tissue paper it will be even better.
Zooming off to the machine …
Helen from Hobart
Tasmania, Australia
Ooh, Helen, that sounds like an excellent idea!
Do try this with the beautiful patterned paper napkins as well, separating their layers first, The effect can look really good when layered over another piece of work.
Great idea, Maggi. I think I’ve got some of those in the pantry.
Hi Ellen, I am itching to try this technique. It could have a lot of possibilities. Thanks for sharing with us.
You’re welcome, Dianne. Have fun experimenting!
Ellen, this works really well, too for hair. Gives it a 3D effect without a lot of fussing.
For hair??? I think I’m going to need more information on that one, Carole.
Ellen… take a look here:
http://acarolegrant.wordpress.com/published-work/
[…] reading my post about making paper lace, A. Carole Grant sent me a photo of a quilt in which she created hair with the same […]
This is pretty cool, Ellen! I’m definitely going to use this in one of my current “experiment” projects! Thanks for sharing it with us! I’m wondering how mulberry paper would react……..
Neat. I hope I get to see (or at least hear about) your results. It’s great to experiment!!!