Creative Play: Abstract Collages

When I first started my creative play, do you remember that I printed out four inspiration photos and then tore magazine pages to coordinate with each of them?  So, for these next two exercises I completely ignored the photos and used the pages only.  This worked well, since I had two color coordinated piles of papers.

Having recently watched Lesley Riley’s collage segment on Quilting Arts TV, I decided to emulate her style.  Sorta.  She starts with an interesting image and surrounds/backs it with wonderful fabrics and trims.  I found a focal point image from the magazine pages and gave it a shot.

Creative play with Ellen Lindner. AdventureQuilter.com

 Since my papers were often in little pieces, I wasn’t able to do the backing part.  That’s okay.  It was a creative exercise!  (BTW, these magazine pages were for the image with leaves and berries.)

Next, I decided to work with the shapes I found in the pages themselves.  This exercise was inspired by one I saw Pat Pauly do on Quilting Arts TV.  Ignoring color, I looked for shapes.  Once again, I used them to make a collage, gluing pieces to a small piece of cardboard.

Creative play with Ellen Lindner. AdventureQuilter.com

You can probably recognize paint can lids above.  how about the horizontal lines on the left?  They’re the legs of dining chairs.

I sketched the major design lines and got this:

Creative play with Ellen Lindner. AdventureQuilter.com

I thought that was worth playing with a bit more, so I experimented with value options on the computer.  I think this is pretty interesting.

Creative play with Ellen Lindner. AdventureQuilter.com

All this creative play was really getting my Adrenalin flowing.  And I wasn’t finished yet!

Ellen Lindner

Creative Play: Mail Boxes

Continuing with my creative play, I started working with my photograph of farm mail boxes.

Creative play with Ellen Lindner. AdventureQuilter.com

It seems that I always need to start with something very literal .  True to form, I first sketched the mail boxes.

Creative play with Ellen Lindner. AdventureQuilter.com

Creative play with Ellen Lindner. AdventureQuilter.com
That wasn’t very exciting, but it did make me think of some other mail box photos I had.  (Remember, my plan was to take all interesting detours.)  The photo below was taken in the little village of Madrid, NM.

Creative play with Ellen Lindner. AdventureQuilter.com

I loved the crooked boxes and there were many other interesting ones nearby.  This time I did my sketching in the computer, combining photos and auditioning several different background options.

Creative play with Ellen Lindner. AdventureQuilter.com

Creative play with Ellen Lindner. AdventureQuilter.com

Lots of options.  What if I use an outline “drawing” of the background buildings and vegetation with colorful mail boxes in front?  Hmm.

I don’t know if any of this will find it’s way in to a quilt, but I DO know that I did a lot of creative experimenting with these exercises.  Which makes each of them a SUCCESS!

Ellen Lindner

Creative Play: Torn Paper Collage

Do you ever need a creative jump start?  I do.  Especially when I’ve been doing lots of black and white, non-creative, tasks.  Finding myself in this situation, I recently set aside a week for creative play.  In my free time, I vowed to avoid all sewing ofhanging sleeves, labels, hems, etc.  My time in my studio/sewing area would be all about play. And play only!

The rules I set for myself were:
– Start
– Continue
– Take any detours that seem appealing
– DON’T focus on product, ONLY process!  (That’s a biggie.)

Hey, that was sounding fun already!

I had a few ideas of exercises I might do so I gathered materials with those things in mind.   These were my supplies:
– 4 favorite photos, each printed out in color on decent paper
– A few old magazines
– A glue stick

These were my four photos:

VA mailboxes

Japanese Ti Plants. Ellen Lindner, AdventureQuilter.com/blog

Vegas berries

fence post w. yellow flowers

My first task was to go through the magazines and tear out pages that could possibly be used to create collages representing these four images.  That in itself was fun and I was beginning to get that creative buzz in the back of my head.  Soon I had four stacks, each containing the printed photo and lots of magazine images with similar colors.

As my first exercise, I used my magazine pages to create a collage inspired by the fence post photo above.  I limited myself to tearing the paper, rather than cutting it.  This, theoretically, would keep me from getting overly detailed.  As you can see, I managed to overcome that.

fence post torn collage

Although I managed to make a pretty representational collage, I’m NOT assigning a value to the finished product.  Instead, I’m assessing only the process.  It was a creative one, so it was GOOD!  Very good!

Do you need a little creative boost?  If so, why not try something like this?  I’ve since completed many more exercises and I’ll be sharing those with you on this blog.

It’s SO good to just play every now and then.  I consider it absolutely necessary for artistic growth!  One of my favorite quotes: “If you never make mistakes, you’re not experimenting enough.”

Ellen Lindner

Making Labels

After last month’s post about finishing tasks, I got several requests for a post about my label-making process.  So here goes.

I print my labels onto fabric using my home printer.  The first thing to think about is how to ensure the ink is permanent.  There are several options:
– Prepared paper-backed fabric sheets.  I’ve used several different brands with good results.  The only down side is their cost.
– You can buy solutions for treating your own fabric.  This involves some planning to allow for soaking and drying times.  But, the biggest down side is that it just doesn’t print as well as the prepared sheets.  This option is less expensive than prepared sheets.
– Most Epson printers use Durabright inks, which are permanent.  With such a printer you don’t need the fabric to be pretreated in any way.  This is my preferred method.

Once you’ve answered the ink question, you’ll still need to make sure your fabric will feed through your printer properly.  The prepared sheets are handy here, since they’re already sized at 8 1/2 by 11.  Otherwise, you’ll need to temporarily mount your fabrics onto something slightly stiff to go through the printer.  Freezer paper is a common item for this.  Just iron it to your fabric, and cut it into the proper sizes.

Making labels. Ellen Lindner, AdventureQuilter.com/blog

I like to use Avery full size labels.  I iron stick them on my fabric, then trim around them.  AND I can use them again.  If I’m efficient, I’ve got pressed fabric ready to have the sticky label added to it as soon as I’m through with it.  If not, I can stick it to freezer paper for later use.  I’ve heard that you can get up to 10 uses from one page, but I haven’t tried that yet.

Since my labels never take up a full page, I tend to have extra odd shapes remaining.  I’ve found that I can still send them through my printer, if I tape them to a page of typing paper.  You’ll have to experiment with that.

BTW, I use a PFD (prepared for dying) fabric.  It’s tightly woven and uber clean.  You’ll probably need to order this.

There you go!  I hope you’ve found this useful.

Ellen Lindner
P.S.  Do you also want posts about what to include on a label, or how to attach it?
P.P.S.  Thanks to Brenda J. for catching my iron vs. stick error above.


St. Petersburg, Russia

As part of revamping my website, I’m moving travel articles to this blog.  This one was published in 2007.

What’s more iconic than the ornate exteriors of Russian churches?

St. Petersburg, Russia.  See on AdventureQuilter.com

 These spires are part of the Church on the Spilt Blood, which is Russian Orthodox.

These spires are part of the Church of the Spilt Blood, which is Russian Orthodox..

The interior is just as magnificent, with a soaring ceiling.

St. Petersburg, Russia.  Seen on AdventureQuilter.com

Petrahof, the summer palace of Peter the Great, is extremely opulent.  These crosses are on the roof, designating the chapel area.

St. Petersburg, Russia.  Seen on AdventureQuilter.com

The ballroom is extremely gilded, with windows on one wall and mirrors on the other.

St. Petersburg, Russia.  Seen on AdventureQuilter.com

Petrahof is very famous for its fountains, which are gravity fed.

St. Petersburg, Russia.  Seen on AdventureQuilter.com

Once part of the winter palace, The Hermitage now houses more art than the Louvre. And the architecture is absolutely spectacular!

St. Petersburg, Russia.  Seen on AdventureQuilter.com

The sculpture hall of The Hermitage

St. Petersburg, Russia.  Seen on AdventureQuilter.com

Of course, there was a little souvenir shopping, too.

St. Petersburg, Russia.  Seen on AdventureQuilter.com

Hope you enjoyed the tour!

Ellen Lindner

More Notes for a Friend

Here are the other four “Notes for a Friend” I made by cutting up a completed quilt.  These are #19-22.

#19Note for a Friend #19, by Ellen Lindner. AdventureQuilter.com

#20

Note for a Friend #20, by Ellen Lindner. AdventureQuilter.com

#21

Note for a Friend #21, by Ellen Lindner. AdventureQuilter.com

#22

Note for a Friend #22, by Ellen Lindner. AdventureQuilter.com

These were a lot of fun to do, and I like them MUCH better than the original quilt!

Which note is your favorite?

Ellen Lindner
P.S.  See the entire “Notes for a Friend” series here.
P.P.S.  Each “Note” is available for purchase at a cost of $59.

A Visit to Santa Fe

As part of revamping my website, I’m moving travel articles to this blog.  This one was published in 2008.

Santa Fe Photos

Pieced Panorama, shot along State Road 14, “The Turqouise Trail”
Along the Turquoise Trail.  Ellen Lindner, AdventureQuilter.com
Santa Fe.  Ellen Lindner, AdventureQuilter.com

Santa Fe.  Ellen Lindner, AdventureQuilter.com

Santa Fe.  Ellen Lindner, AdventureQuilter.com

The “Miraculous Staircase” at Loretto Chapel

Santa Fe.  Ellen Lindner, AdventureQuilter.com

Crab apples in bloom

Santa Fe.  Ellen Lindner, AdventureQuilter.com

A rugged gate leading to an arid garden

Santa Fe.  Ellen Lindner, AdventureQuilter.com

This woman was glad to have her photo taken, but she wanted to make sure I included her jewelry.

Santa Fe.  Ellen Lindner, AdventureQuilter.com

A typical fence, made from tree
trunks and large branches

Santa Fe.  Ellen Lindner, AdventureQuilter.com

One of the many blue doors
seen on adobe buildings

Santa Fe.  Ellen Lindner, AdventureQuilter.com
I hope I get to go back one day.

Ellen Lindner

New Notes for a Friend

After cutting up a finished quilt, I used it as the starting point for EIGHT new Notes for a Friend.  Here are four of them, #23-26.

Click any image for a larger view.

#23
Note for a Friend #23, by Ellen Lindner.  AdventureQuilter.comI had fun adding cross stitches,

#24Note for a Friend #24, by Ellen Lindner.  AdventureQuilter.comand French knots,

#25
Note for a Friend #25, by Ellen Lindner.  AdventureQuilter.comlittle bits of fabric,

#26
Note for a Friend #26, by Ellen Lindner.  AdventureQuilter.comand hand stitched twigs.

I really enjoy creating these tiny pieces, each of which is 5 x 7.  Many of them look great turned 90 or 180 degrees.  They also look fabulous framed.  Here’s an earlier example:

Note for a Friend mounted and framed, Ellen Lindner, AdventureQuilter.com

Each Note for a Friend is $59.  I’ll add them to my website soon, or you can email me with your purchase request.

Four more coming soon!

Ellen Lindner

Paris’ Fabric District

As part of revamping my website, I’m moving travel articles to this blog.  This one was published in 2006.

Ooh-la-la!
A Visit to Paris’ Fabric District

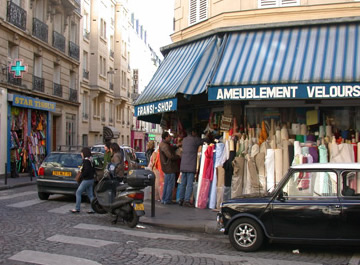
Just down the hill from Sacre-Coeur, lies a wonderful surprise. Nestled in the narrow streets are an abundance of fabric shops, each with their colorful wares displayed prominently on the sidewalk.

When I visited in March of 2006, there was lots of activity. Frequently, shoppers could be seen carrying large bolts of fabric, either hoisted on one shoulder, or perhaps carried by two people. I’m guessing that this large yardage was destined for drapes or such.

Paris' Fabric District.  AdventureQuilter.com/blog

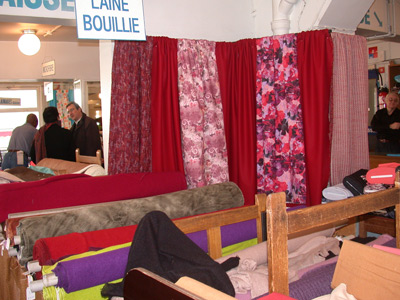
I did most of my shopping at Marche (Market) St. Pierre. Unlike most of the small shops, this store was five stories tall. (See below.) It was very busy on the day we were there. Among the shoppers were fashion students, who had their sketches in one hand, while they caressed fabrics with the other.

AdventureQuilter.com/blog

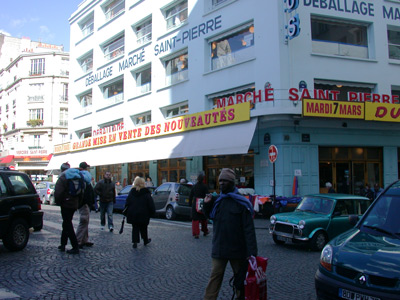
All the fabrics were on tubes, like upholstery fabric in the U.S. The tubes were arranged on large tables. (See below.) There was no cutting table anywhere in sight. Instead, there were lots of salespeople standing around, waiting to help you. Each one held a meter stick and a big pair of sheers. You would tell them what you wanted, they would cut it, and give you a handwritten slip with the price and quantity indicated.

AdventureQuilter.com/blog

On my visit, no one spoke English, and my French is NOT very good! I did okay until the sales lady asked me “combien?” How much? I THOUGHT I knew the correct way to say half a meter, but apparently not. She just looked at me. Then, I remembered a sign (in French) saying “Minimum cut .50 meter”. So, I motioned for her to follow me, and pointed to the sign. She asked “???” (something, in French, that I didn’t understand,) and I answered “oui!” It worked, and I got my half meter! Later, my sister had the brilliant idea of pointing to 50 centimeters on the meter stick. That worked much better! Of course, the language barrier was part of what made our visit fun, as we felt like we had gotten completely away from the “tourist track.”

I had great fun exploring all 5 floors, and making a few purchases along the way. The top floor had fabulous (and expensive) fabrics, like silks with wonderful embroidery on them. Only €120 (about $145/meter!) Another great thing about the top floor is it’s wonderful view of Sacre-Coeur. The back window is a great place to take a photo!

Sacre-Coeur, Paris.  AdventureQuilter.com/blog

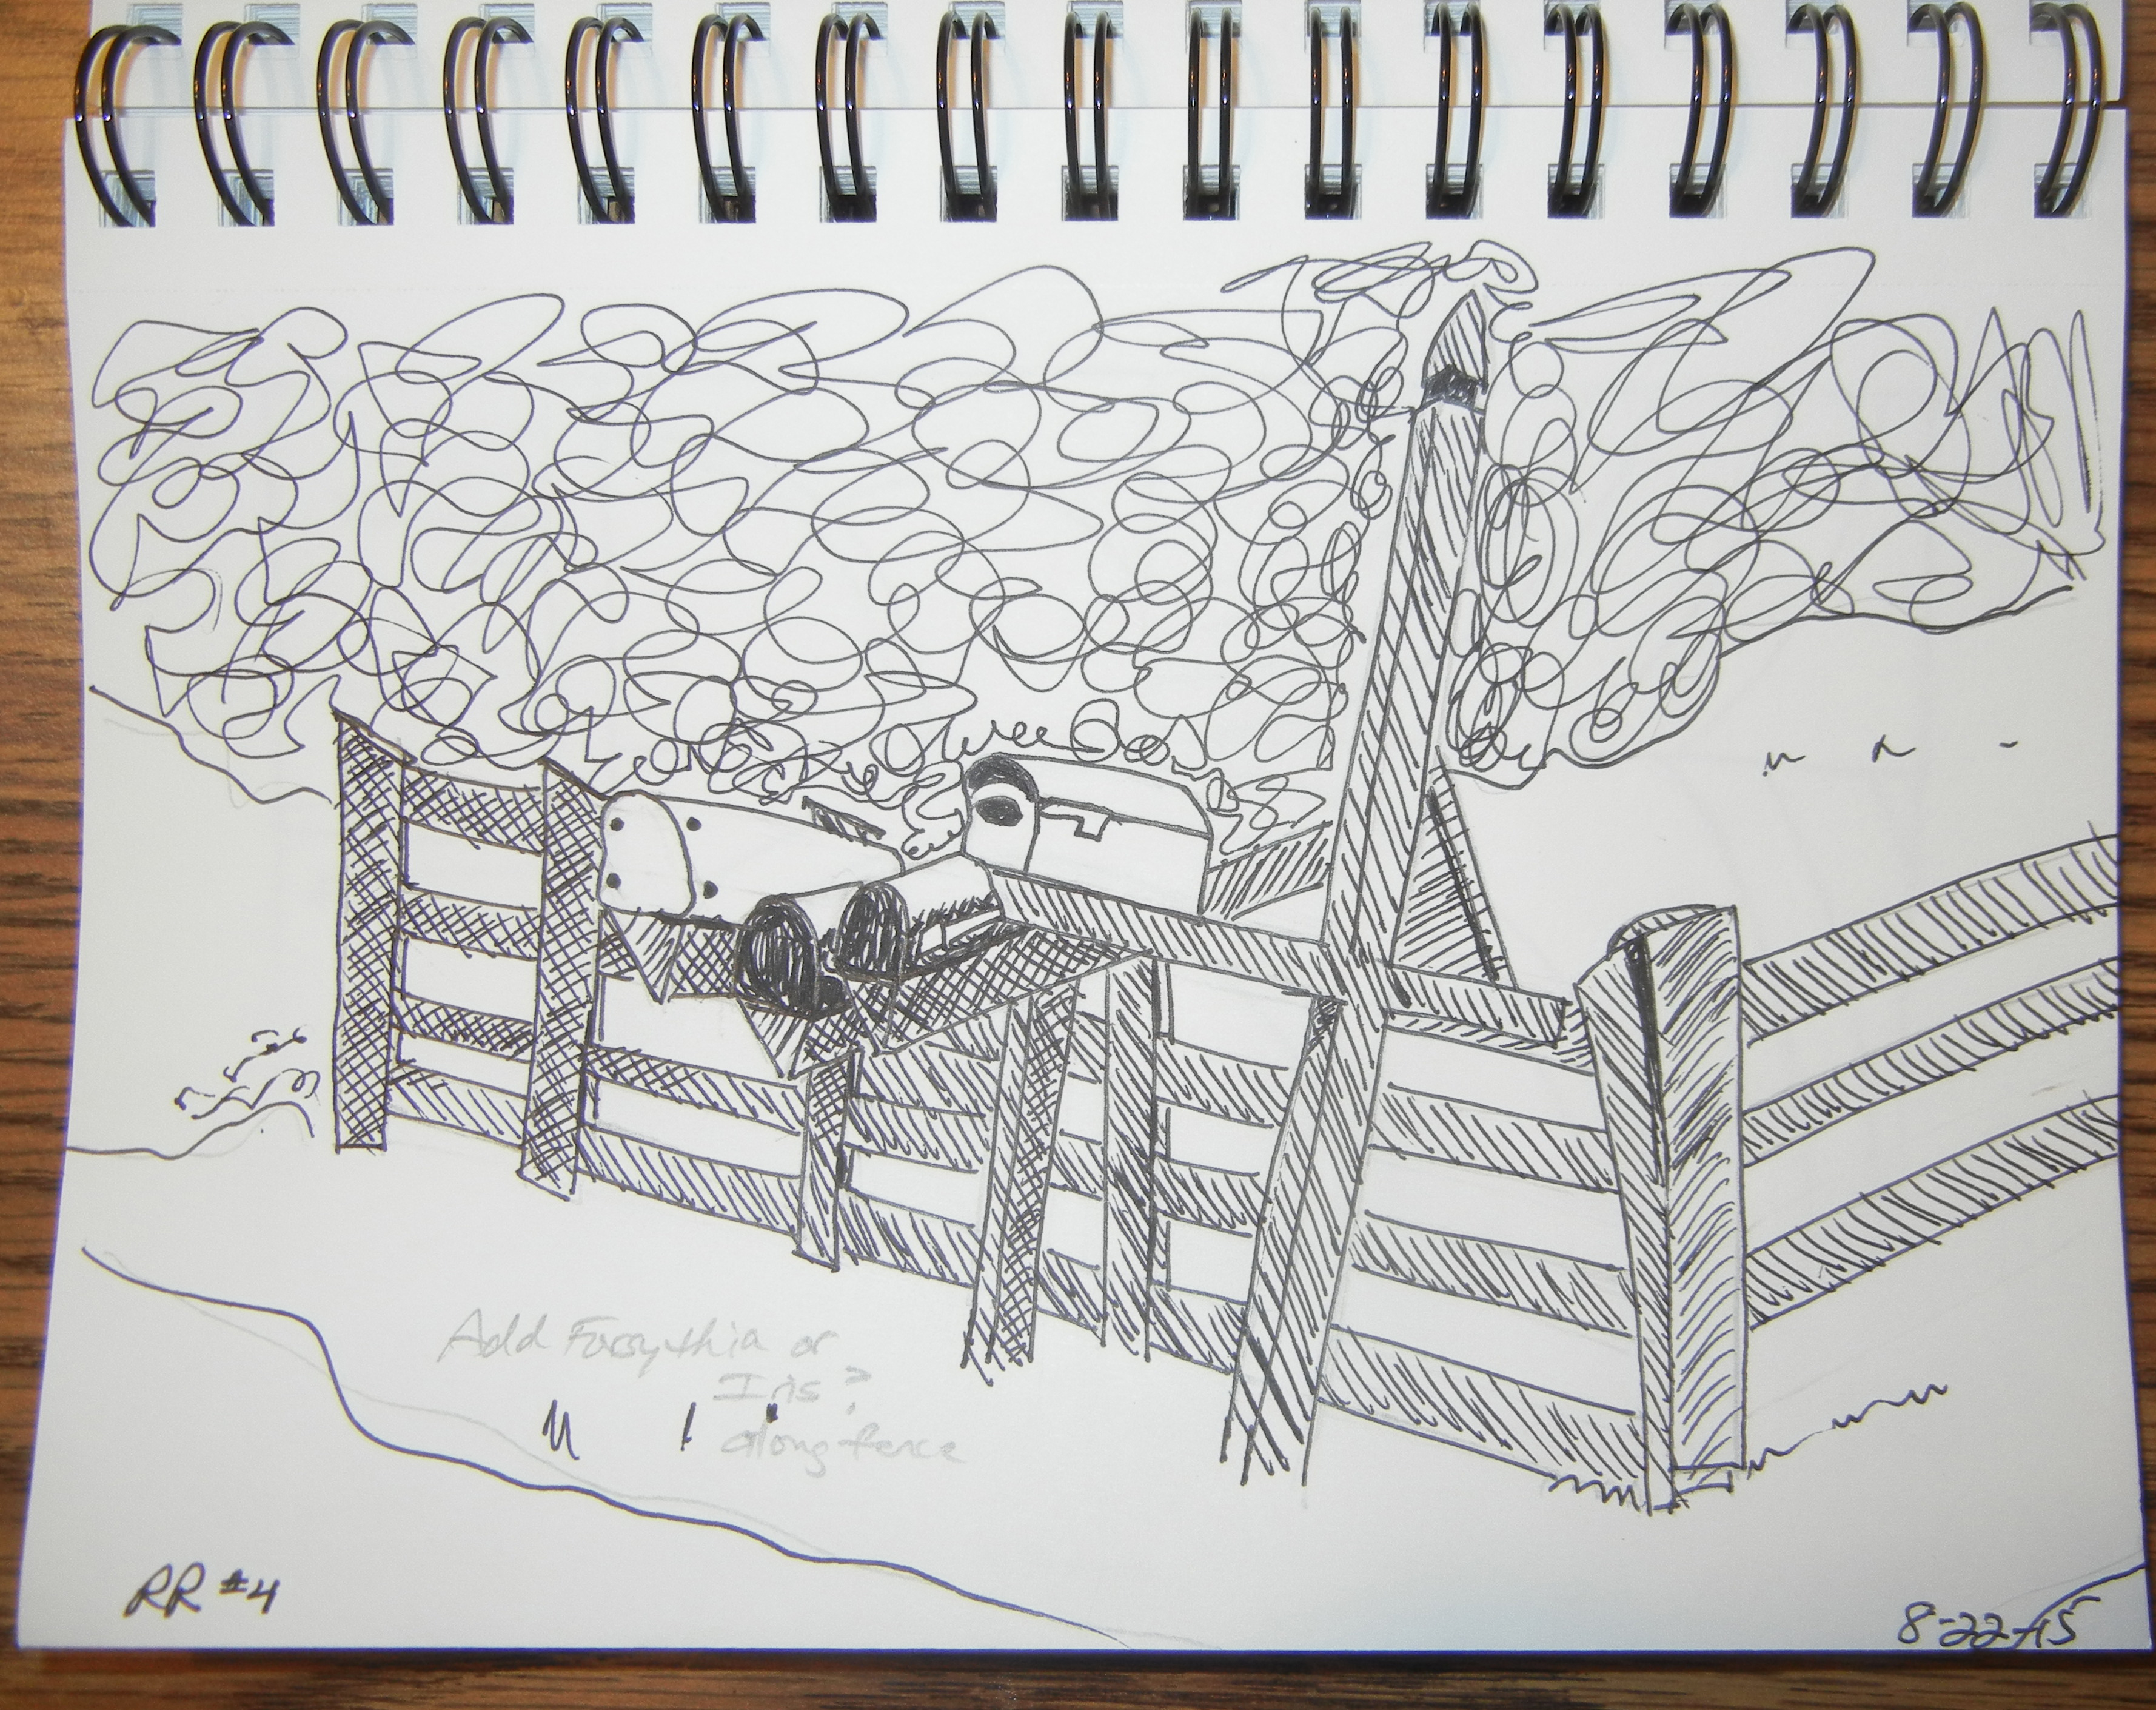
Across the street from Marche St. Pierre, was a cool trim and notions shop, called Moline. My sister and I loved the way they displayed their buttons. Each type was in a tube, with one button glued to the cap. They were all housed in a big wooden grid, which was set on point. It was a very colorful and interesting display. (See my sketch below. They didn’t allow photography.)

AdventureQuilter.com/blog

This same shop had a very beautiful and ingenious way to show off their multitude of trims: they had made them up into lovely samples that looked like children’s dresses. (See sketch, above.) Most shops in the district sold only fabric. Others sold only notions and trims. But no store (that I saw) sold both.

We saw another notions shop that carried American “patchwork” (quilting) fabric. These were on traditional American bolts, and were displayed in the usual American fashion. The supply was very limited, however. It made me really appreciate American quilting stores!

What a delightful side trip! I highly recommend it – to everyone. It’s very easy to find, visually stimulating, and a fun non-touristy thing to do!

If you go:
After descending the hill from Sacre-Couer, go left on the street you’re already on. The second intersection is where you’ll find Marche Saint-Pierre, at 2 rue Charles-Nodier. It’s open from 10-6:30, Tues. – Sat., and 1:30-6:30 on Mondays (except August.) From there, you can wander a few side streets, as you head back to the Anvers Metro stop. (2006 information)
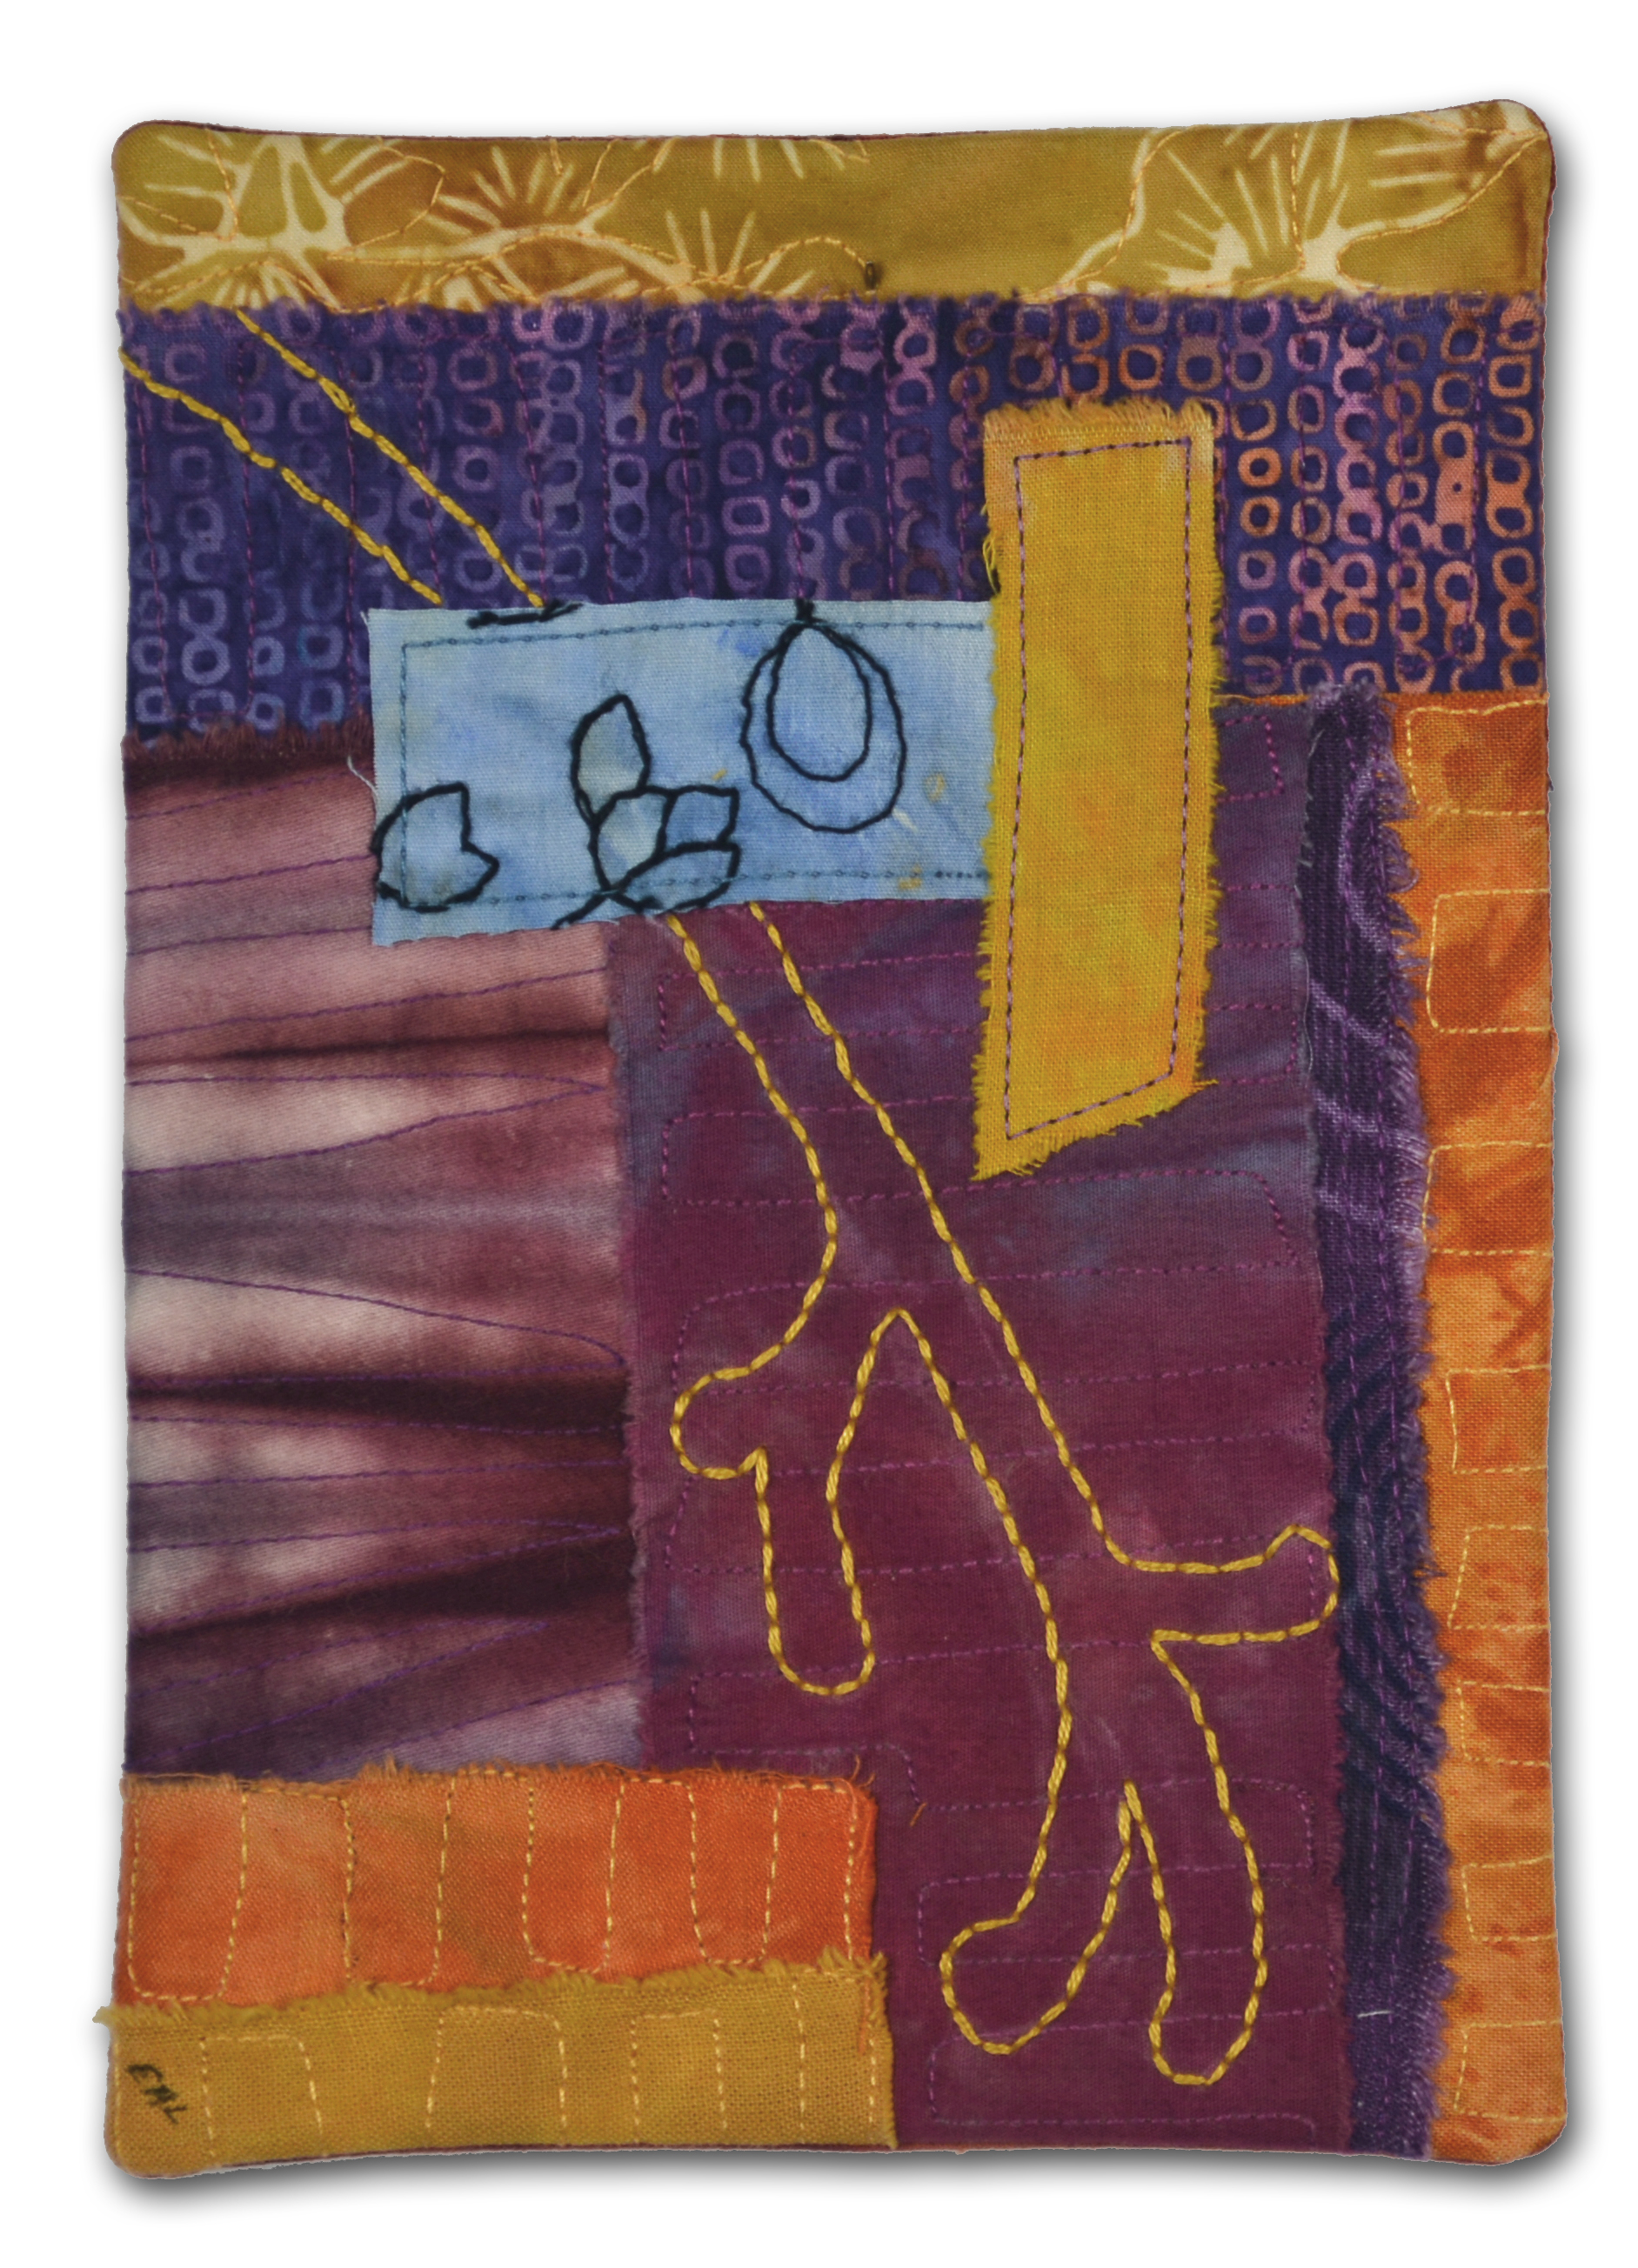
Ellen Lindner

A Postcard for Mary

When our SAQA “pod” leader decided to step down, the rest of us chose to make postcards for her, as a “thank you” gift.

I had the perfect scraps, given to me by Judith Content.

Click any image for a larger viewA fabric postcard in-progress.  Ellen Lindner, AdventureQuilter.com/blog

I thought about proportions and “sweet spots” (good spots for focal points,) and came up with this.  Hand stitching really stands out on small projects like this, so I added accents using both a running stitch and a back stitch.

A fabric postcard in-progress.  Ellen Lindner, AdventureQuilter.com/blog

Finally, I quilted it and began to consider what else it might need.

A fabric postcard made by Ellen Lindner.  AdventureQuilter.com/blog

I chose a circle.  When I traced it onto the background I messed up, but then decided I liked the effect.  So, I stitched it that way with black thread.

Once I cleaned the marks off, the black circle didn’t show up as much as I wanted against the black stripes.  So, I smudged some white oil pastel into that area.  I’m very happy with it!

Fabric postcards are lots of fun since they’re so quick to complete.  When was the last time you made one?

Ellen Lindner
P.S.  SAQA is Studio Art Quilts Associates.  The state of Florida is considered a region, but we’re too large to easily meet together.  Therefore, we have area groups, called pods, which meet to learn together and to enjoy one another’s company.
P.P.S.  Want to learn more about SAQA?  Send me an email and I’ll tell you all about it.  It’s a fantastic organization!